
In this blog post, I will give a detailed view of installing Arduino software IDE on your Windows 11 Operating System.
1. Open a web browser of your choice and search for Arduino IDE. Click on the first link.

2. Once the window opens, you will be able to see the download option. I am going to choose Windows 7 and the newer option.

3. It will redirect you to another page. Click on the Just Download option. It will start to download.

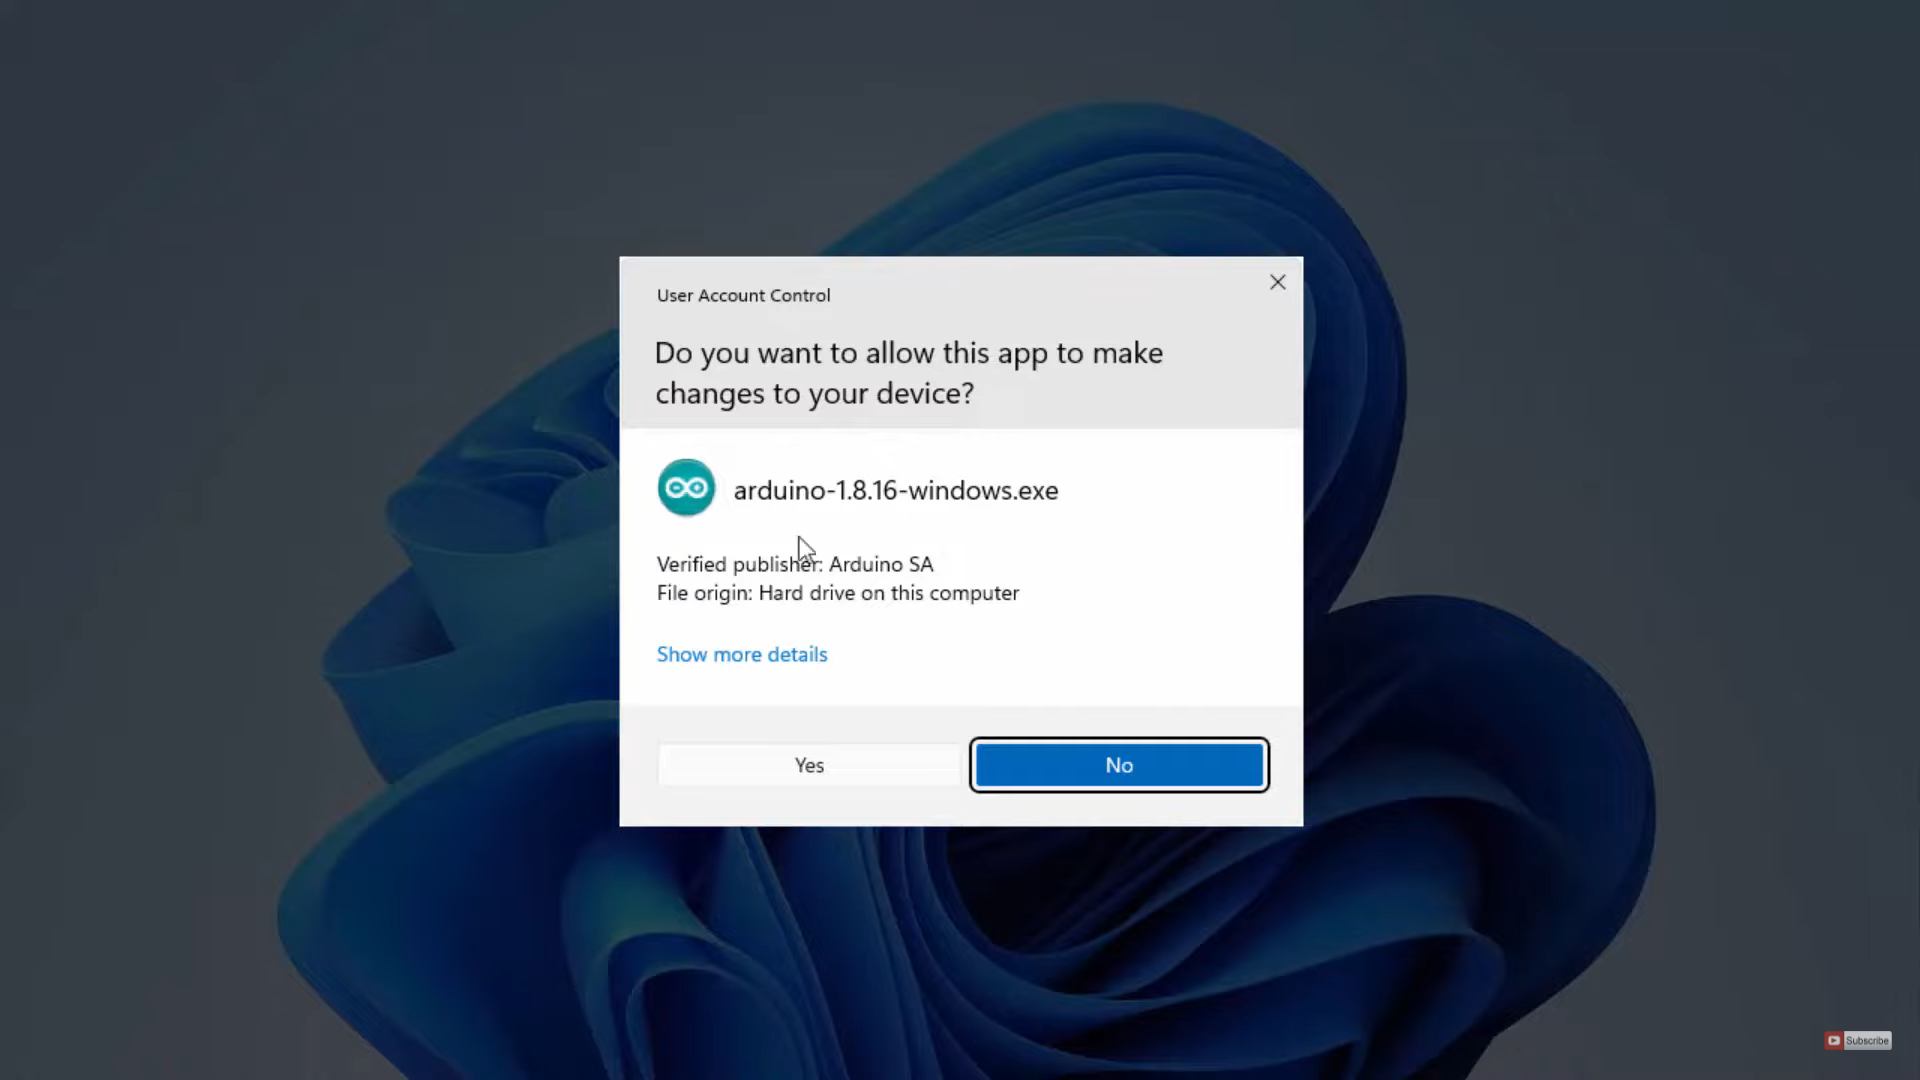
4. Once the download is complete, click on the exe file and minimize the browser. It will show a warning. Click on Yes.
5. In the license terms and agreement window, click on I agree.

6. In the next window, leave everything as default. Then, click on Next.
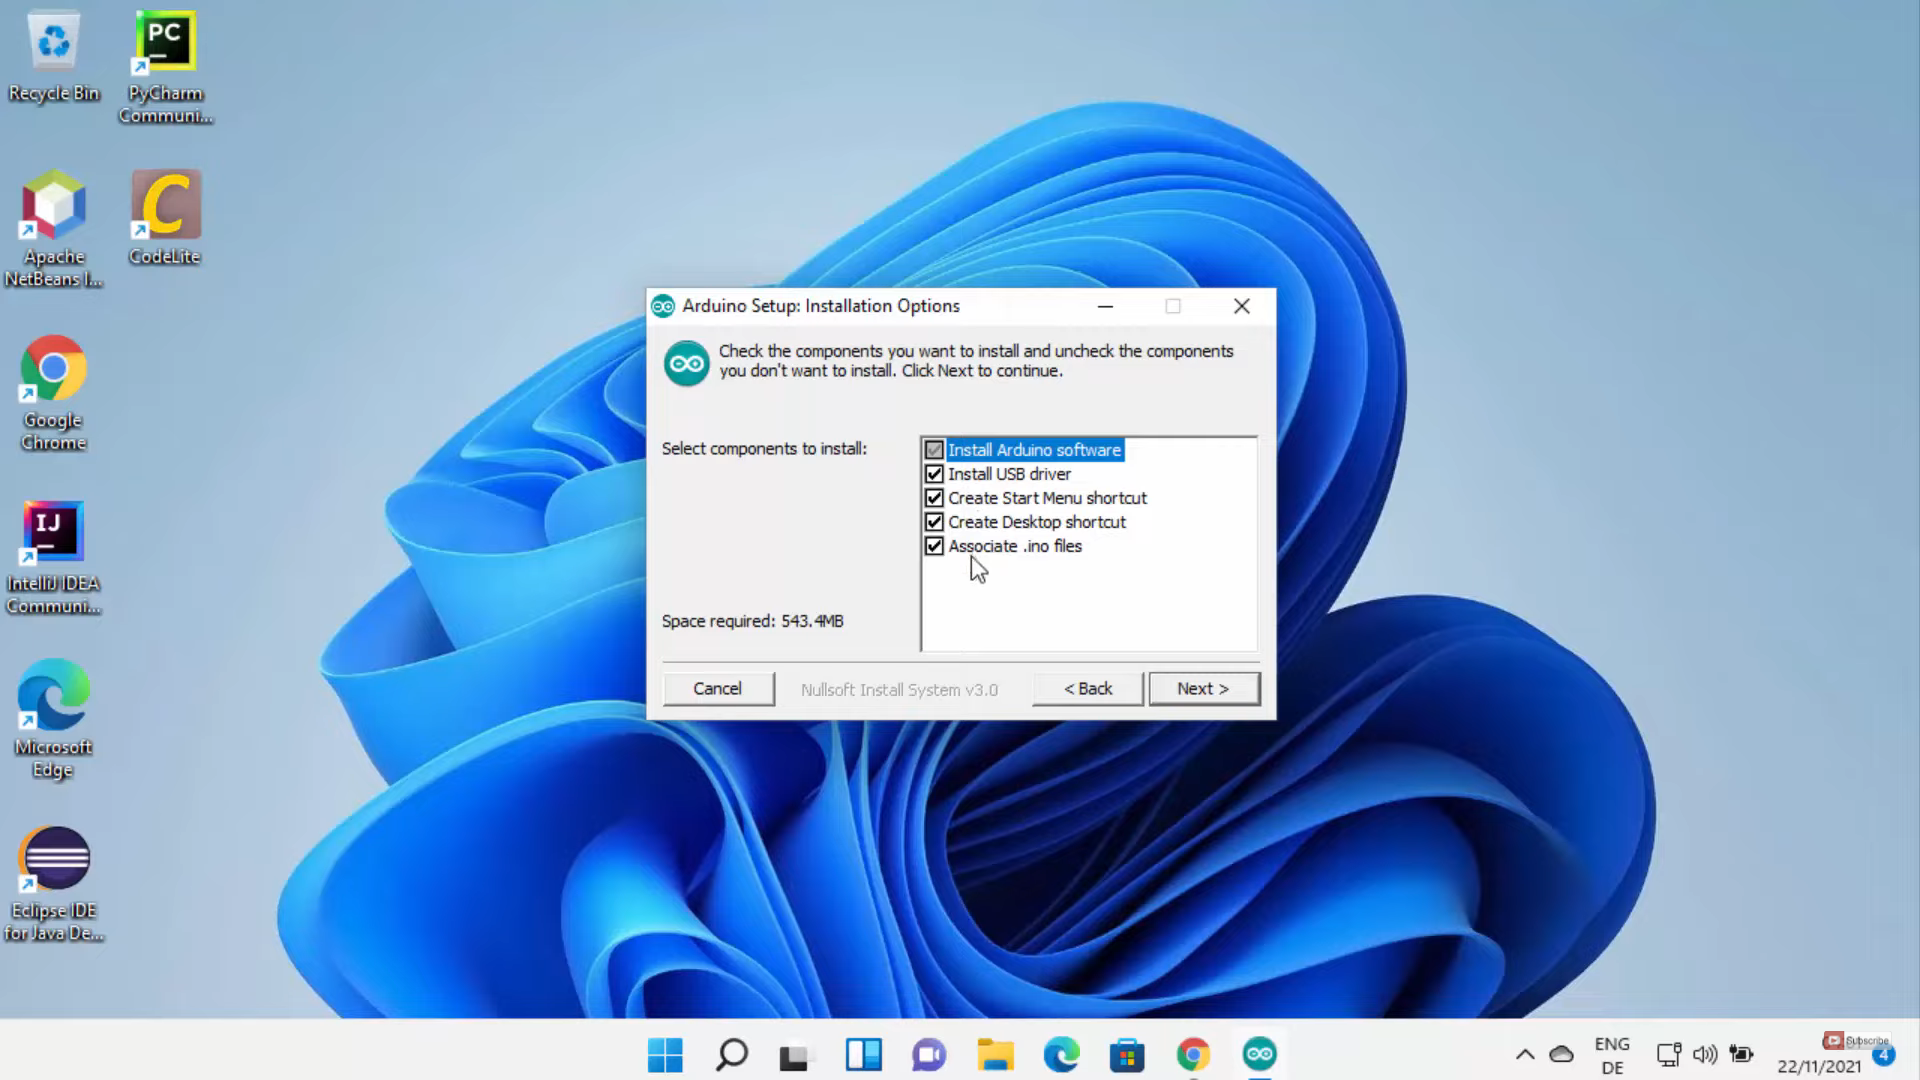
7. This will be the location where it will be downloaded. If you don’t have any reason to change this, click on Install. If you want to change the location, then click on the Browse option.

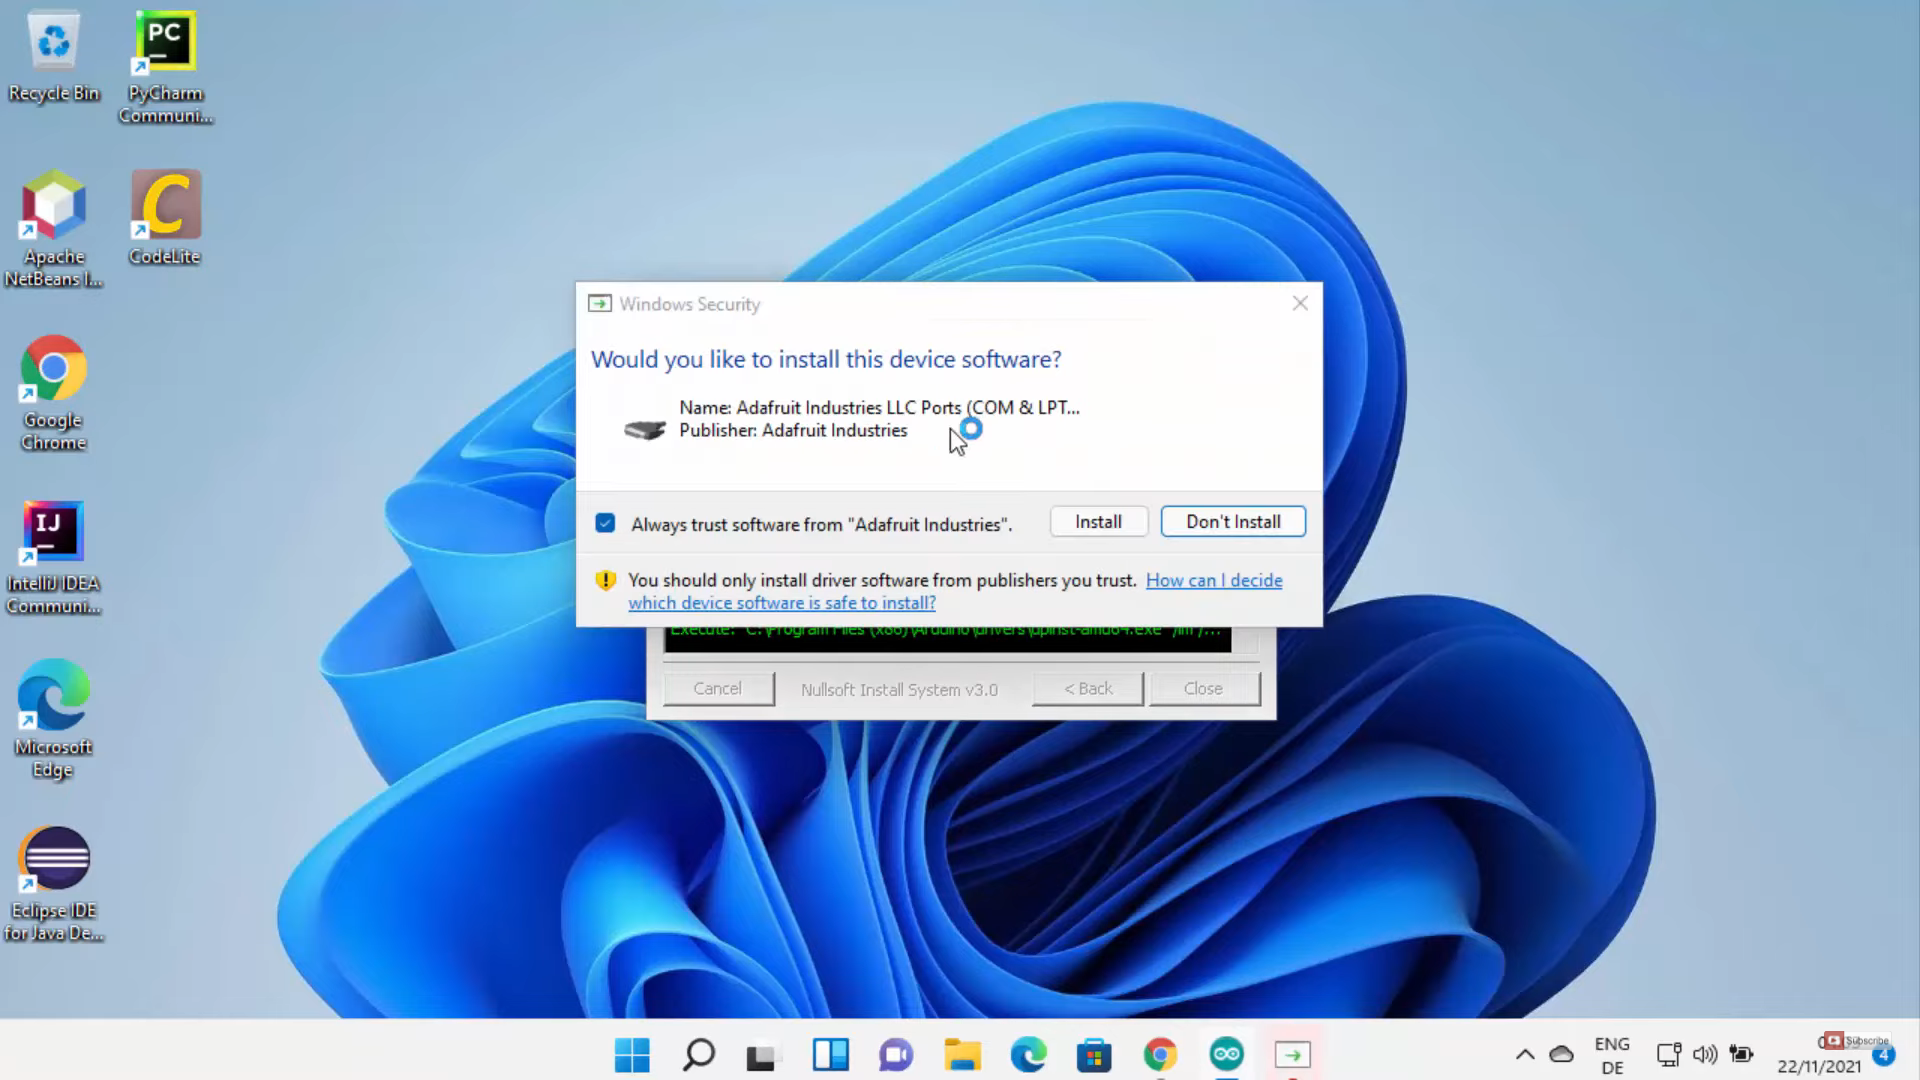
8. In between, it will show a warning. Click on Install.
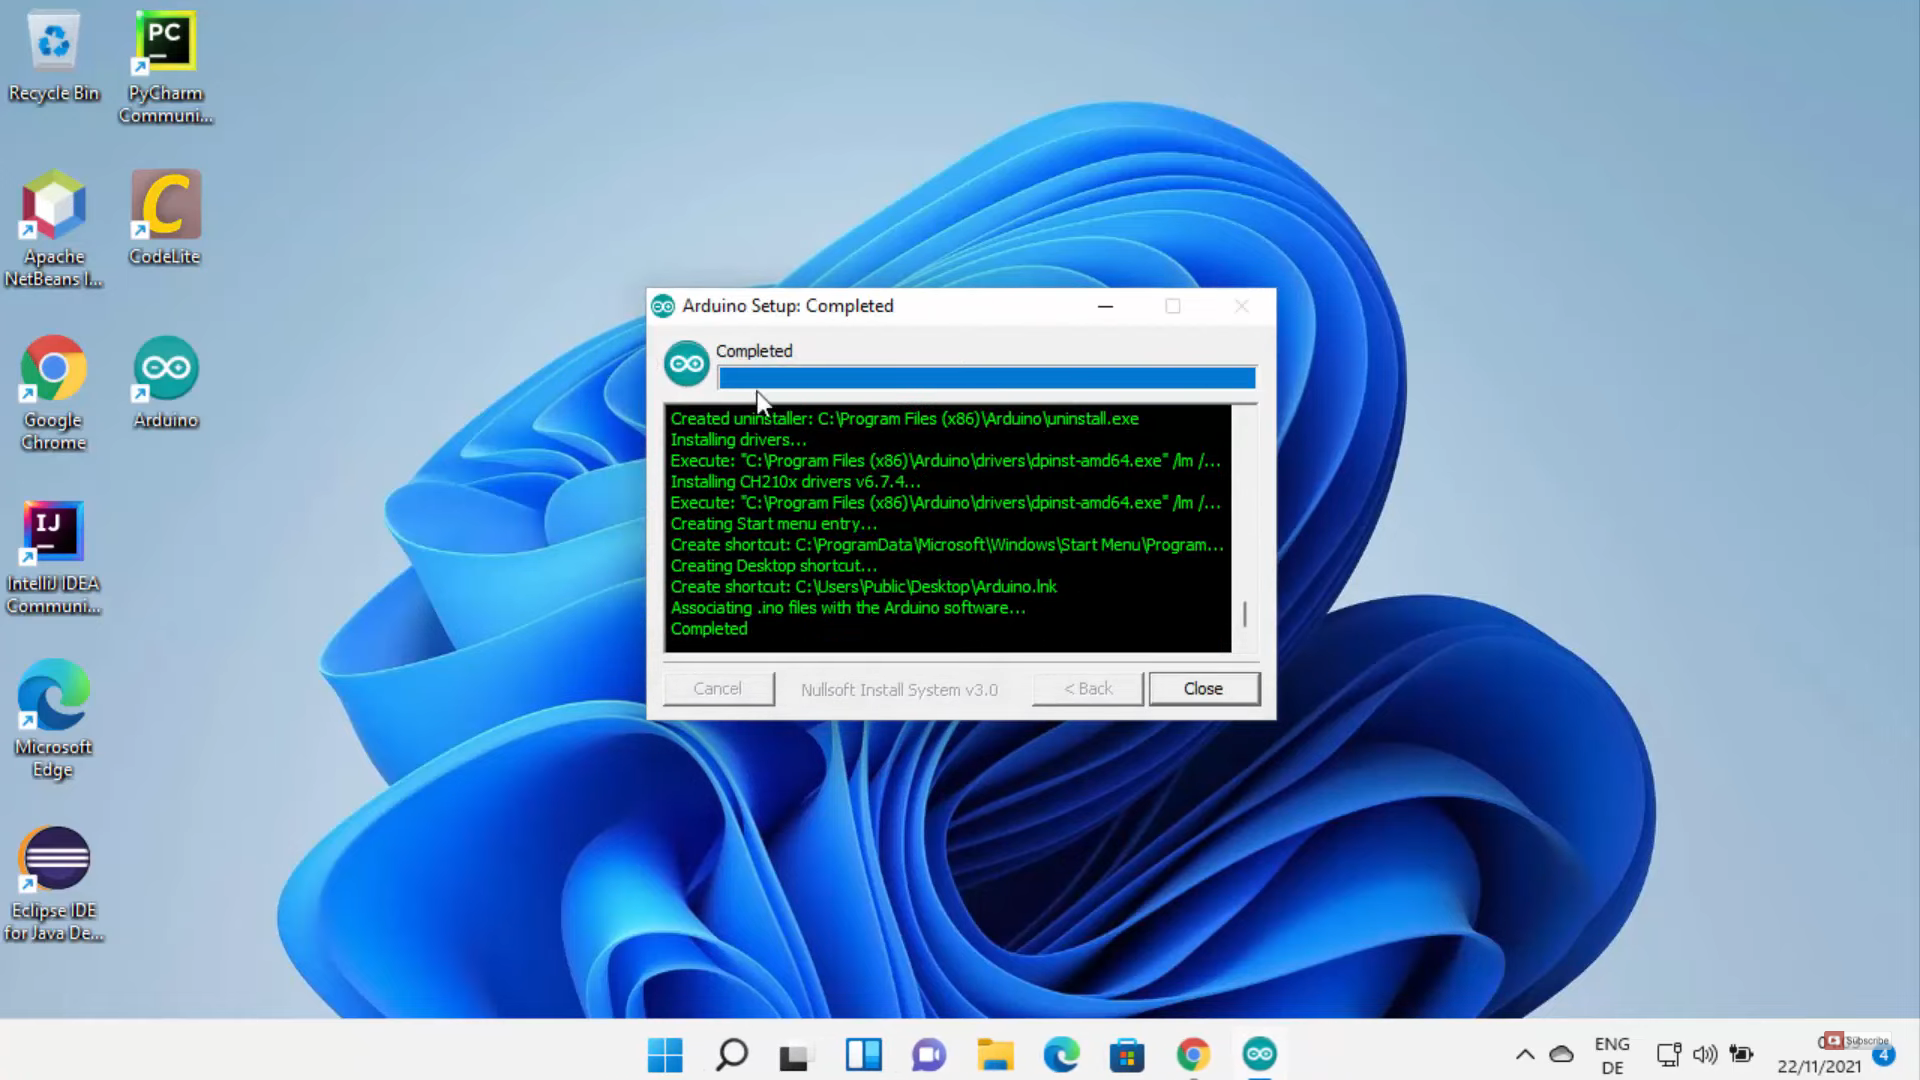
9. The Arduino setup is complete. You will be able to see the shortcut icon on the desktop. Click on Close.
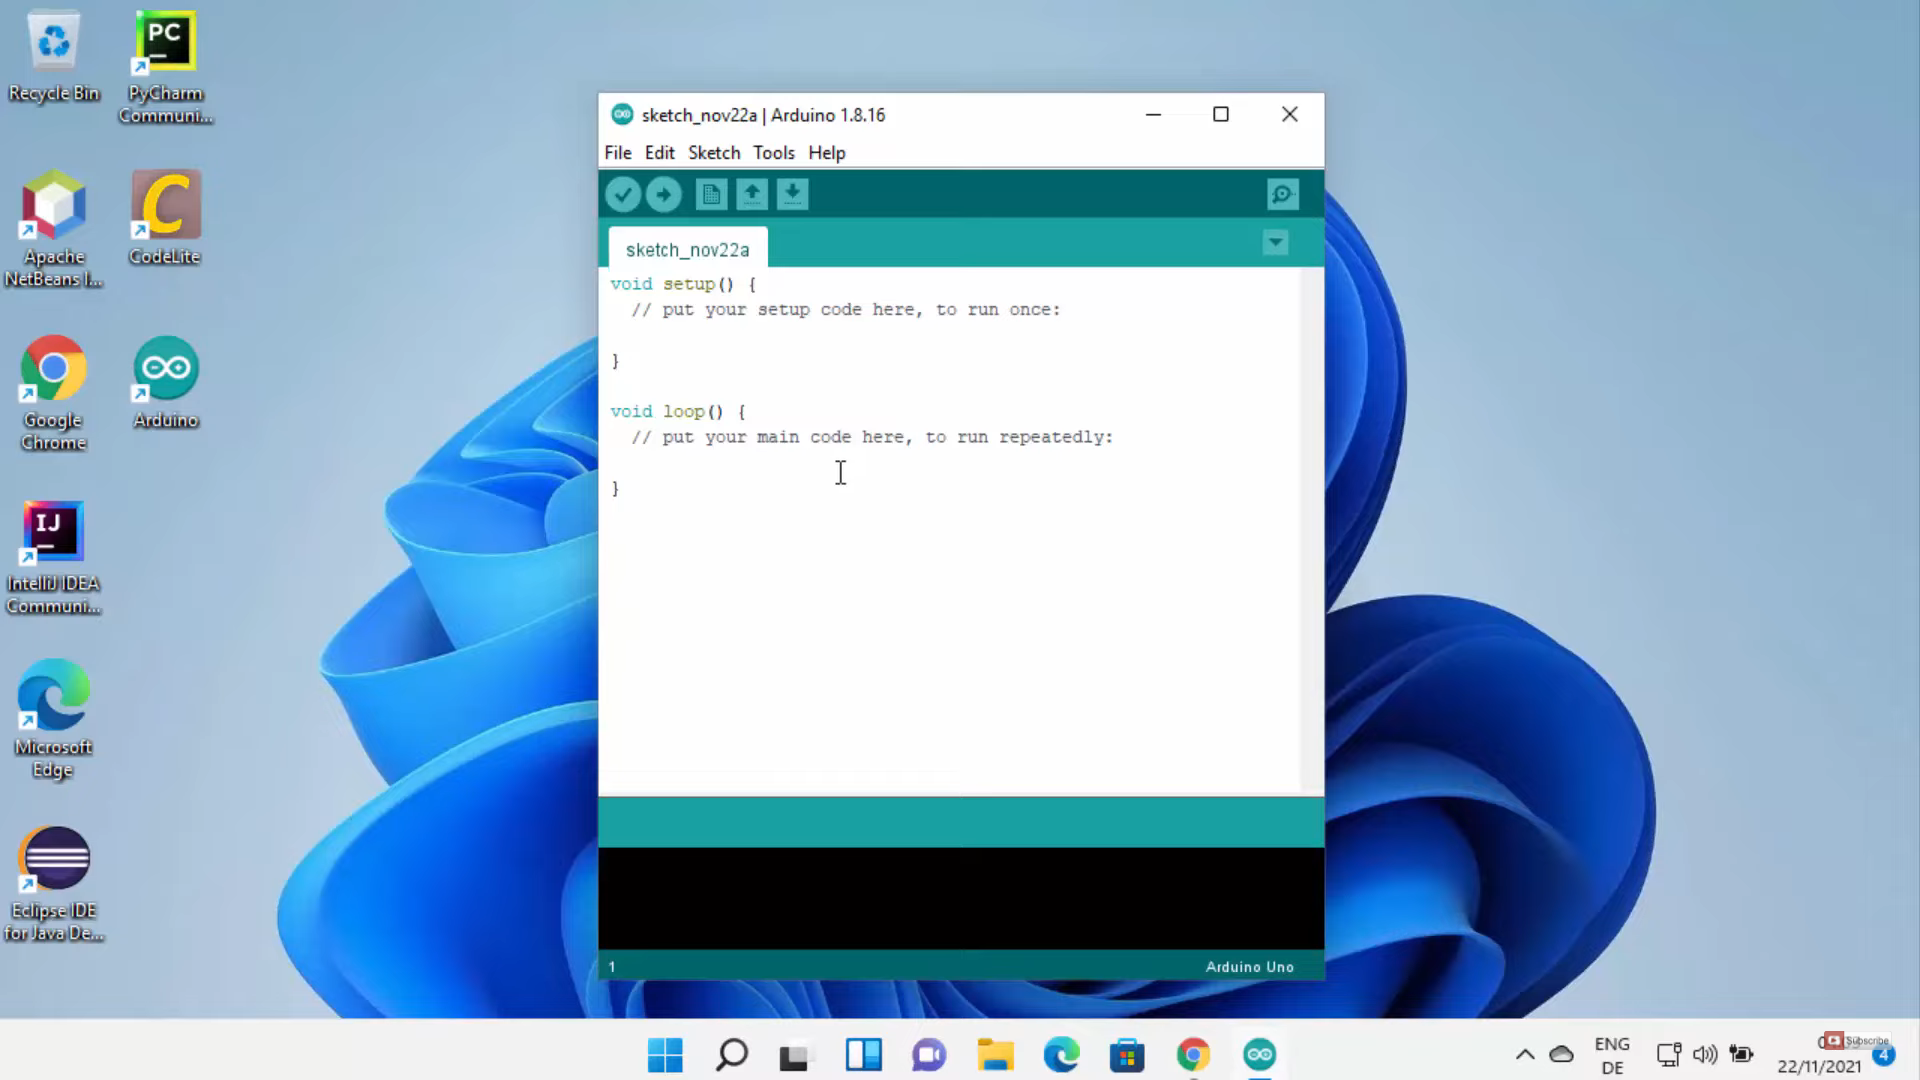
10. Click on the shortcut icon. Once you start Arduino IDE, it will look like this. To use this, you should have installed Arduino hardware.
11. To check whether it is available or not, you need to right-click on the windows start menu and click on Device manager.
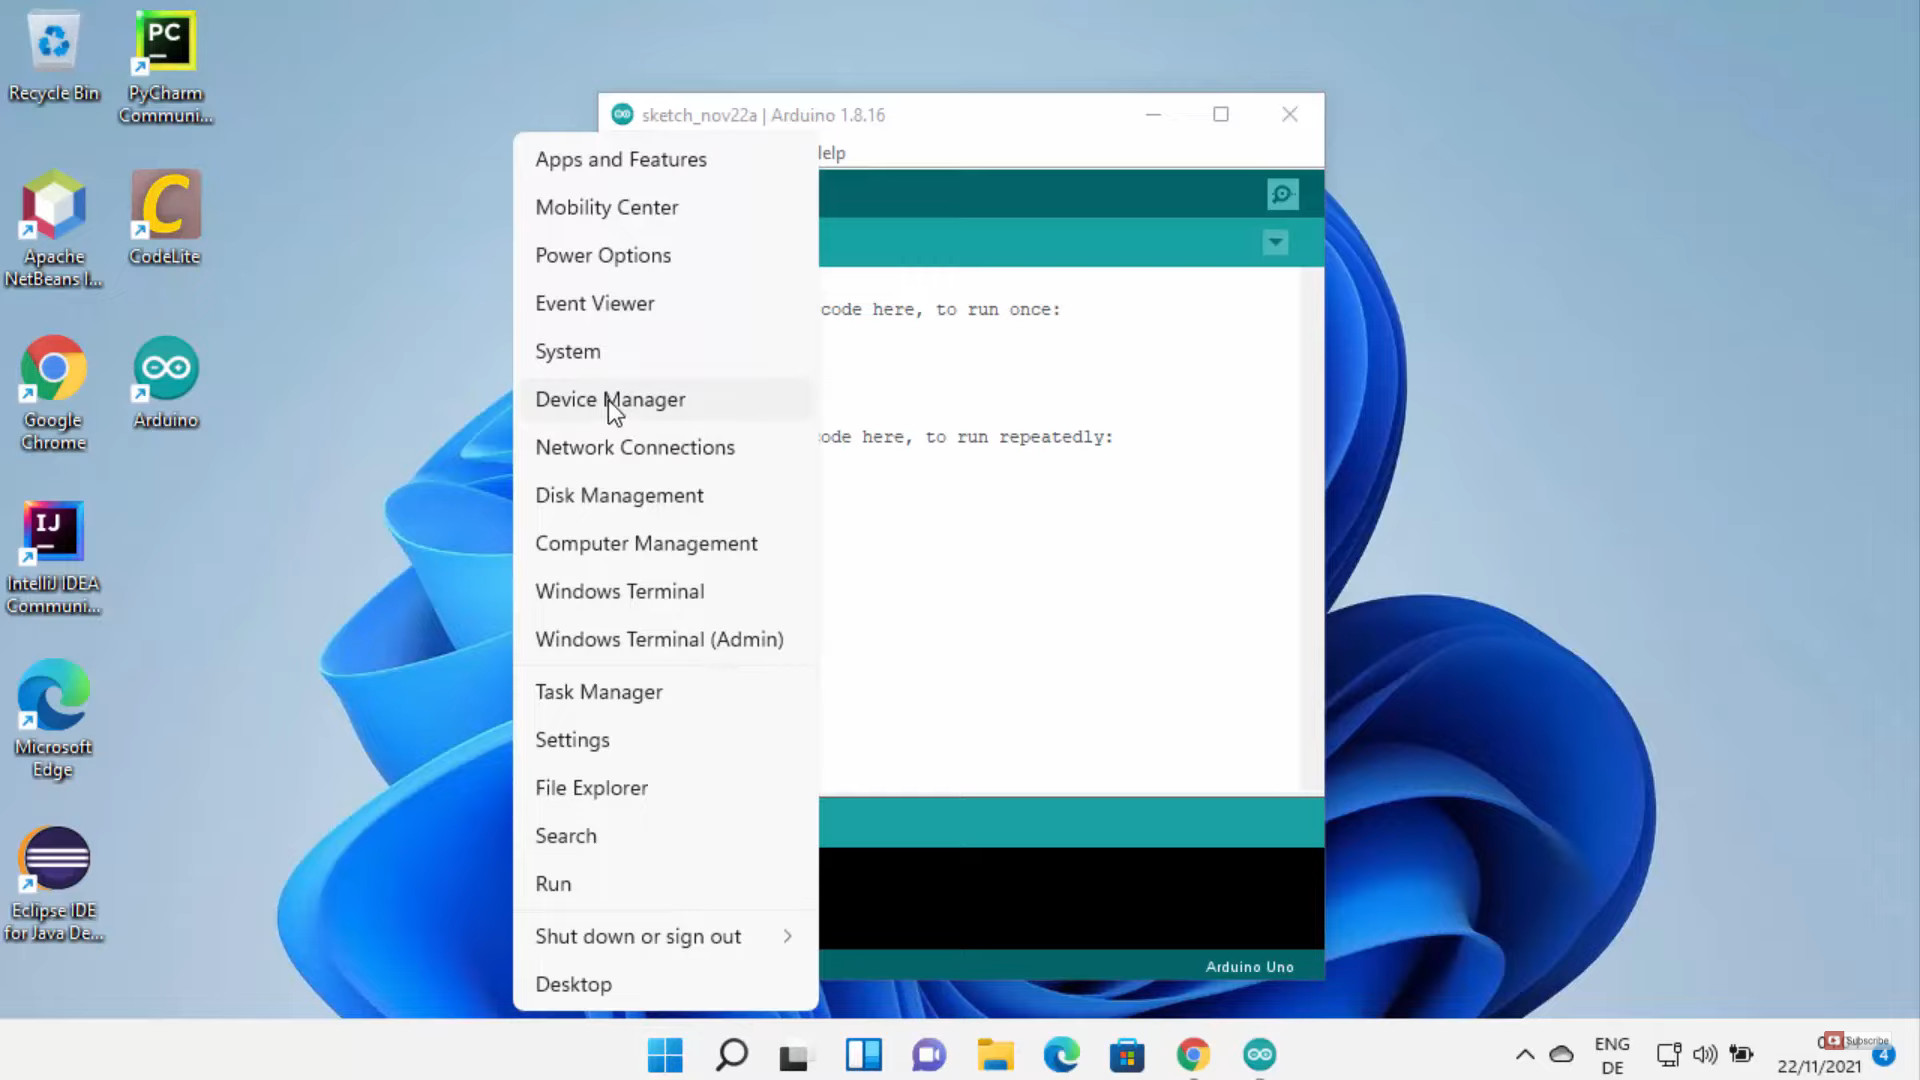
12. Once it opens, under Universal Serial Bus Controller, you will be able to see the Arduino listed there. Since I have not connected the hardware, I couldn’t see Arduino.

These are the steps for installing Arduino IDE software on your Windows 11 Operating System.
Leave a Reply