
In this blog post, I will give a detailed view of finding your computer name on the Windows 11 Operating System.
I am going to discuss a few different by which you can change the computer name or your PC name. Let’s check them one by one.
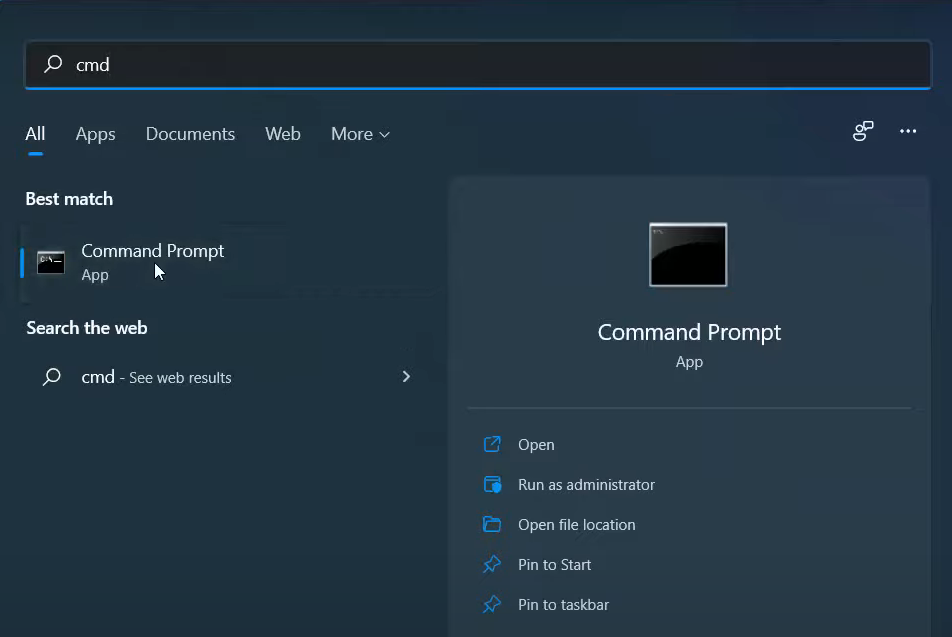
1. The first method involves the Command prompt. The easiest option to open the command prompt is by searching it on the search bar.
2. The command prompt window will open.
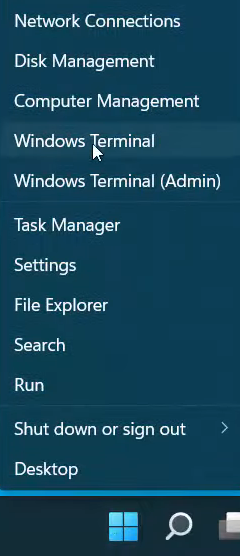
3. You can also open it by right-clicking on the Windows icon. So, that you can click on the Windows terminal.
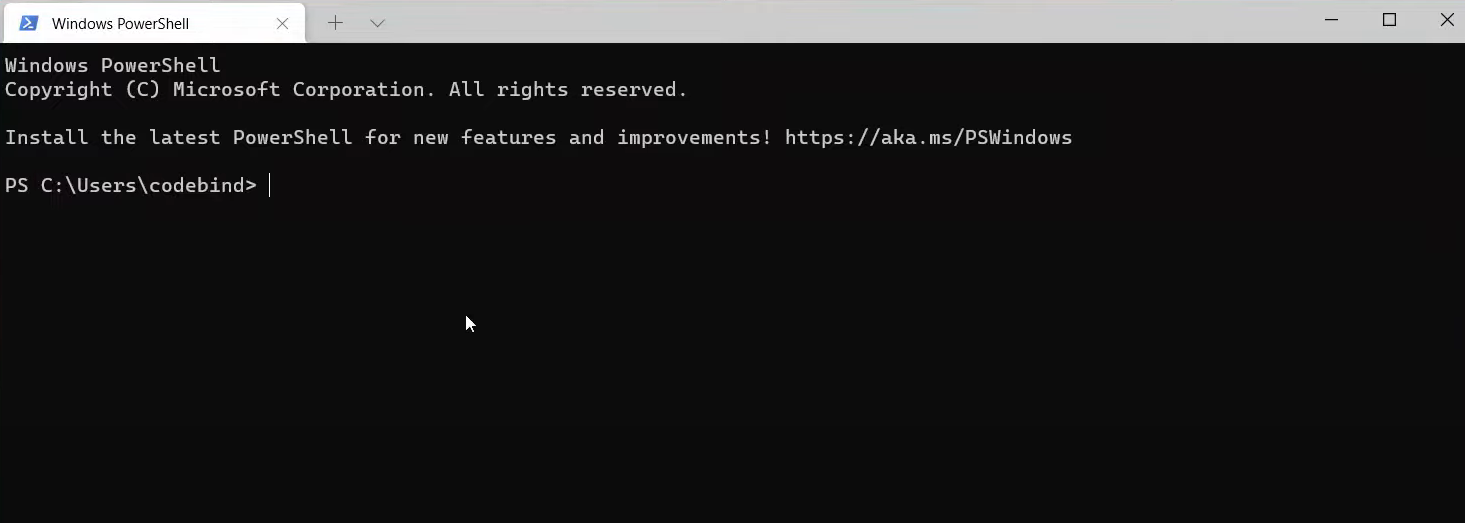
It will open the windows terminal which is the default windows terminal of your Windows Operating System. It could be your Windows PowerShell or your windows command prompt.
4. You can right-click on the Windows icon and click on Run. Then, type cmd and click on Ok.


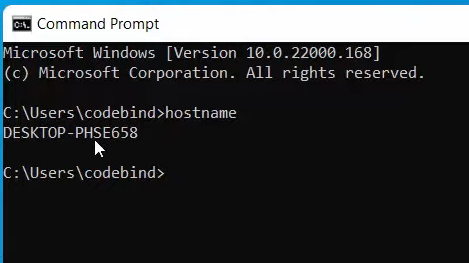
5. It will also open the command prompt. In the command prompt, type hostname and press enter.
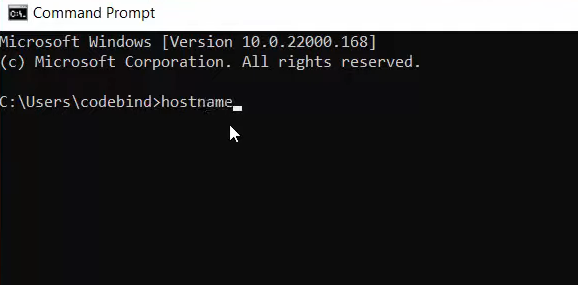
6. Whatever result you see after pressing enter is your computer name.
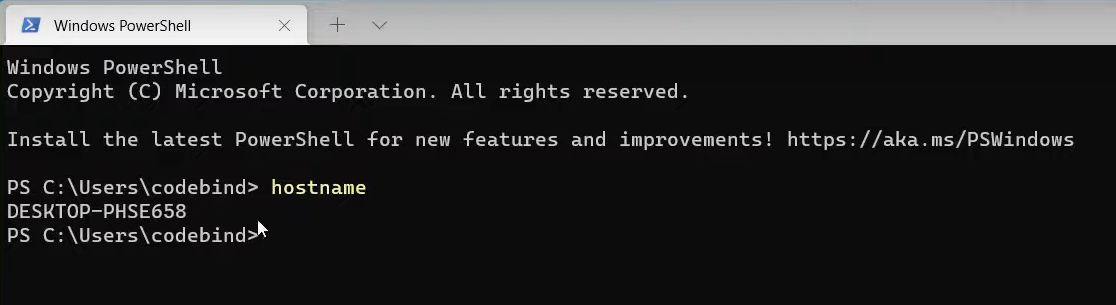
7. You can do this in Microsoft PowerShell as well. Just open that window. Type hostname and press enter. It will also display the same name.
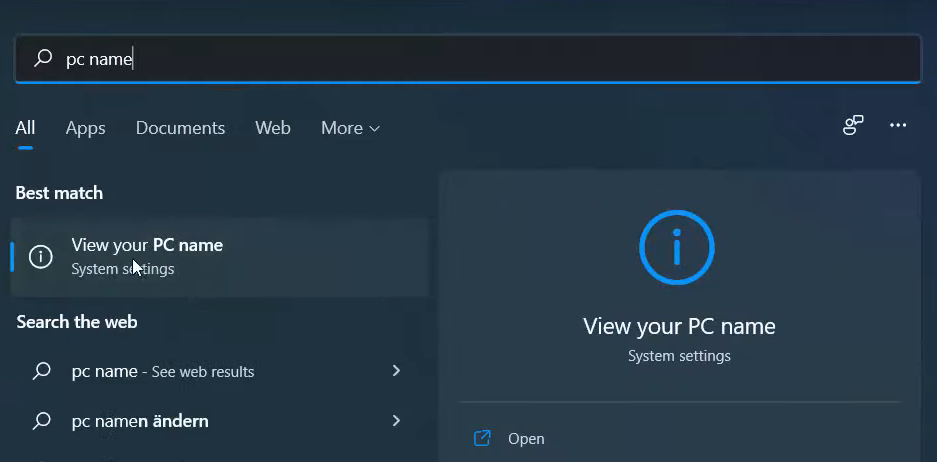
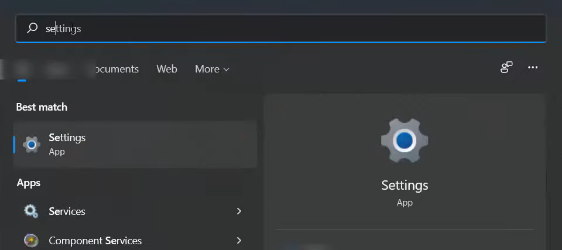
8. Click on the search icon and type PC name. And the first result that will appear will be View your PC name. Click on that.
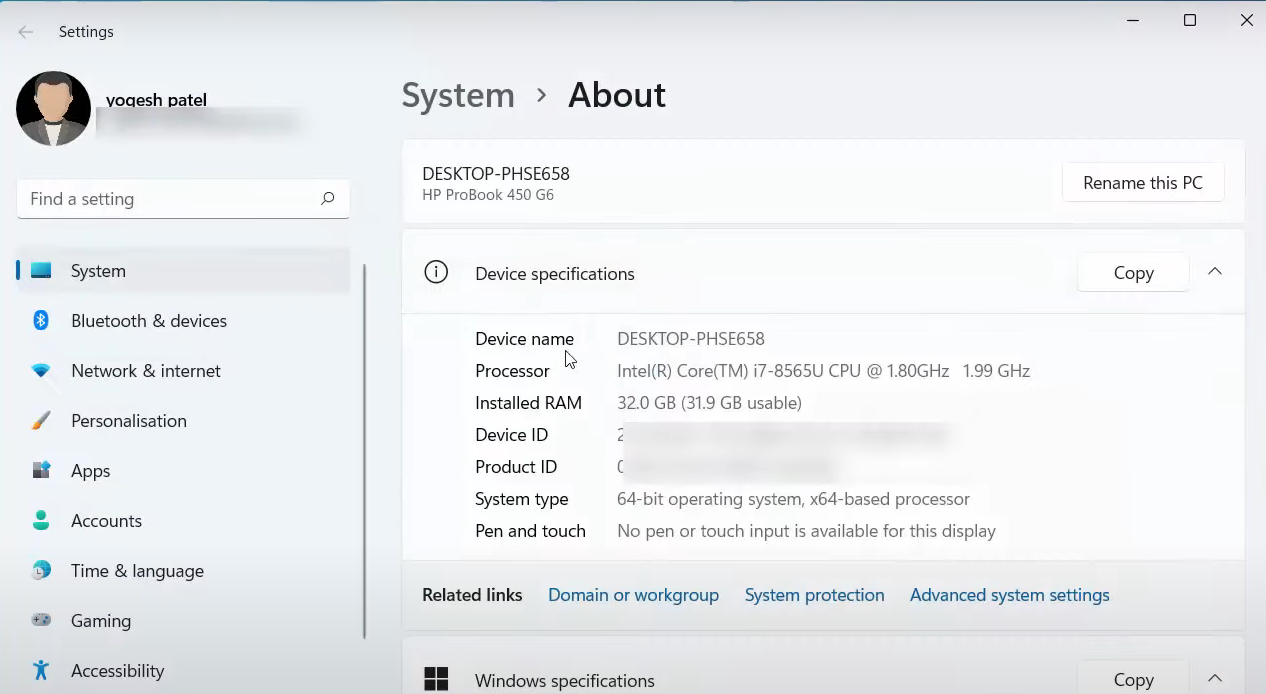
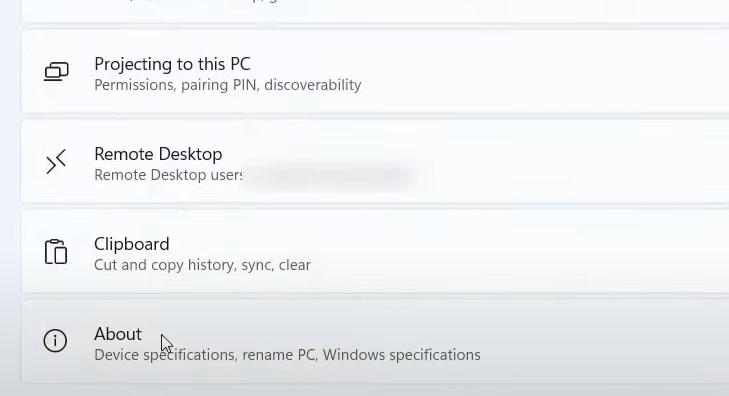
9. It will open a window where you can see the computer’s name under Device specifications. You can also reach this window by using the settings app.
10. In the search icon, search for the Settings app.
11. Once the settings app opens, click on System.
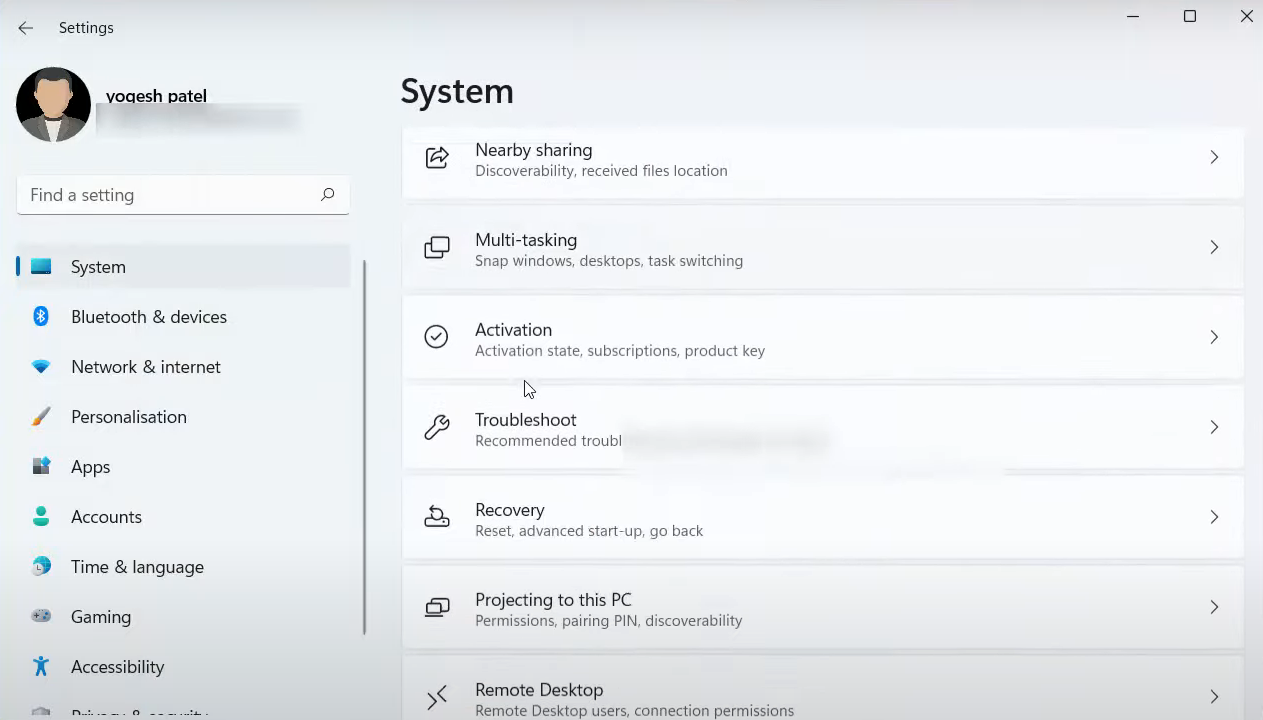
12. Scroll down and click on About which is also the last option available. It will also reach the same window which I mentioned earlier.
These are the steps for finding the computer name or PC name. You can follow any of the mentioned steps above for finding the computer name.
Leave a Reply