
In this blog post, I will give a detailed view of downloading and running AnyDesk for your Windows 11 Operating System.
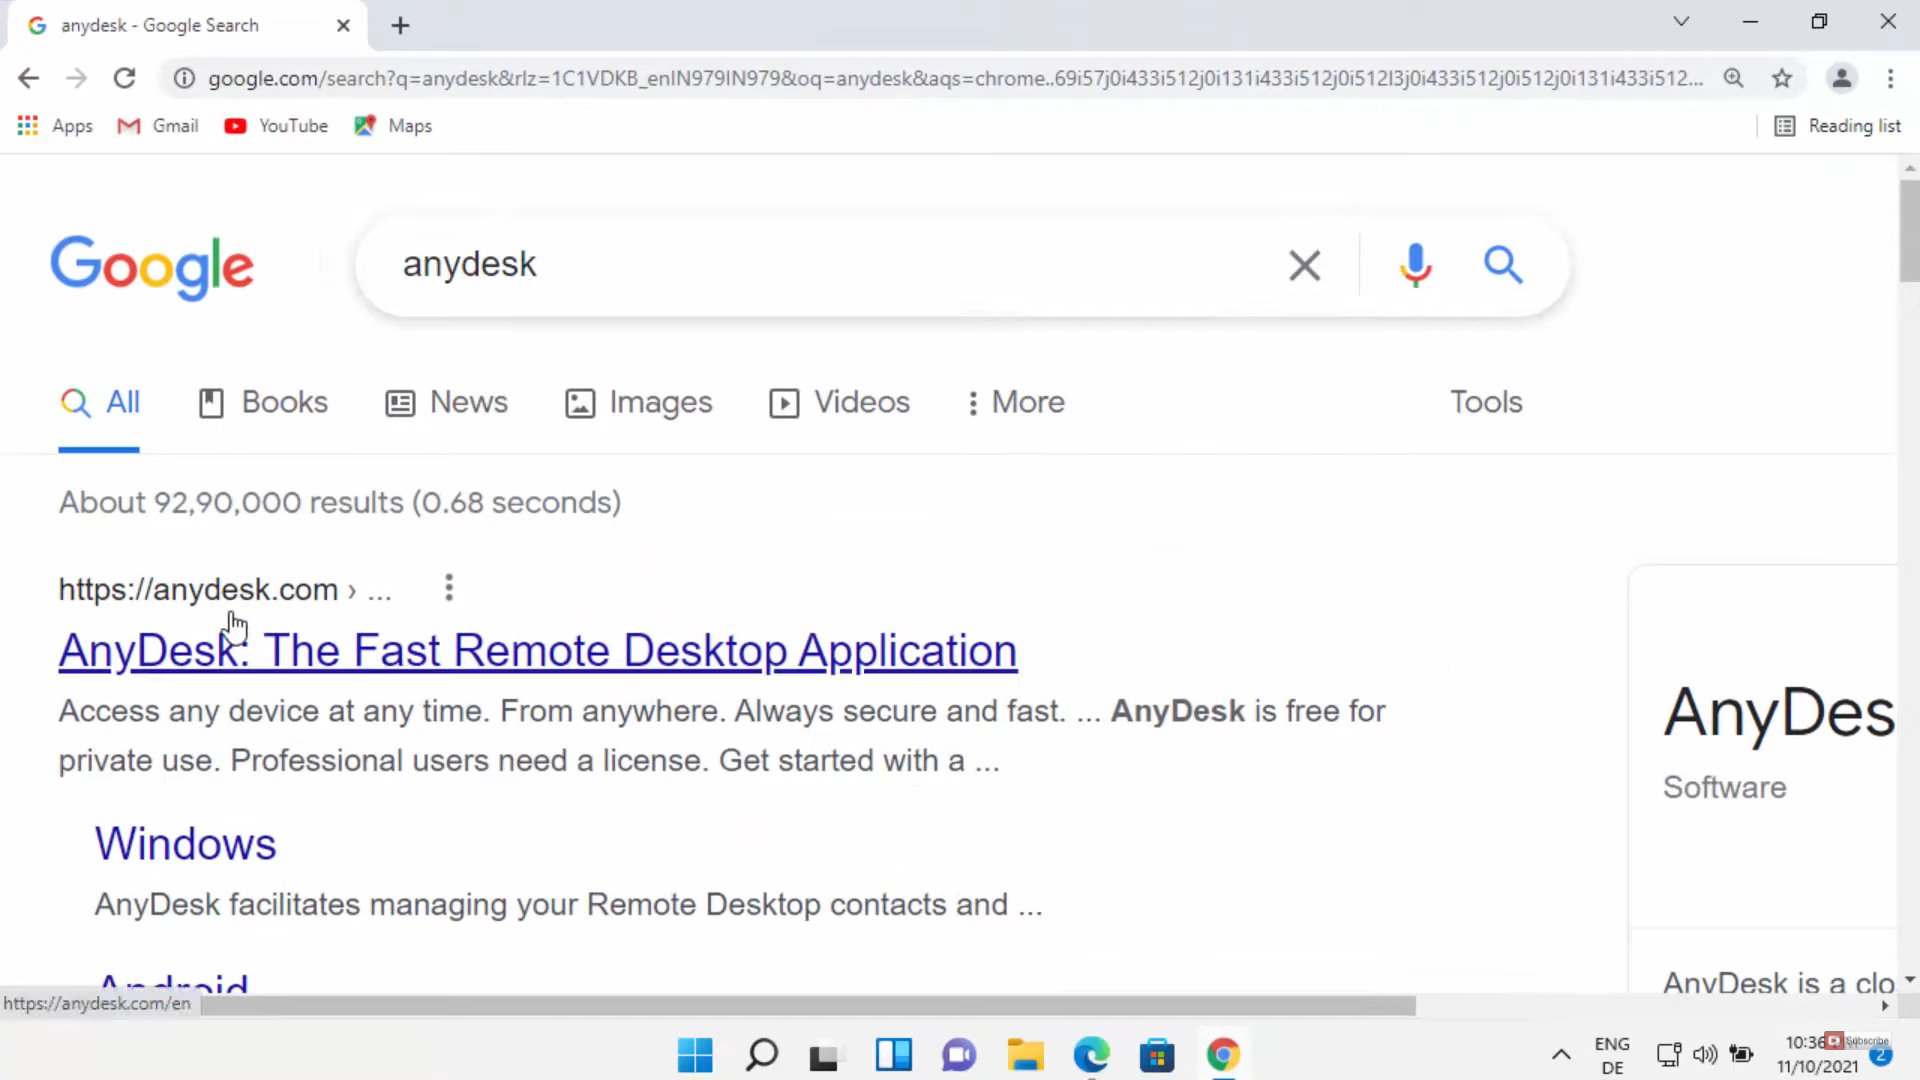
1. Open a web browser of your choice and search for anydesk. The first link will be from anydesk. Click on that link.
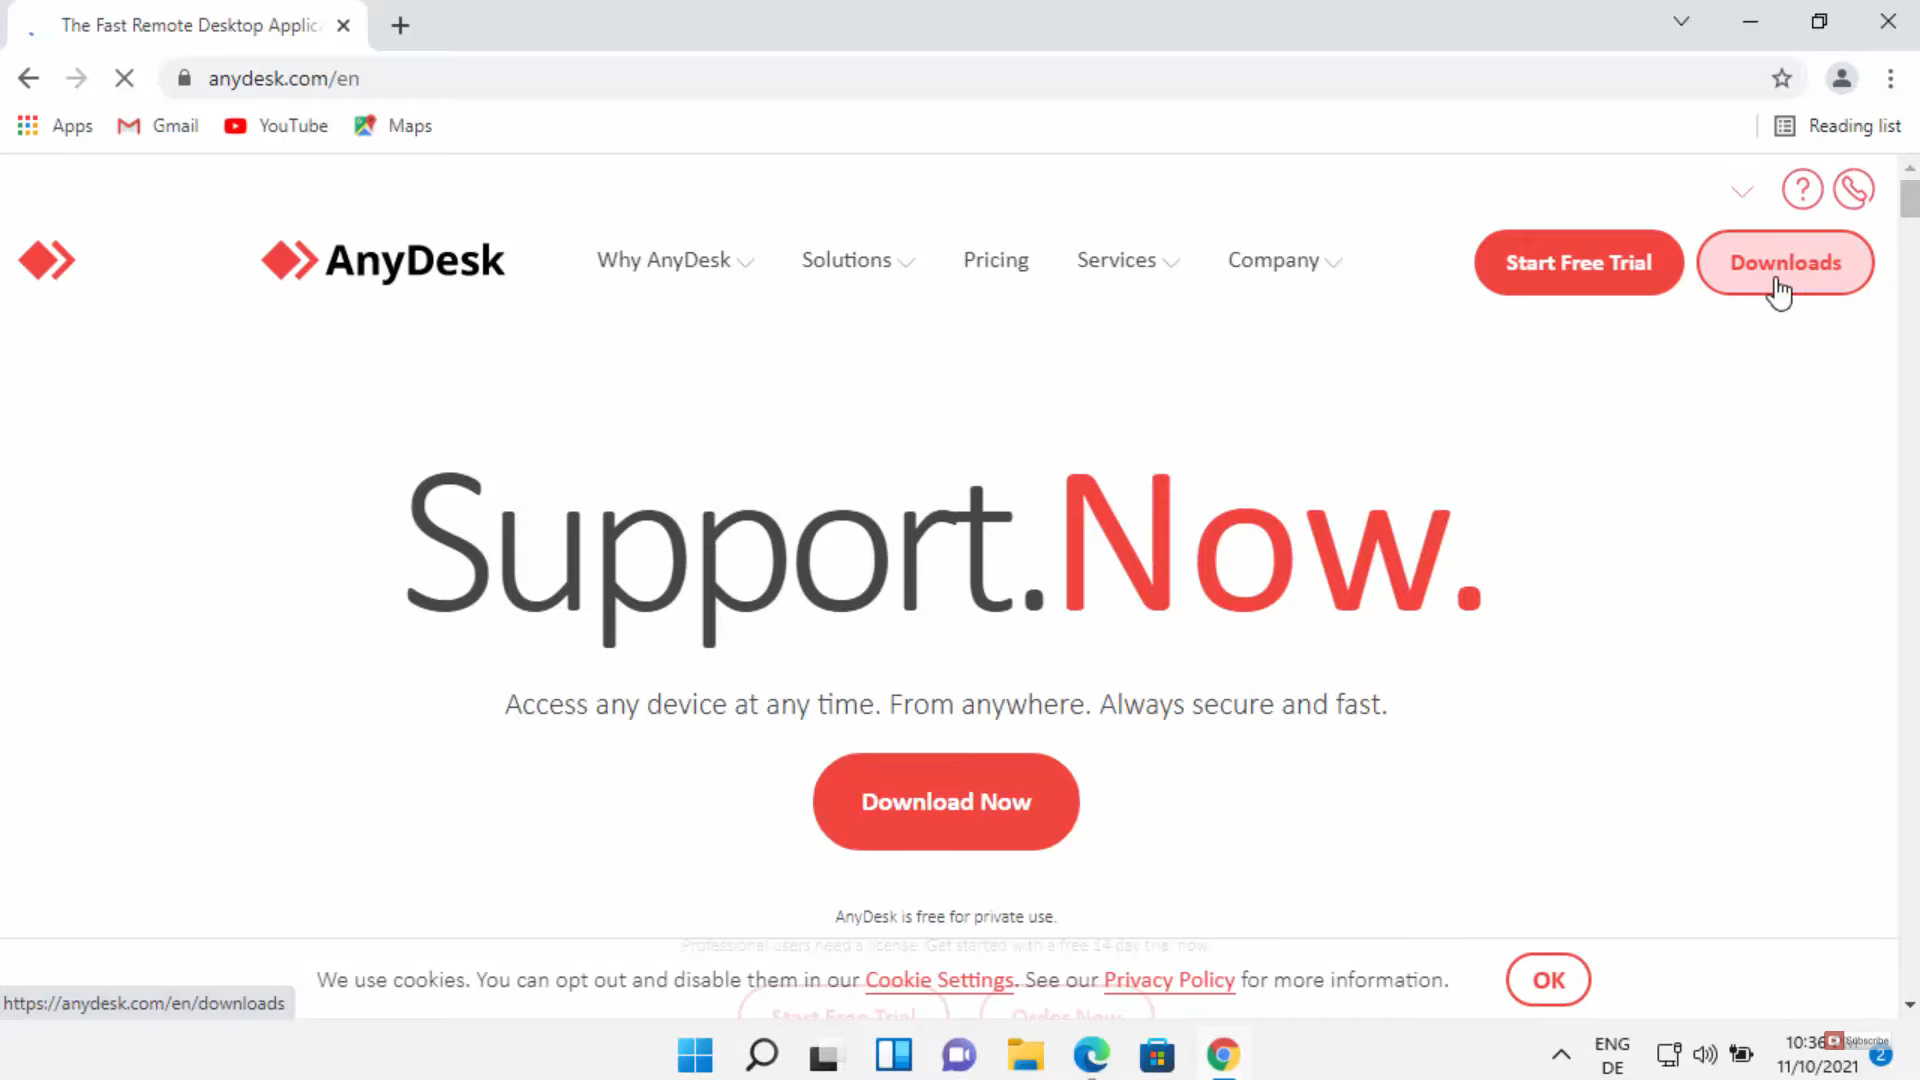
2. On that website, you will be able to see the Download Now button. Click on that button. It will start the downloading process.
3. Once it is downloaded, click on that exe file and minimize the browser. Anydesk will start on your Windows 11 Operating System.
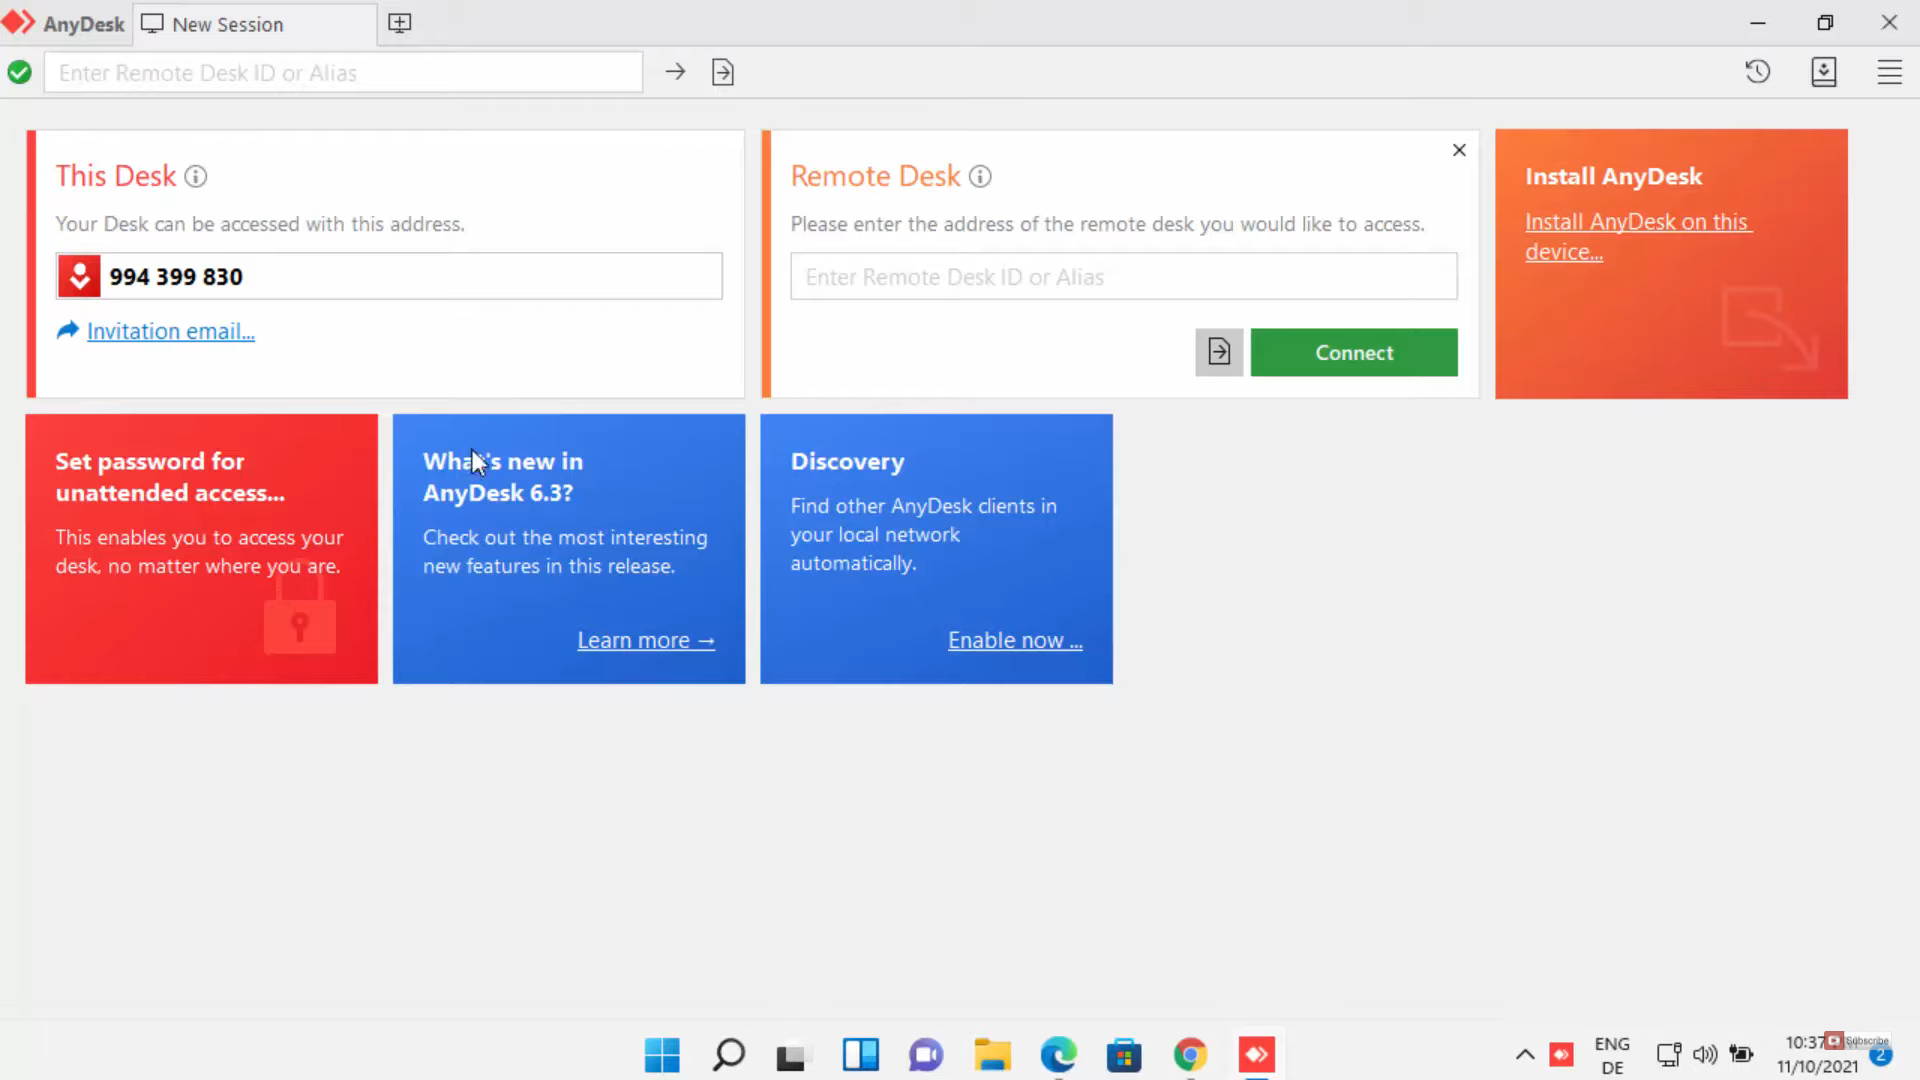
4. Under This Desk, you will be able to see a number. You can give this number to anyone you want. They can view your desktop. Under Remote Desk, you need to provide several other people’s this desk so that you can view their desktops. I am going to try this option. I have anydesk installed on my other device. I am going to provide that number. After entering that number, you need to click on Connect option.
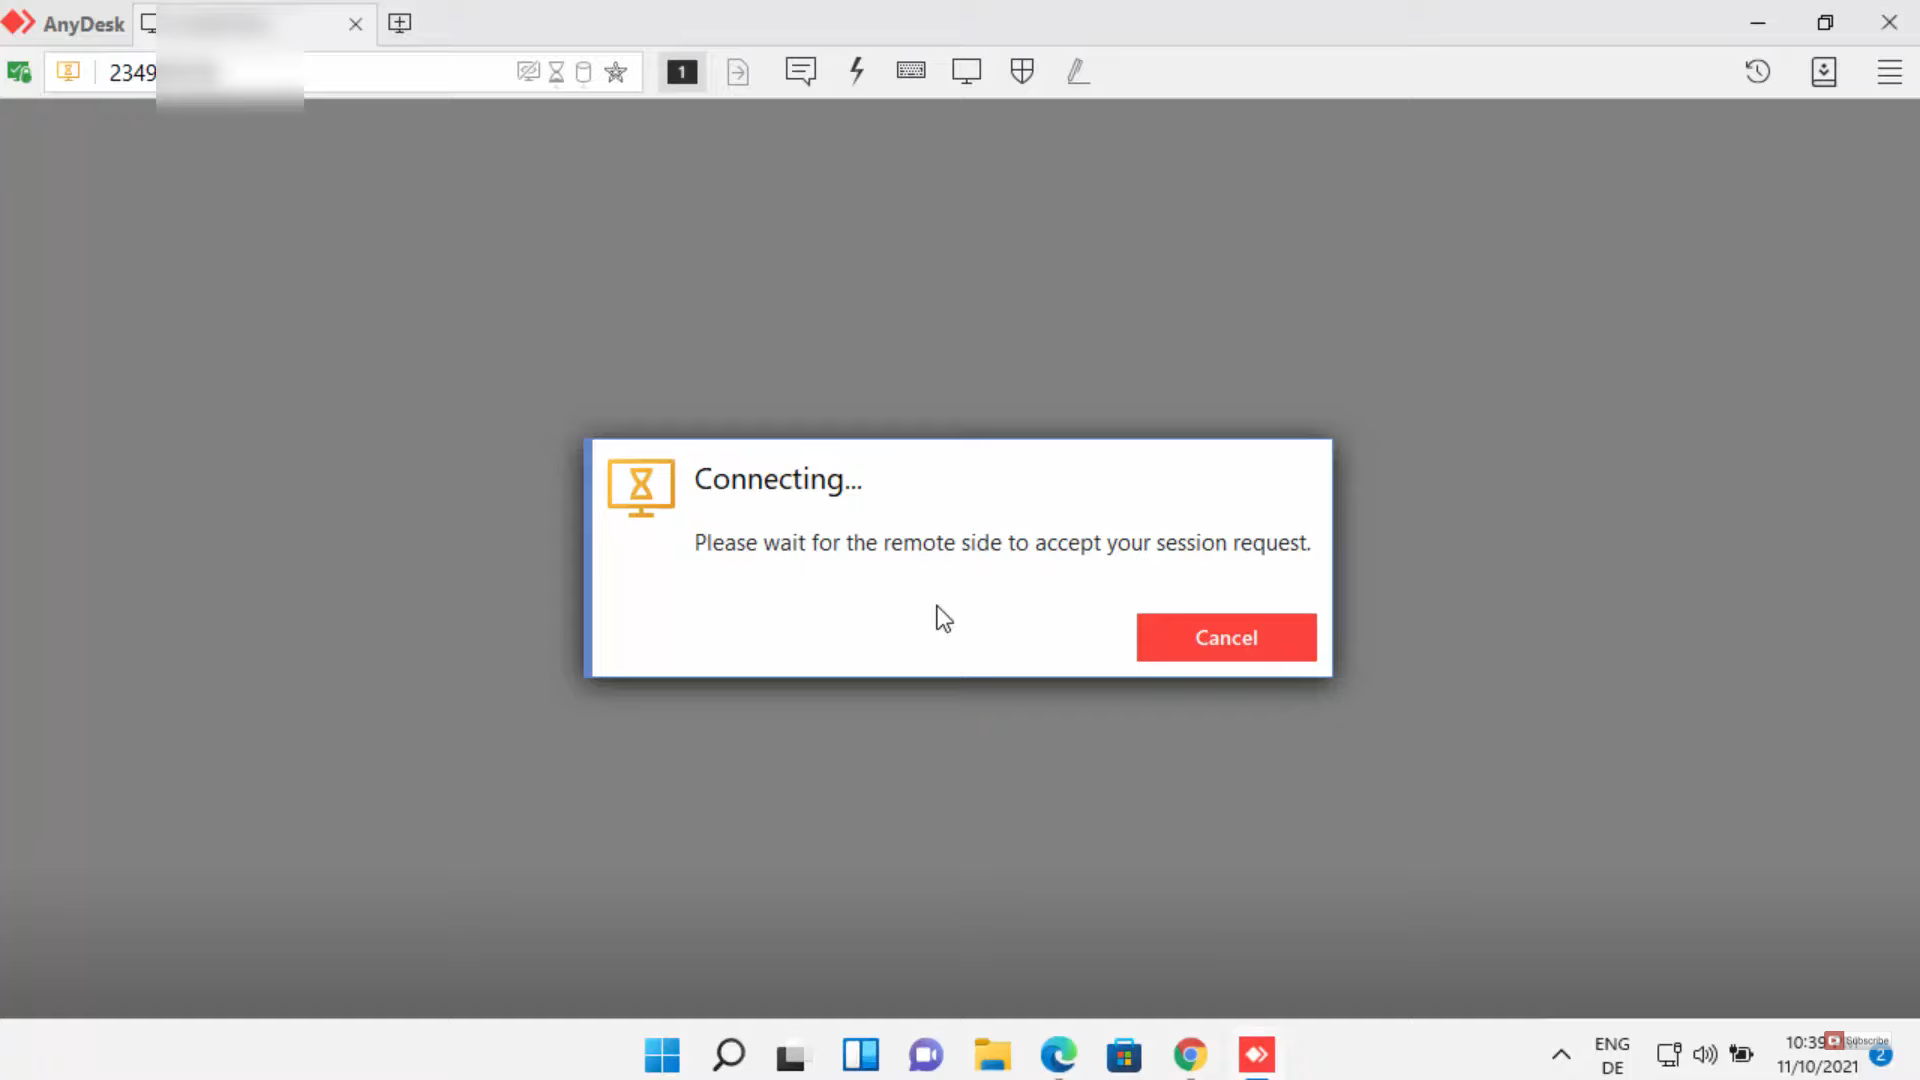
5. It will show a warning window. You need to click on Allow access button. It will start connecting. On the other device, you need to click on Accept to allow this.

6. When you click on Start broadcast on your other device, it will start to broadcast on your Windows 11 Operating System.
7. I am using a tablet and I can see that screen.
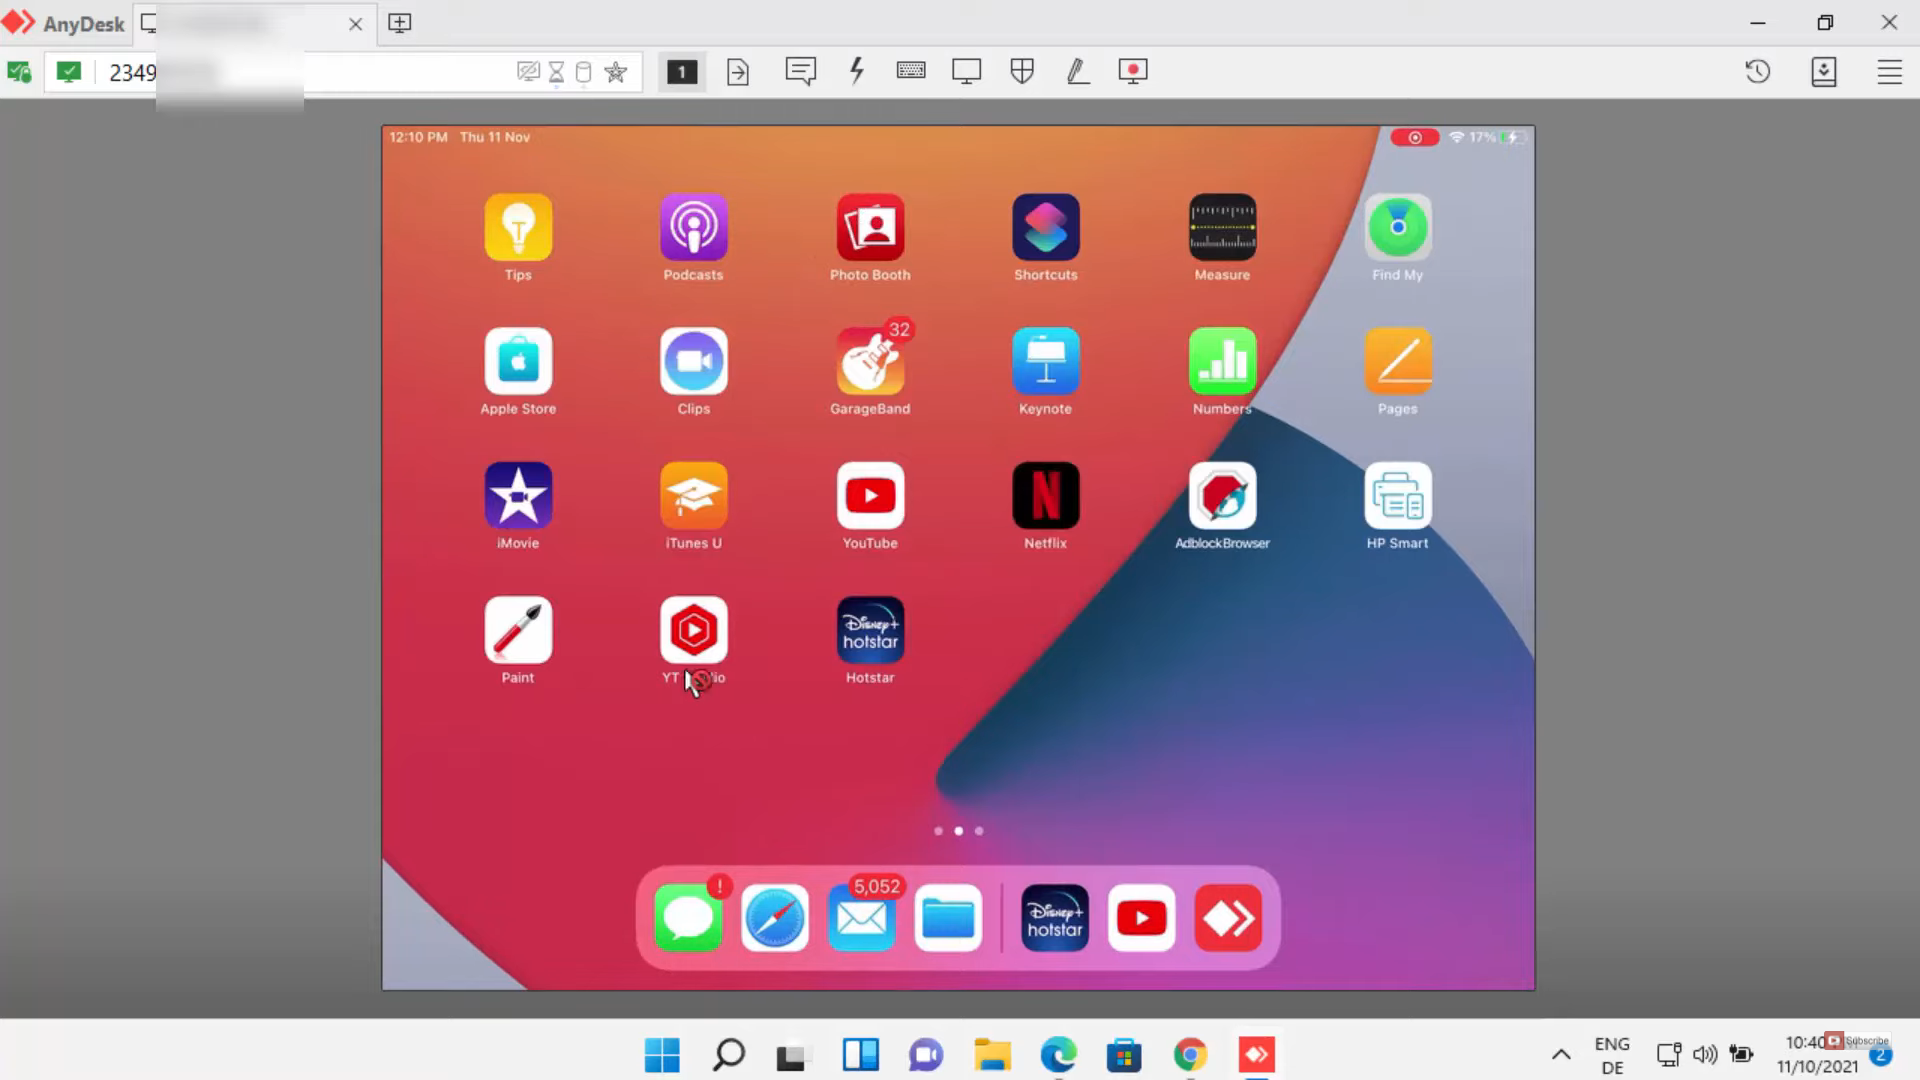
8. You can see two sections. One is a New session.

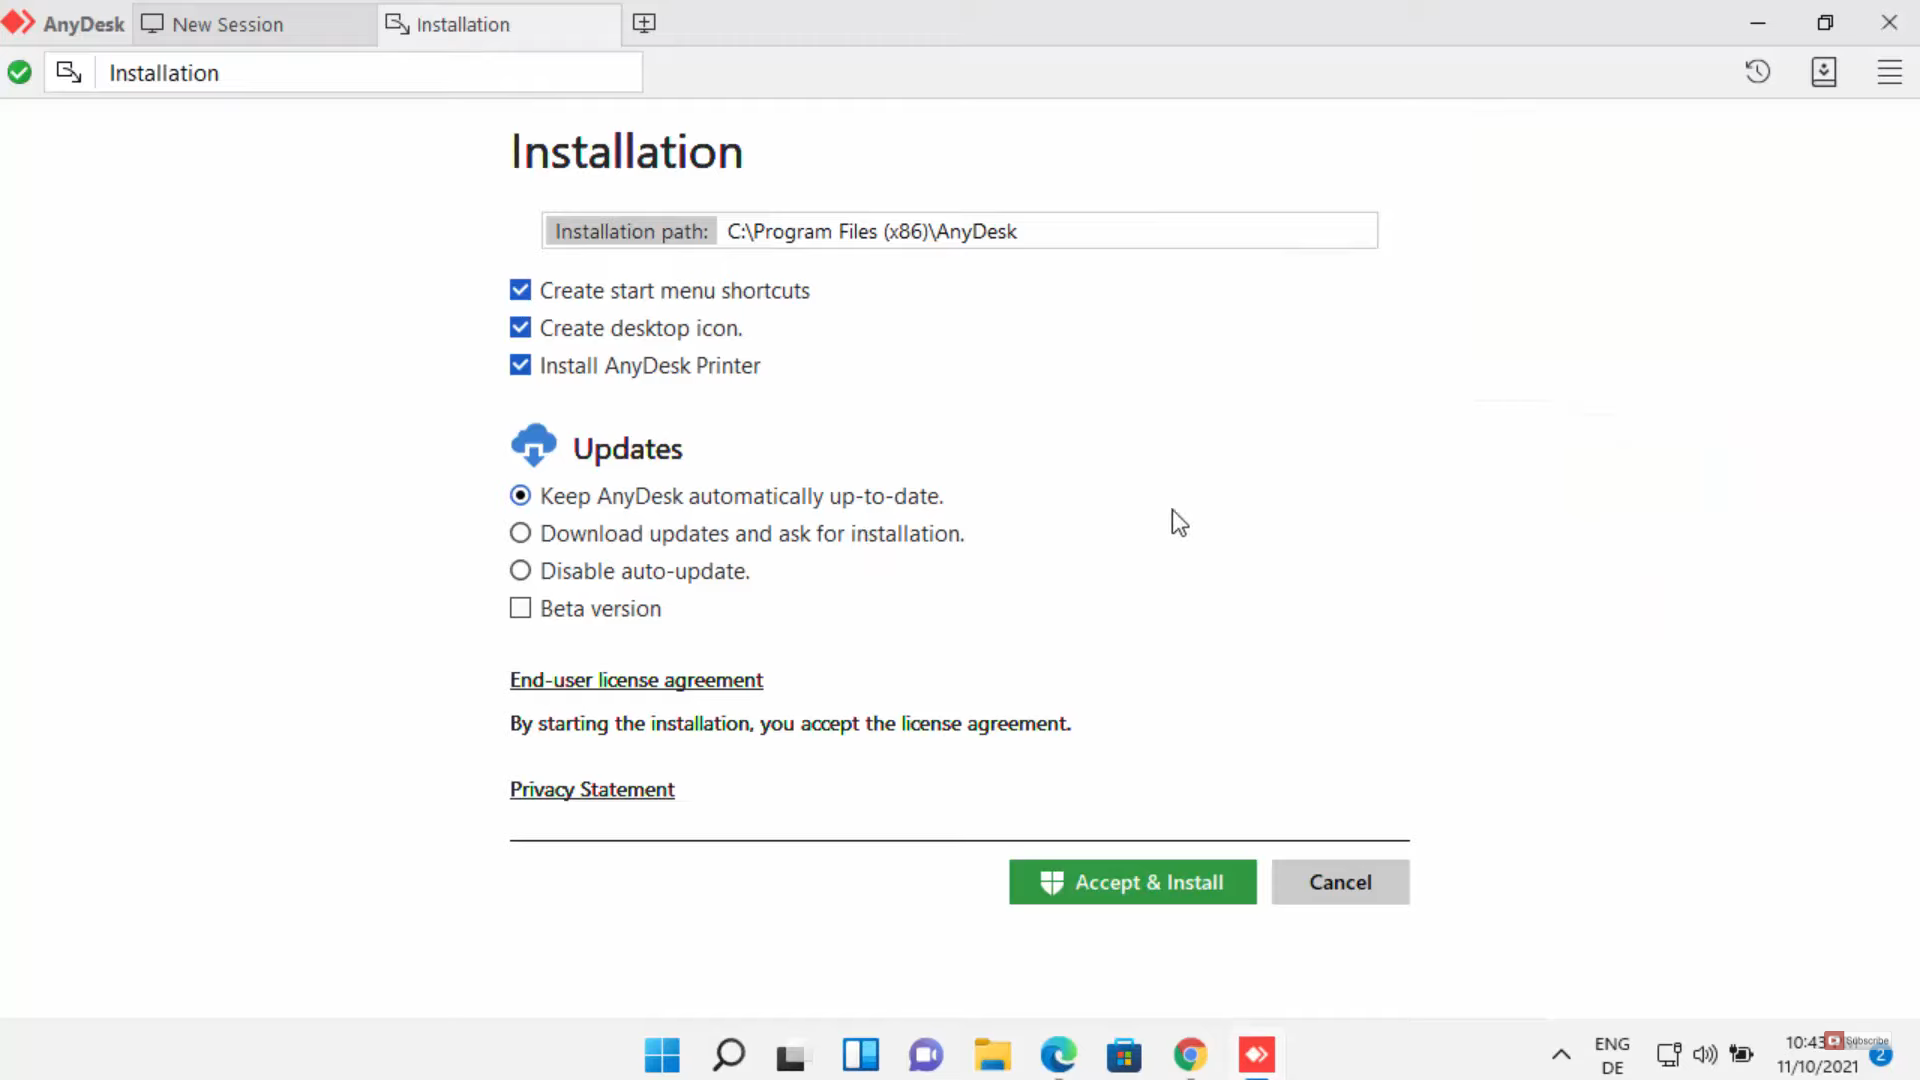
9. The other one is Installation. It will install anydesk permanently on your Windows 11 Operating System. Here, you need to leave everything as default. Click on accept & install button.
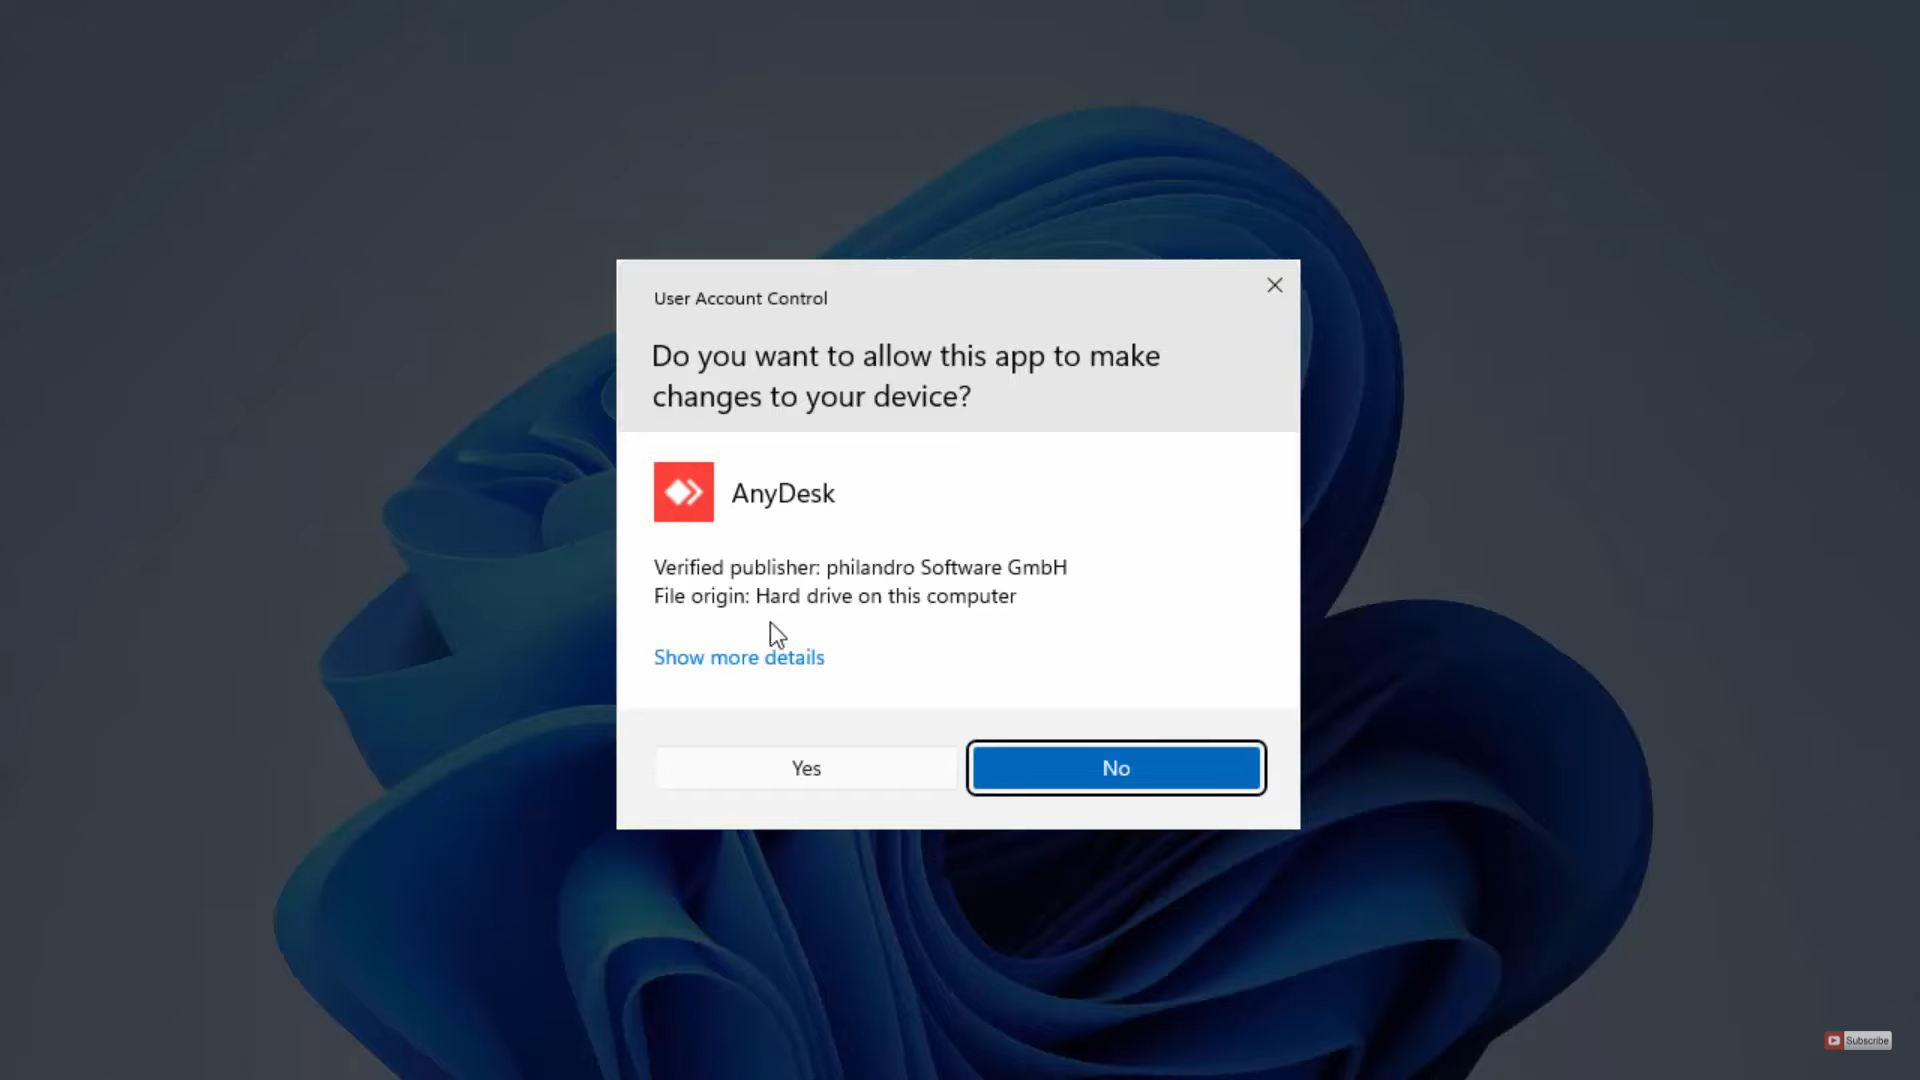
10. It will show a warning. Click on Yes.
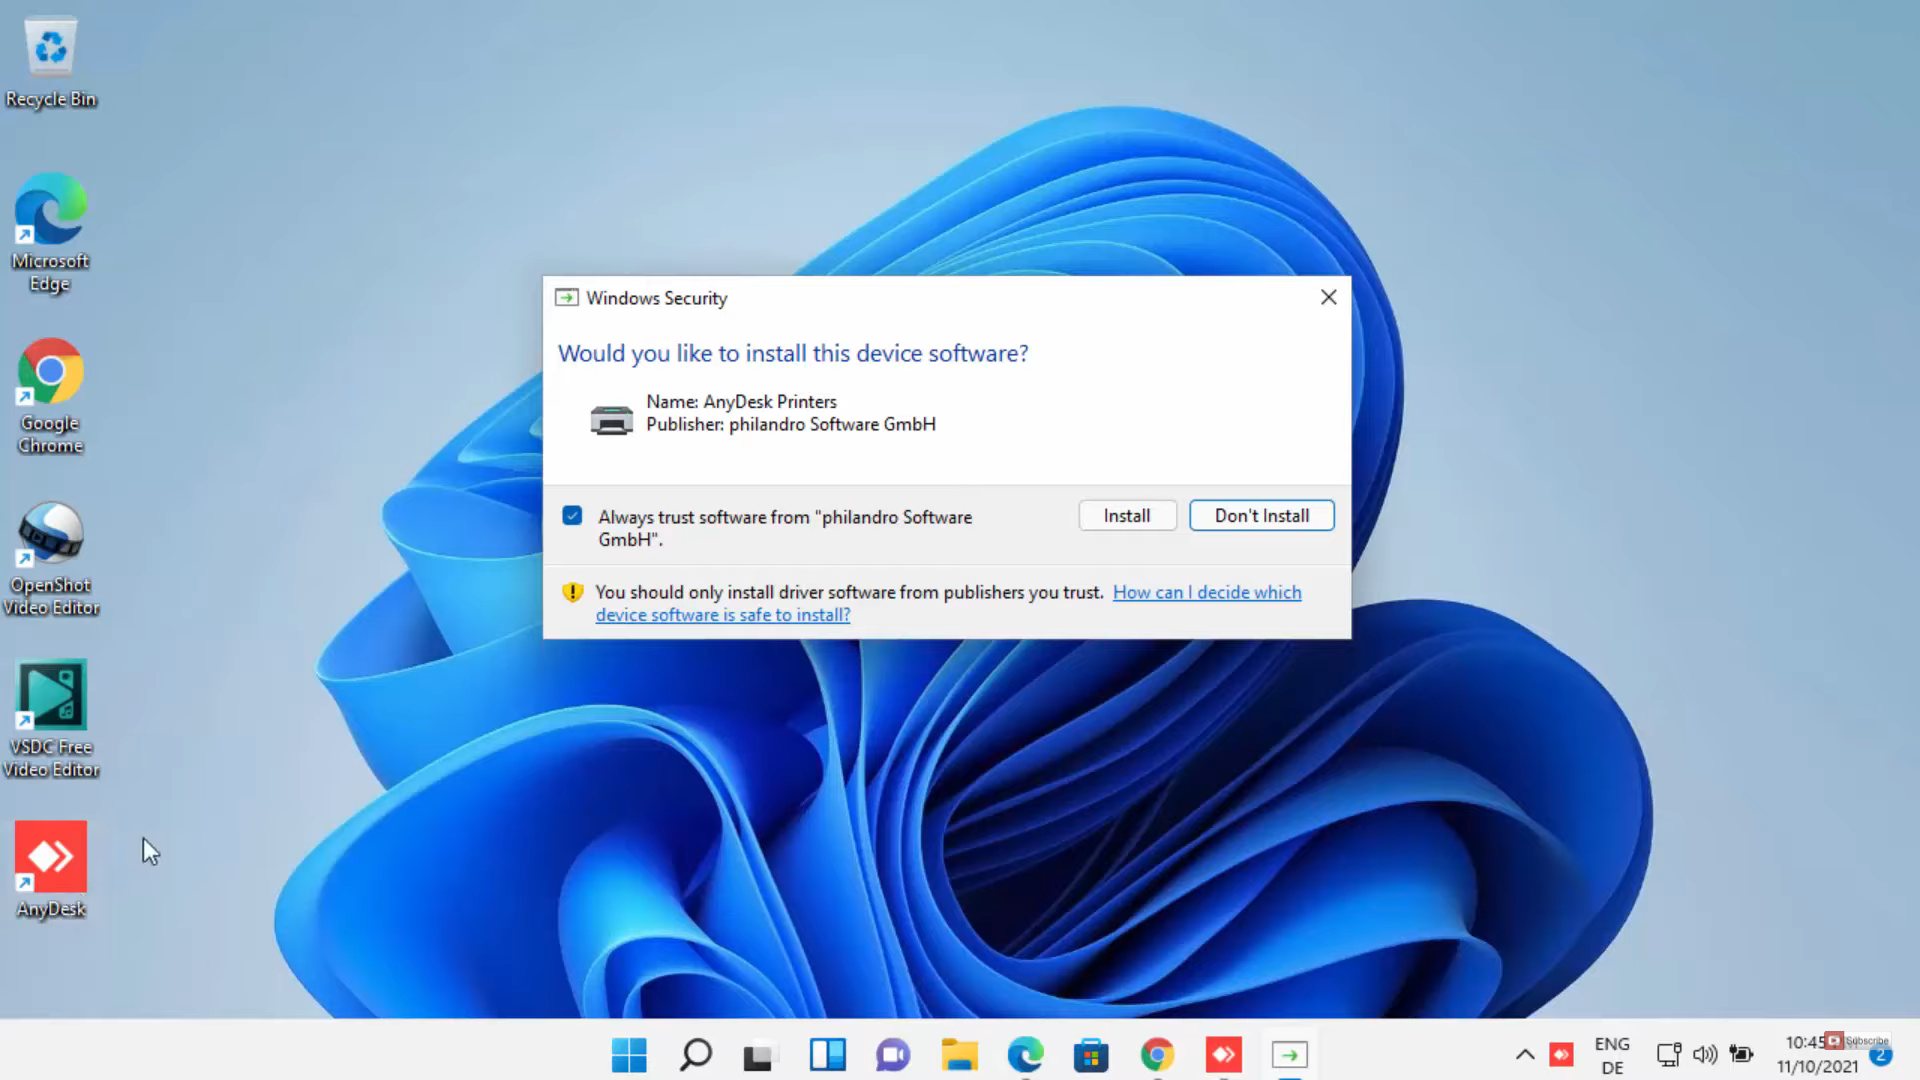
11. It will create a desktop shortcut icon. You will see a windows security tab. You need to click on Install.
These are the steps for downloading and running Anydesk on your Windows 11 Operating System.
Leave a Reply