
In this blog post, I will give a detailed view of adding or removing a Microsoft account on your Windows 11 Operating System.
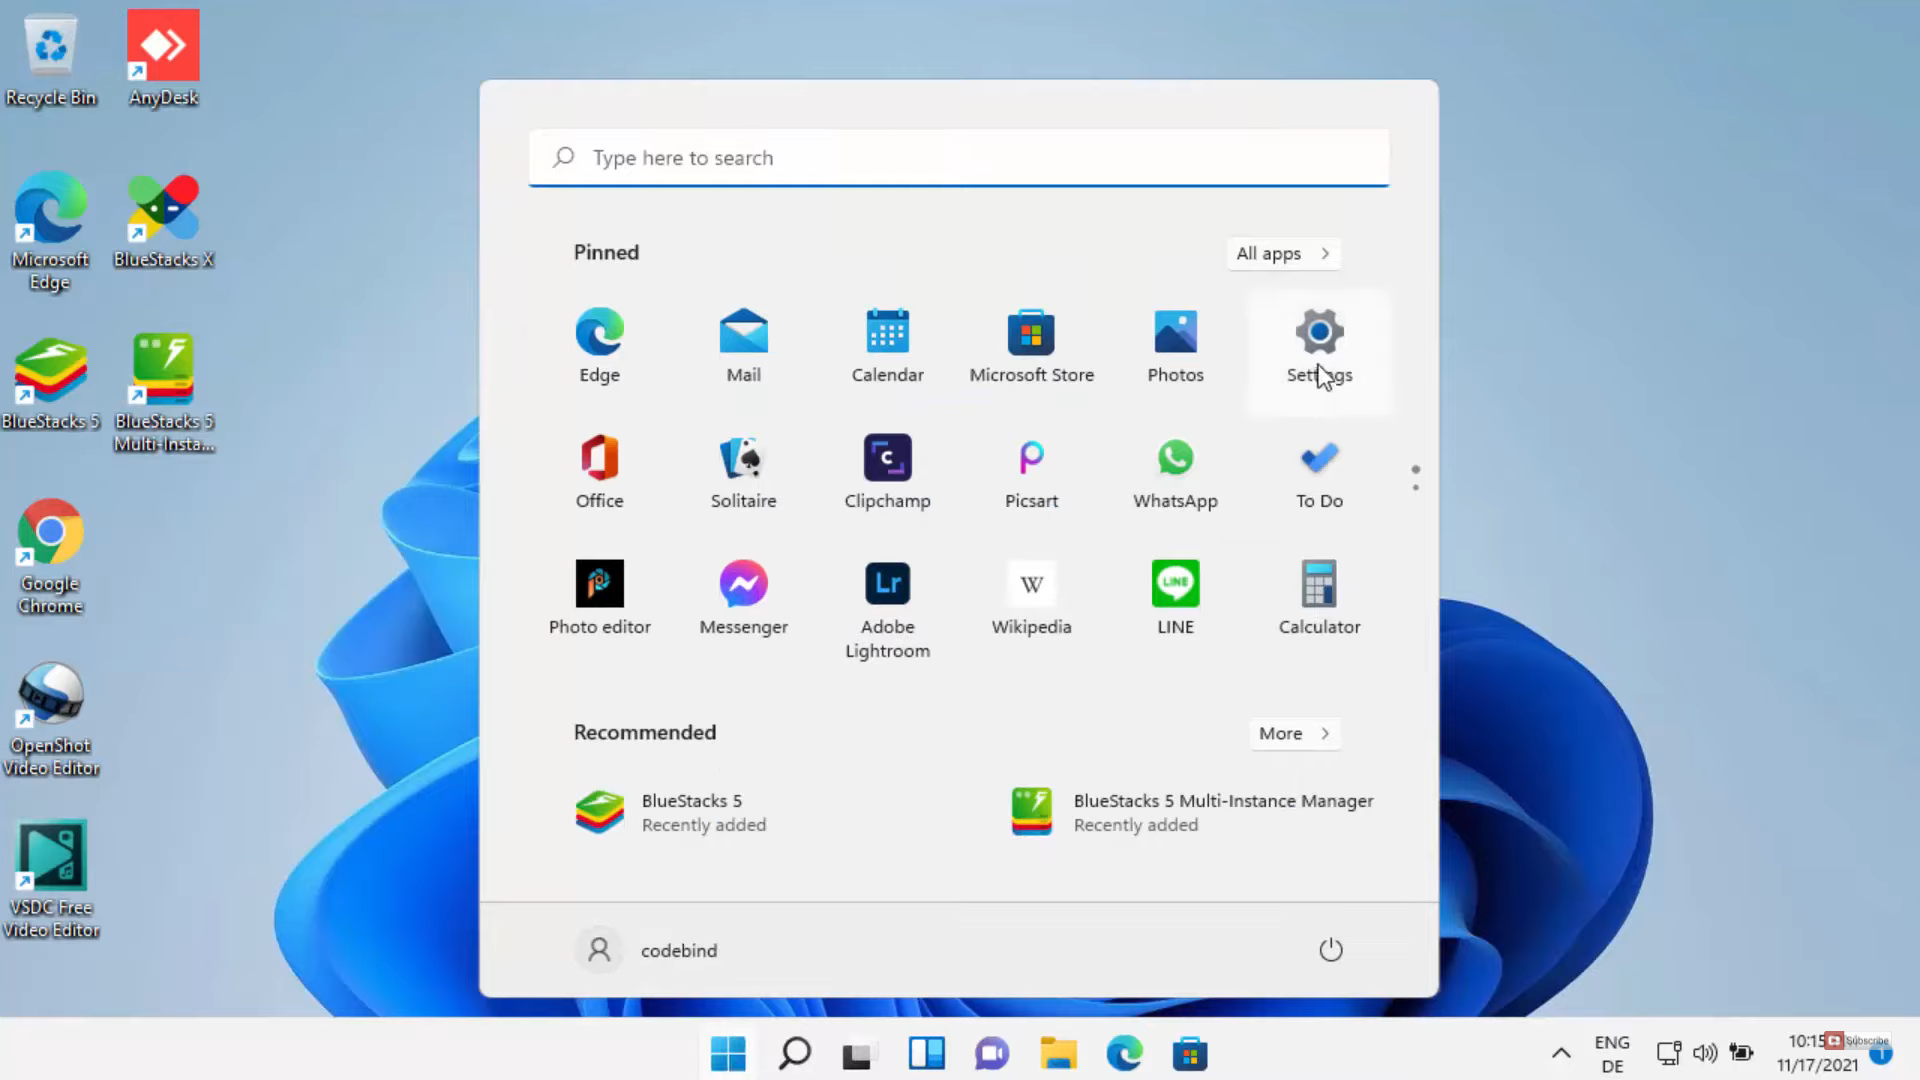
1. Click on the Windows start icon and under apps, you will be able to see settings. Click on that app.
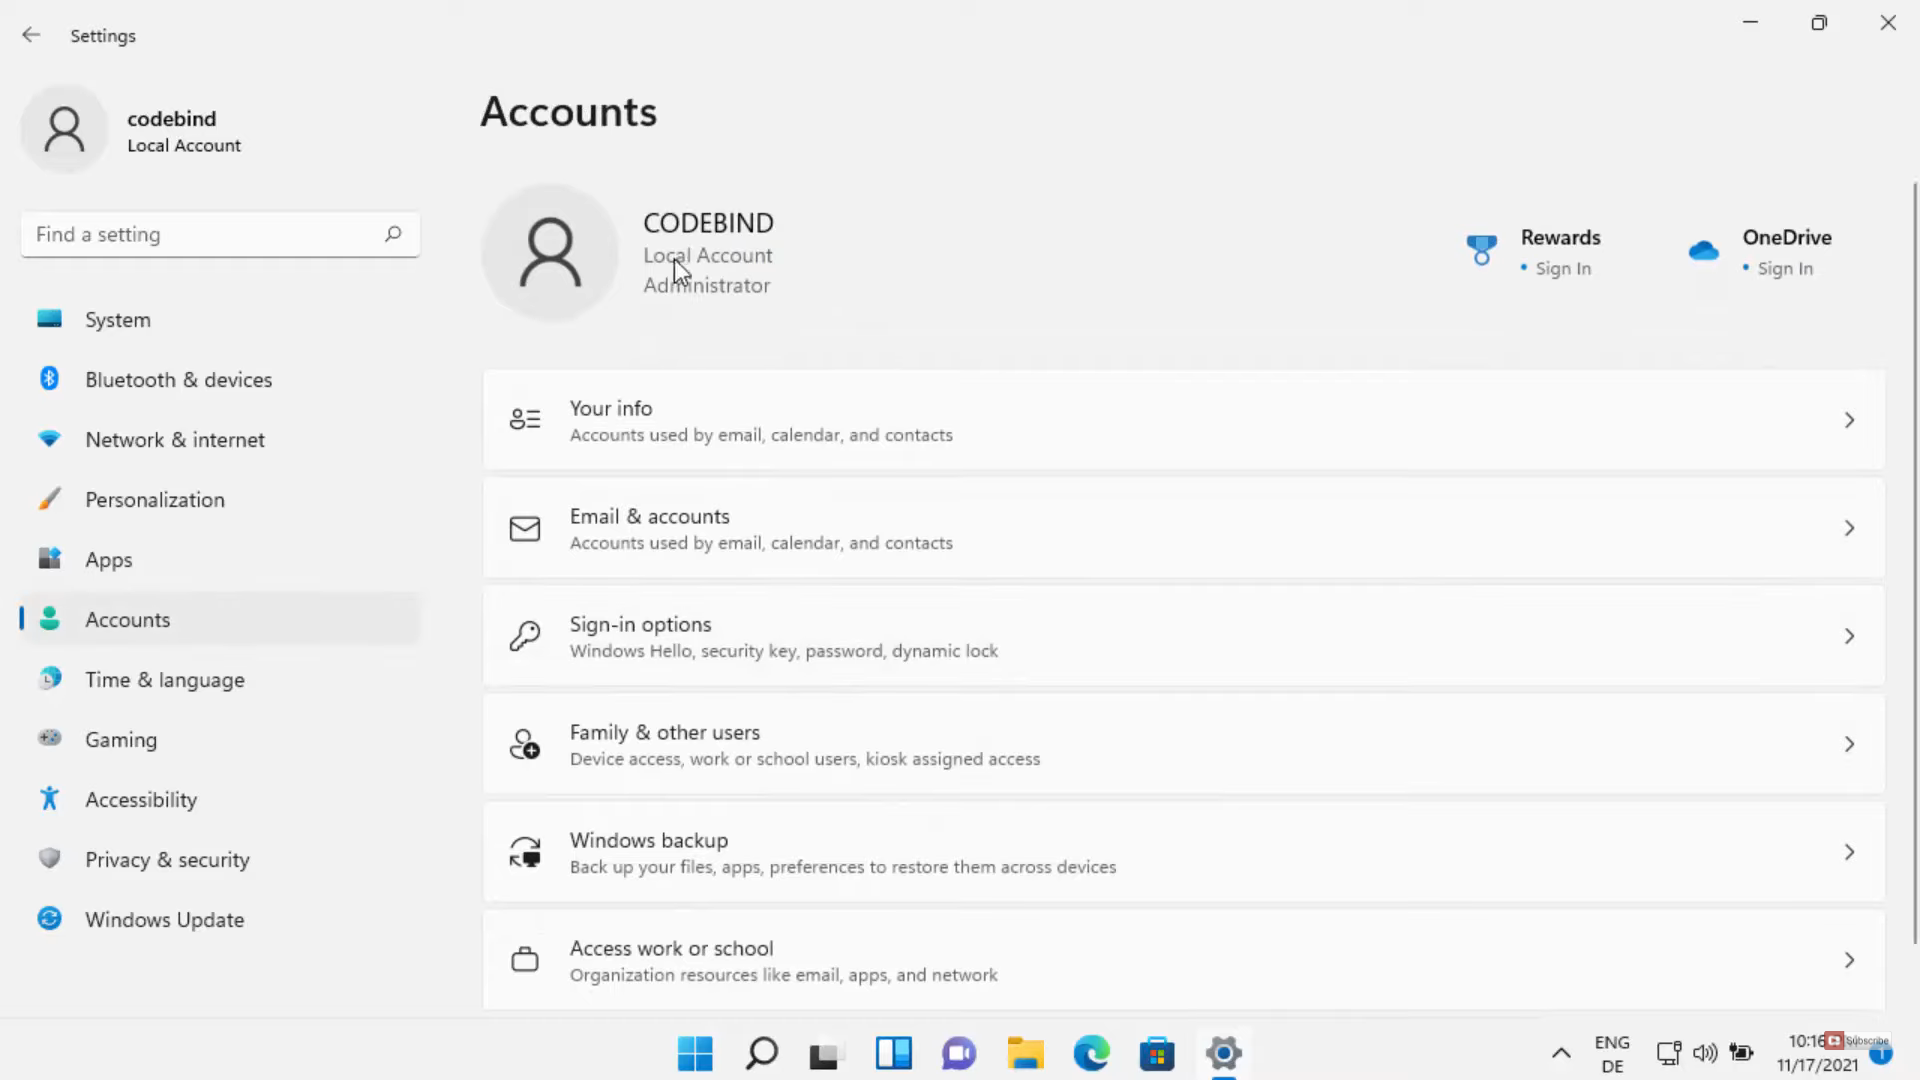
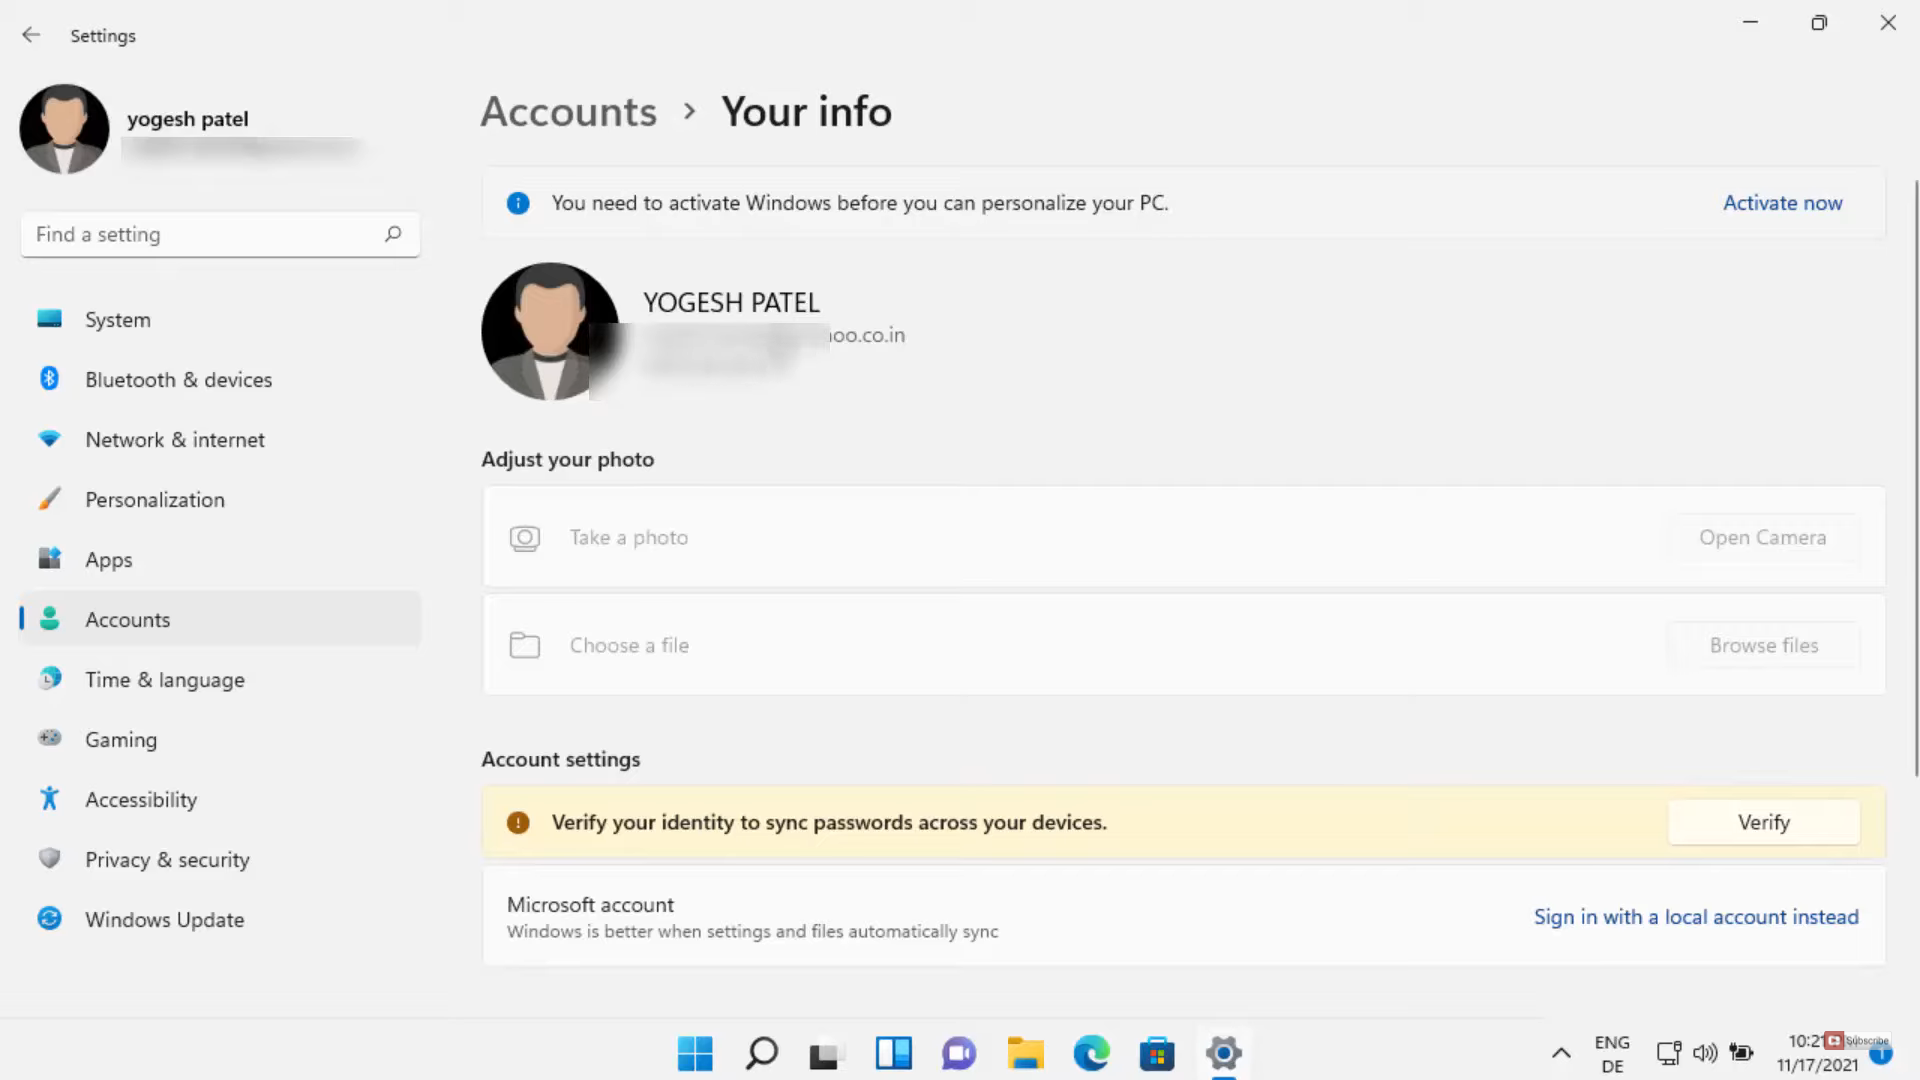
2. In the settings app, click on Accounts. On the top, you will be able to see the type of account that you have. In my case, I have a local account. Now I am going to add a Microsoft account. Click on Your info.
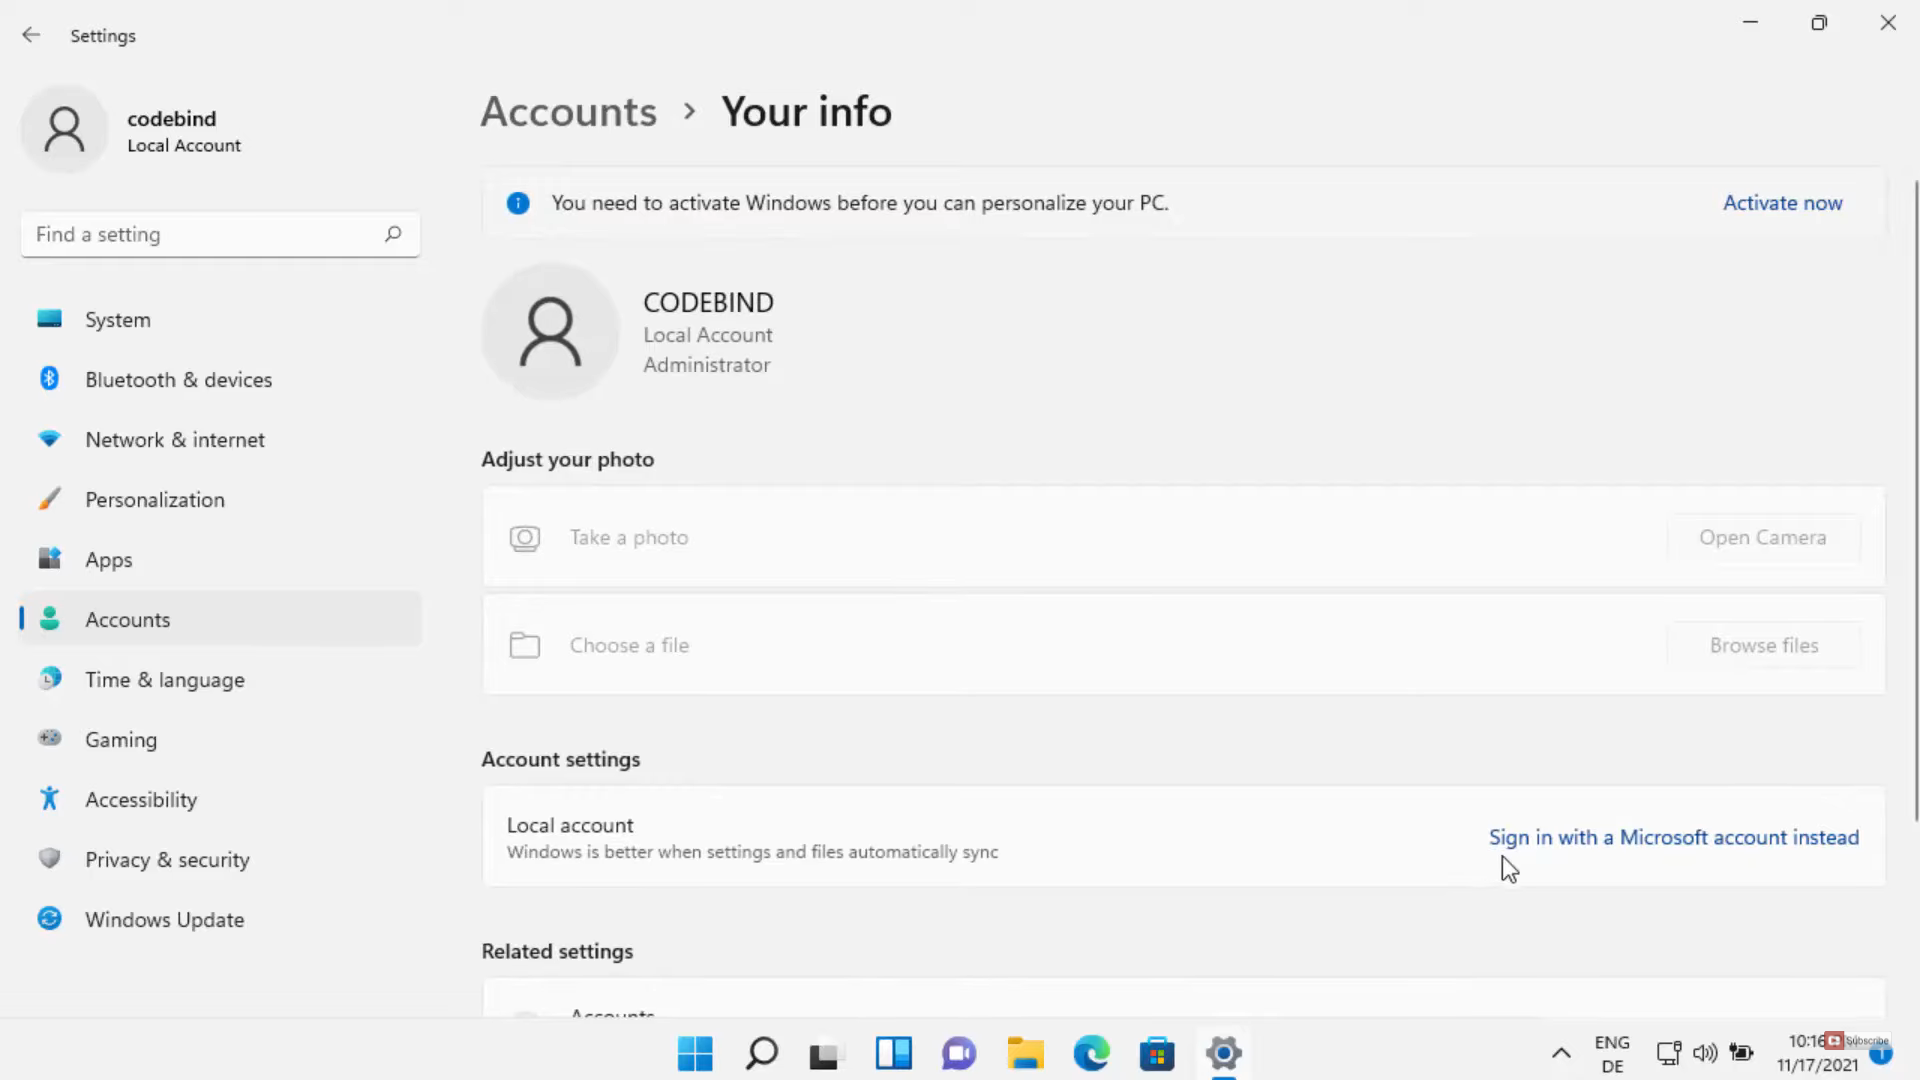
3. Under Account settings, you will be able to see this option called Sign in with a Microsoft Account instead. Click on that option.
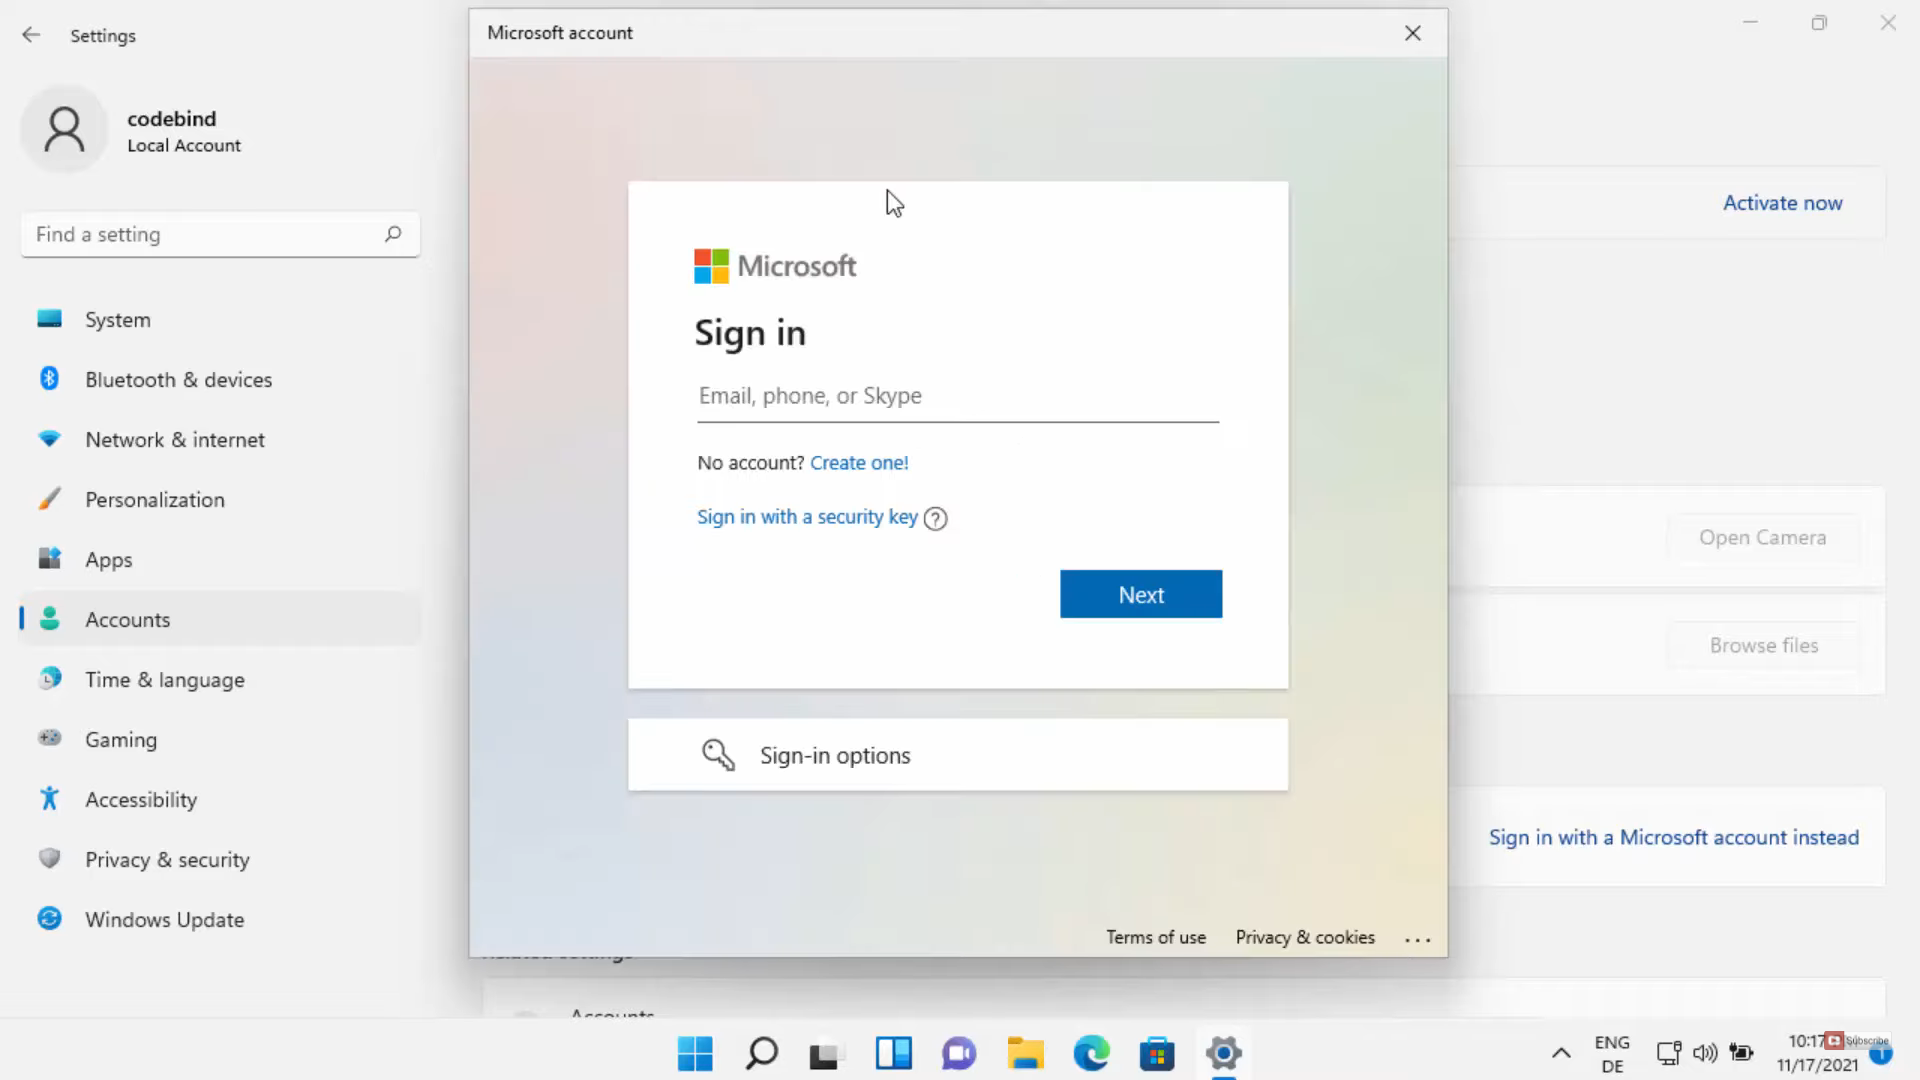
4. Now, you need to provide your Microsoft email id. If you don’t have, then you can create easily by using Create one option. I have provided my email id. Then, click on Next.
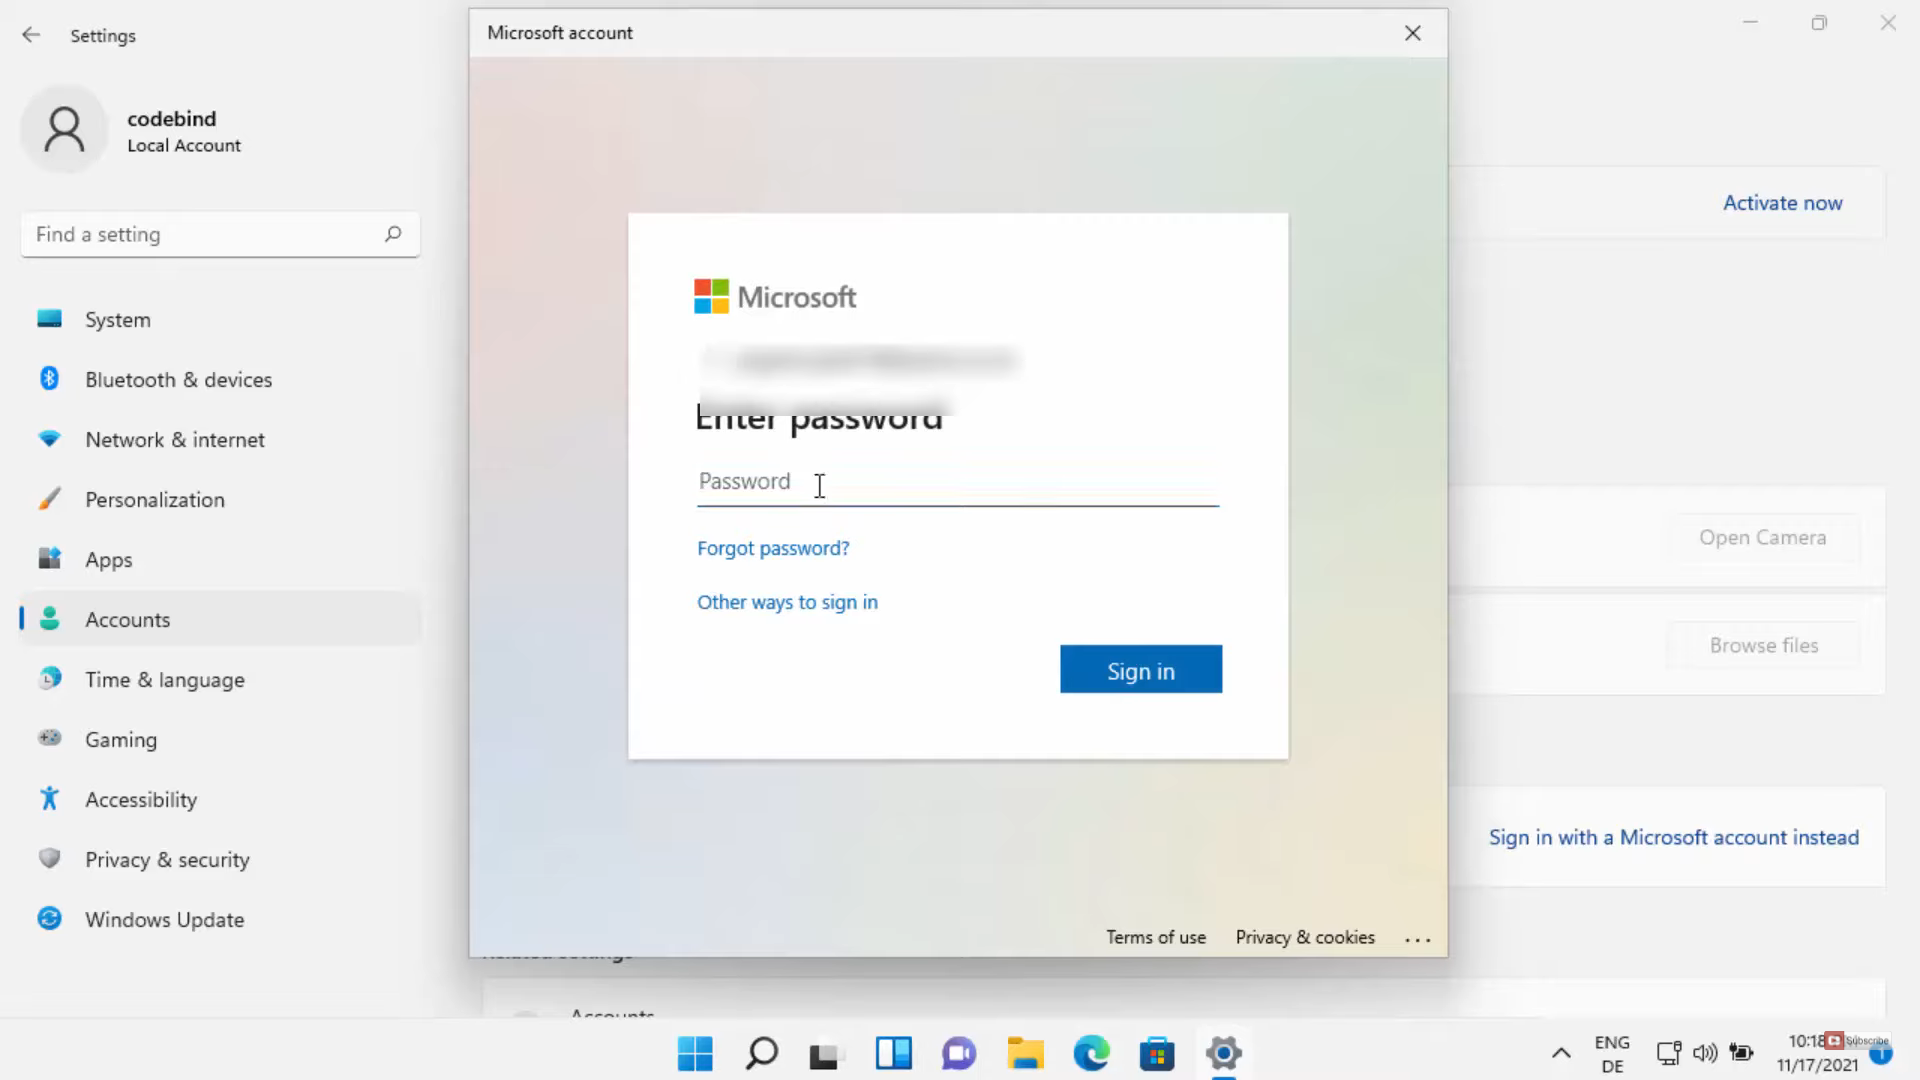
5. Here, you need to provide your password. Then, click on the Sign-in option.
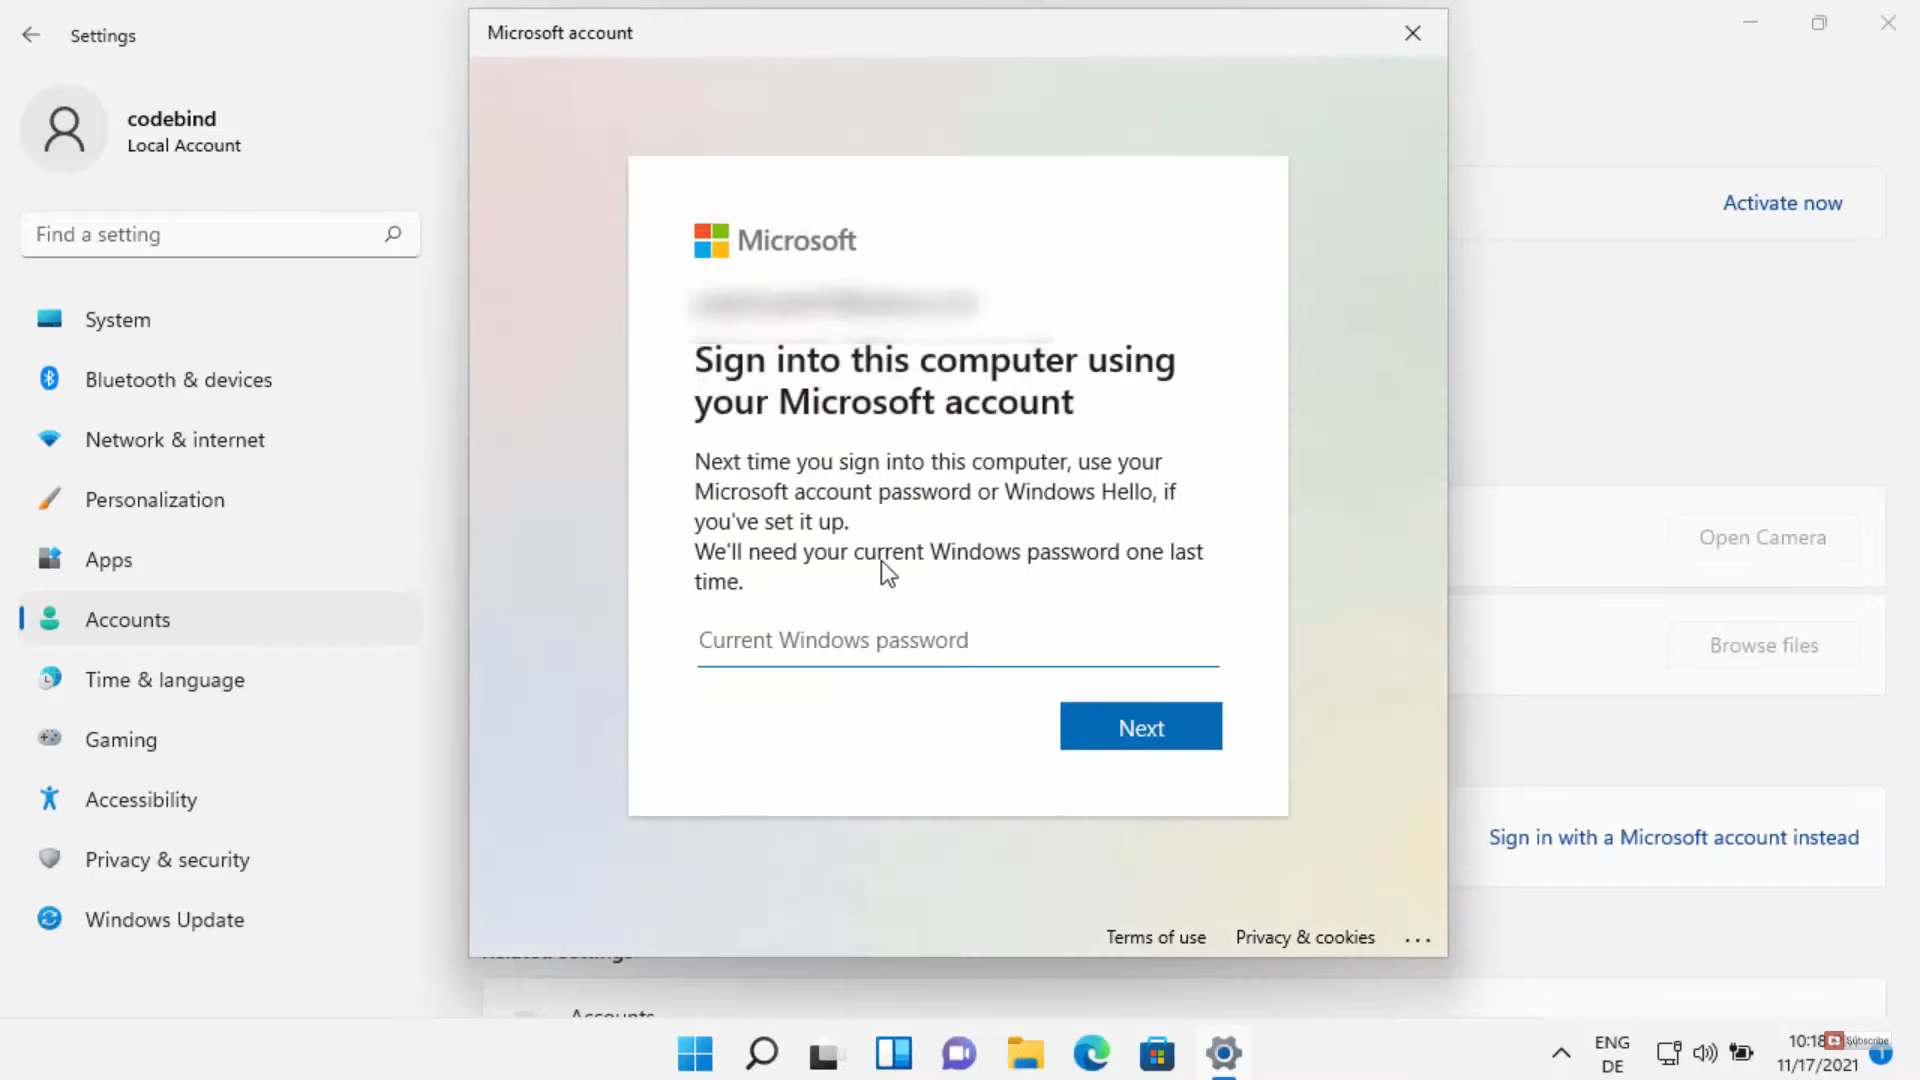
6. Once you have signed in with your Microsoft account, you need to provide your current windows password. Then, click on Next.
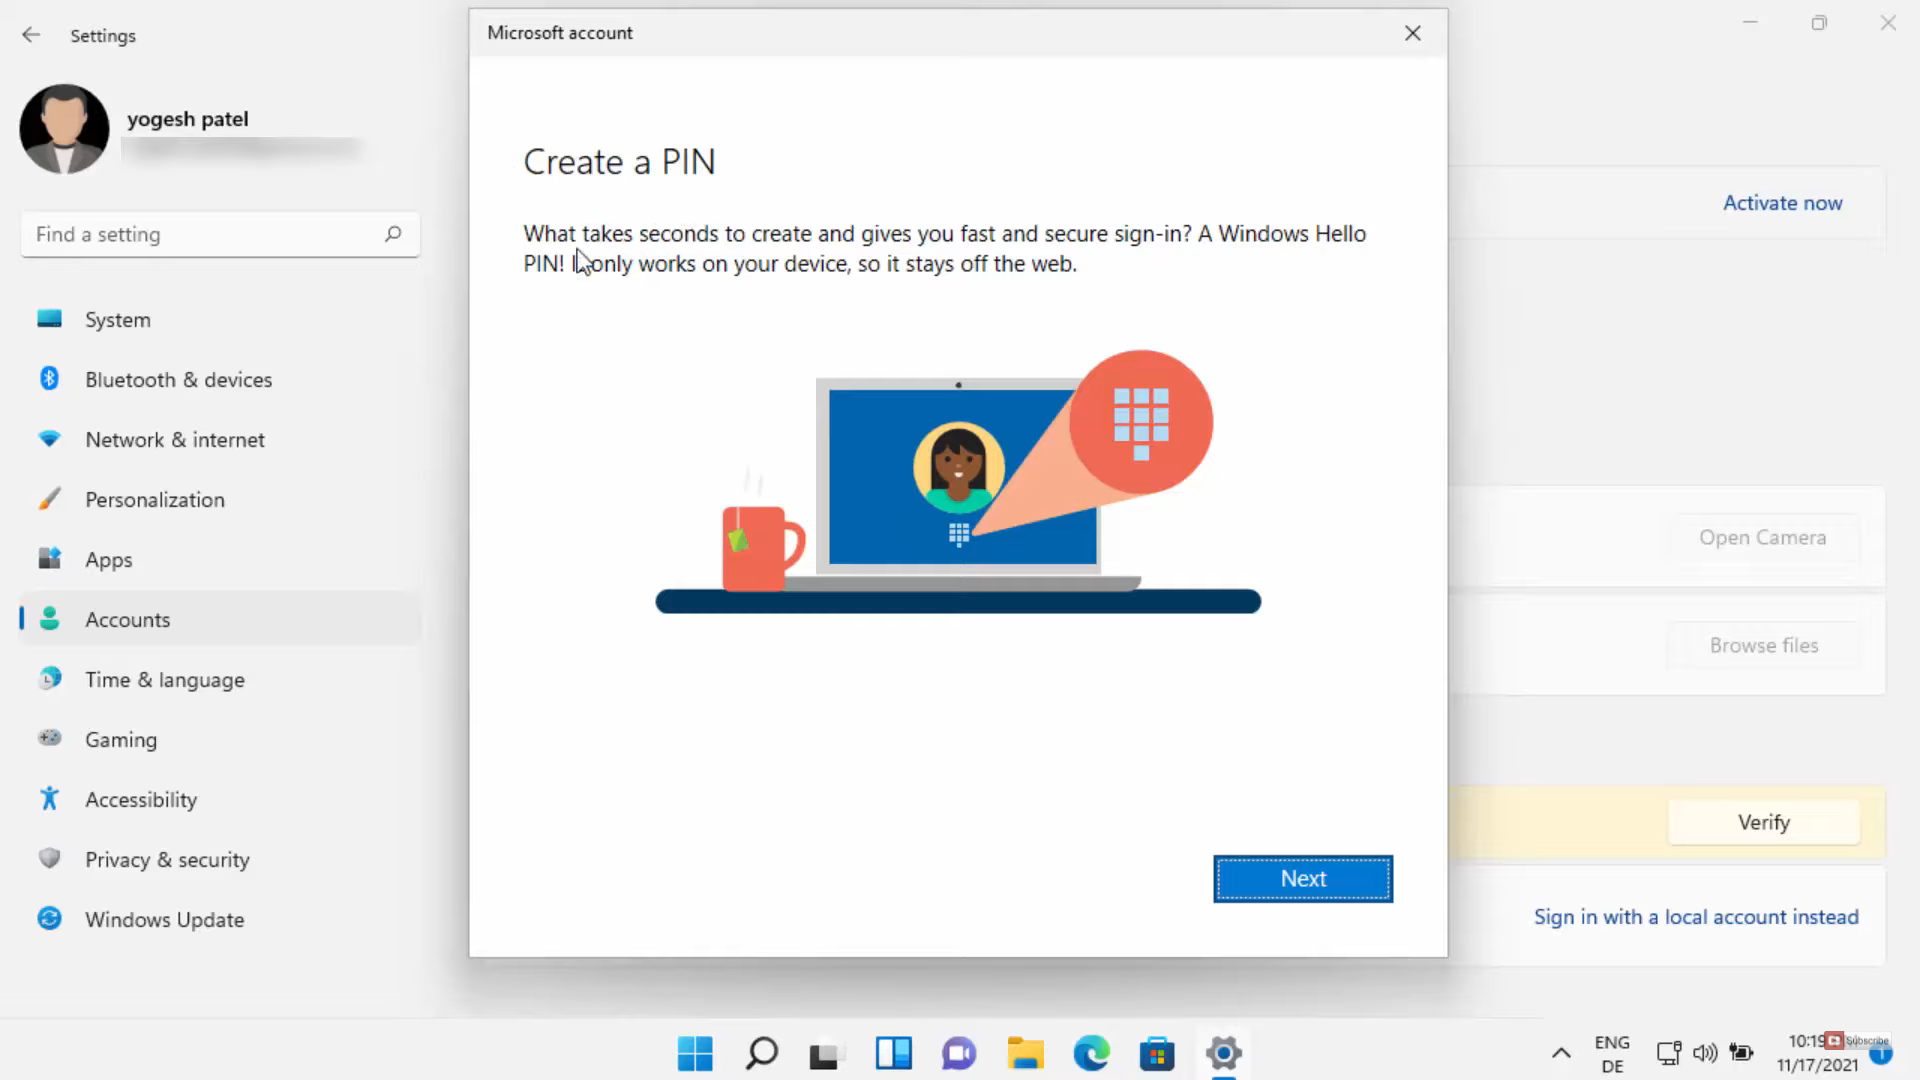
7. Now, you need to create a PIN. Click on Next.
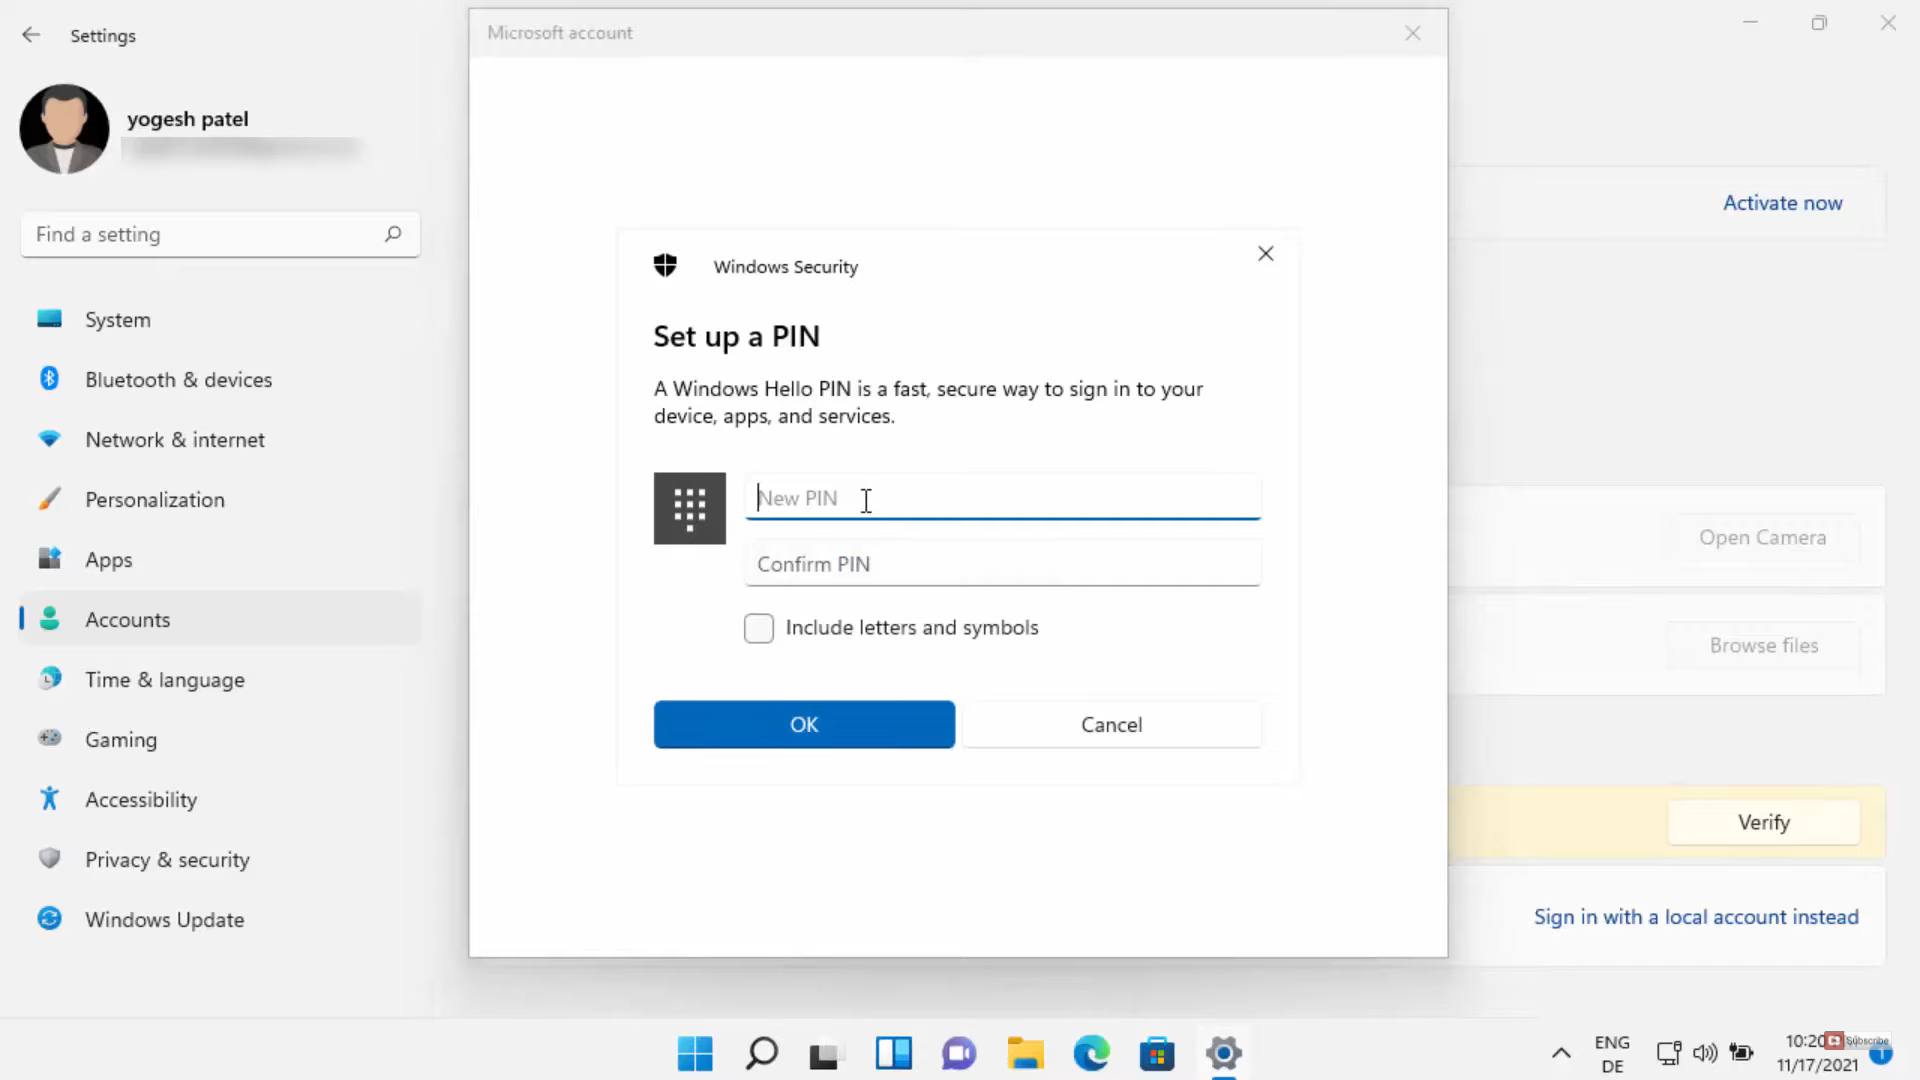
8. You need to enter the credentials and click on Ok.
9. Now, you can see the email id on your info window. Once you have added your Microsoft account, you can log out of your Windows 11 Operating System. Now you need to provide the PIN that you have entered during your Microsoft account setup. Provide that PIN and click that arrow. You will be signed in.
10. For removing the Microsoft account, Open the Settings app and click on Accounts.
11. You will be able to see your email id which means you have logged in with your Microsoft account. Click on the Your info option.

12. Under Account settings, you will be able to see the Sign in with a local account instead option.

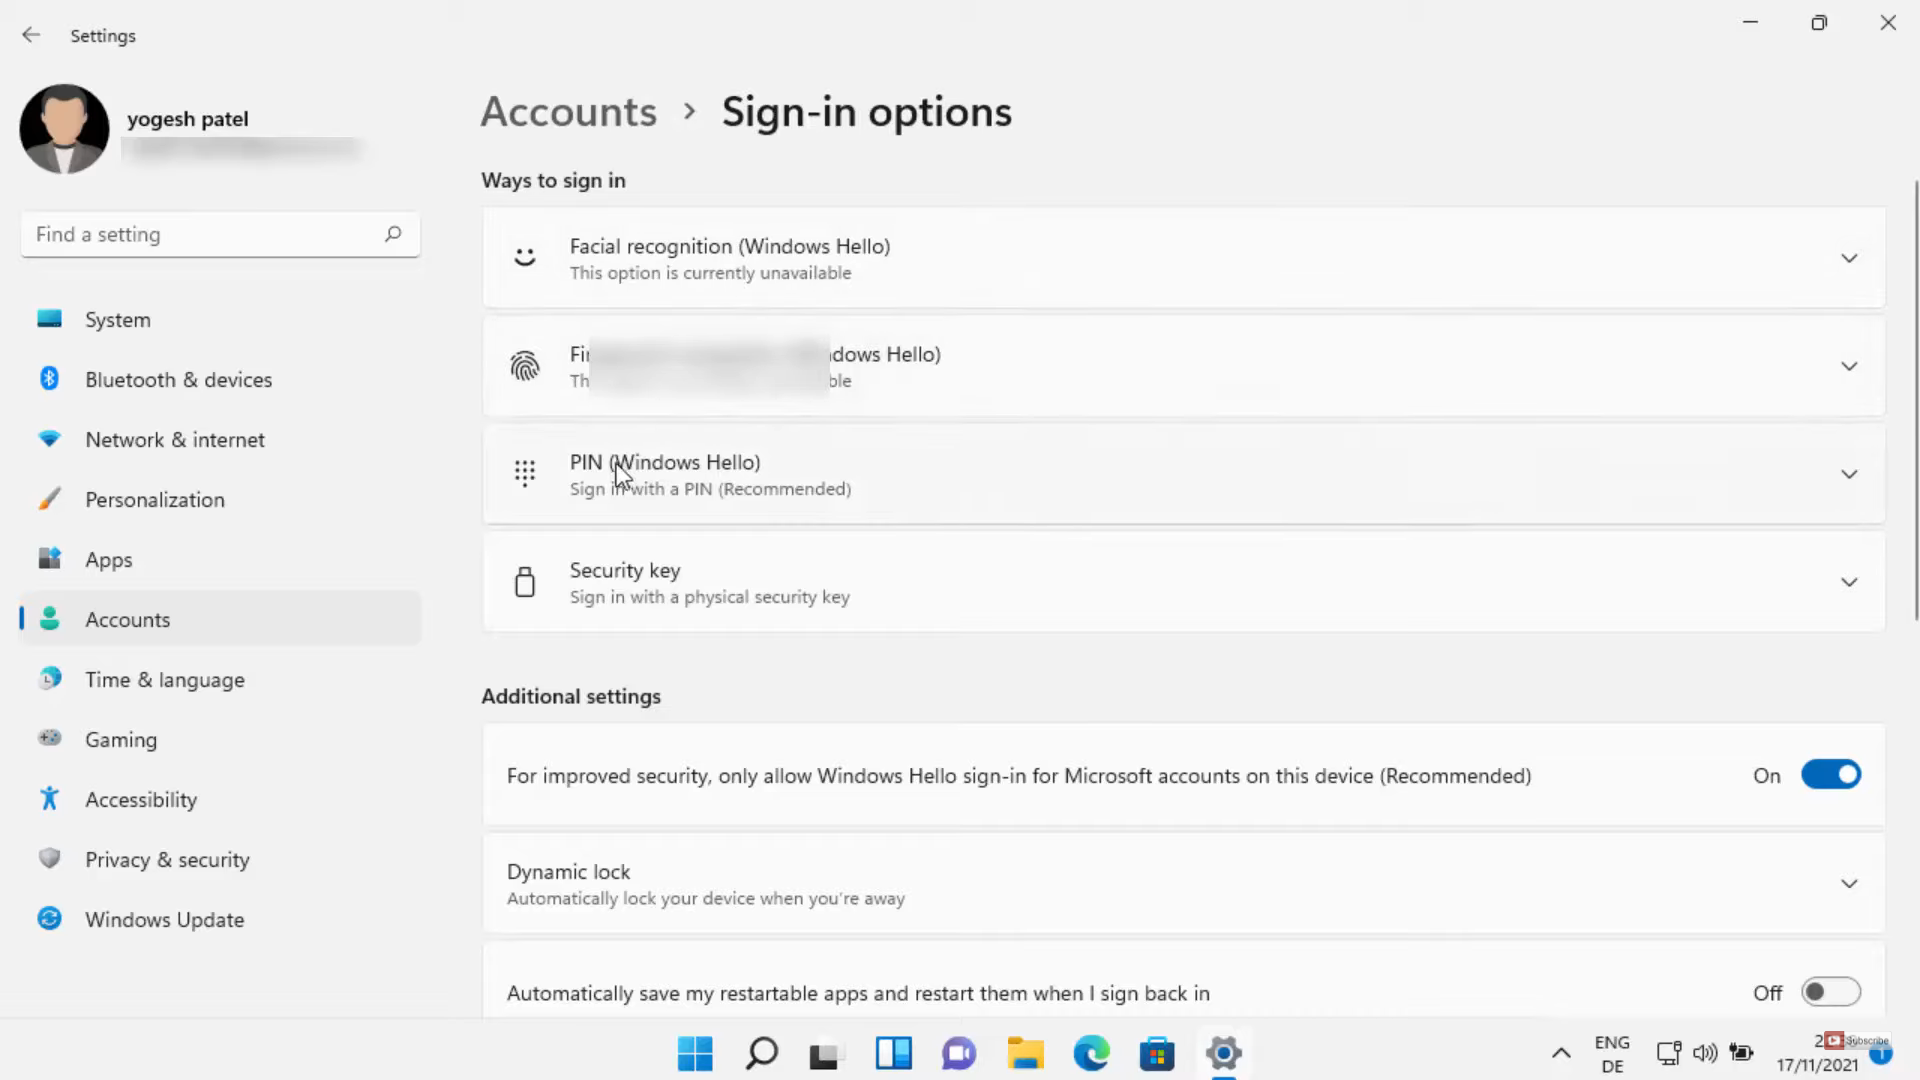
13. When you go back and click on Sign-in options, you can sign in with facial recognition, fingerprint, PIN, and security key.
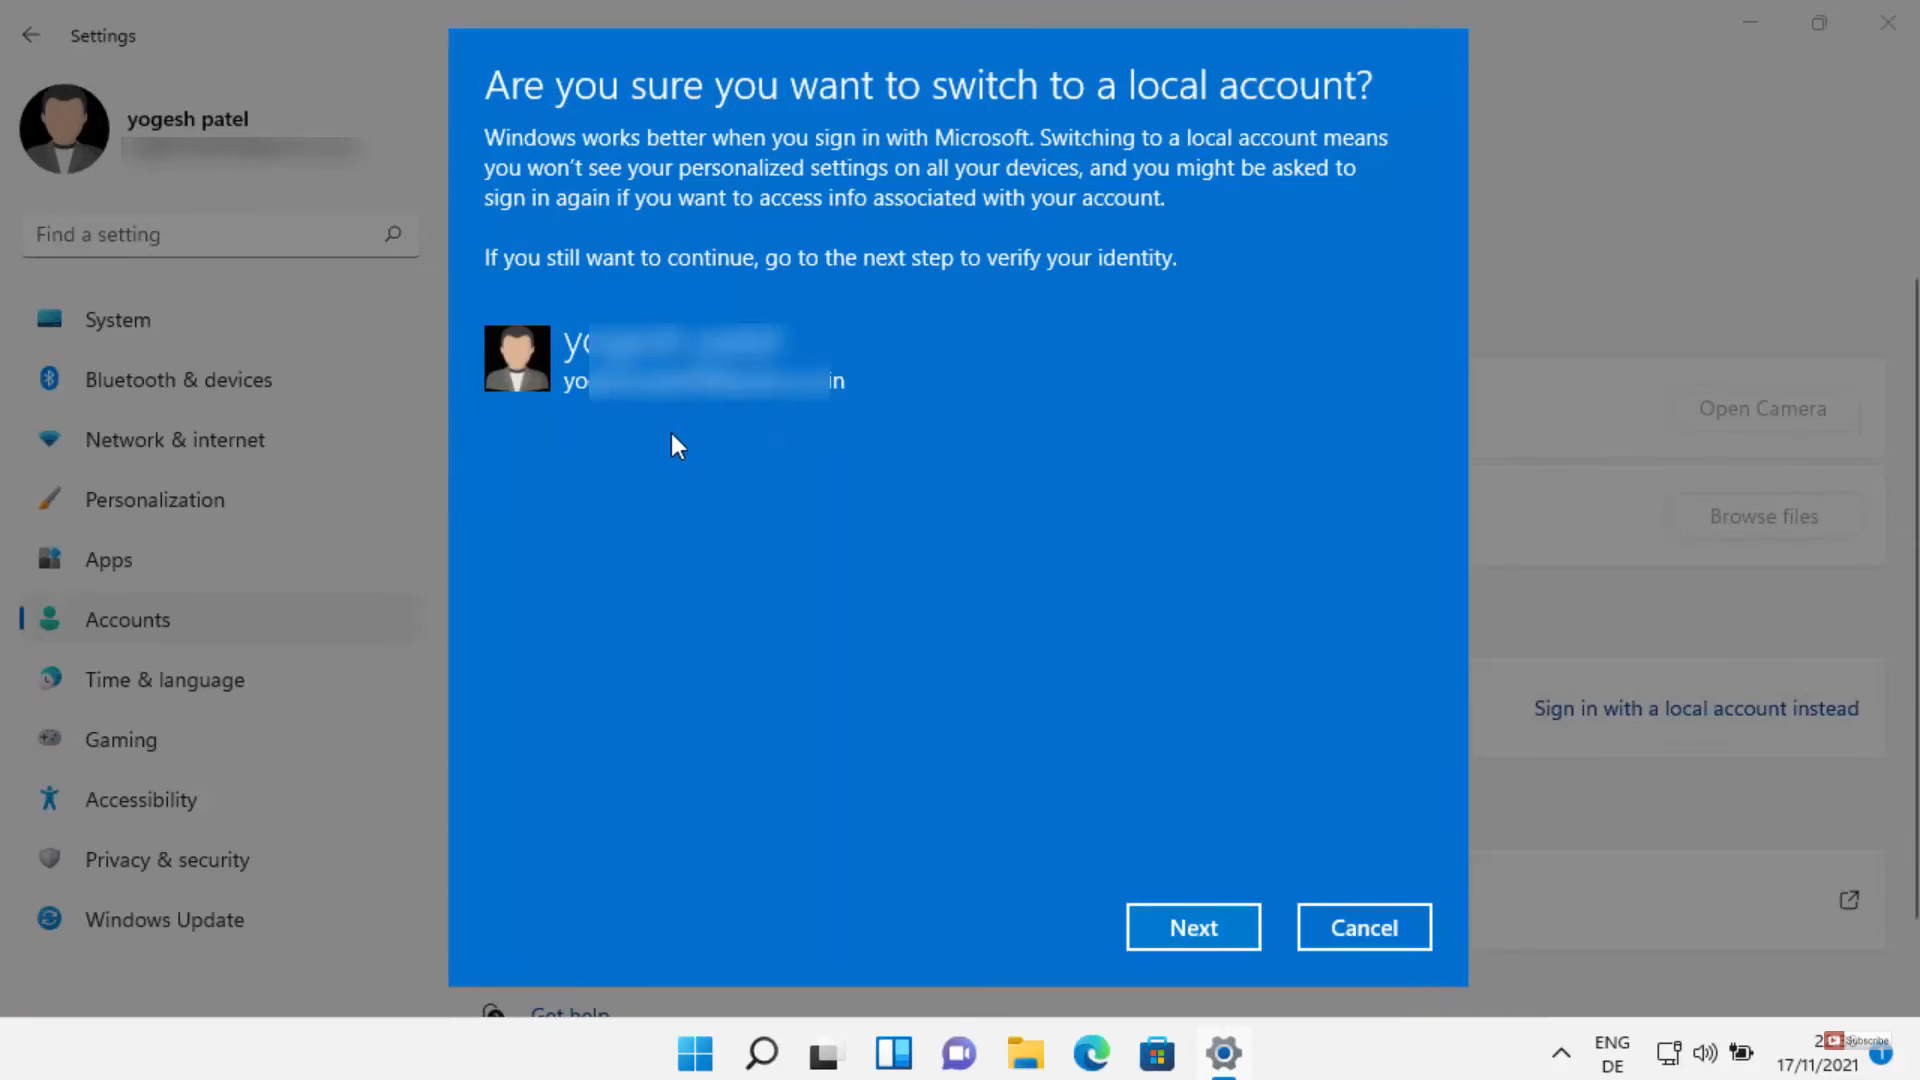
14. Now, I am going to sign in with a local account. It will show a warning. Click on Next.
15. You need to provide your PIN here. Then, click on Ok.

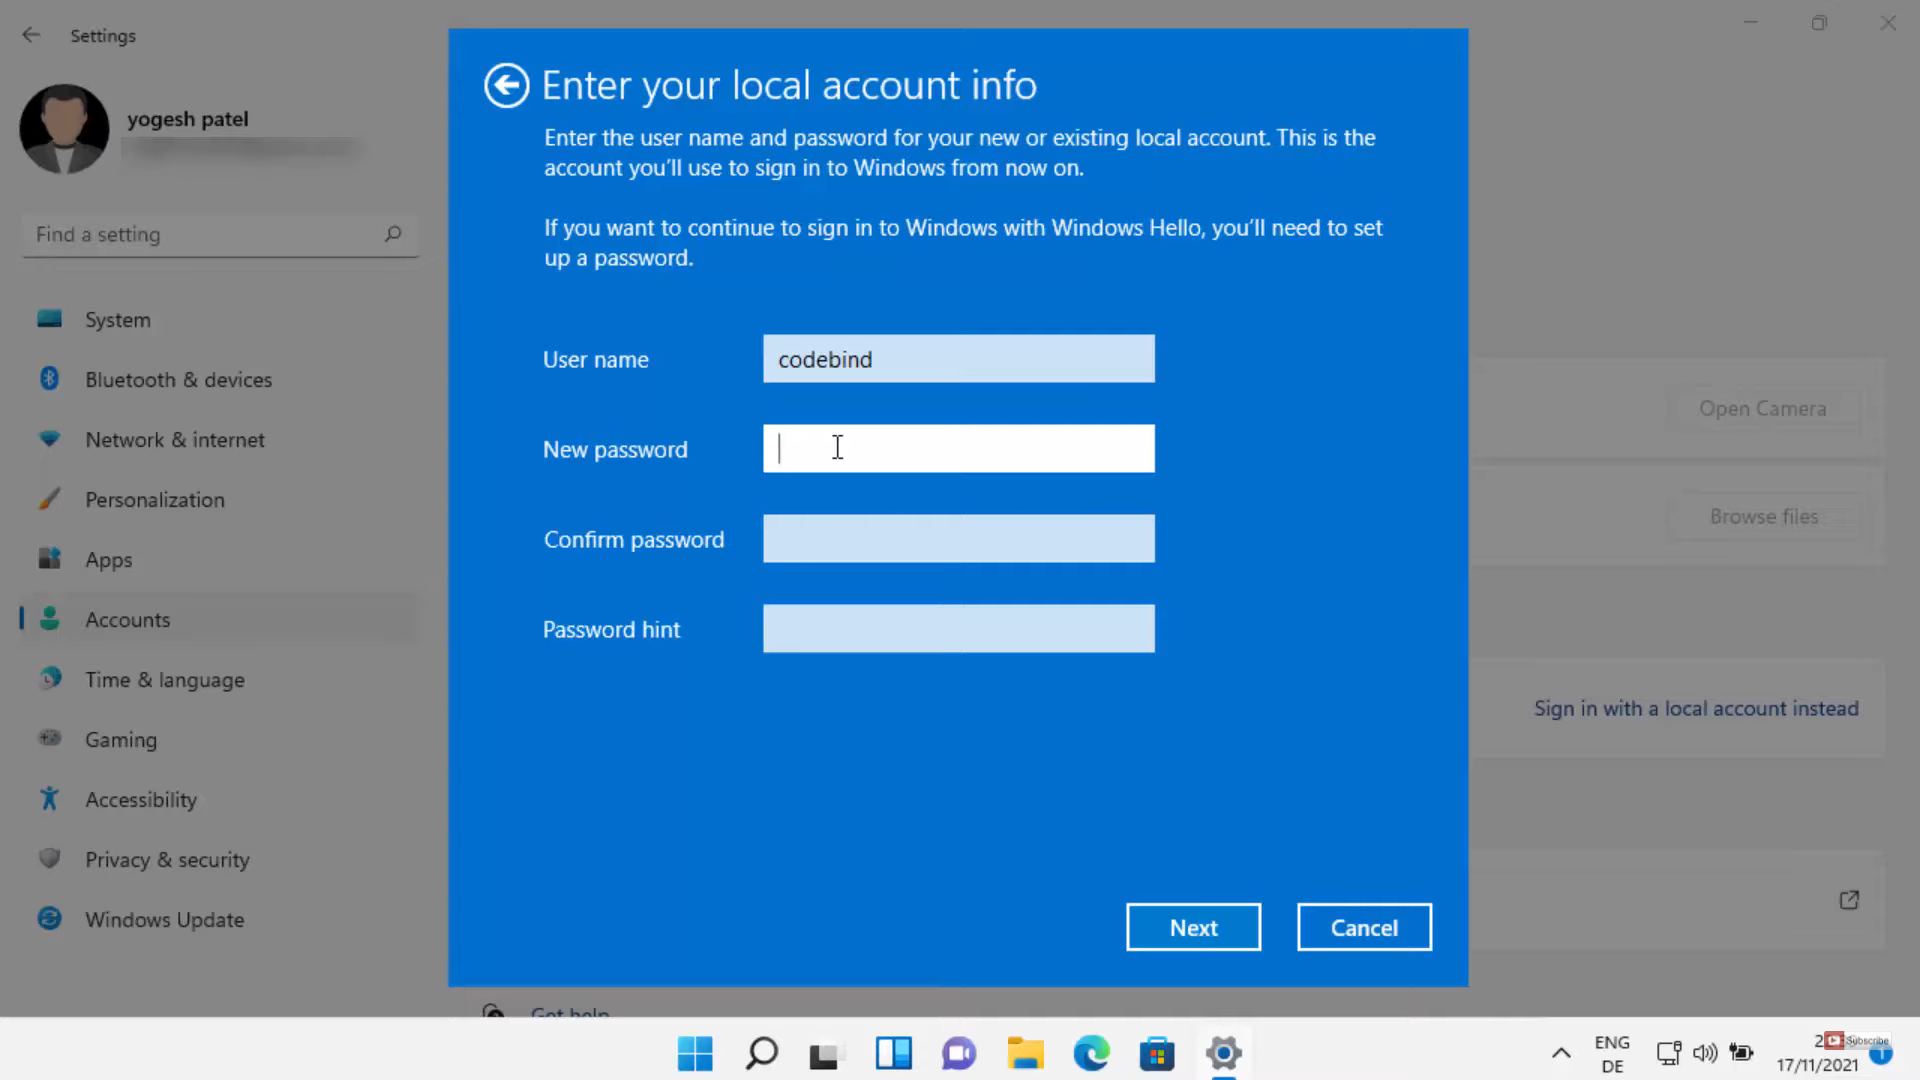
16. Now I can provide a new password. It will be a local offline password without using the Microsoft account. After entering all the credentials click on Next.
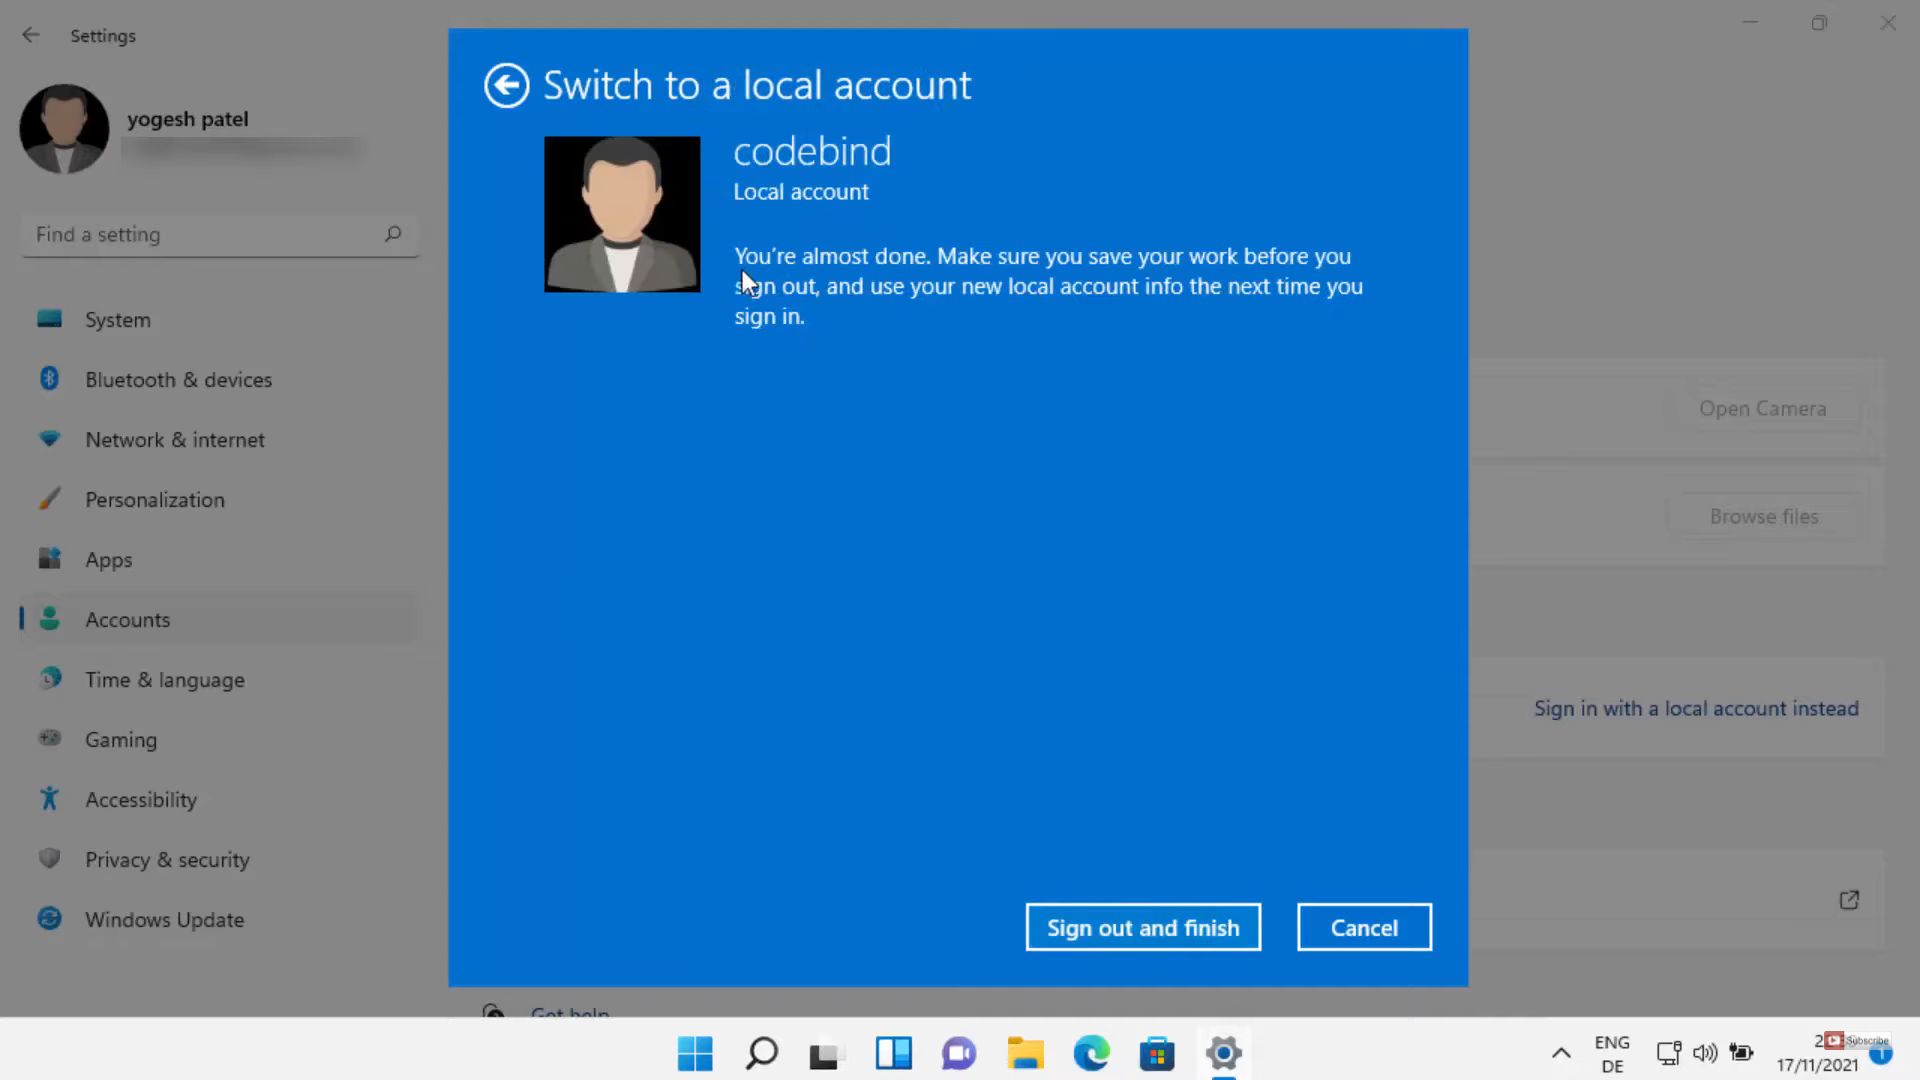
17. It will show you’re almost done. Click on Sign out and finish.
18. After you have signed out, you can provide your local account password. Now, I can see my local account name here. After entering the password, click on the arrow provided there.

19. Now I have logged in with my local account. You can verify this by clicking on the Windows icon. You will be able to see your account.

20. You can also open the Settings app, you can also see your local account. My email id is also not shown here. Under the Rewards section, you will be able to see sign-in.
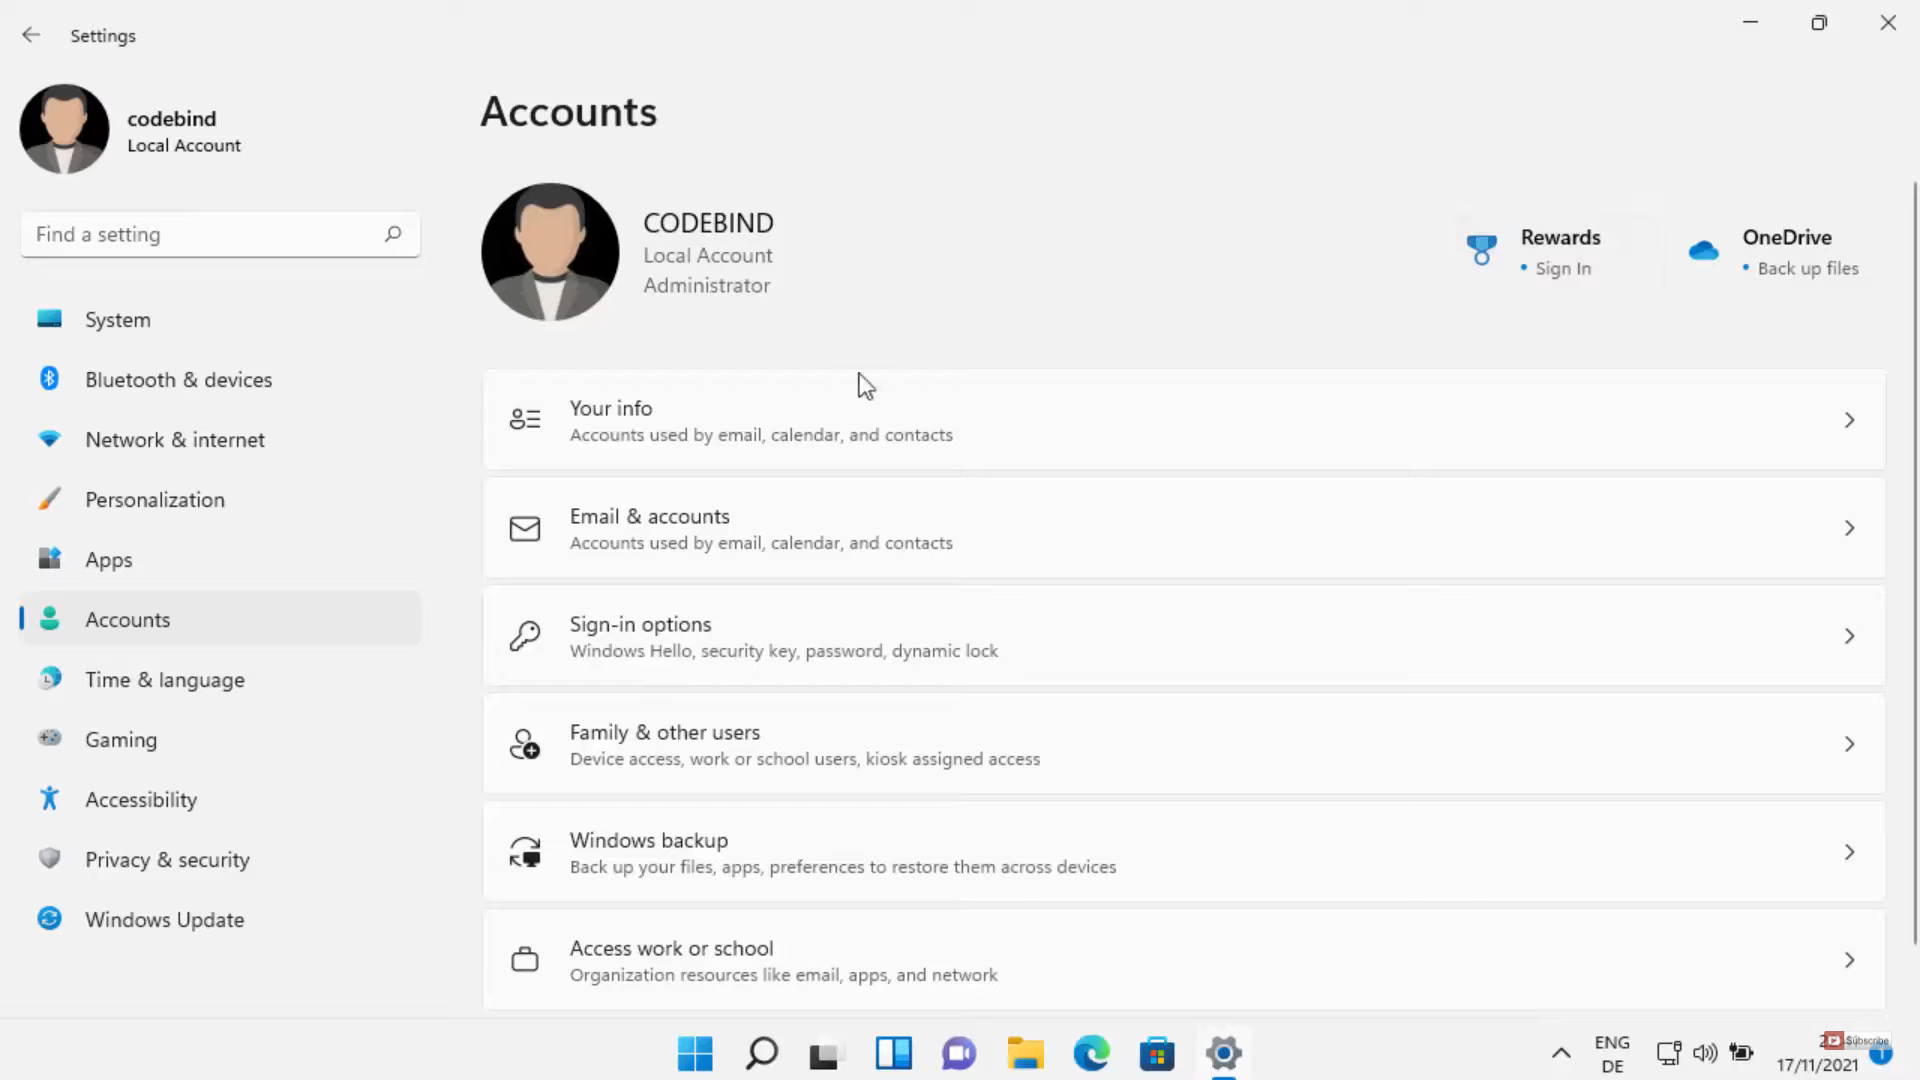
21. When you click on your info, under account settings you will be able to see sign-in with a Microsoft account. Since I have logged in with my local account, it shows this option.

These are the steps for adding and removing Microsoft Account on your Windows 11 Operating System.
Leave a Reply