

In this post on Arduino Tutorial For Beginners, i will introduce you
+ How to install Arduino IDE
+ How to upload the first sketch into the Arduino board.
Download Arduino IDE:
- Arduino IDE Can be downloaded for free from http://arduino.cc/en/Main/Software. Arduino programs, called “sketches”, are written in a programming language similar to C and C++.
- There are many Arduino version in this Arduino Download but the version 1.8.6 is more stable than the other. I will download and use version 1.8.6 in this articles series.
- There are 2 options for downloading on that page:
- First, you can download the Window Installer, you can setup your IDE on your computer system with an exe file. This way is pretty hard to uninstall the library and re-install the Arduino.
- Second, you can download the IDE as a zip package, you just need to extract the package after downloaded and it can run immediately, i recommend you use this way, because it’s easy to delete and re-extract the IDE when Arduino IDE is error.We just delete the old file and extract it again. After we downloaded and extracted, click and open the Arduino shortcut icon on desktop to open Arduino IDE.
This is Arduino’s interface and some components.
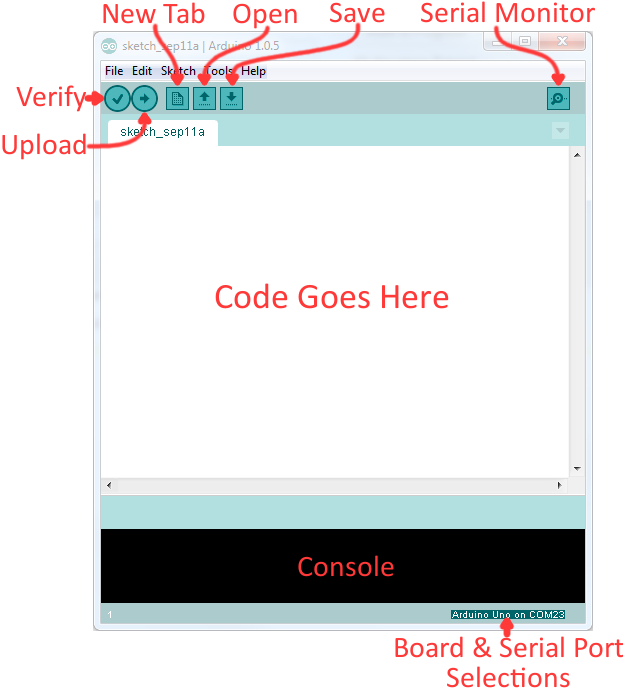
As the picture above.
- You will code in the editor
- The output pane (Error console) will show the code compilation and some information about Arduino board after uploaded code.
About the menu buttons we have:
- The check mark button to verify the code
- The arrow key button is compiling and uploading the code to Arduino board
- Beside that with a document symbol is creating a new project,
- The upward arrow button is opening an existing Arduino project.
- And the last button is saving the current project.
- The button appearing on the top right corner is a Serial Monitor. The Serial Monitor will actually help to debug the code via UART. Your Arduino board should be connected to your computer by USB cable in order to activate the Serial Monitor. I will use it in the UART video.
- And some information as the picture above.
About some sessions we have:
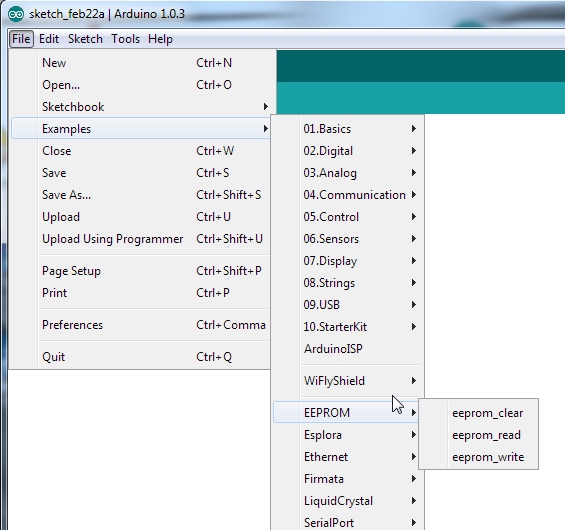
- You can find many Arduino examples in File session and some the others commands
- We can change some option in “Preferences”
- In Sketch session, we can use commands to Verify/Upload,.. instead of buttons outside. Beside that, we can find more library in “Manage Libraries” and add library offline via ZIP file by “Add .ZIP Library” as the picture below

- Next is tool session, we can change/select the relevant board we are using, and we can add more boards to the Arduino.
- Select the COM port to identify which Arduino Board is connected to computer
- We can also use Arduino as a Board Programmer to upload code for the others microcontroller or the others Board by “Burn Bootloader” session. It is very helpful to burn the code directly into the microcontroller ATmega328, setting you free from buying the external burner to burn the required code. When you buy the new Arduino board, the bootloader is already installed inside the microcontroller ATmega328. However, if you intend to buy a new to repair and put on the Arduino board, you need to burn the bootloader again inside the controller by going to the Tools section and selecting the burn bootloader.

Next, Upload a first project to Arduino Board.
Do step by step as the picture below to open Blink project in example session.
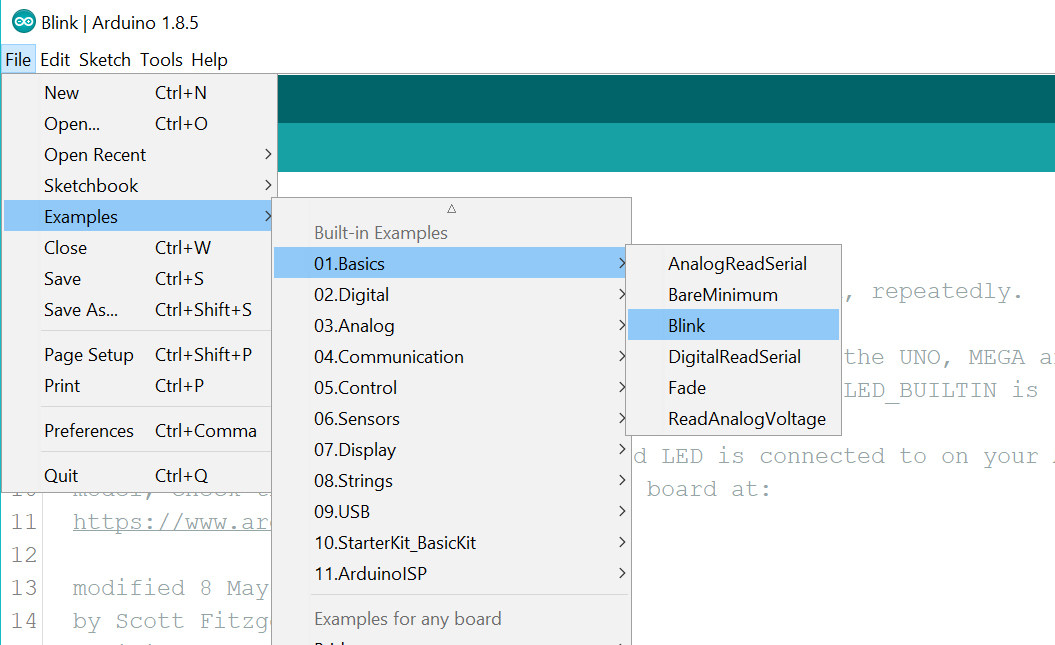
After open the blink project, do step by step like this to upload code:
- Connect Arduino board to your computer
- Select board in Tools session
- Select COM port of Arduino ( to know Arduino port are using, we can check in device manager )
- Verify by click to check mark button and then Upload.
Then, on the Arduino Board, if you see the default LED(pin 13) is blinking. You’ve successfully uploaded
Leave a Reply