
In this blog post, I will give a detailed view of setting up environment variables in your Windows 11 Operating System. I am going to explain it for java software. You can do the same for any other software as well.
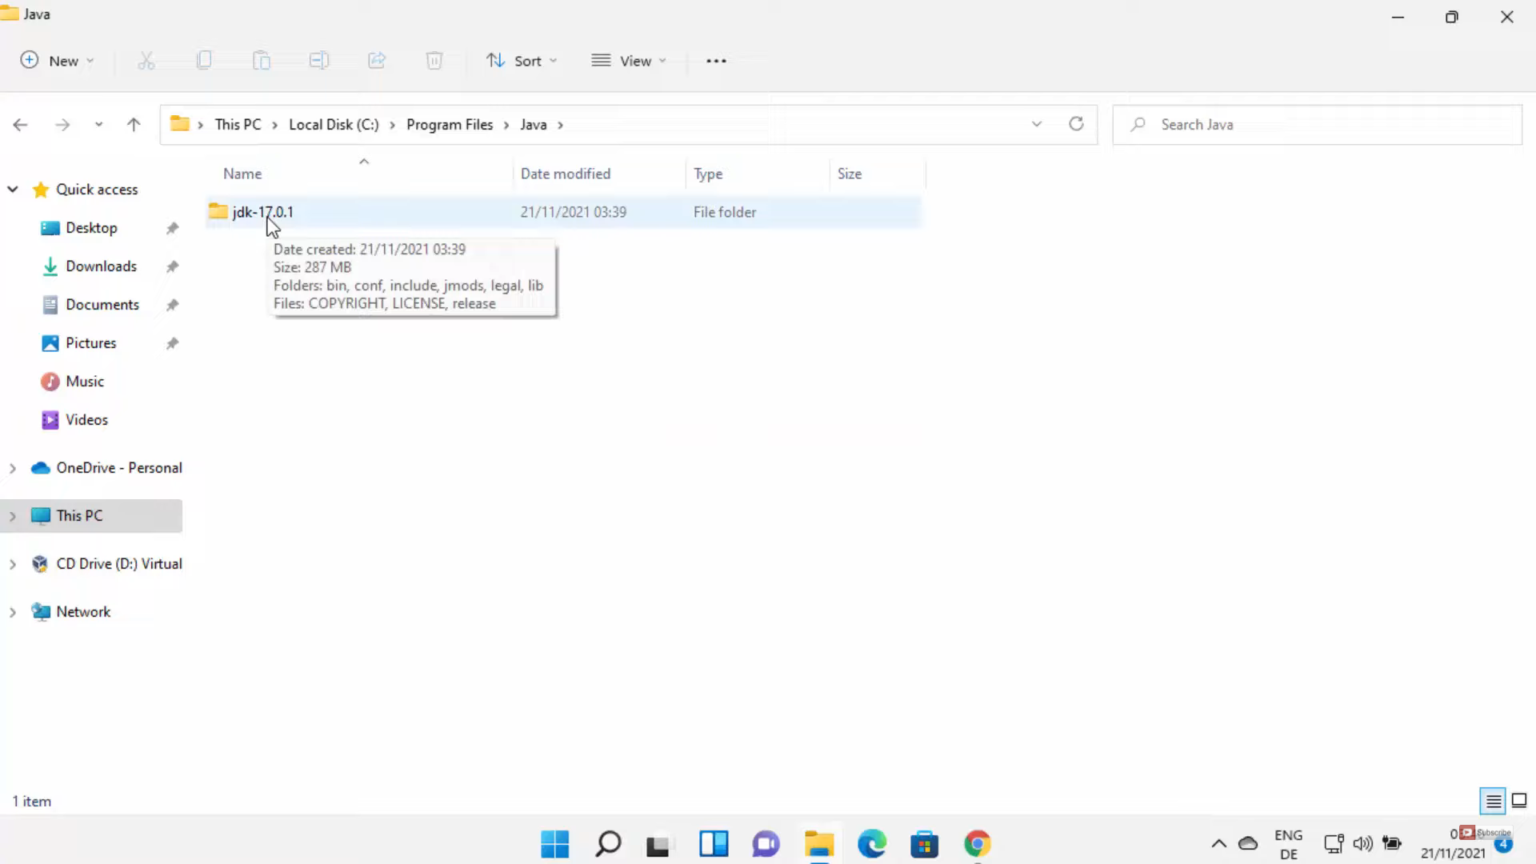
1. Open File Explorer and go to the location where java is installed. Click on the java folder.
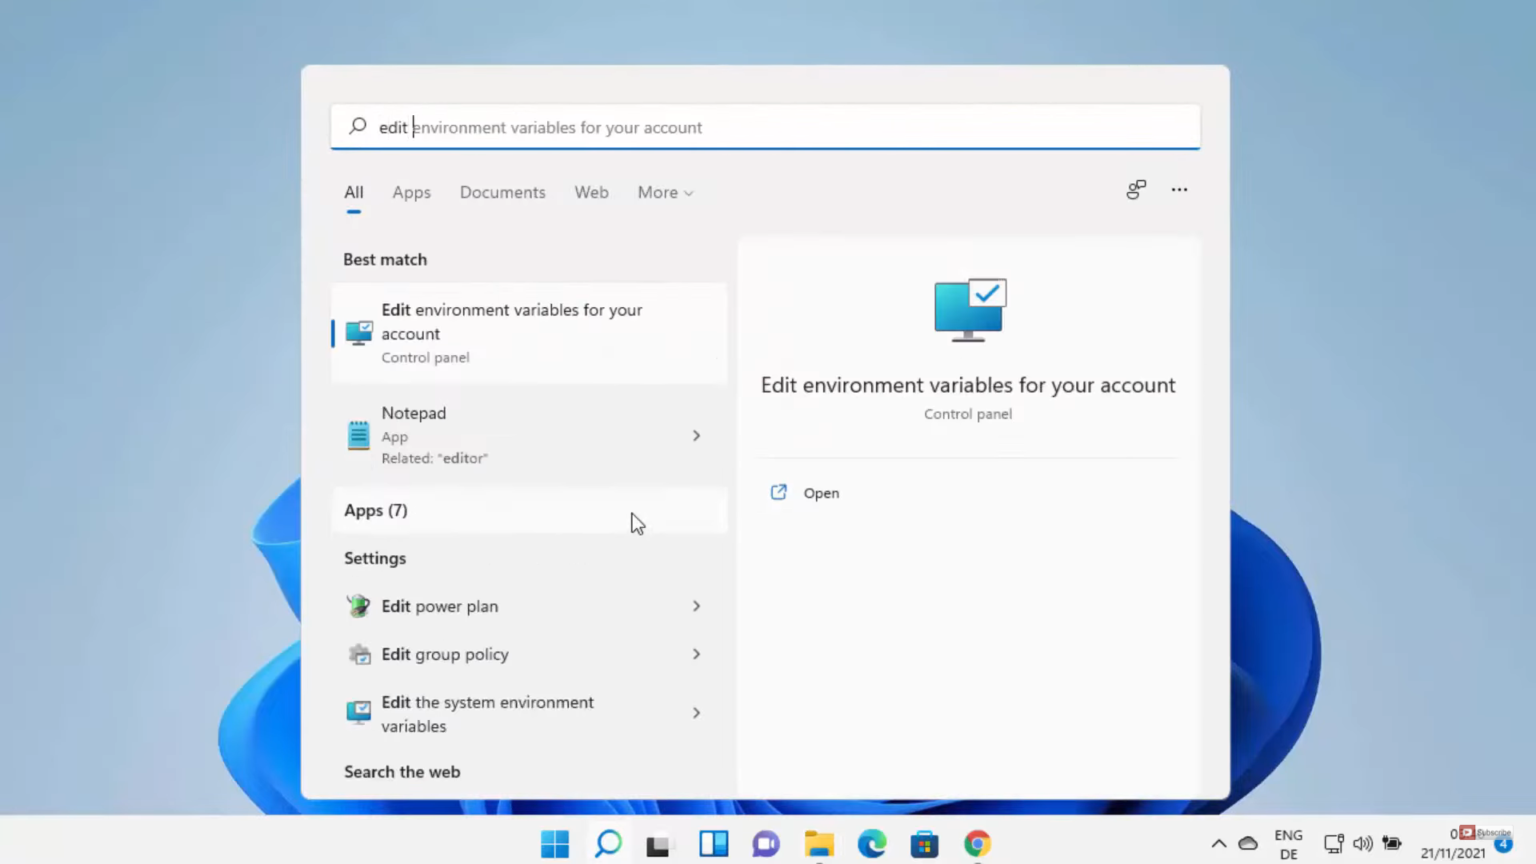
2. To set the environment variable for java, click on the search icon and type Edit Environment and click on the search result.
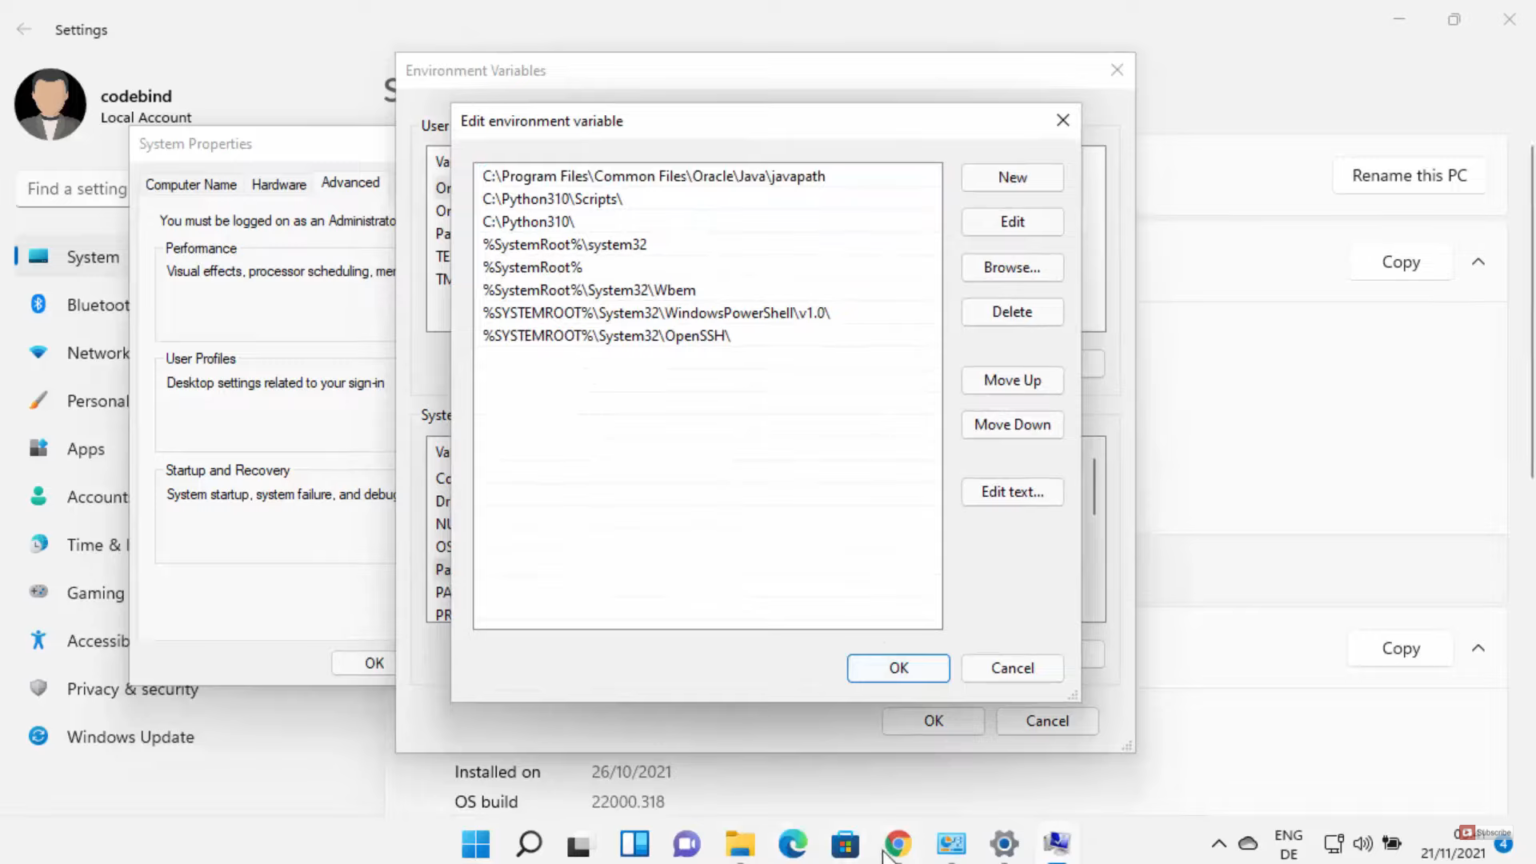
3. It will open this kind of window. Click on the path under system variables. Then, click on Edit. Here, you need to add the path. Go to the bin folder and copy the path. You can either double click or click on New. Then, paste the path. Press Enter. It will add the path. Then, click on Ok. Some applications need java home environment variables.

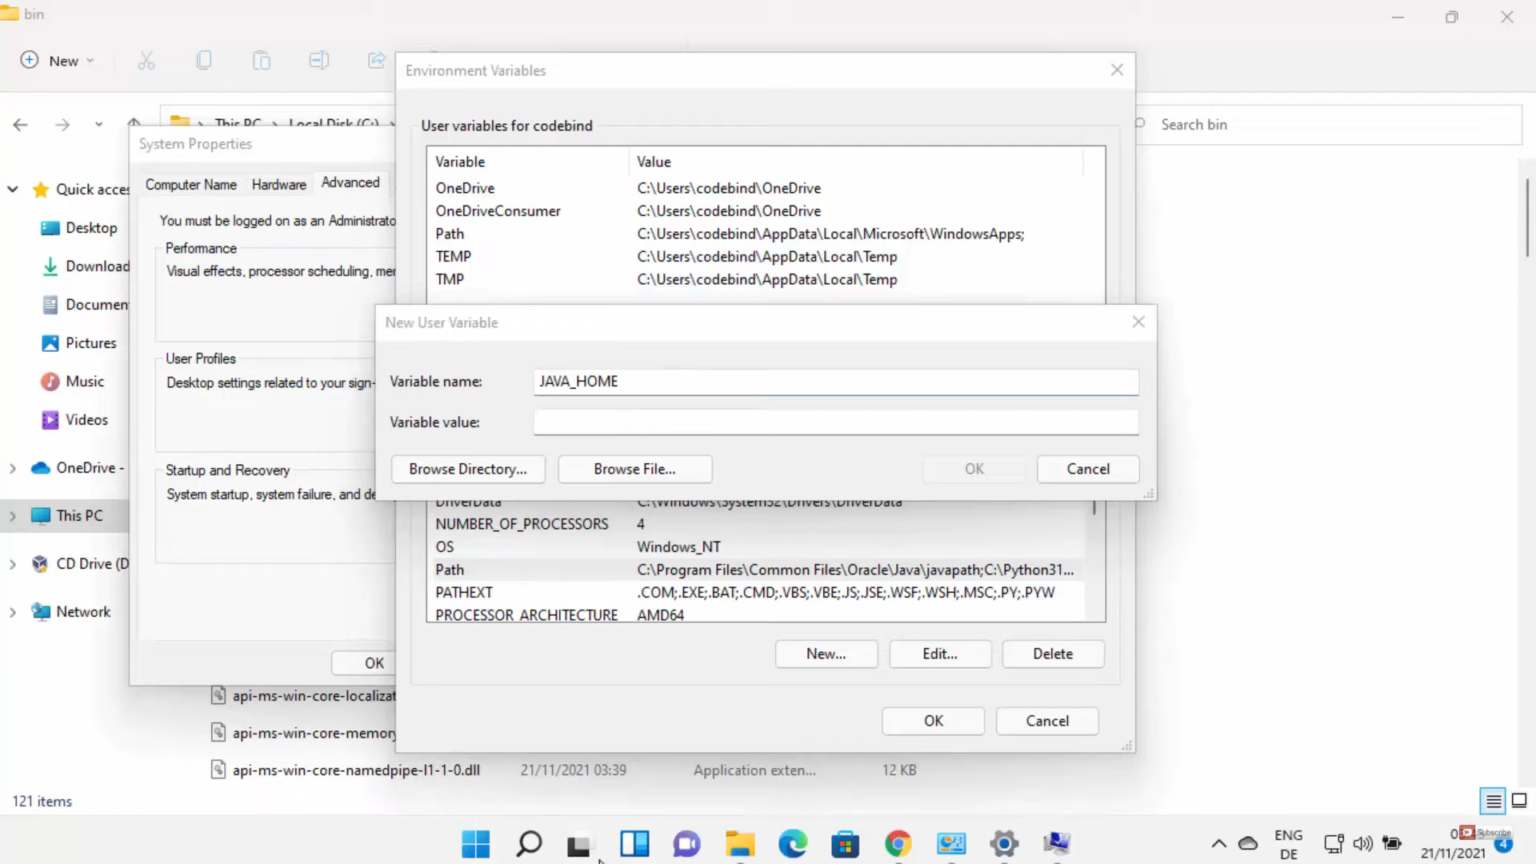
4. To set a home environment variable, you need to click on the New under the user variable section.
5. Here, you need to provide the variable name as JAVA_HOME and the variable value will be the folder. Just copy the path until the JDK folder and don’t go inside the bin folder. Paste that path in variable value. Click on Ok.
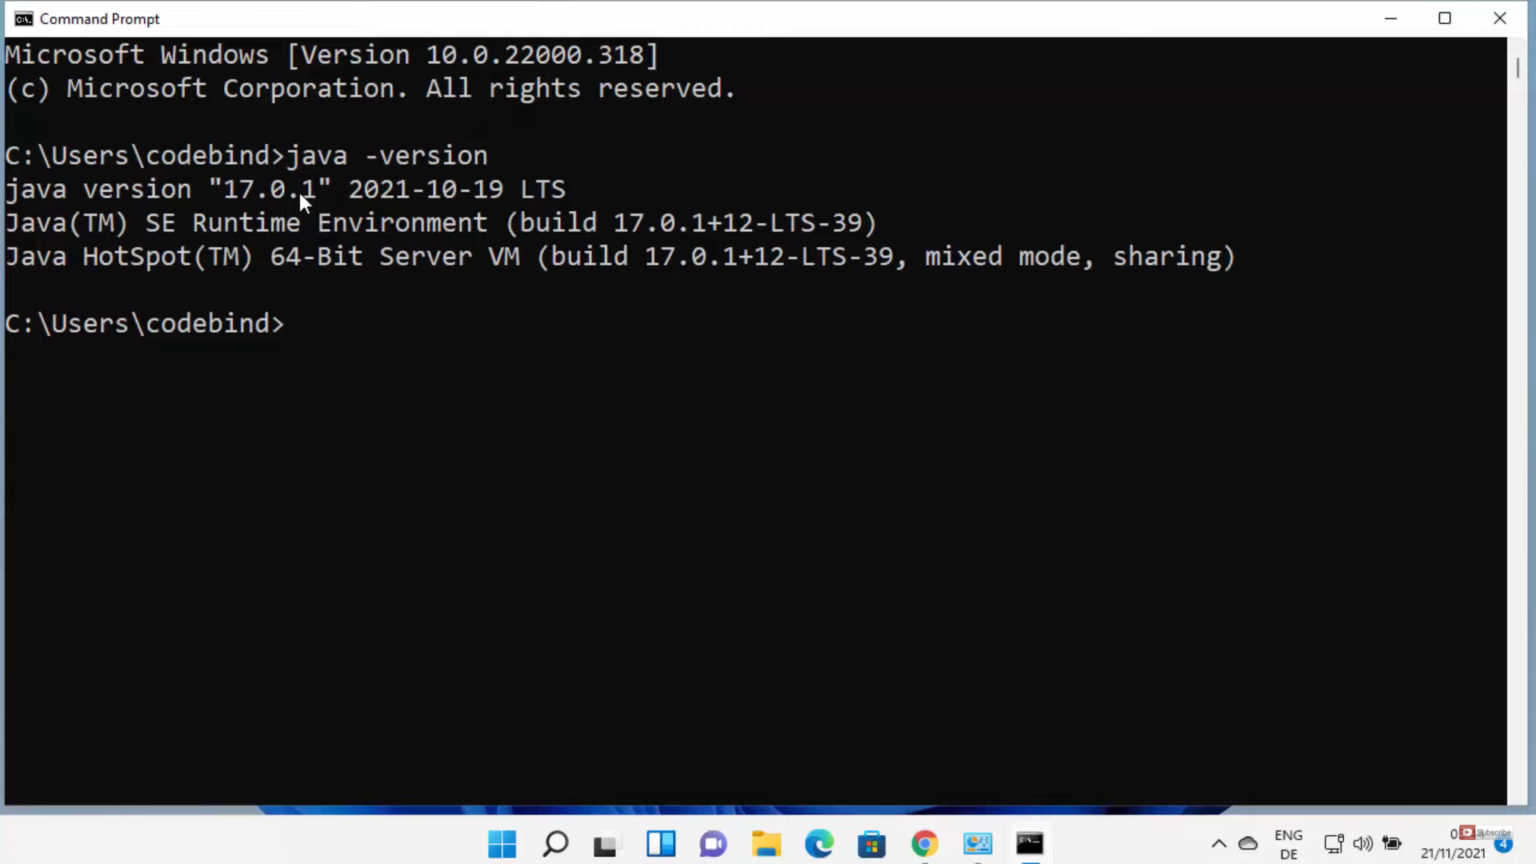
6. Once you have installed java and the environment variable, you can view java in the command line. Click on the search icon and type cmd. Once the command prompt window opens, type java -version and press enter. You will be able to see the latest version of java.
7. To compile a java file, you need to use the javac command. Type javac -version and press enter. You will be able to see the javac version on the screen.

These are the steps for setting the environment variables in your Windows 11 Operating System.
Leave a Reply