
In this blog post, I will give a detailed view of installing VirtualBox on your Windows 11 Operating System. VirtualBox helps you to install different operating systems on your host operating system. Here, Windows 11 is our host operating system.
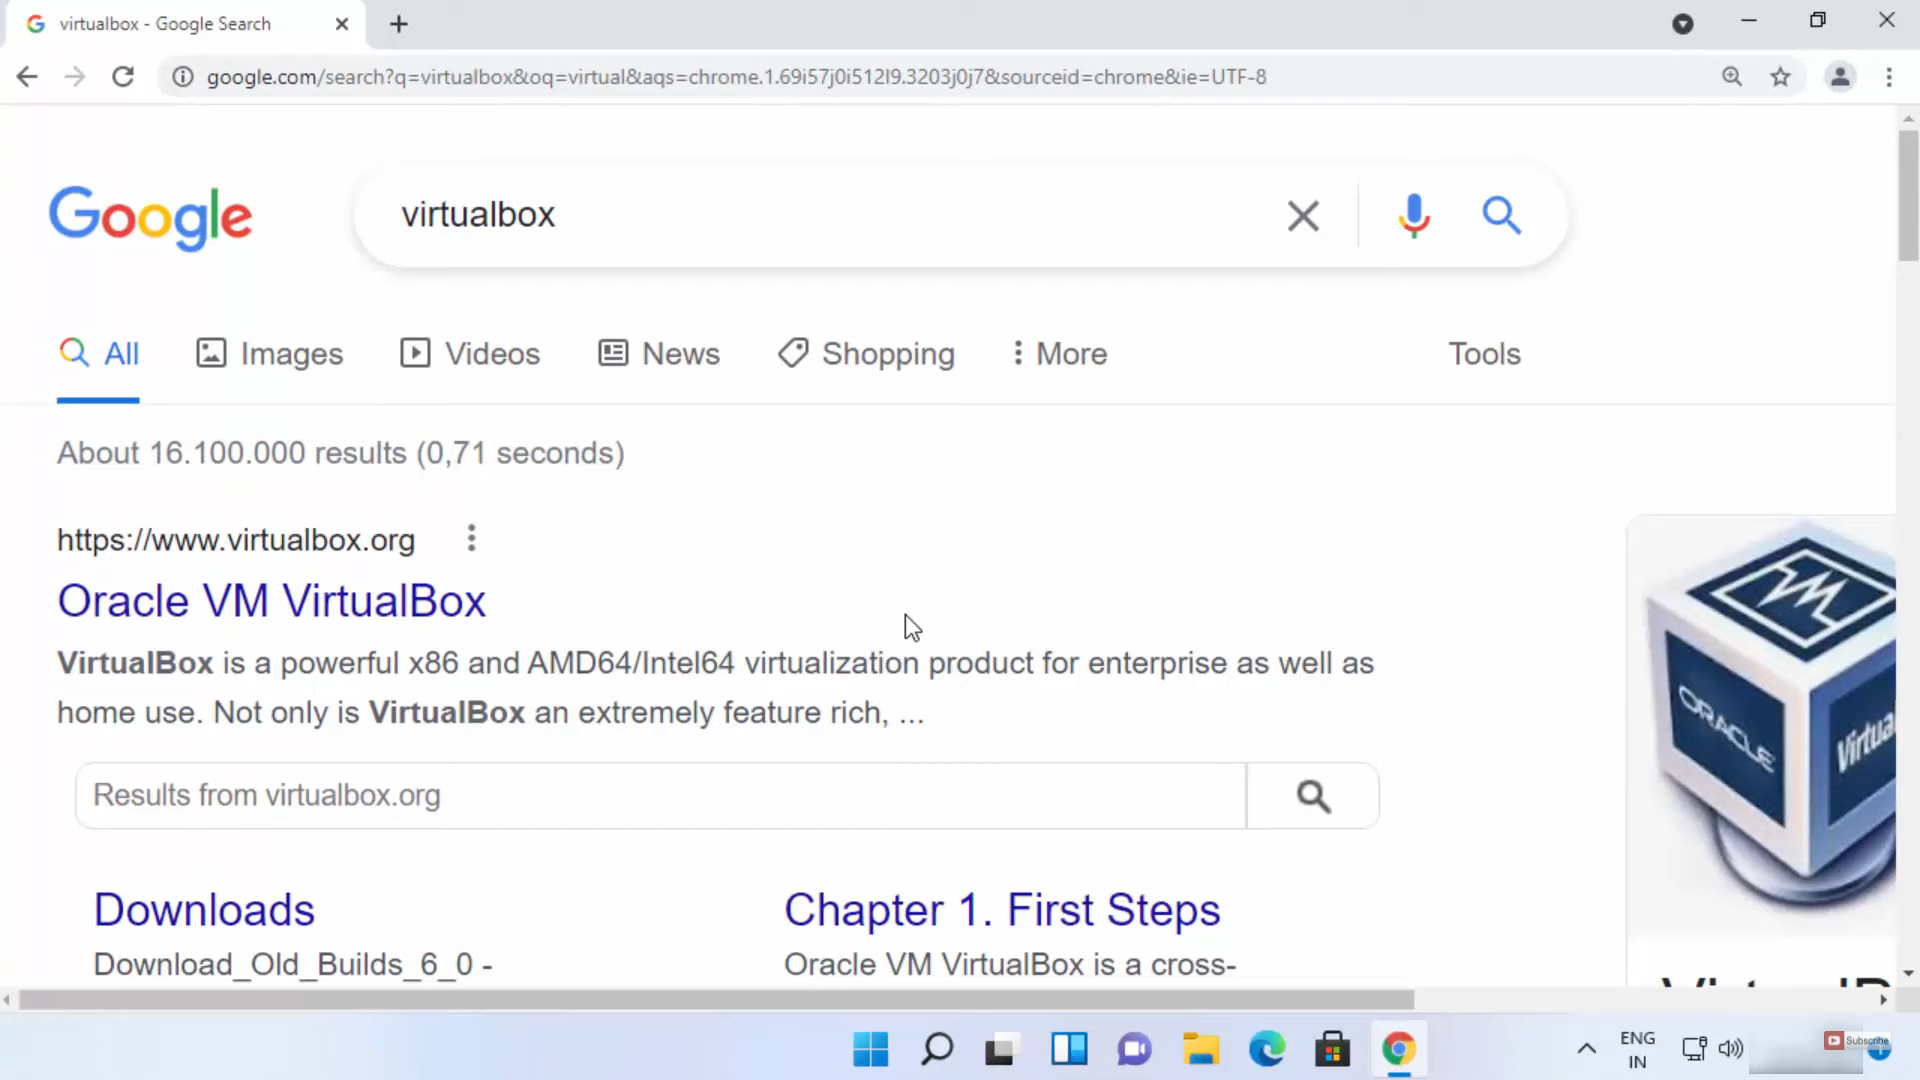
1. Open Google Chrome and search for VirtualBox. The first link is from VirtualBox. Click on that link.
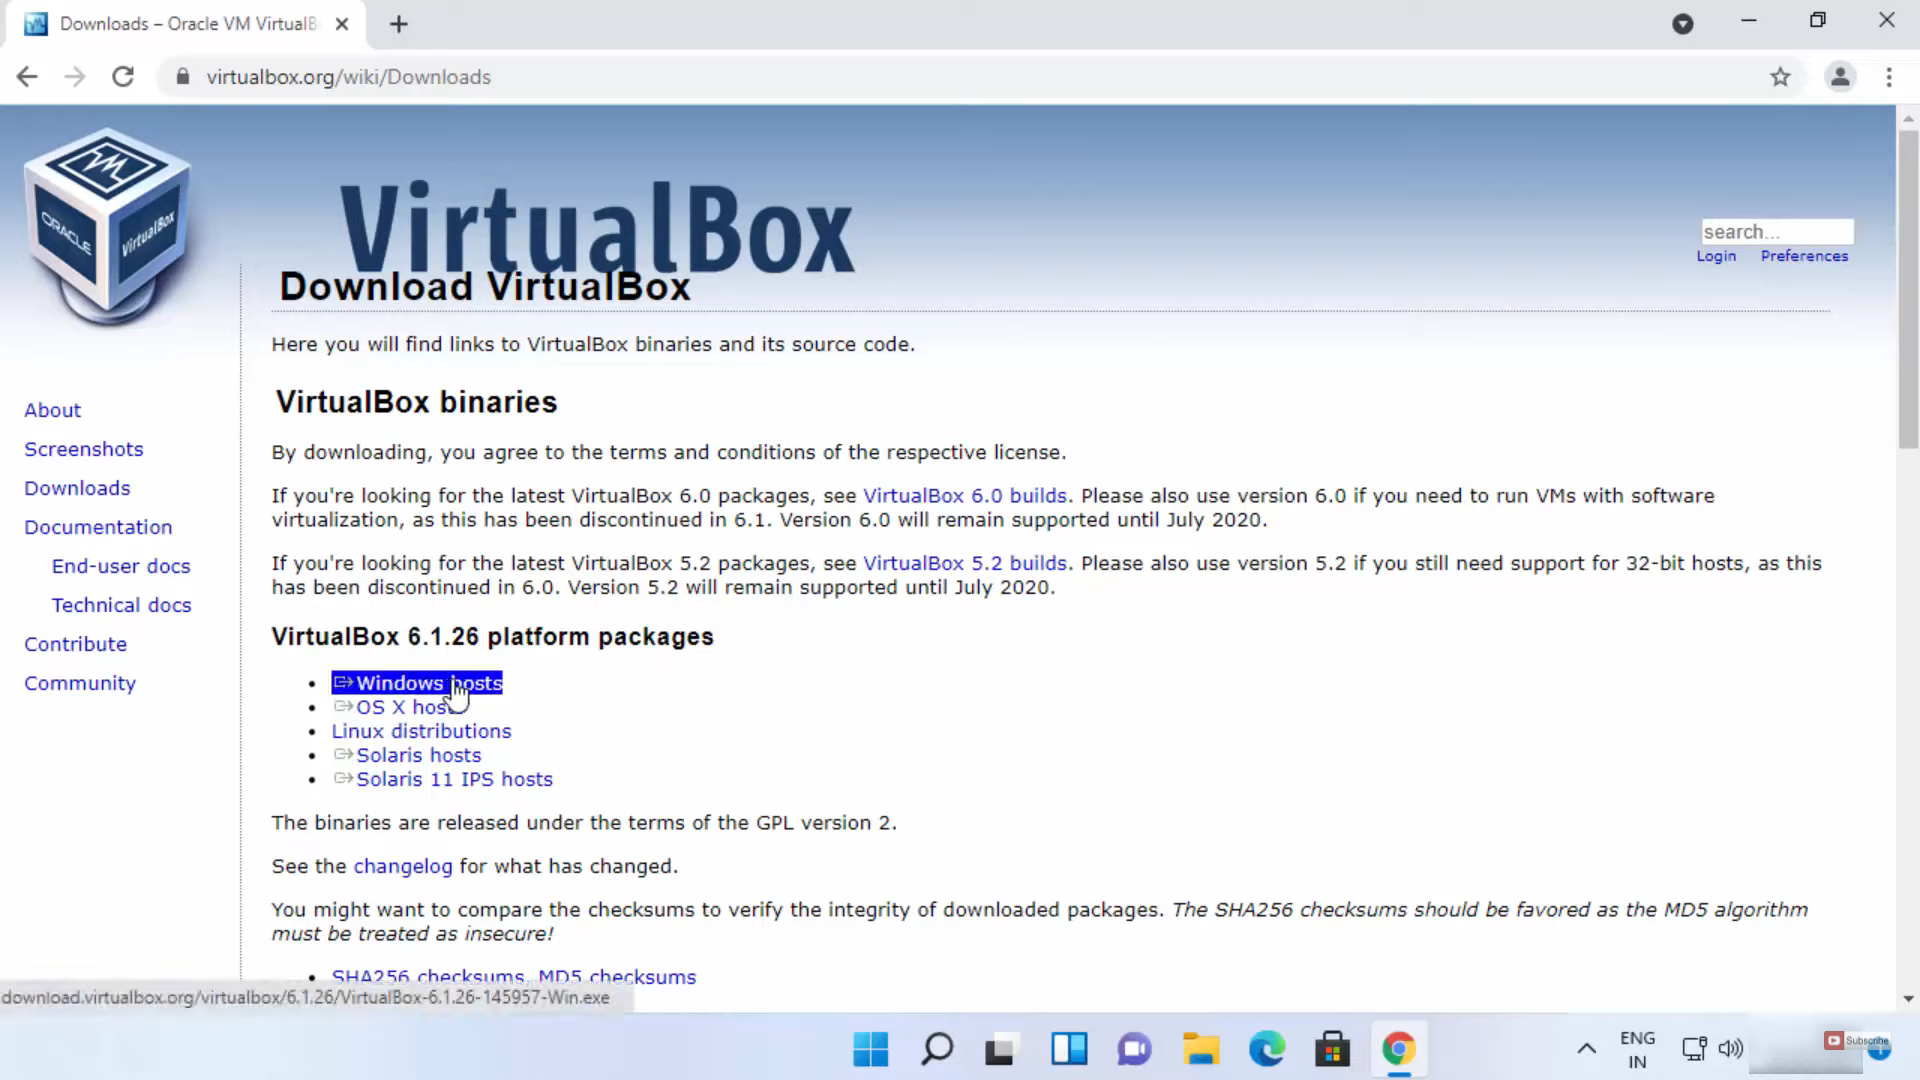
2. Here, you will be able to see the Download button. Or else you can click on the Downloads option as well.

3. Click on the download button. It will take you to a new page where you will be able to see the installation packages for different operating systems. We are interested only in windows operating systems. So, click on Windows hosts. It will start to download.
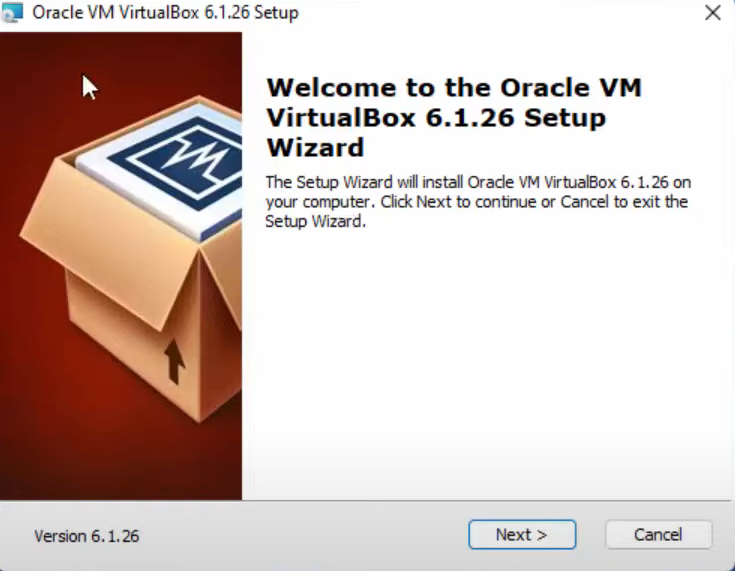
4. Once the exe file is downloaded, click on it and minimize your browser. The installer will start.
5. In the setup window, click on the Next button.
6. Here, the default location will be selected. If you want, you can change the location as per your choice.
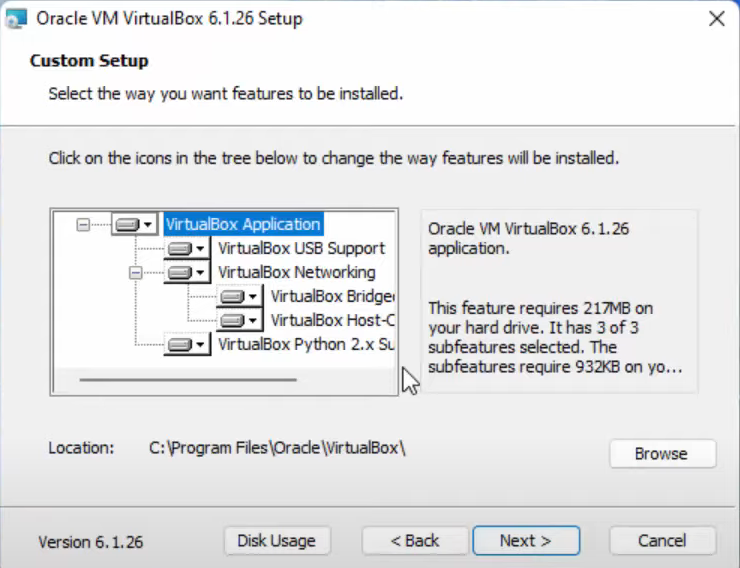
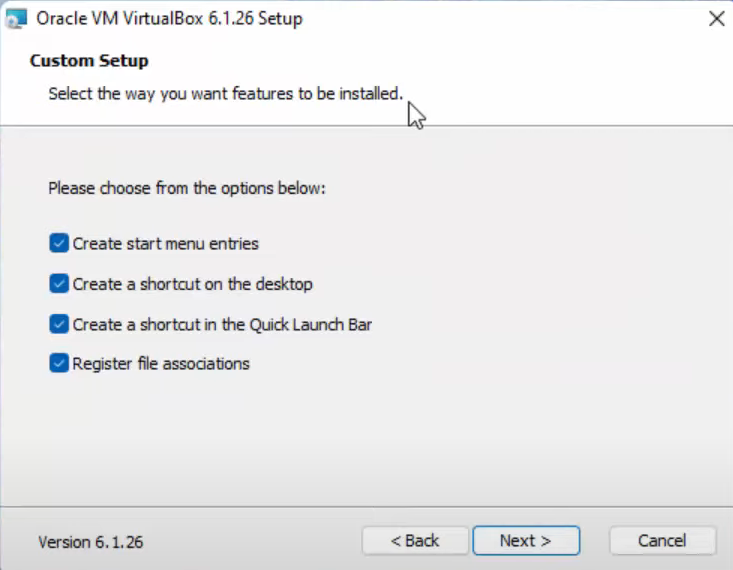
7. In the custom setup window, you can uncheck some options if you don’t need them. Then, click on the Next button.
8. In the warning point, click on Yes.

9. Now, click on Install.

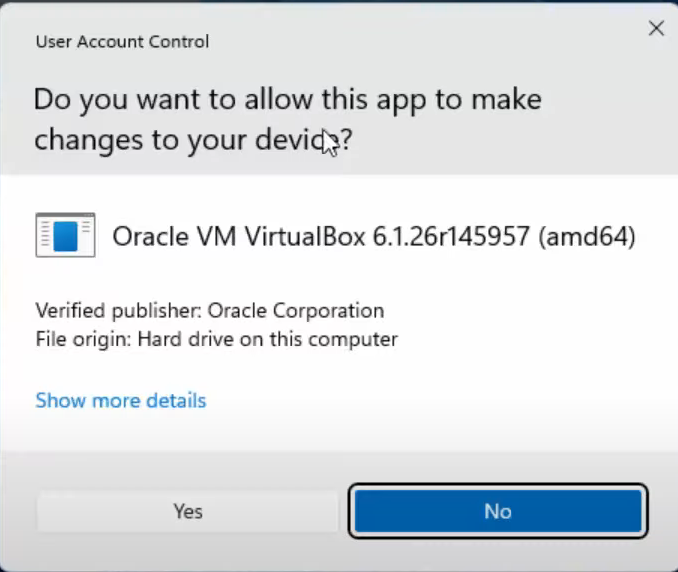
10. It will start the installation process. It will show you a warning. Click on Yes.
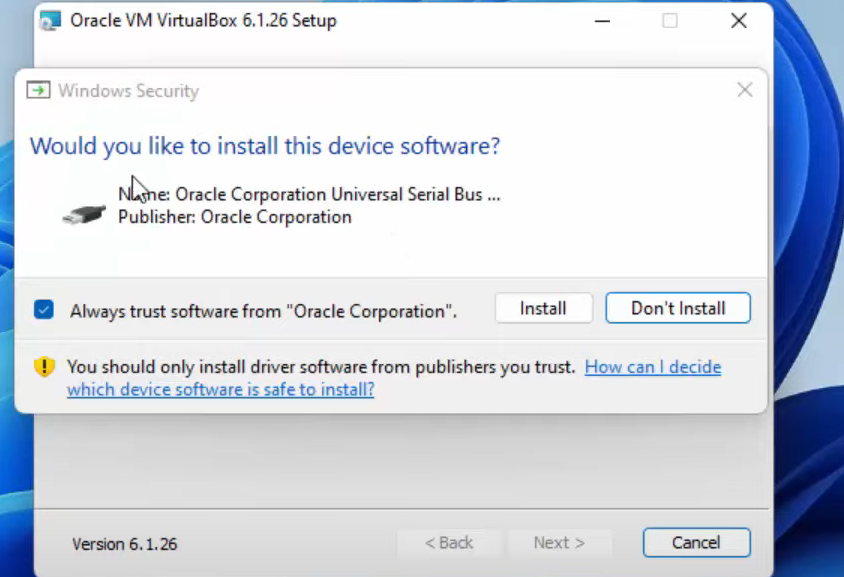
11. It will show a new warning. If you trust VirtualBox, then click on the Install option.
12. The VirtualBox icon has been created on the desktop as well. Once the installation is complete, click on Finish.

13. Now, VirtualBox has been started on the Windows 11 Operating System.
14. For creating a new VirtualBox, you can either click on New or click on Machine.

15. You need to have the ISO file of the operating system that you need to install here.

These are the steps for installing VirtualBox on your Windows 11 Operating System.
Leave a Reply