
In this blog post, I will give a detailed view of installing Adobe Acrobat Reader DC on your Windows 11 Operating System.
1. Open a web browser of your choice and search for adobe reader download. Click on the first link.

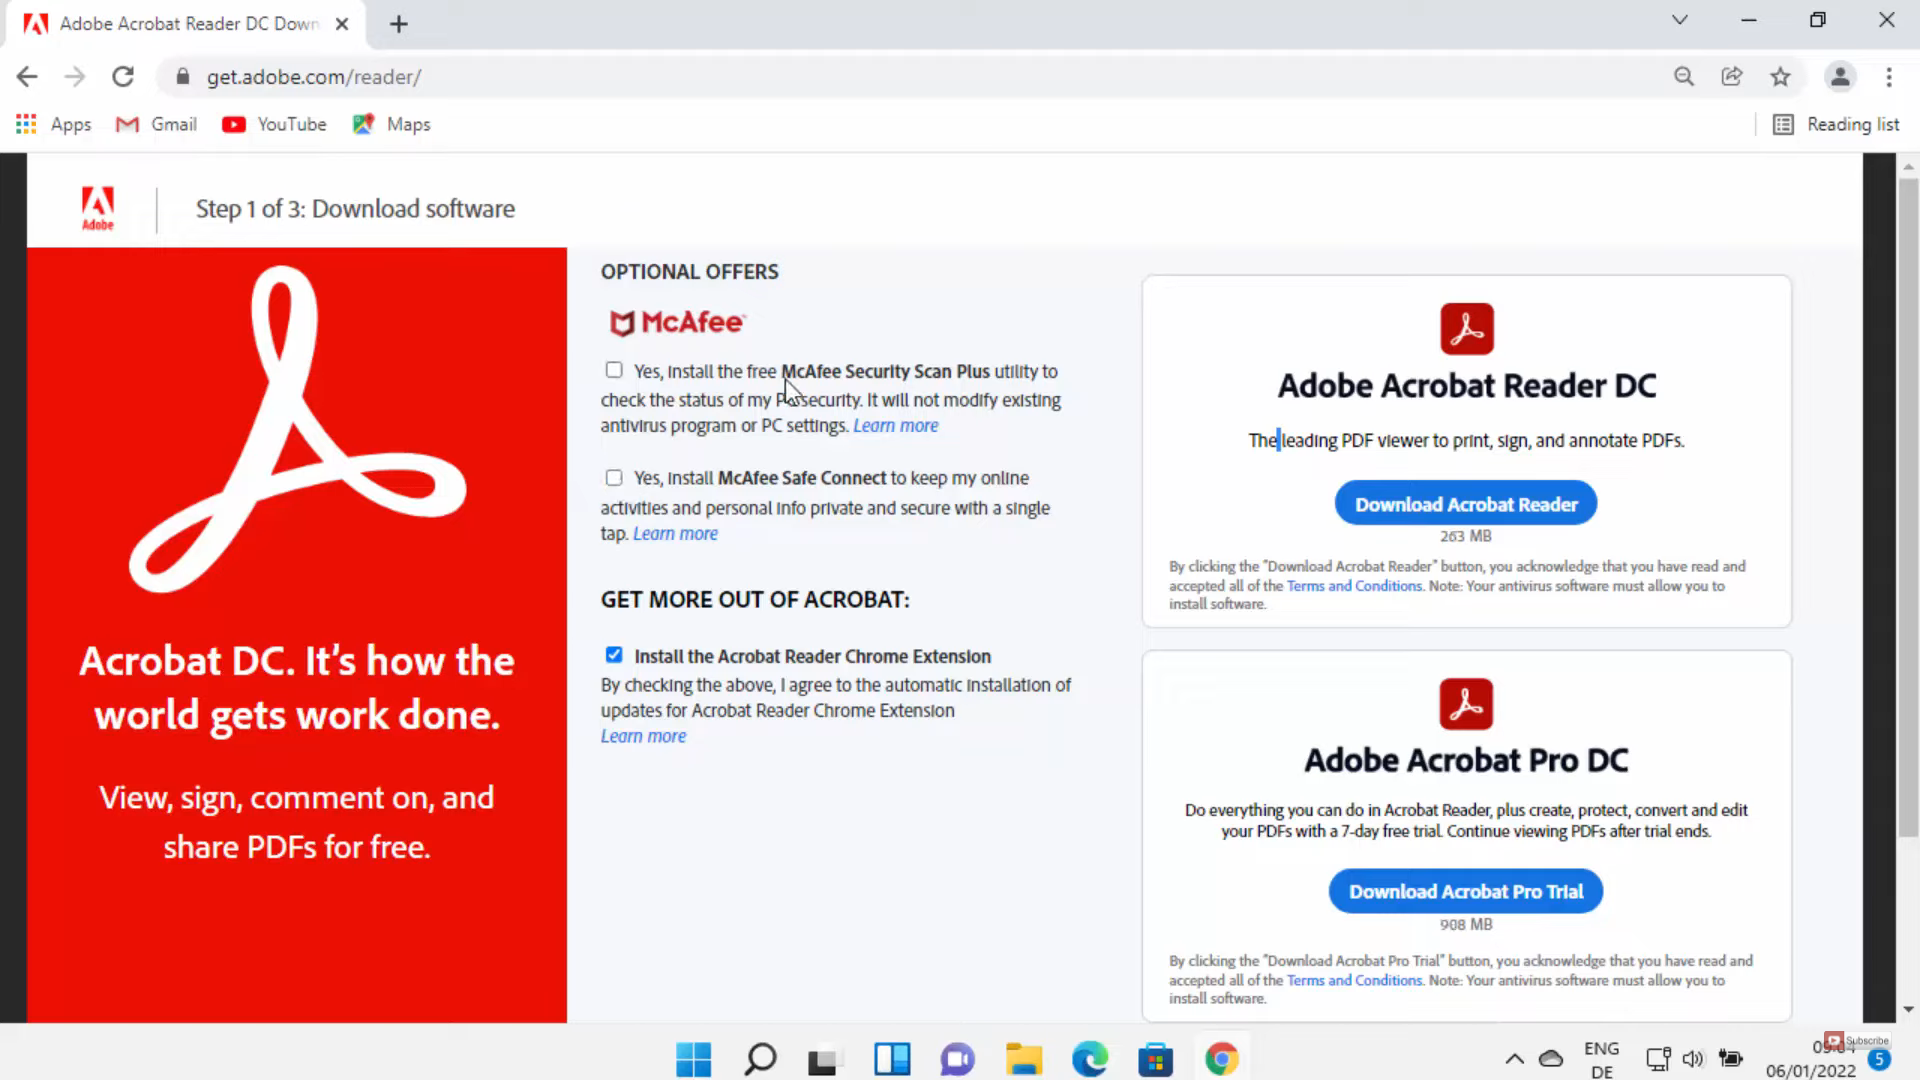
2. Once the link opens, you will be able to see 2 versions. I am going to download the free version. Click on Download Adobe Reader. Before clicking on that button, you need to uncheck all the options on that screen. It will start to download.
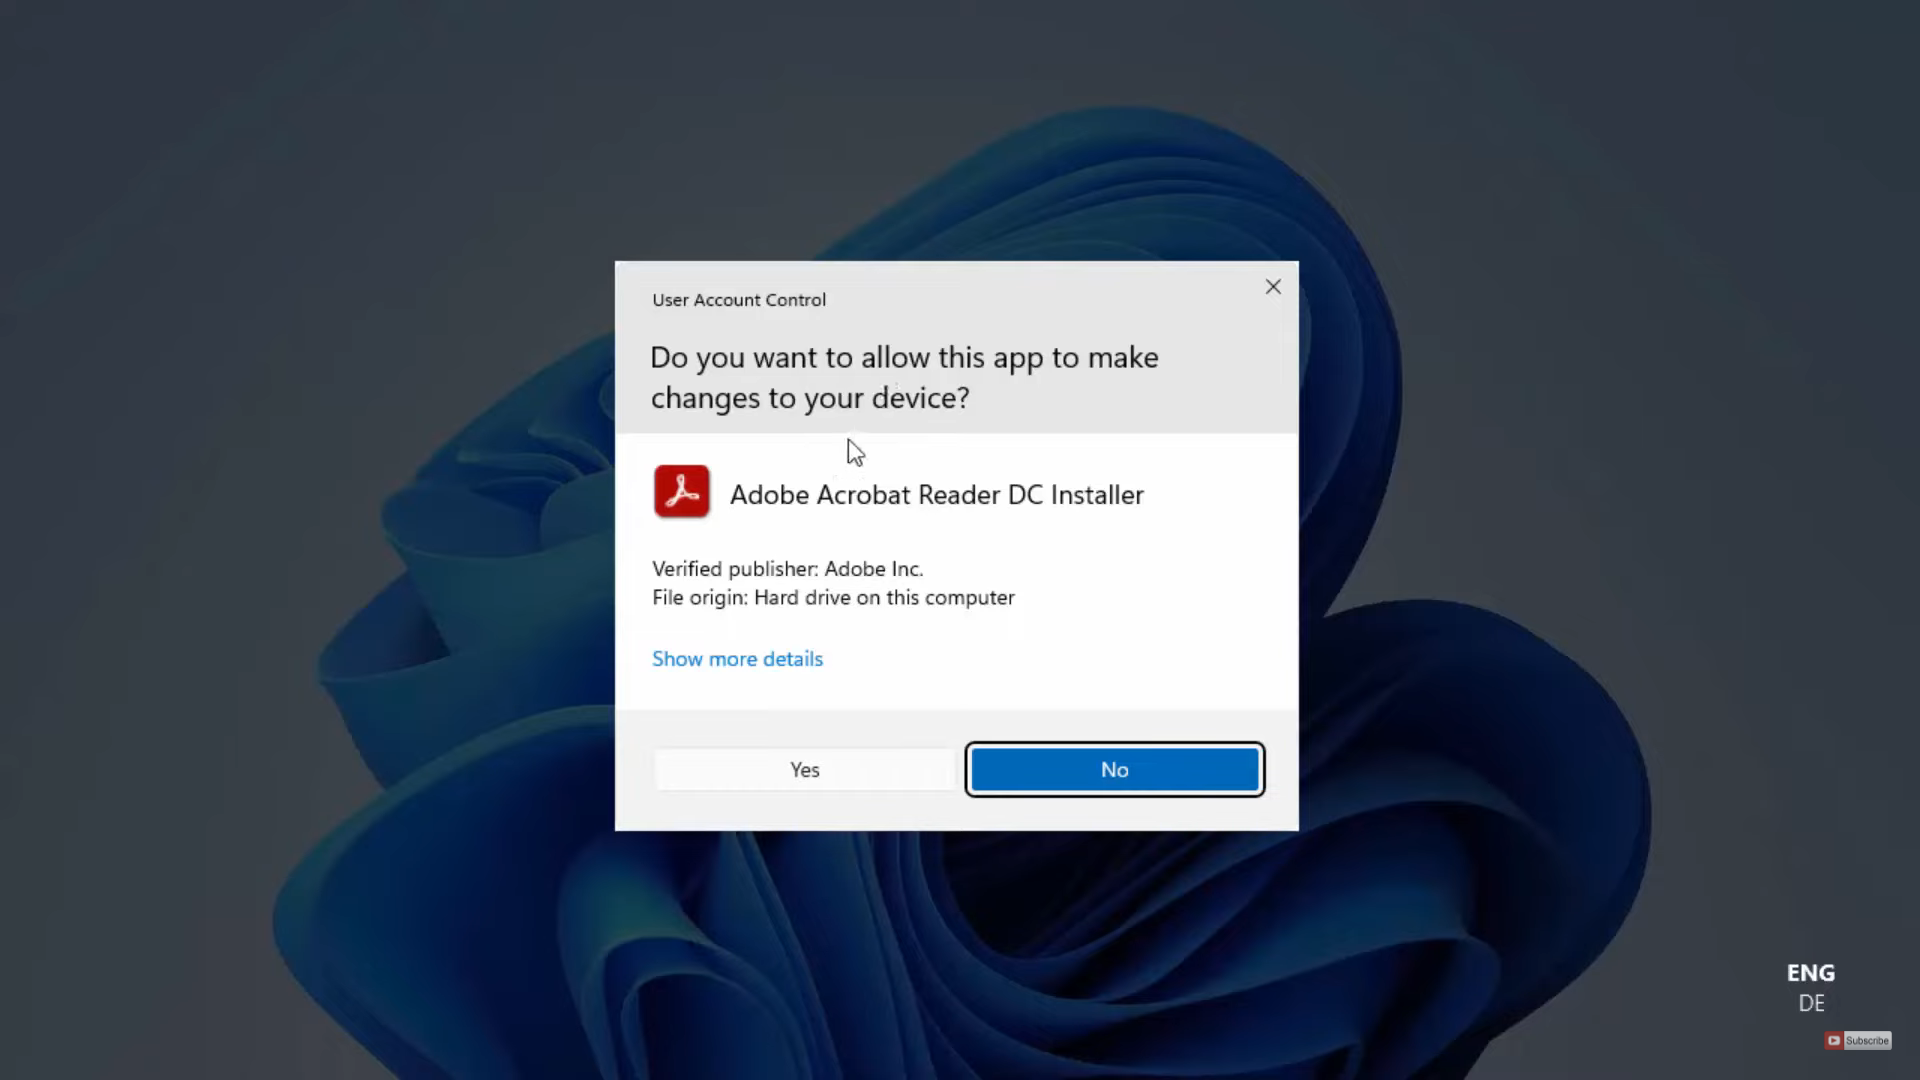
3. Once the download is complete, click on the exe file and minimize the browser. It will show a warning. Click on yes.
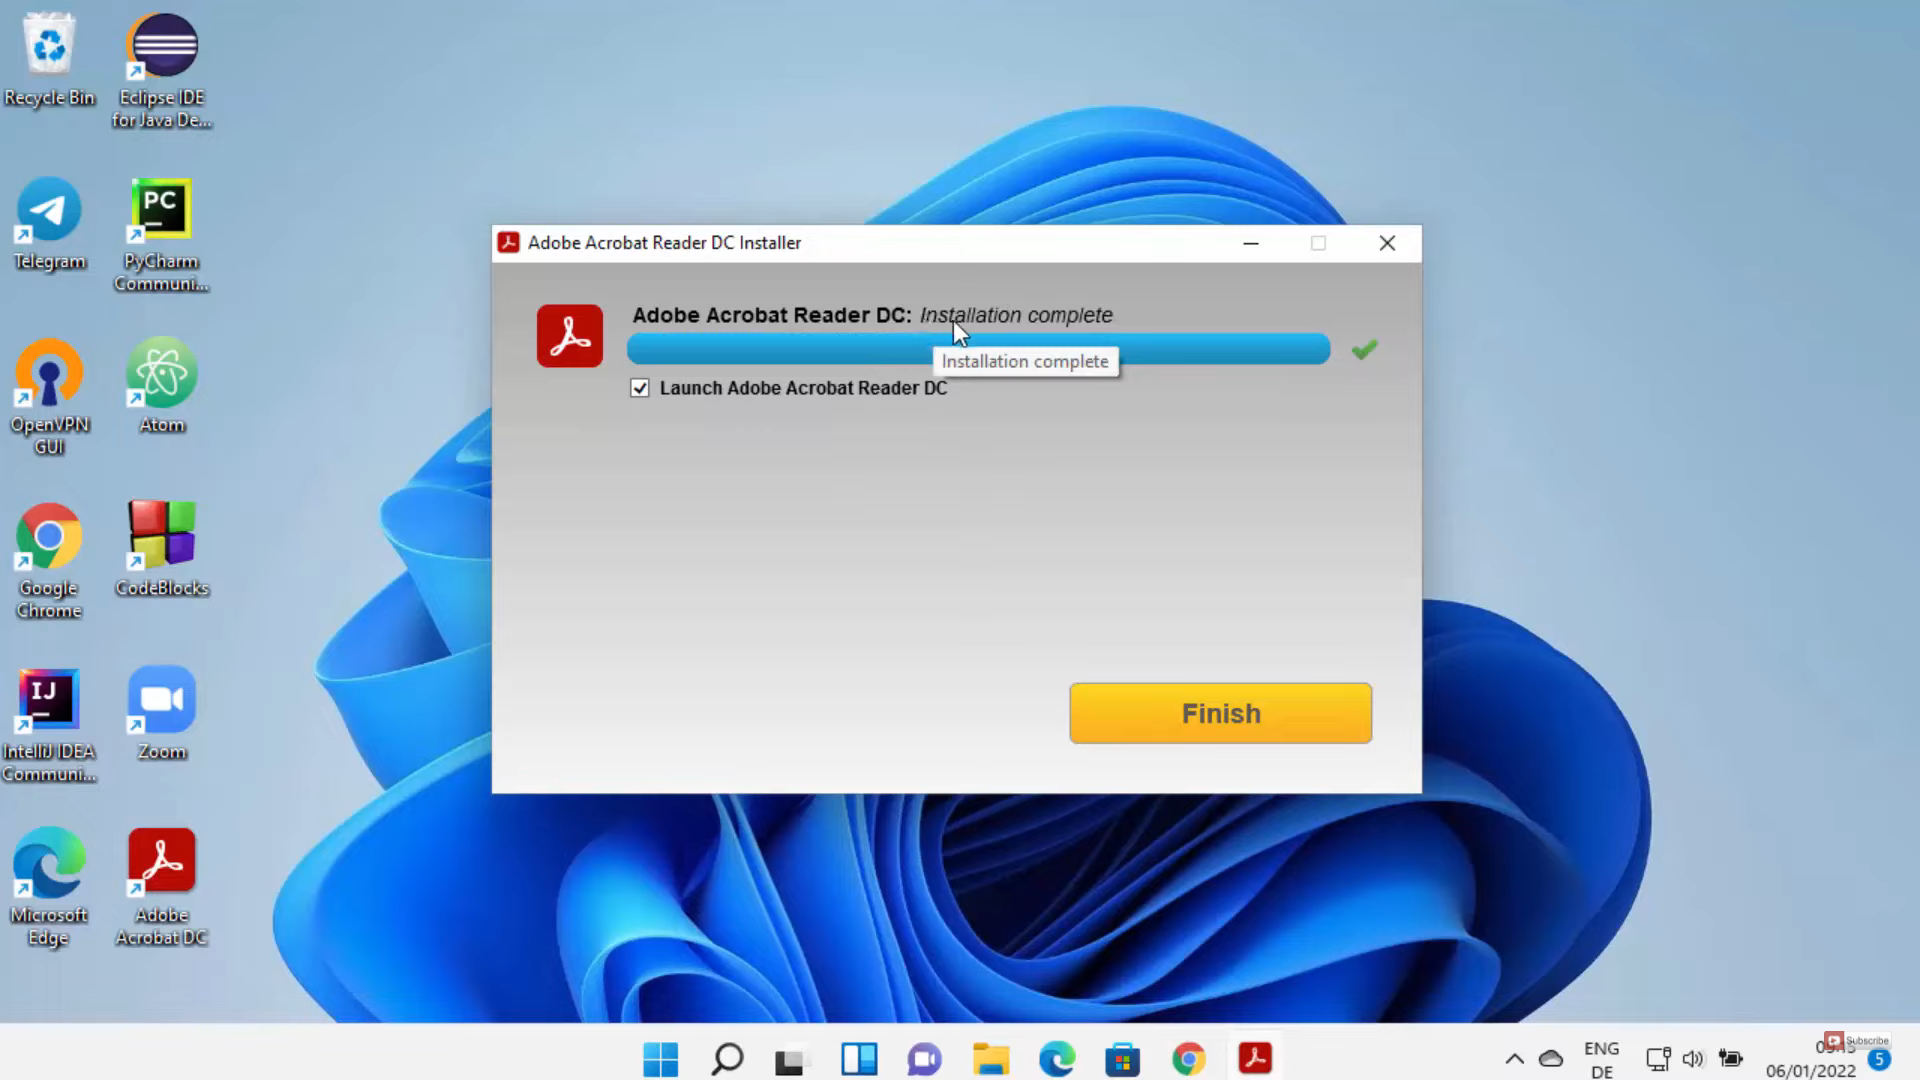
4. The installation will start automatically. You will be able to see the installation’s successful message. Click on the Finish option. You can also see the shortcut icon on the desktop.
5. It will launch an acrobat reader on your Windows 11 Operating System. It will open a website. You can minimize it. Now, you can see acrobat reader has been started. You can start using it on your Windows 11 Operating System. When you start it for the first time, it will show you a message. Click on yes.

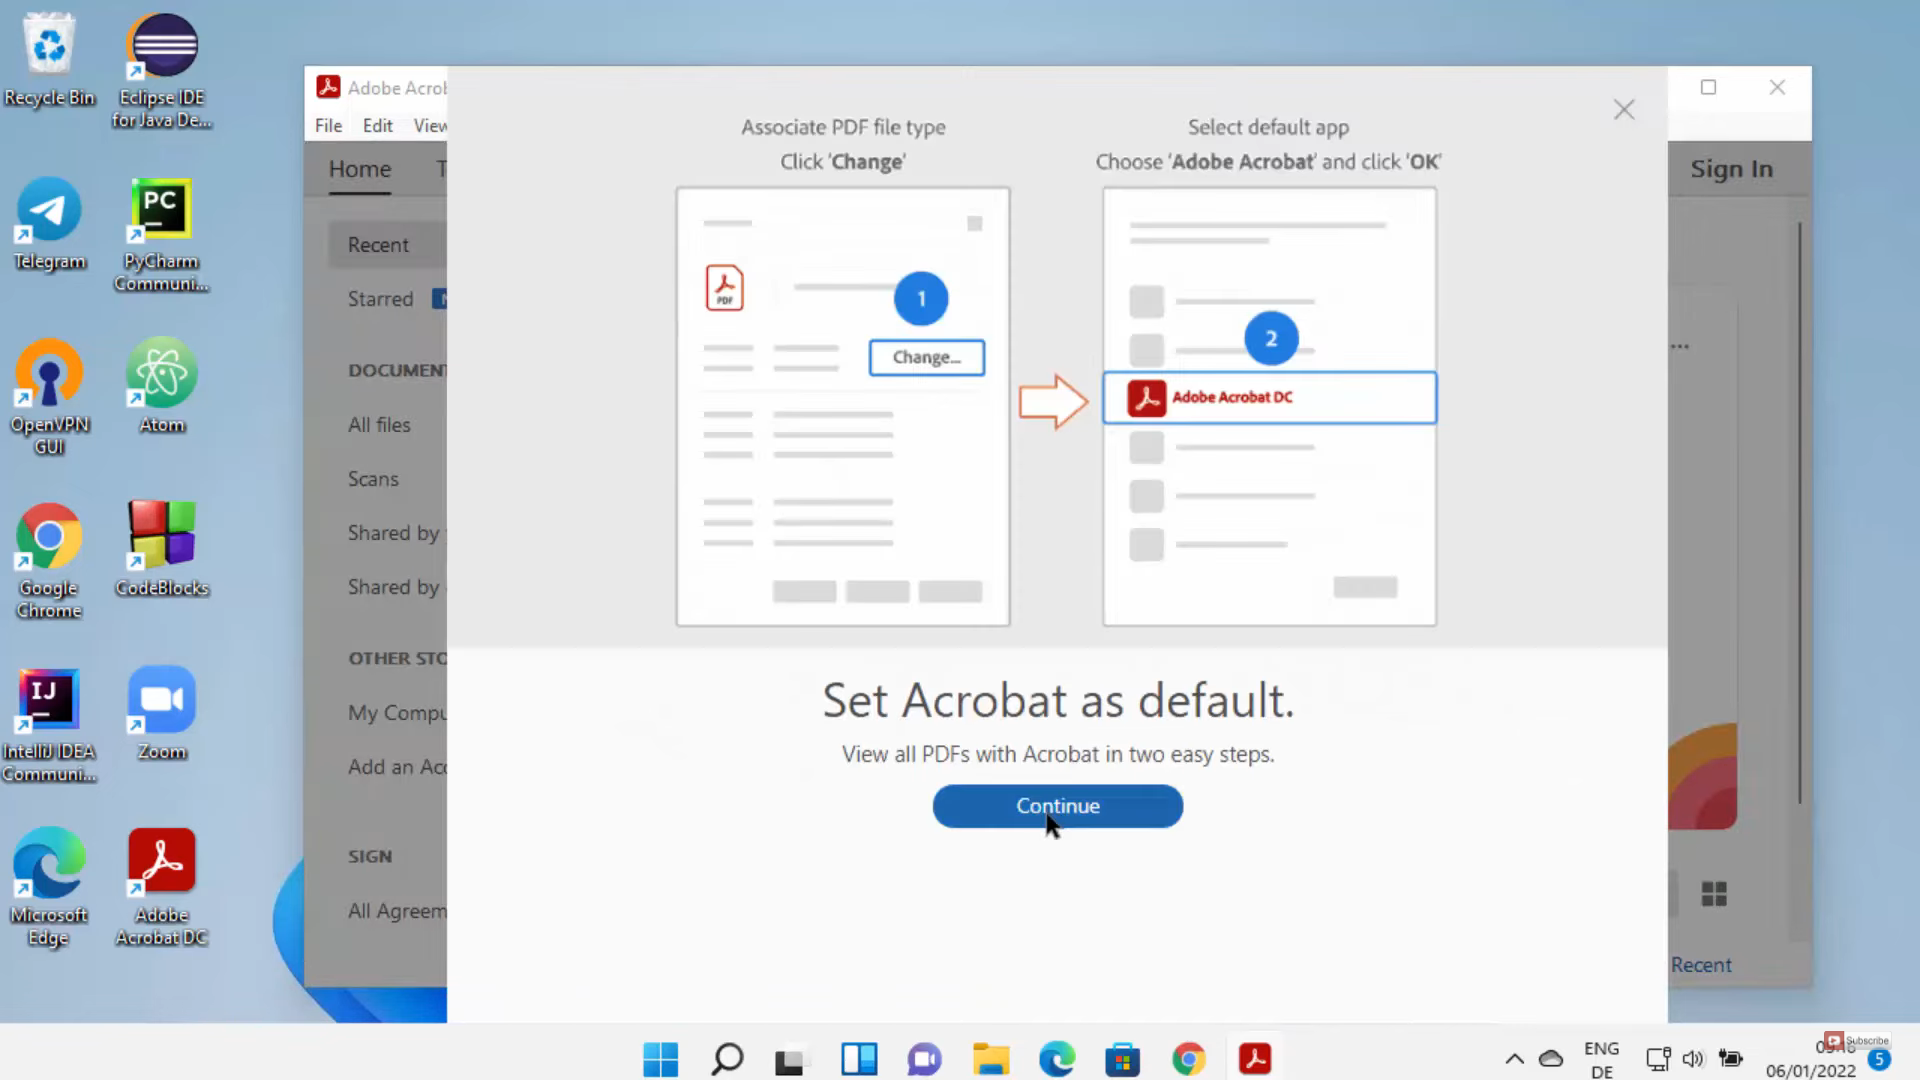
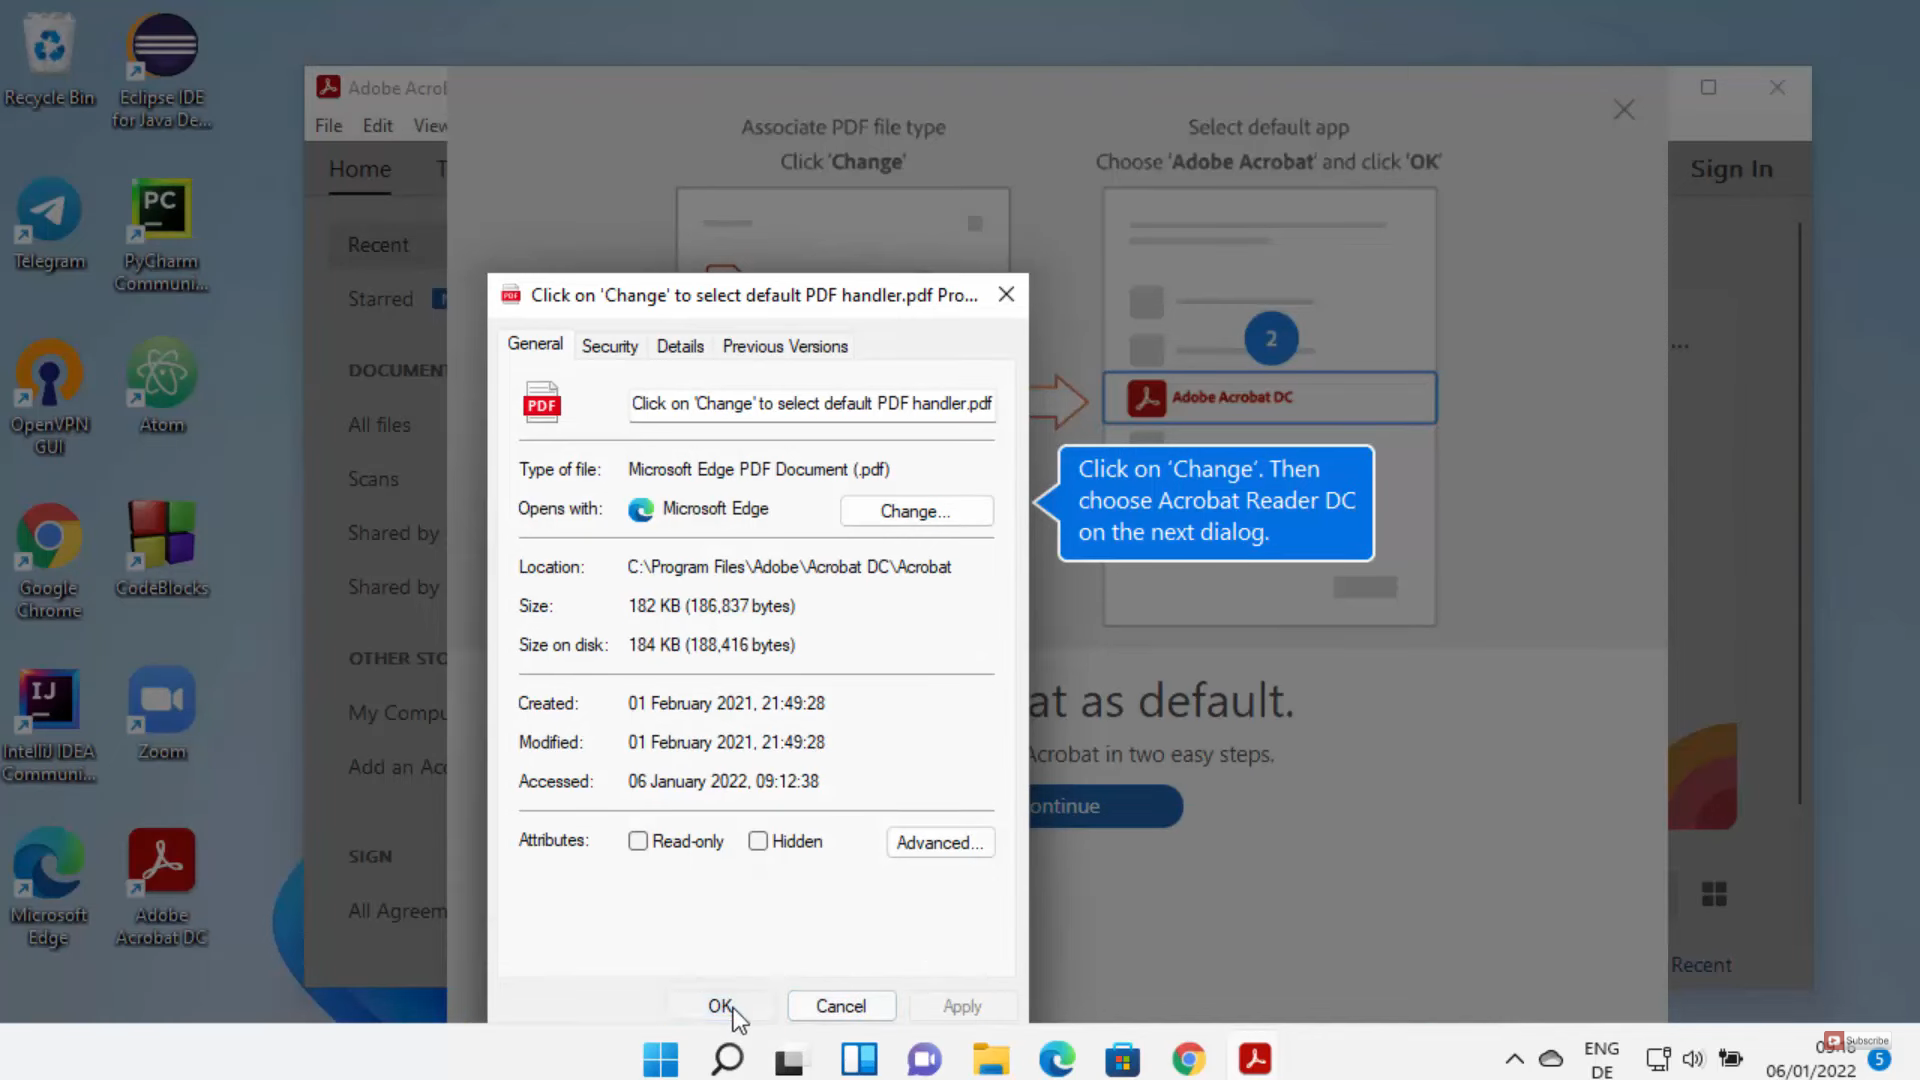
6. Click on continue in this window.
7. Here, you need to click on Ok.
8. Using an acrobat reader, you can open pdf, sign in to your account, and can do many other things. I am going to close and open a sample pdf file.
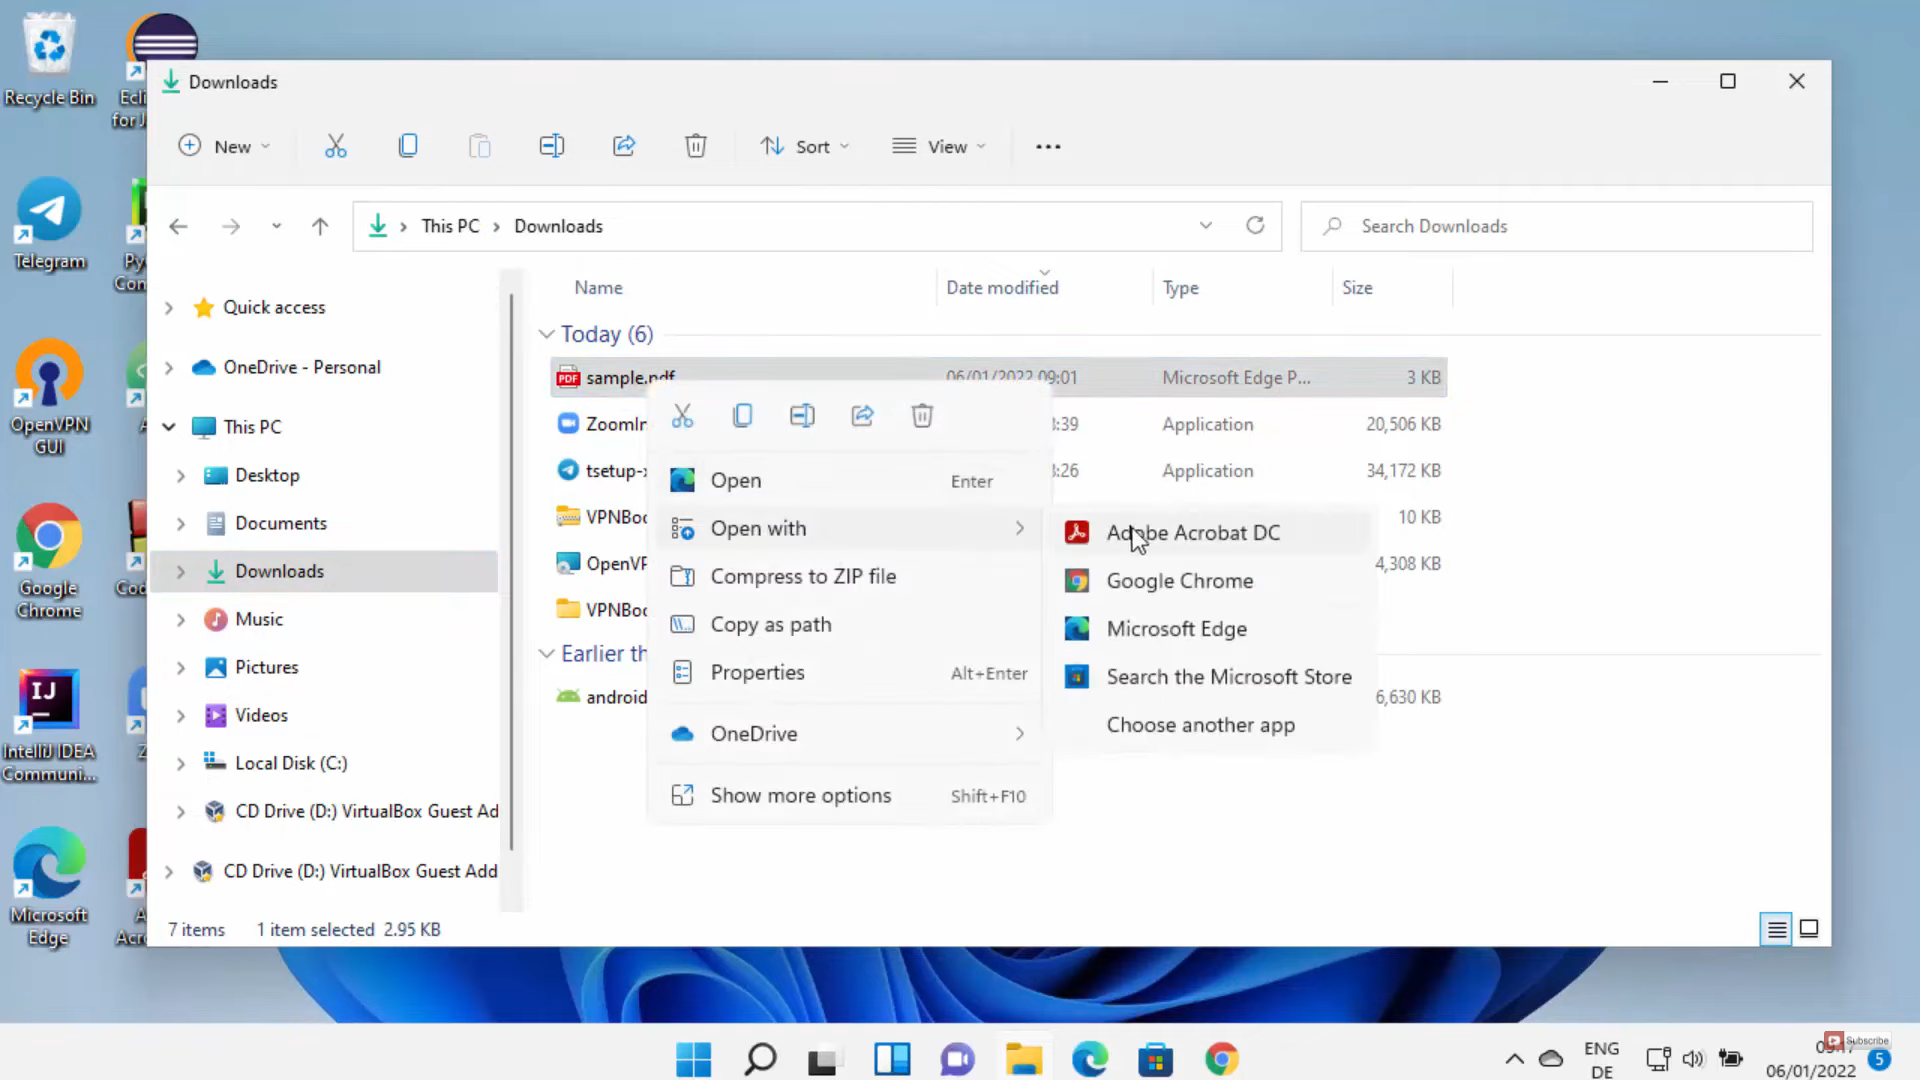
9. Open your File Explorer and go to the place where you have the sample file. Right-click on that file and click on open with Adobe Acrobat DC.
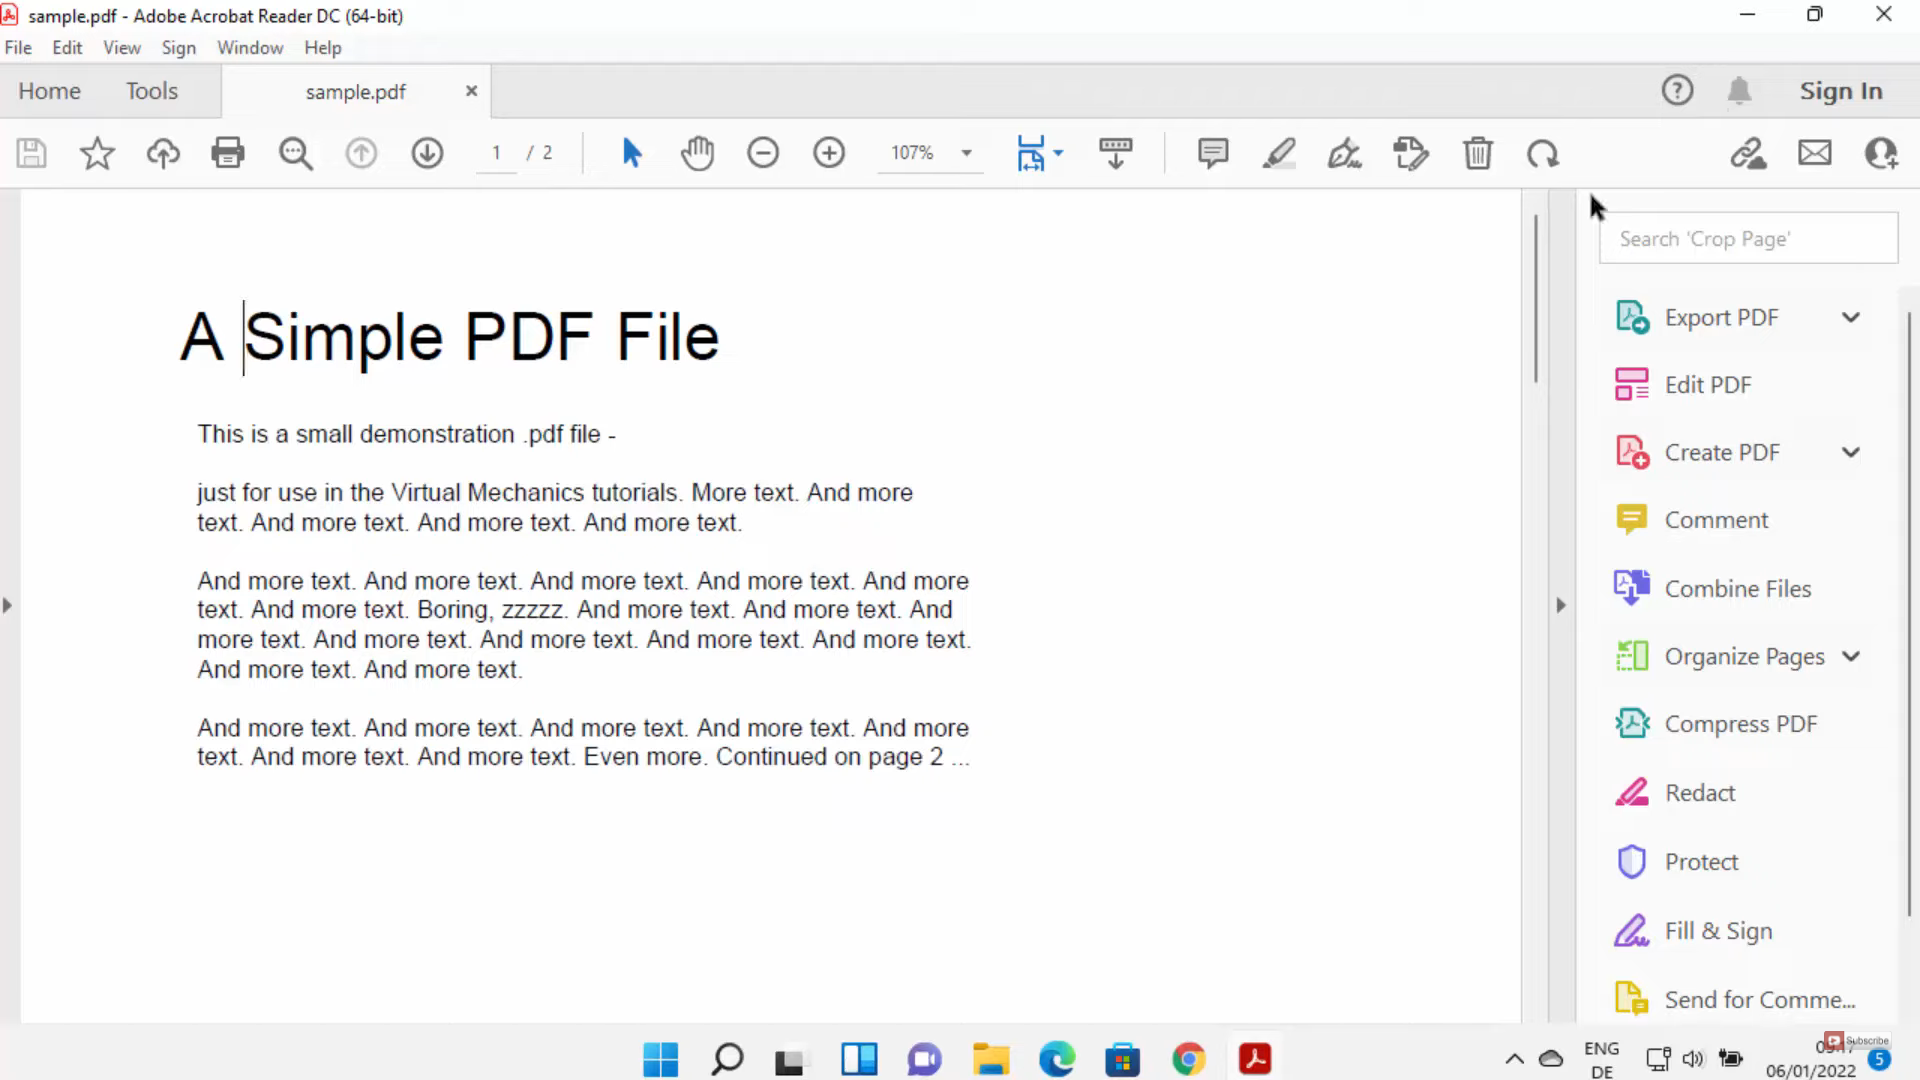
10. It will open the sample pdf in adobe acrobat reader.
These are the steps for installing adobe acrobat reader DC on your Windows 11 Operating System.
Leave a Reply