
In this blog post, I will give a detailed view of creating a new user account on the Windows 11 Operating System.
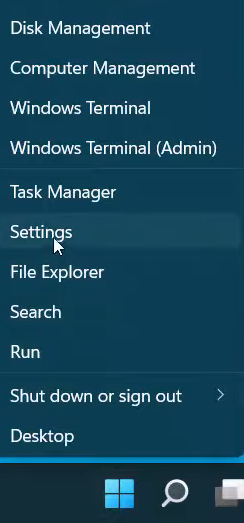
1. Right-click on your Windows icon. Click on Settings.
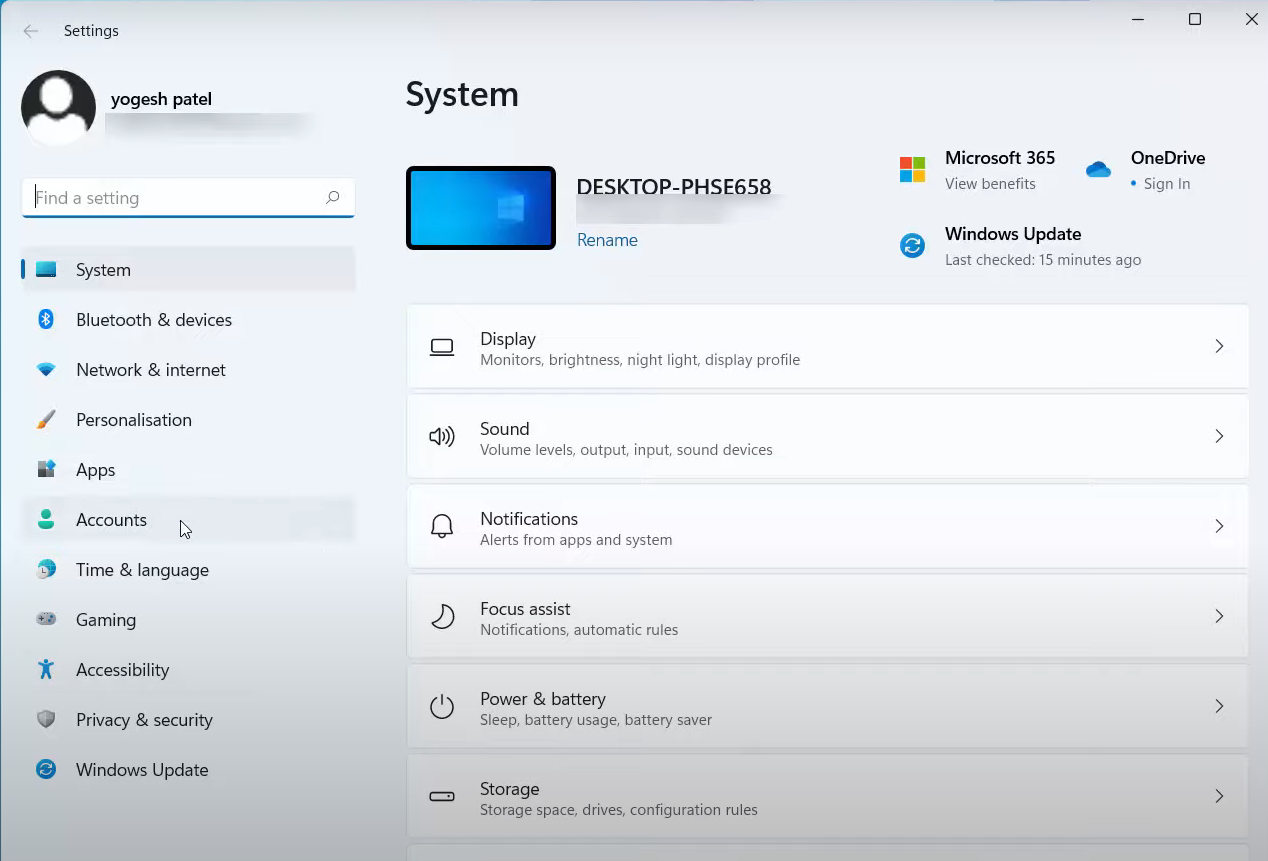
2. It will open the settings app. Click on Accounts.
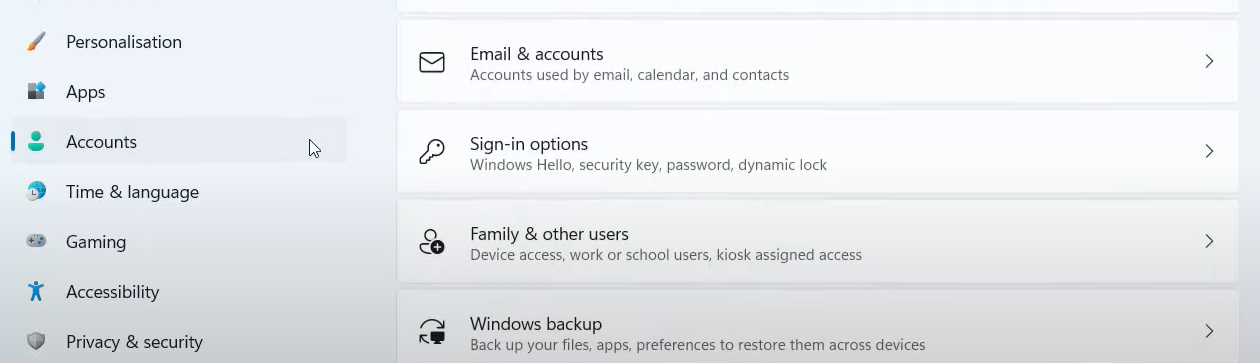
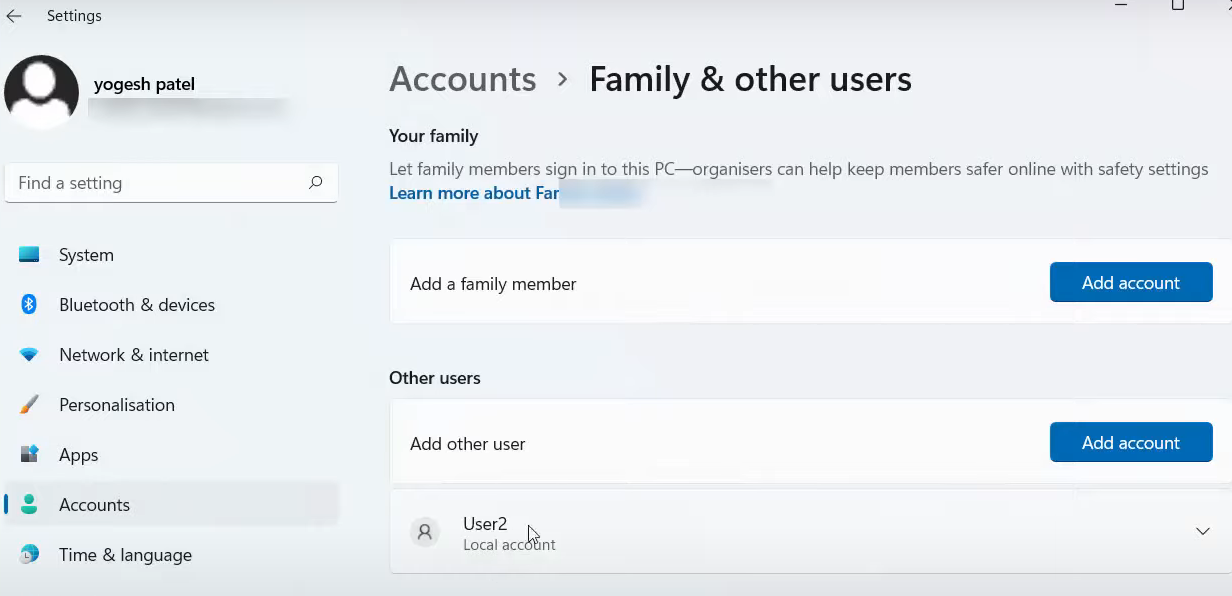
3. Once you click on the account section, a list of options will be provided. Click on Family & other users.
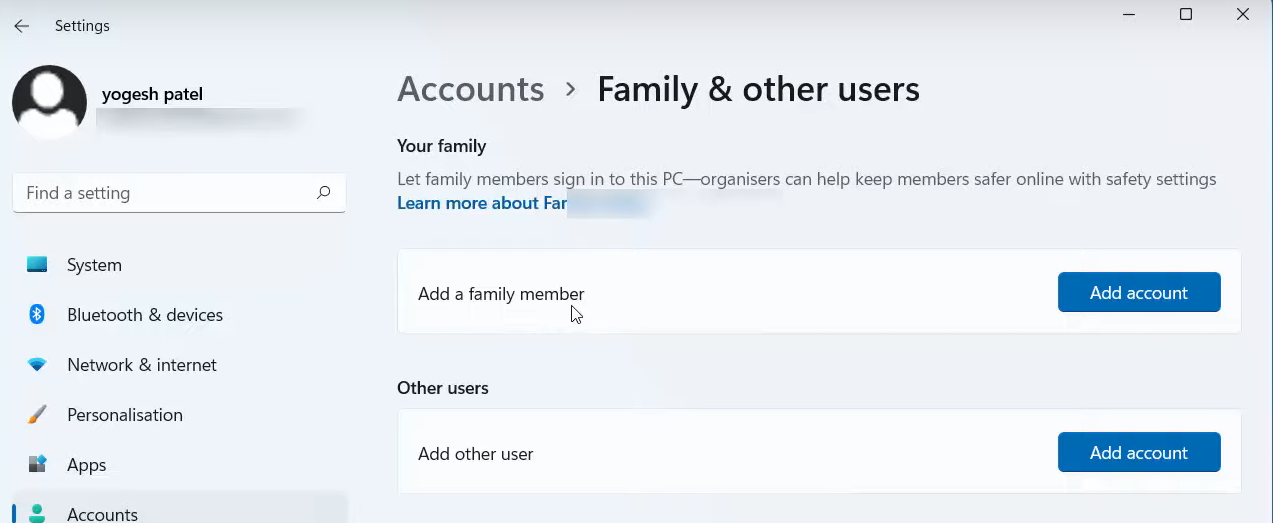
4. Here, you can either add a Family member or the other user. We are going to add other user. Click on Add account.
5. It will open a new window. It says we need to use your Microsoft account for creating a new user account. But I am not going to use my Microsoft account. You will be able to see a link I don’t have this person’s sign-in information. You need to click that link.
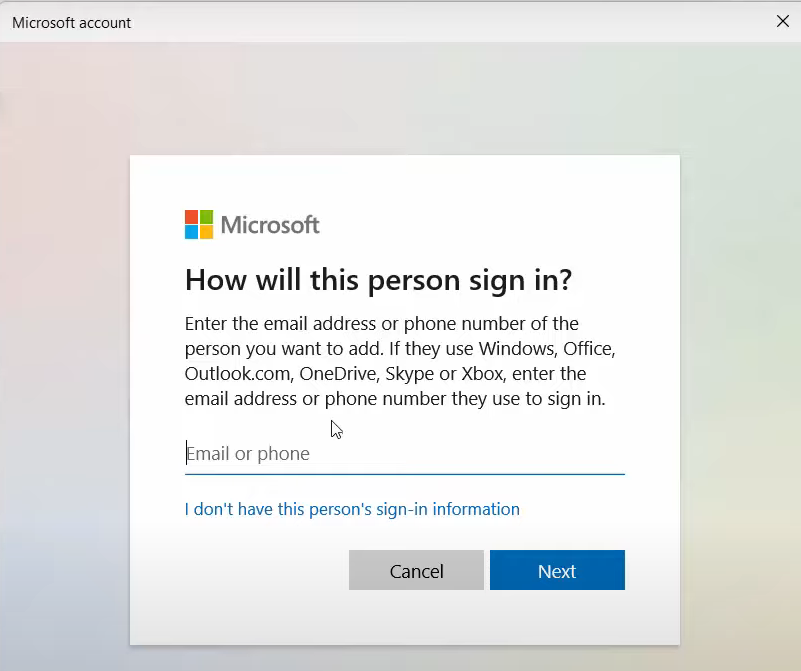
6. Select the third option Add a user without a Microsoft account.
7. Before adding the user name and other credentials, let’s see how many users I have right now on my Windows Operating System.
8. Right-click on the Windows icon. You will be able to see the list of user names at the bottom. Right now, I have only one user.
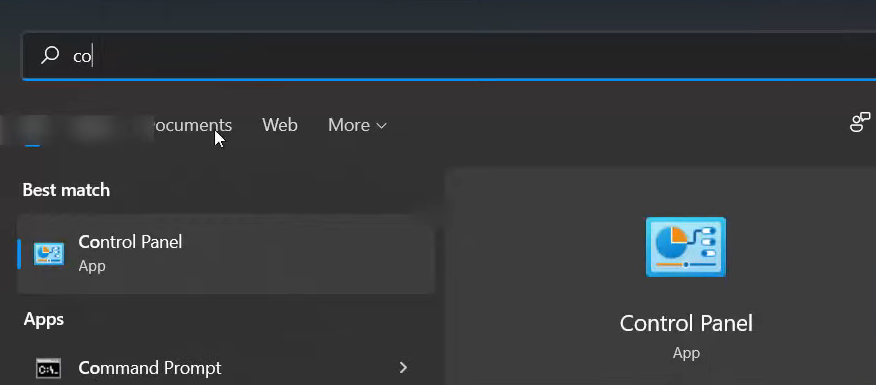
9. You can also verify this by clicking on the Search bar and searching for the Control Panel app. Click on the app.
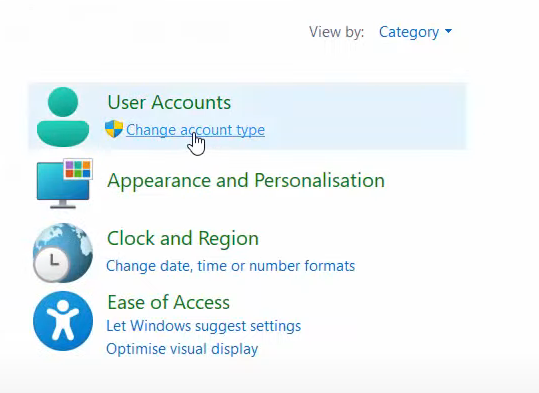
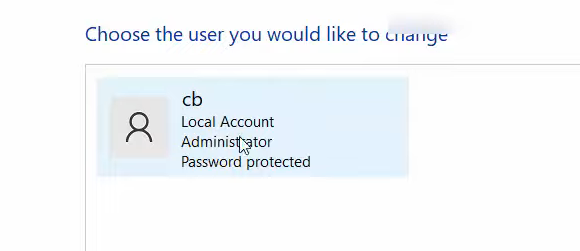
10. It will open the control panel window. In the User Accounts section, click on Change account type. It will show the list of users in your Windows Operating System.
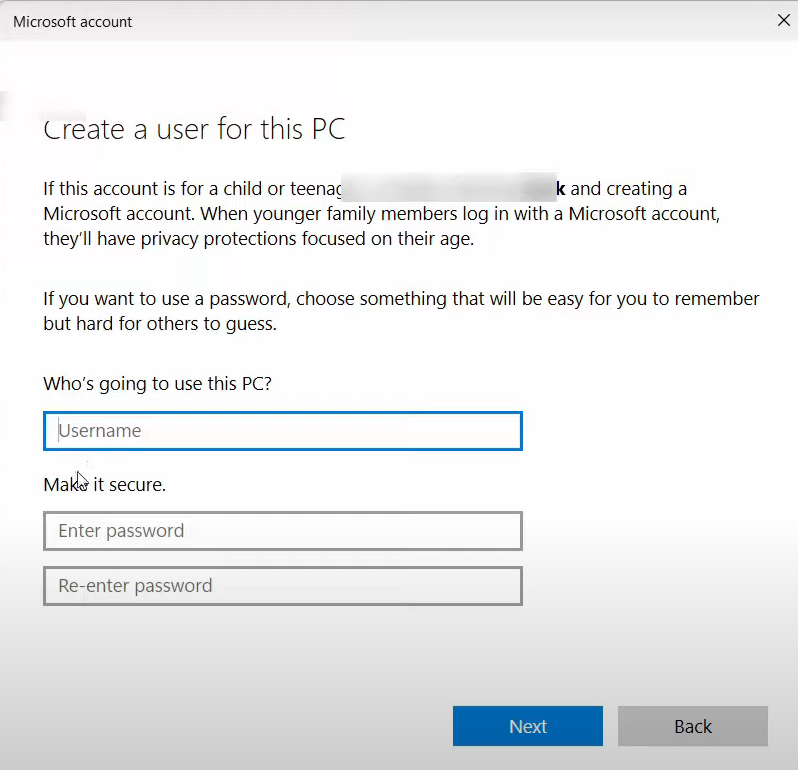
11. Let’s create a new user. I am going to create User2. Then you need to enter and re-enter your password. You have to answer some security questions if you forget your password. Here you have to choose 3 security questions and have answers of your choice. After filling in the details, click on the Next button.

12. You can see the User2 has been added.
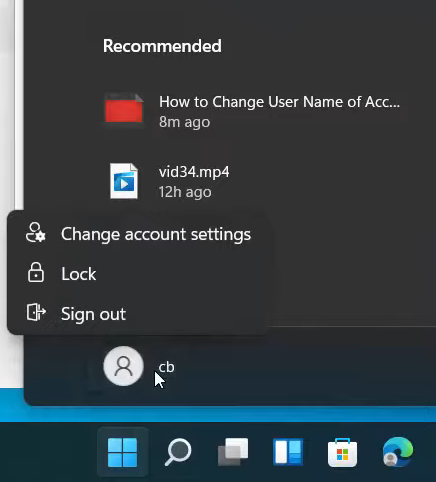
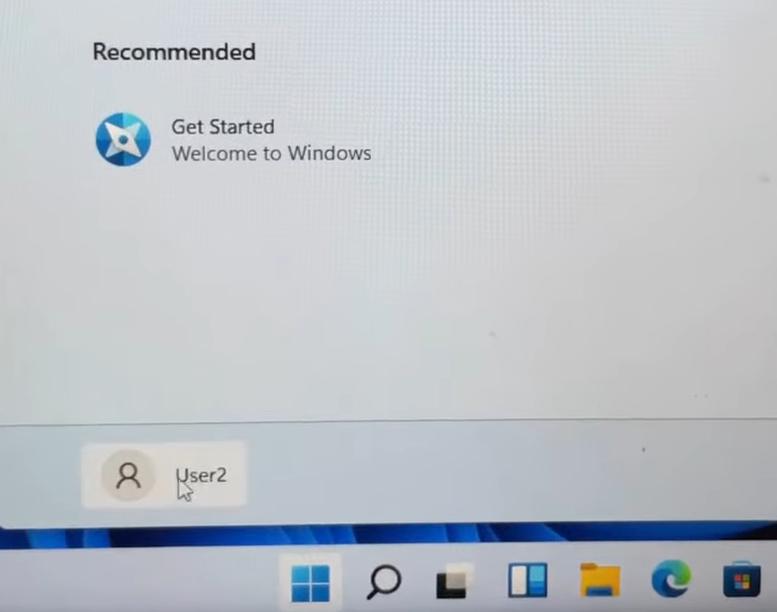
13. For signing in to the new user credentials, right-click on the Windows icon. Here, you can see User2. To sign in, you can either click on User2 or click on Sign out.
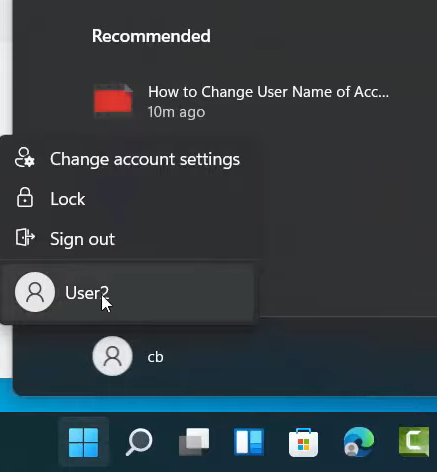
13. I am going to click on Sign out. It will sign out. Once you are signed out or logged out of your account, you will be able to see 2 user accounts.
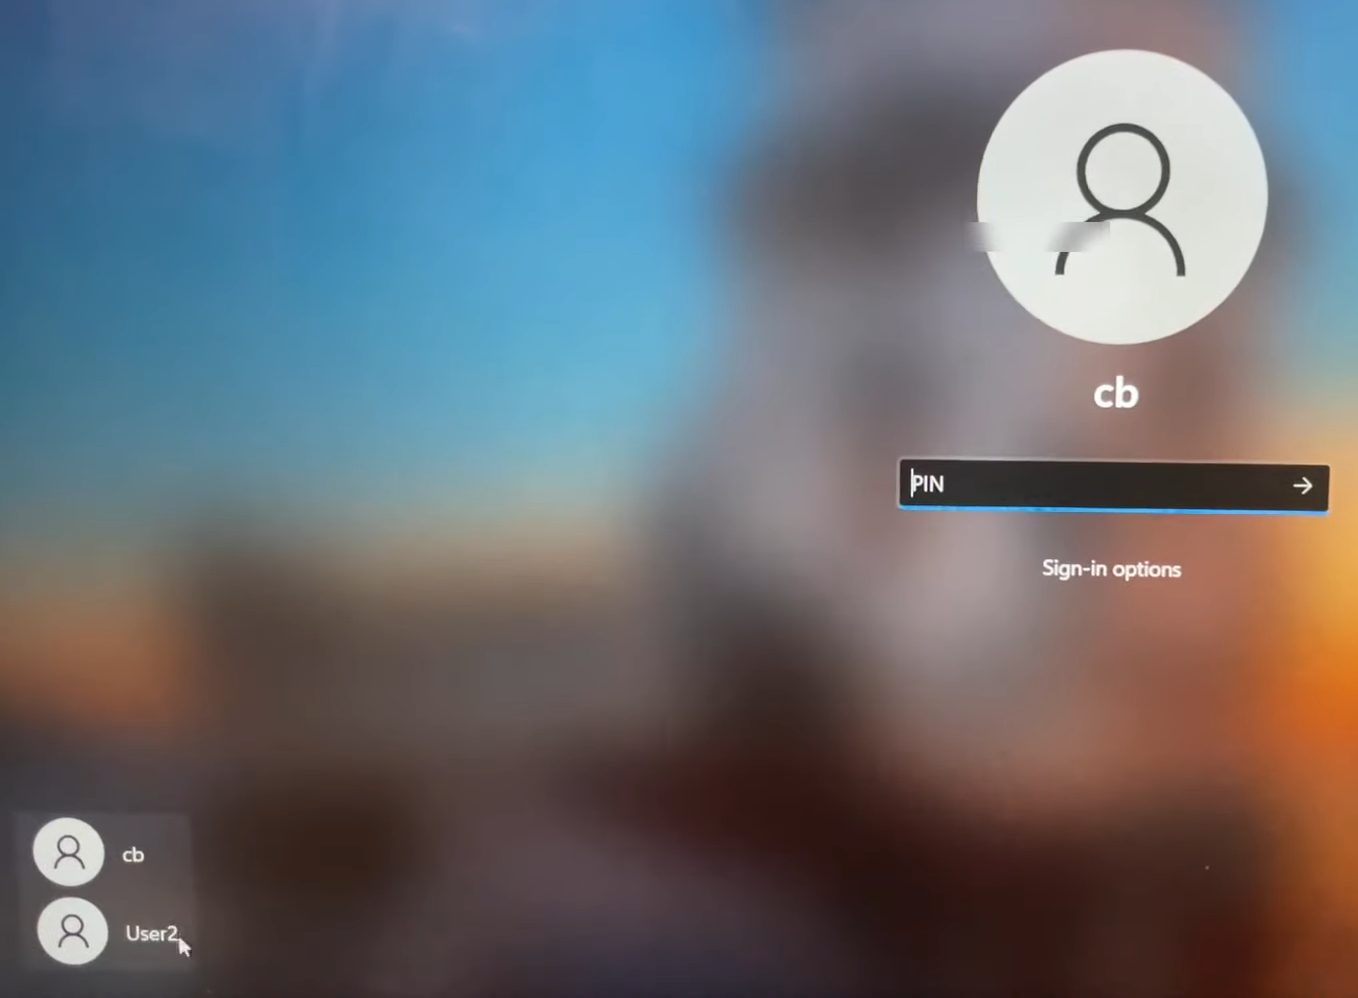
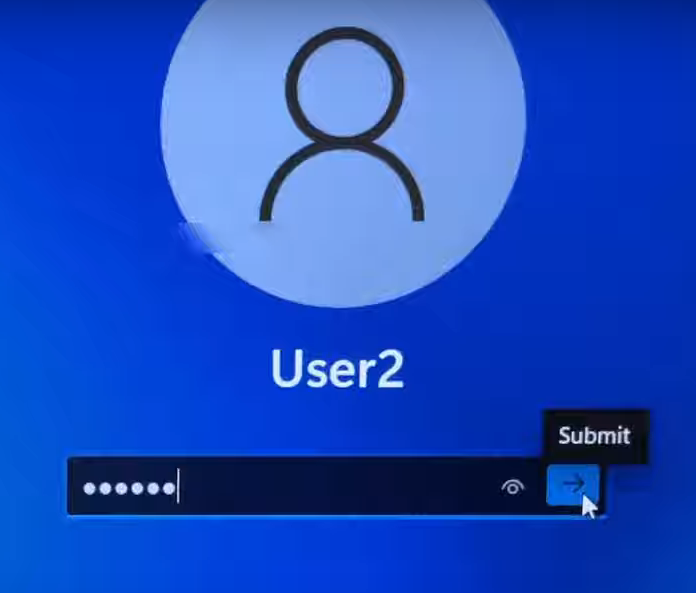
14. Click on the account User2. Enter your password and press the arrow.
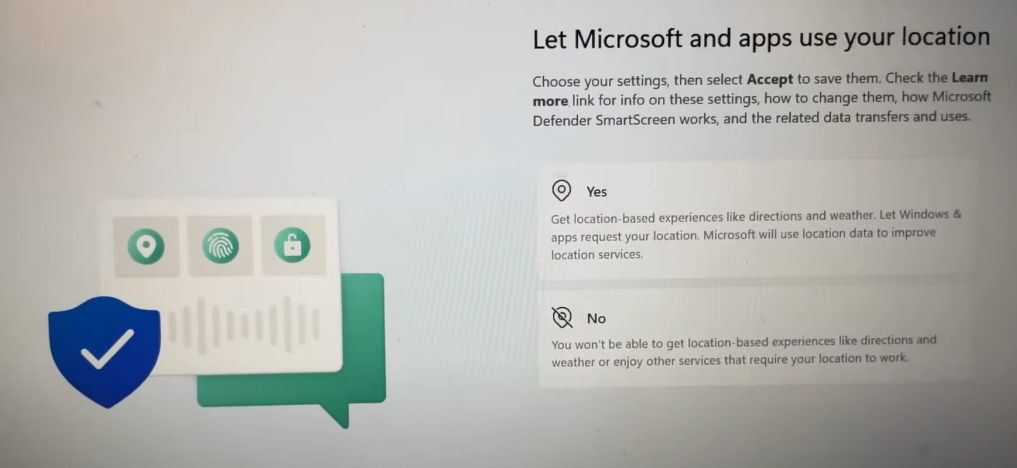
15. It will log in to the new user account. At this point in time, it will take some time to create a new user account.

16. Now, it says Let Microsoft and apps use your location. If you are okay with this, then click on Yes. If you don’t want, then click on No. I am going to click on No. Then, click on Accept.
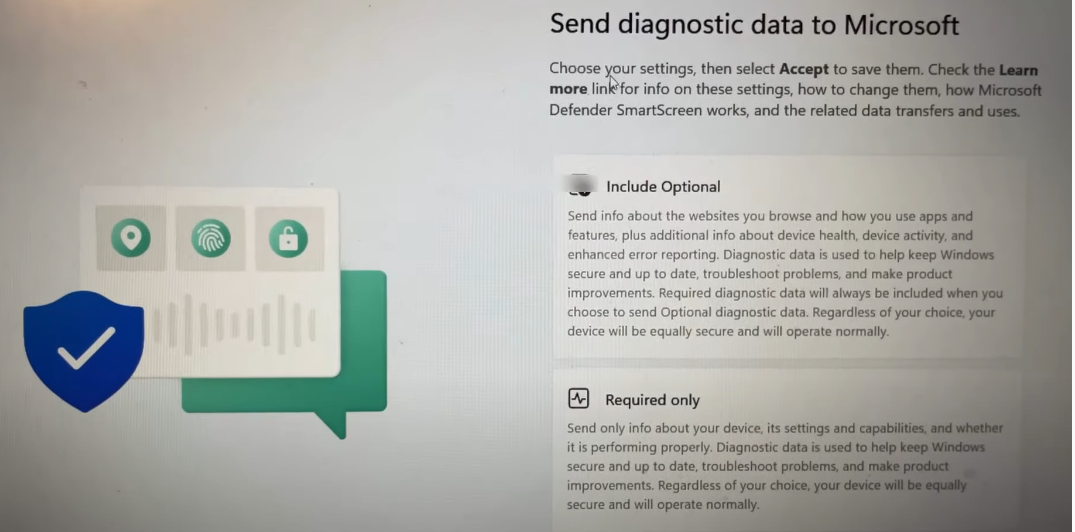
17. Now, you can see Send diagnostic data to Microsoft. Here, you have two options. You can click on any one of them. I am going to click on Required only. Then, click on Accept.
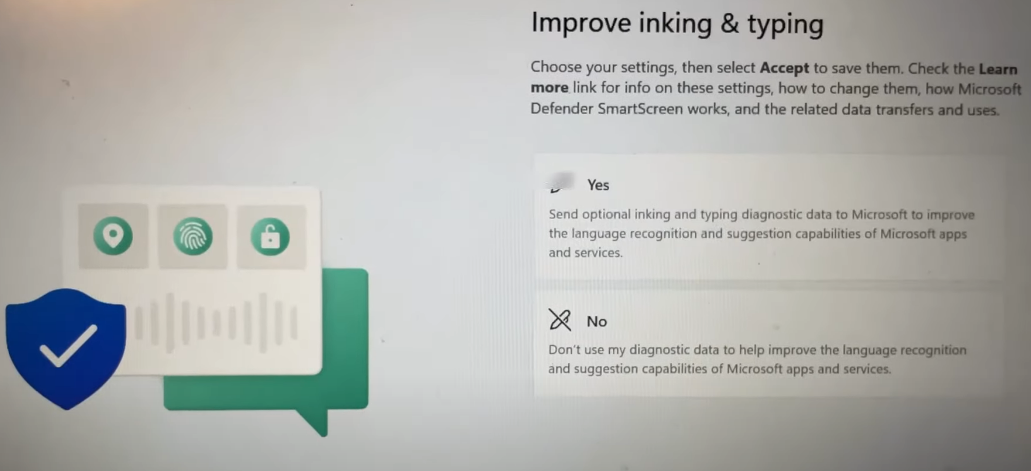
18. Now, it says Improve inking & typing. You have two options. You can click on any one of them. I am going to click on No. Then, click on Accept.
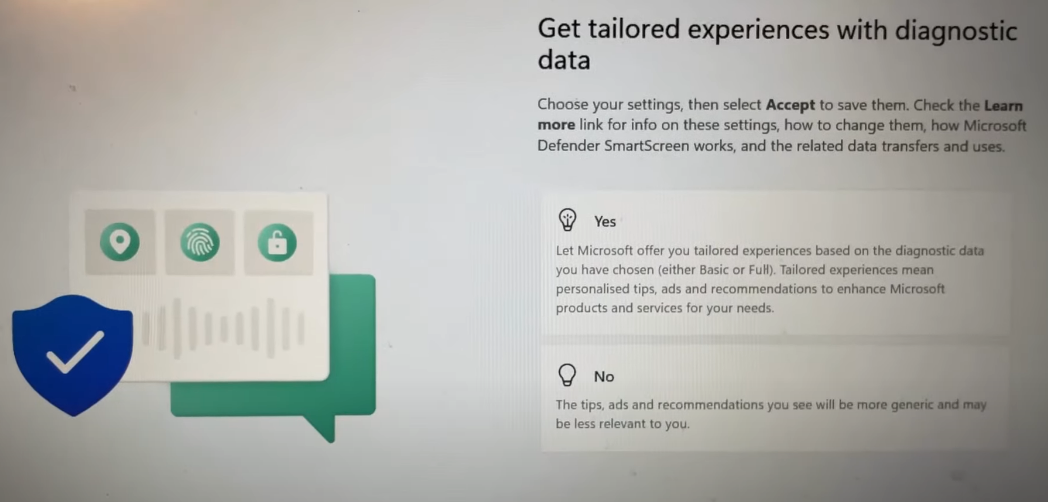
19. Now, it says Get tailored experiences with diagnostic data. You can either click on Yes or No. I am going to click on No. Then, click on Accept.
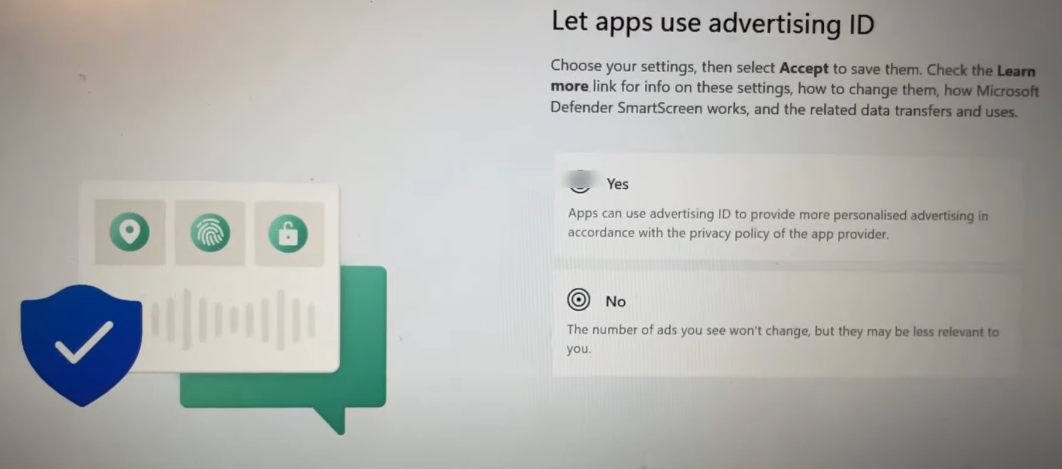
20. I am not going to accept anything. I am simply going to click on No and Accept.
21. Now, you are logged in. Right-click on the Windows icon. As you can see, you are logged in with your new user account. If you want to log in with your other account, then you have to click on that account, it will log out from your new user account, and will ask you to enter your password.
22. This is how you can log in with your main account.

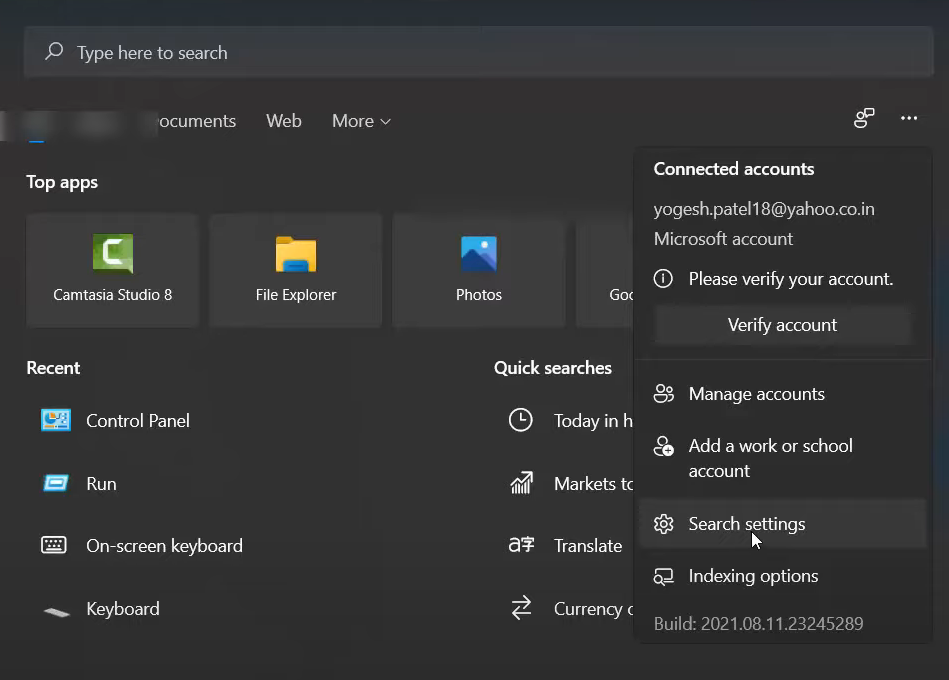
23. There are other ways available to reach settings. Click on the 3 dots on the left side after opening the search bar. A list of options will be provided. You need to click on the Search Settings option. It will open the settings app. You have to follow the same steps mentioned above.
These are the steps for creating a new user account in your Windows Operating System. In this way, you can create as many accounts as you want.
Leave a Reply