
In this blog post, I will give a detailed view of fixing the windows 11 error.
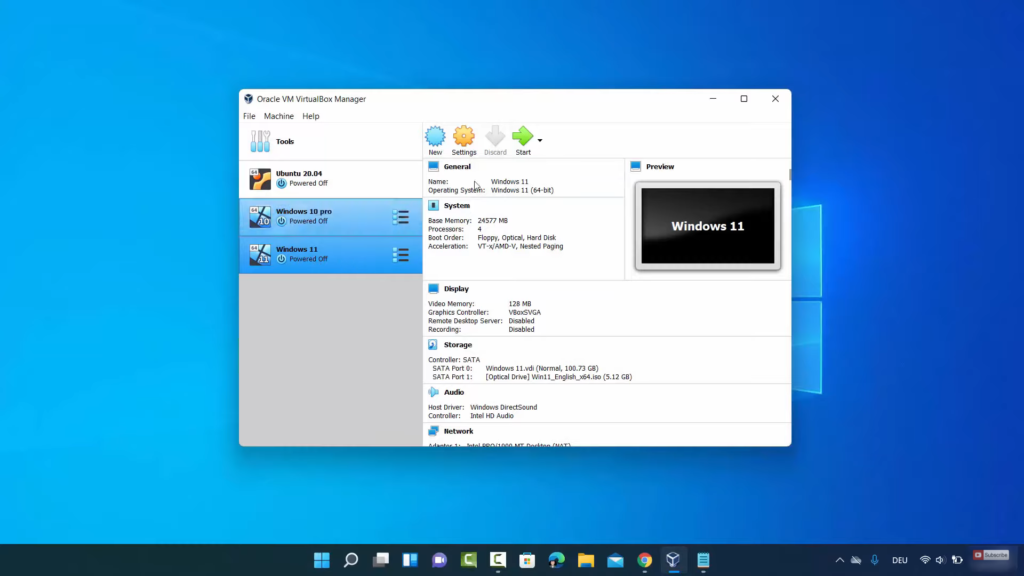
1. You need to click on Windows 11 and click on Start.
2. When you see this window, you need to press Shift + F10.
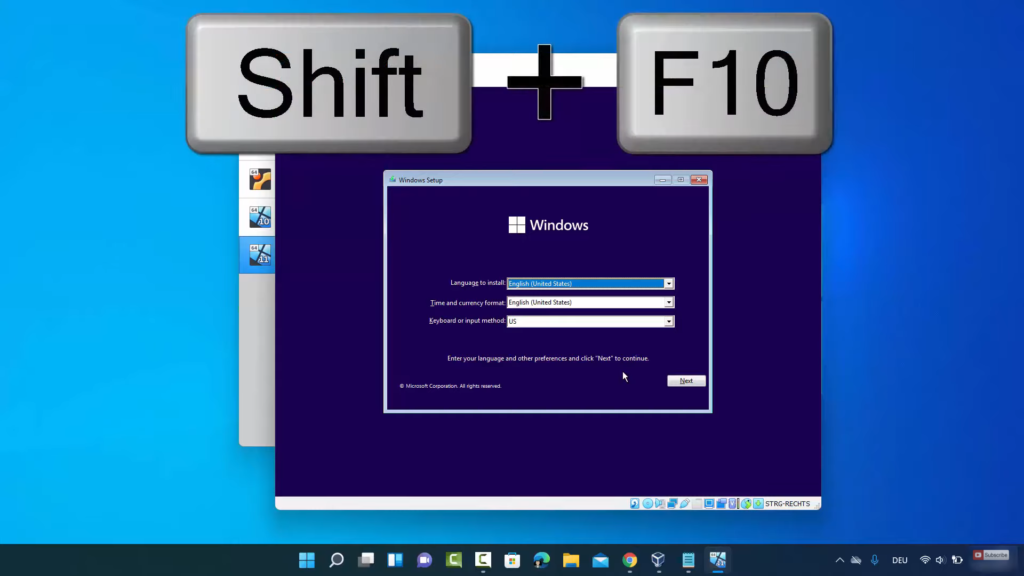
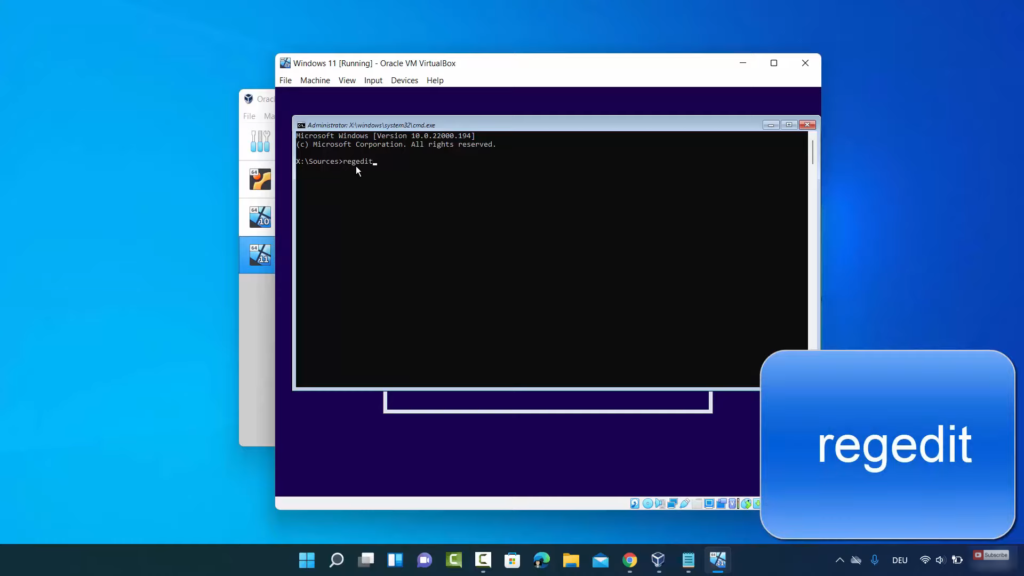
3. It will open this command line. You need to type regedit and press enter.
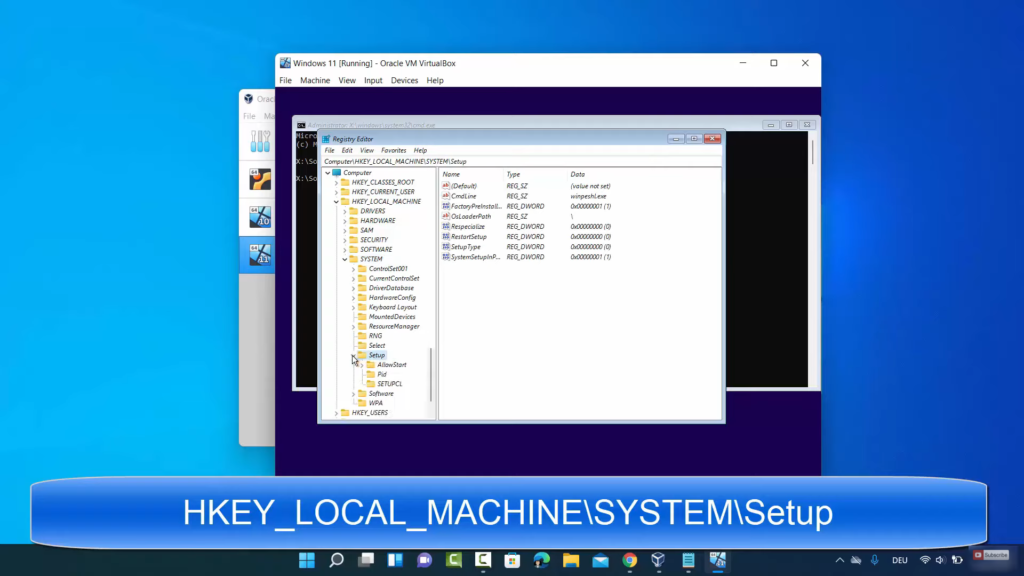
4. It will open this kind of window. Here, you need to choose the setup which is provided in the image below. Then expand the system option. Then, expand the setup option.
5. On the setup option, right-click and click on New and click on Key.
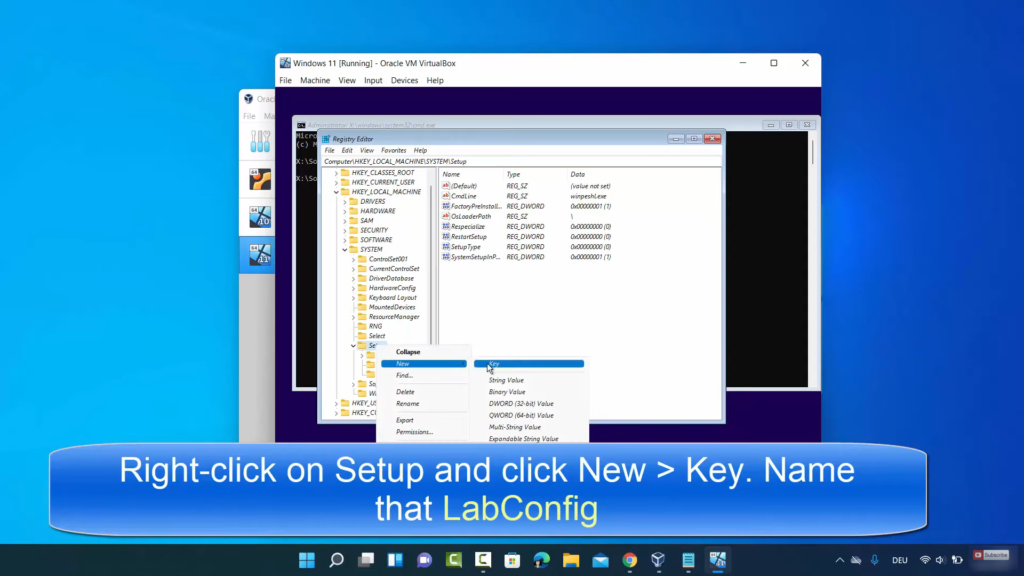
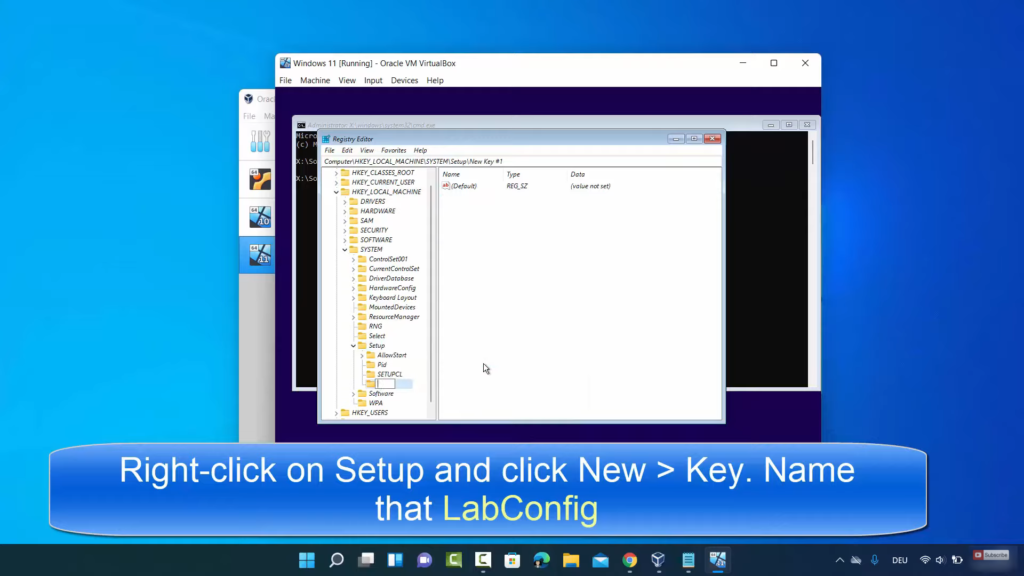
6. Now, name it as LabConfig. Then, press enter.
7. Once you have created this LabConfig key, click on it. Then, right-click on the right pane, click New, and select DWORD (32-bit value).
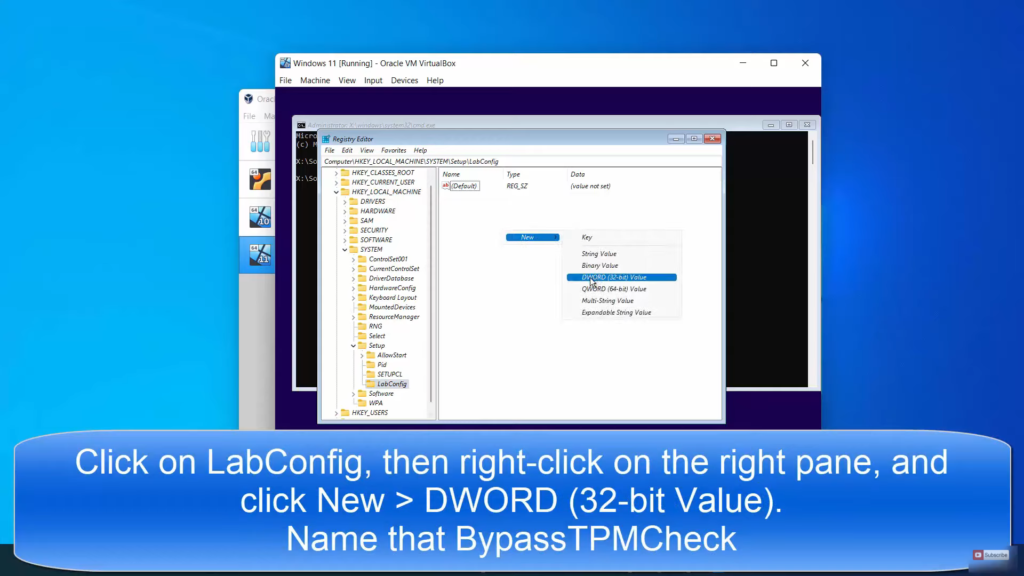
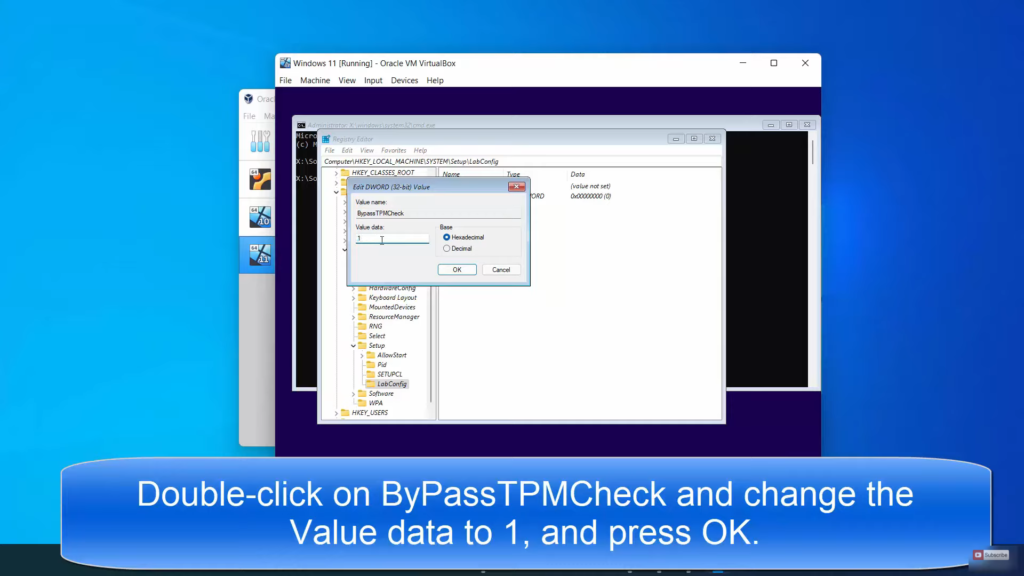
8. You need to name this value as BypassTPMCheck. Then, press enter. Once the key is created, right-click on it and click on modify.
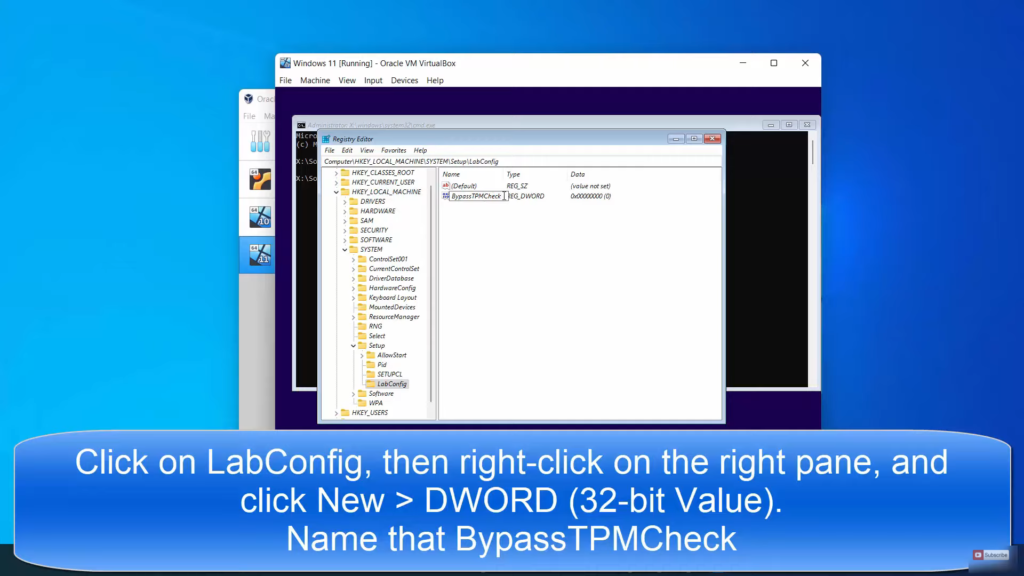
9. In the value data, you need to change it to 1. Then, press Ok.
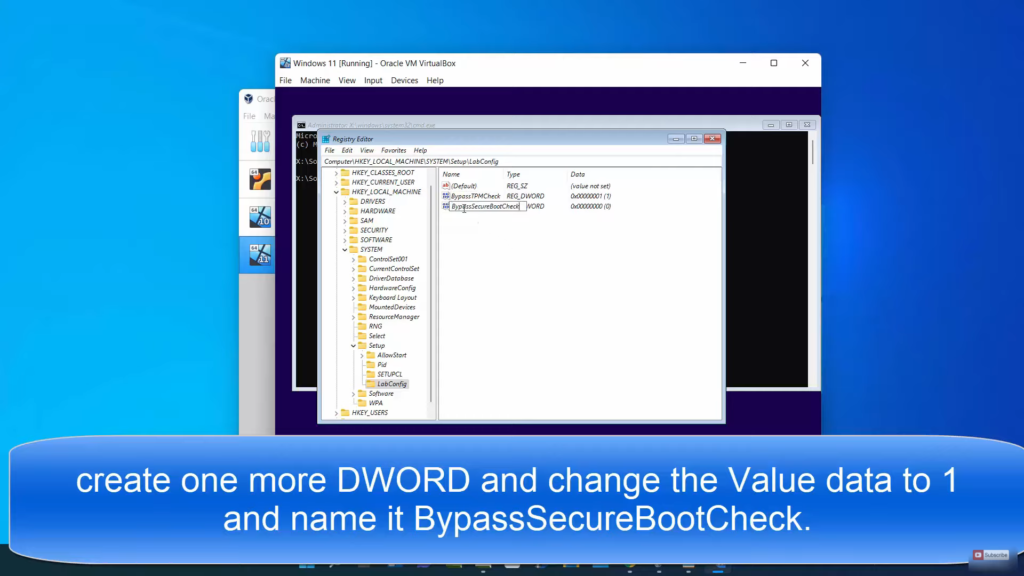
10. Once this is done, right-click on the window once again, click New, and select DWORD (32-bit value) once again.

11. This time you need to name it as BypassSecureBootCheck. Once the key is created, right-click on it and click on modify.
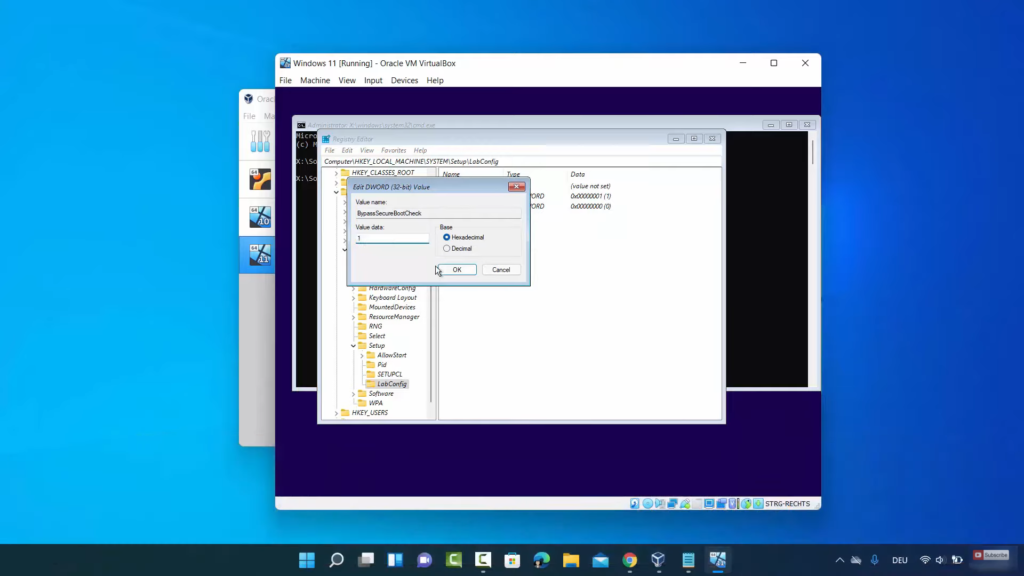
12. In the value data, you need to change it to 1. Then, press Ok. You can close this window now.
13. Here, you can start the installation process. Here, you need to choose the keyboard input method. Since I have a German keyboard layout I am going to choose German. Then, click on Yes.

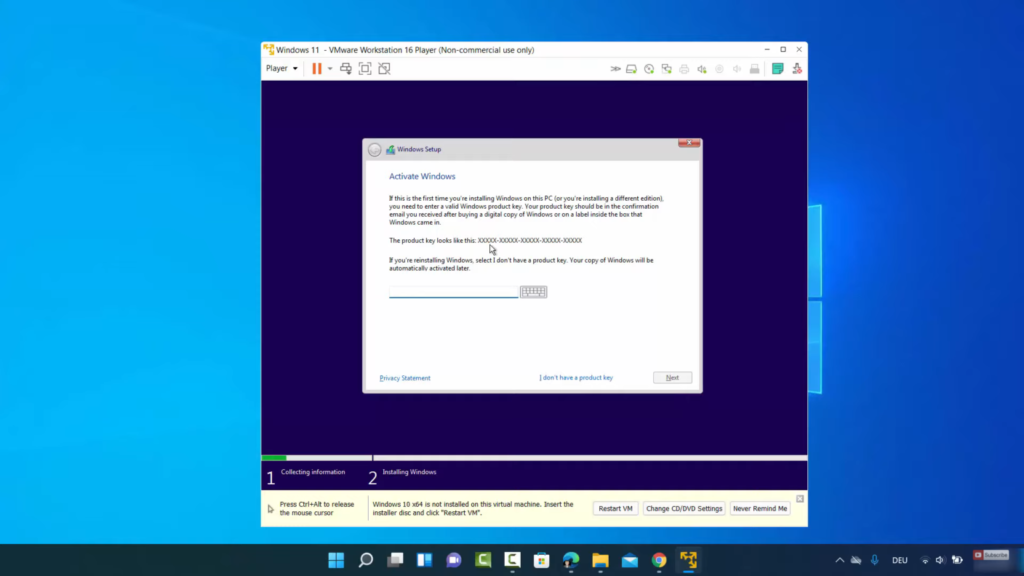
14. In this window, you need to provide the activation key. If you don’t have the activation key, then click on I don’t have a product key. I am going to choose this option.
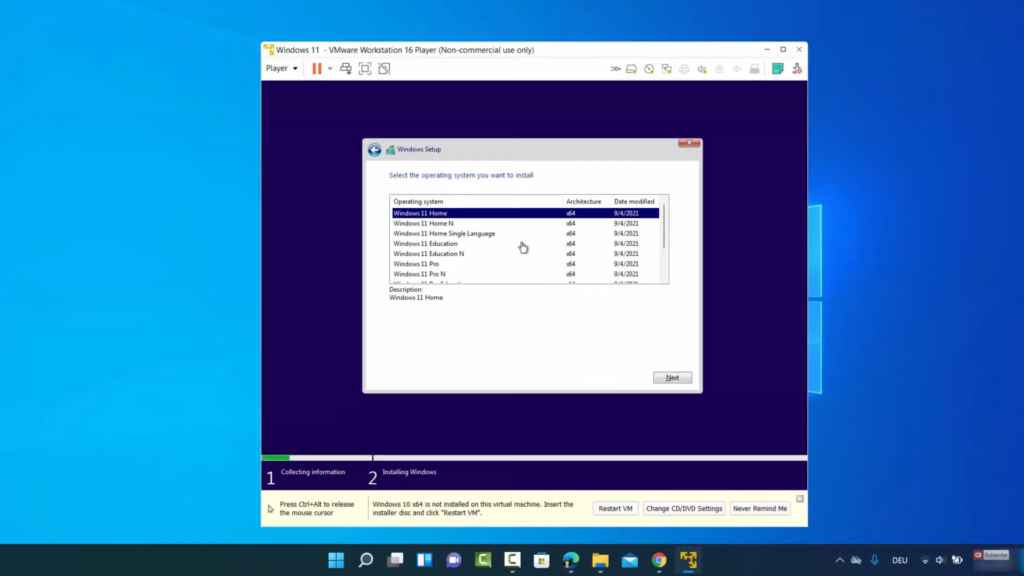
15. Here, you need to choose the type of windows operating system you want to install. I am going to choose Windows 11 pro. Then, click on Next.
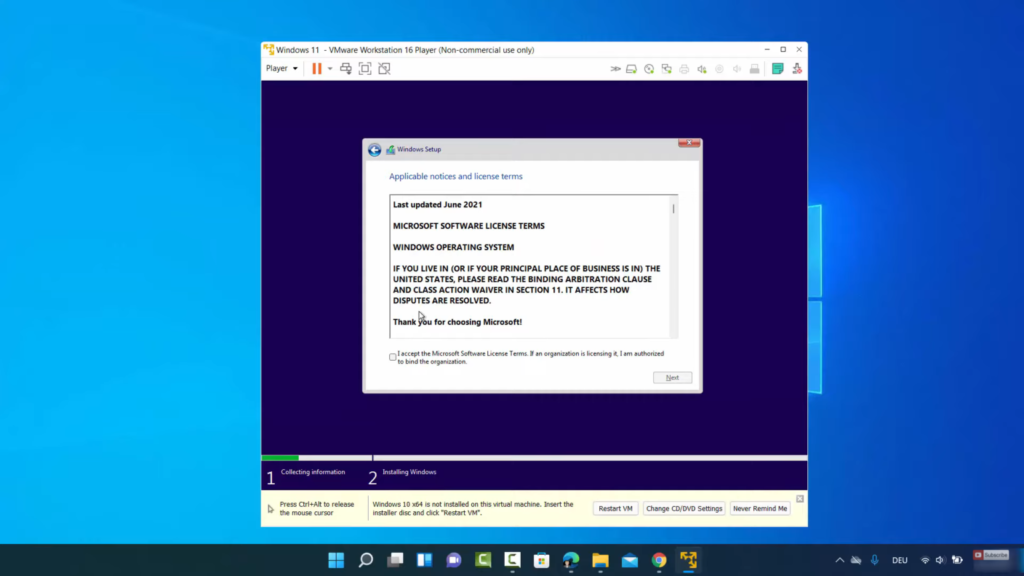
16. In the next window, you need to agree to the license agreement. Then, click on Next.
17. Here, you have two options. I am going to choose the first option.

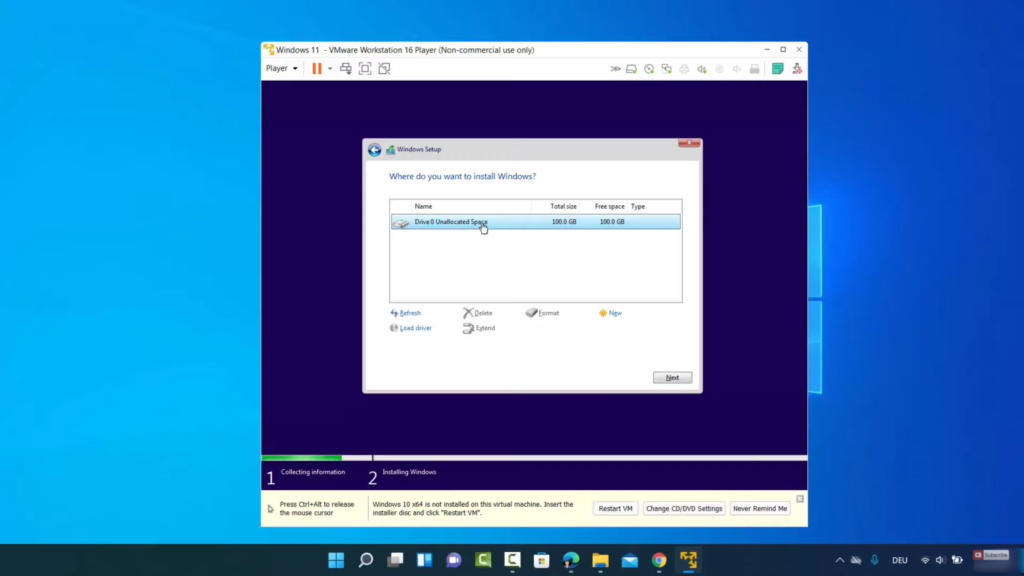
18. Here, you can see one partition which is your main partition. If you want a new partition, you can provide a new partition by clicking on New. Then, click on Next.
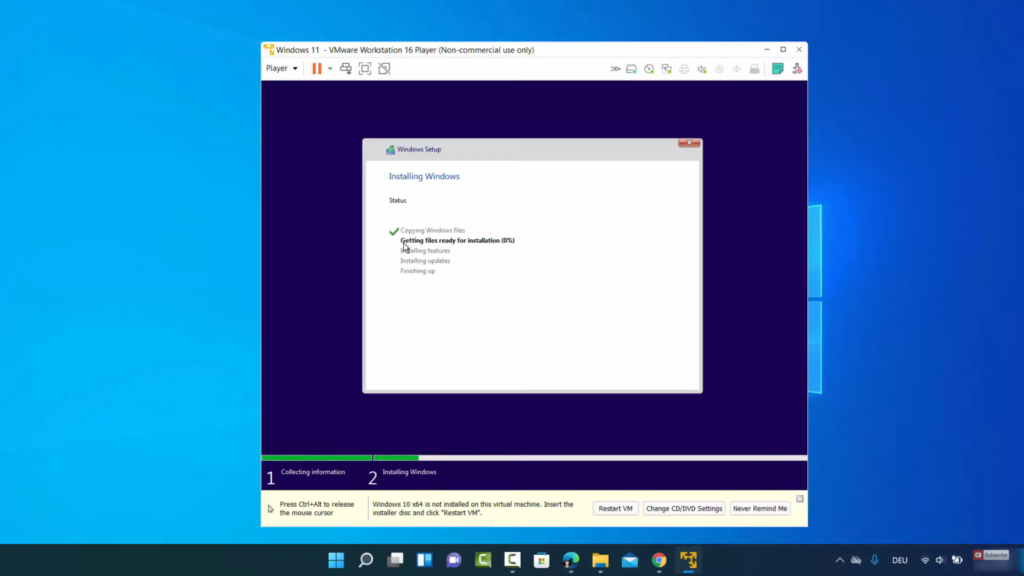
19. Now, you need to wait for the installation process.
20. It will start the services after the installation.
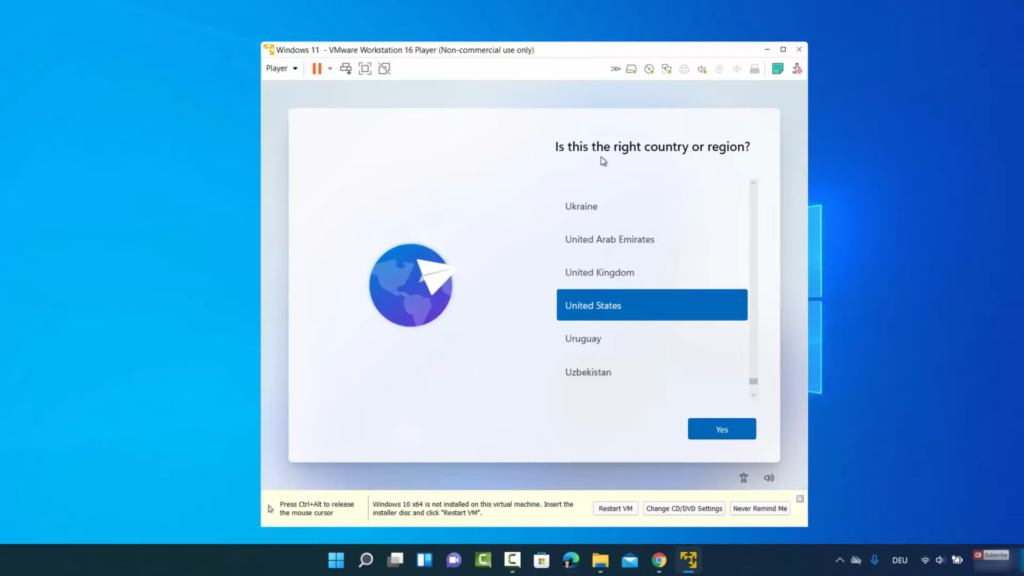
21. Now, you will be able to see the logo and some questions. I am going to leave this question as default. So, click on Yes.
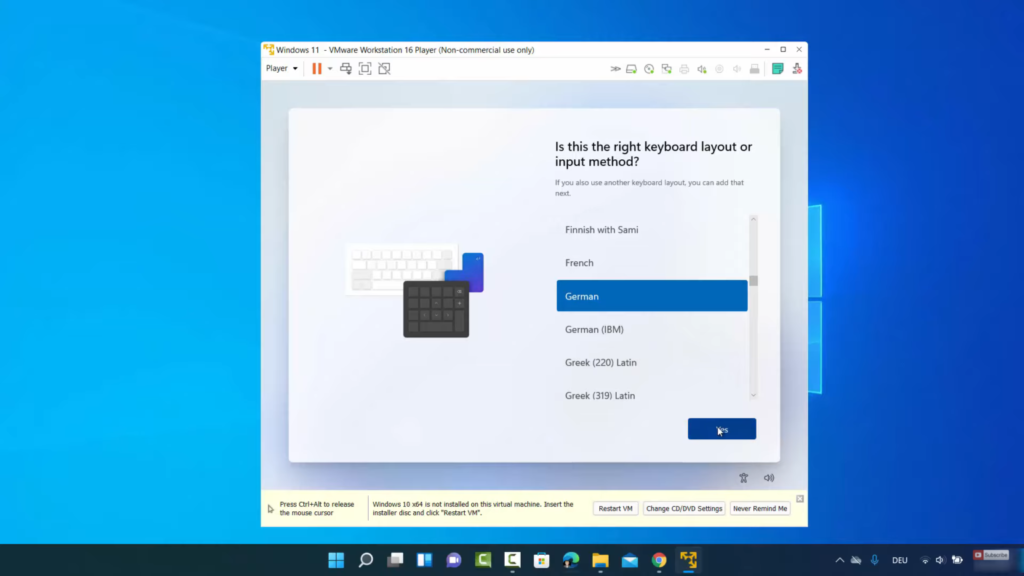
22. Here, you need to choose the keyboard input method. Since I have a German keyboard layout I am going to choose German. Then, click on Yes.
23. For the next window, I am going to click on Skip.
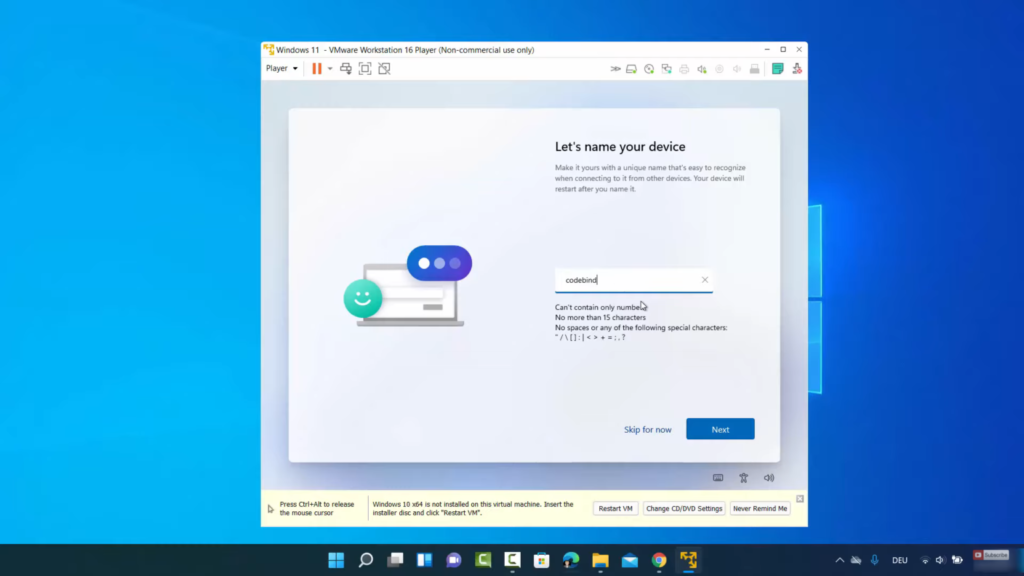
24. In this window, you need to provide a name for your device. I am going to name it codebind. Then, click on Next.
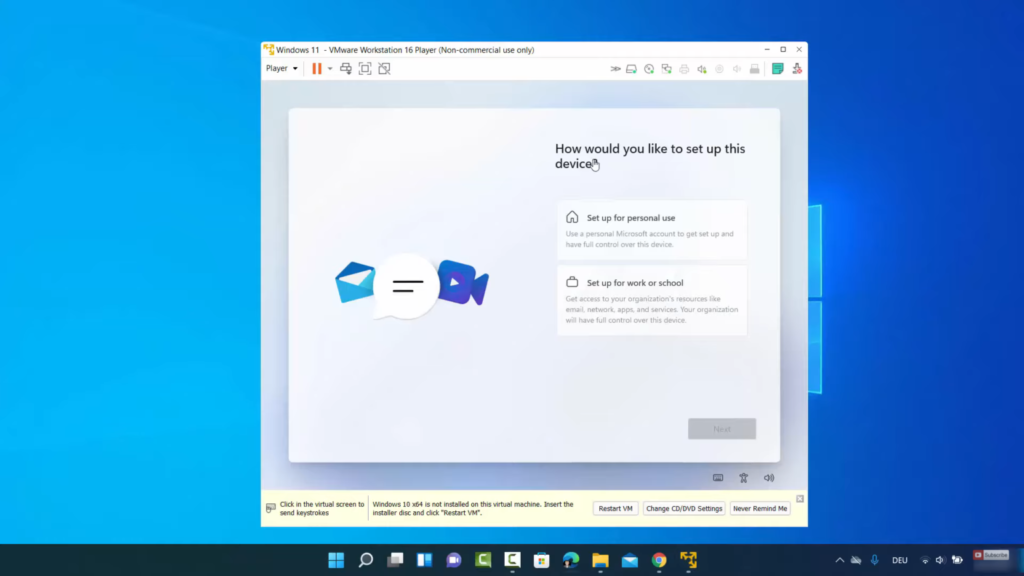
25. In the next window, I am going to choose the first option. Then, click on Next.
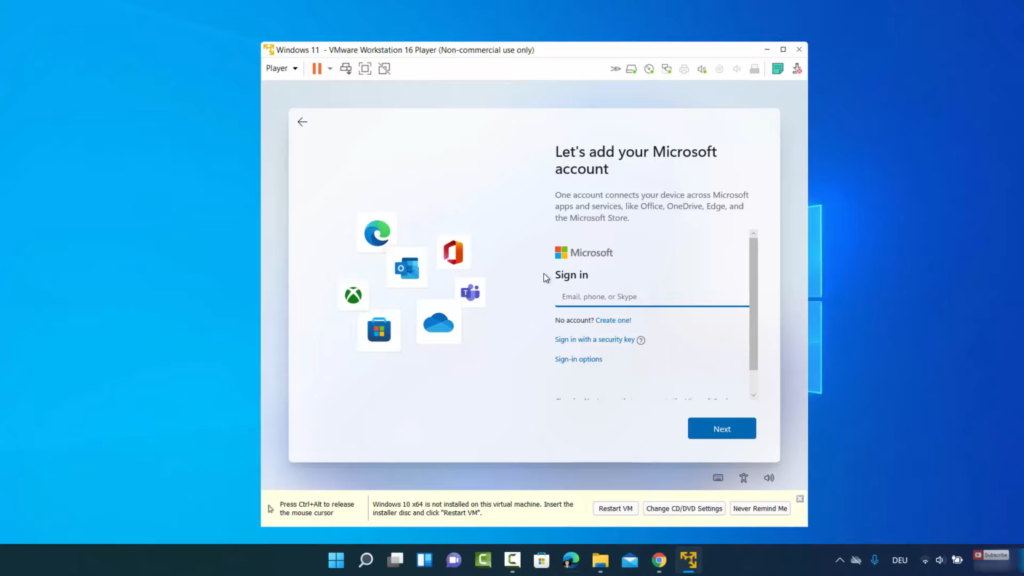
26. At this point, you need to add your Microsoft account. I am going to select the Sign-in options.
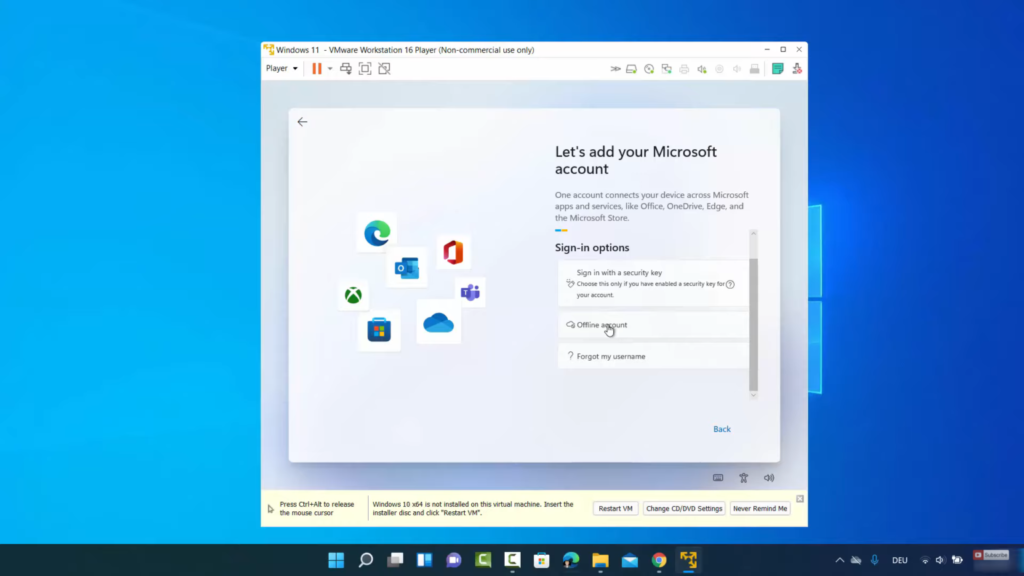
27. Here, I am going to choose an Offline account.
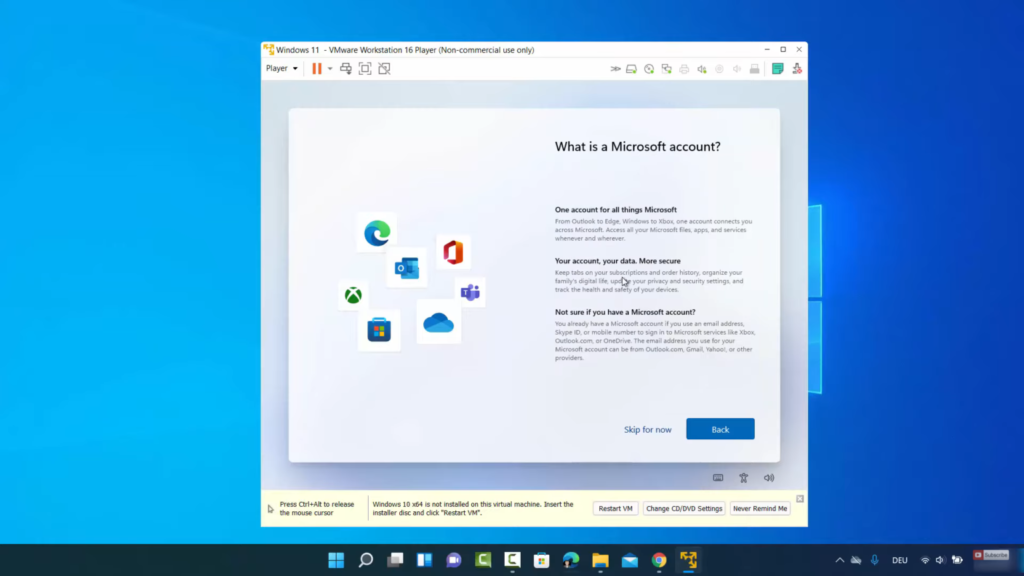
28. In the next window, I am going to select Skip for now.
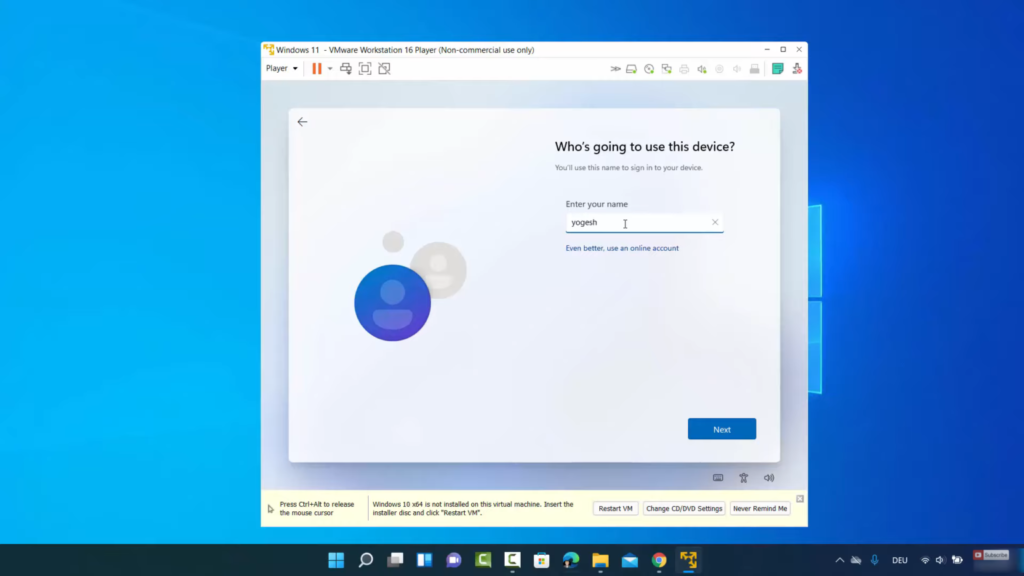
29. In this window, I am going to give my name. Then, click on Next.
30. Here, you need to provide a password. Then, click on Next.

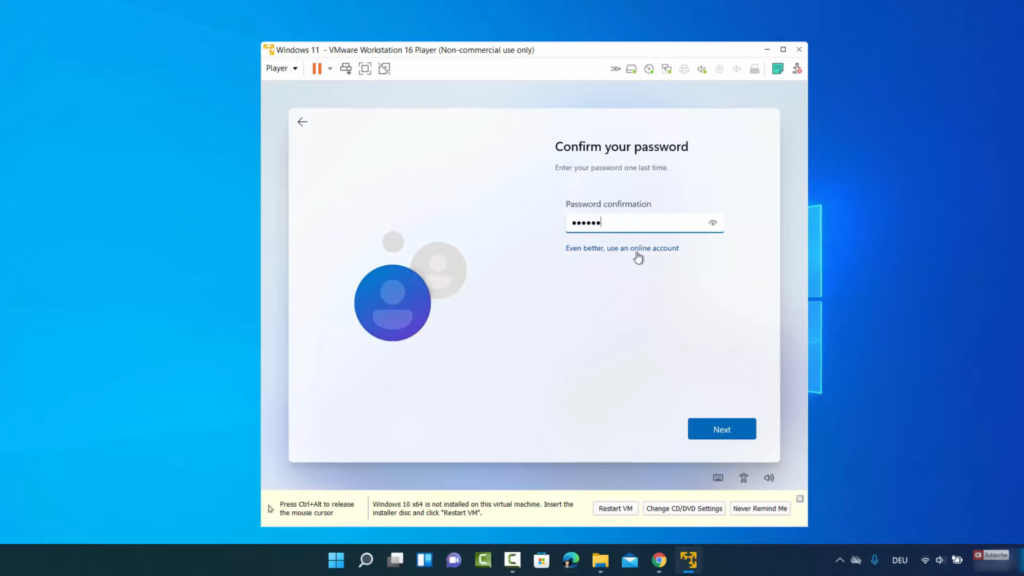
31. Here, you need to confirm your password once again. Then, click on Next.
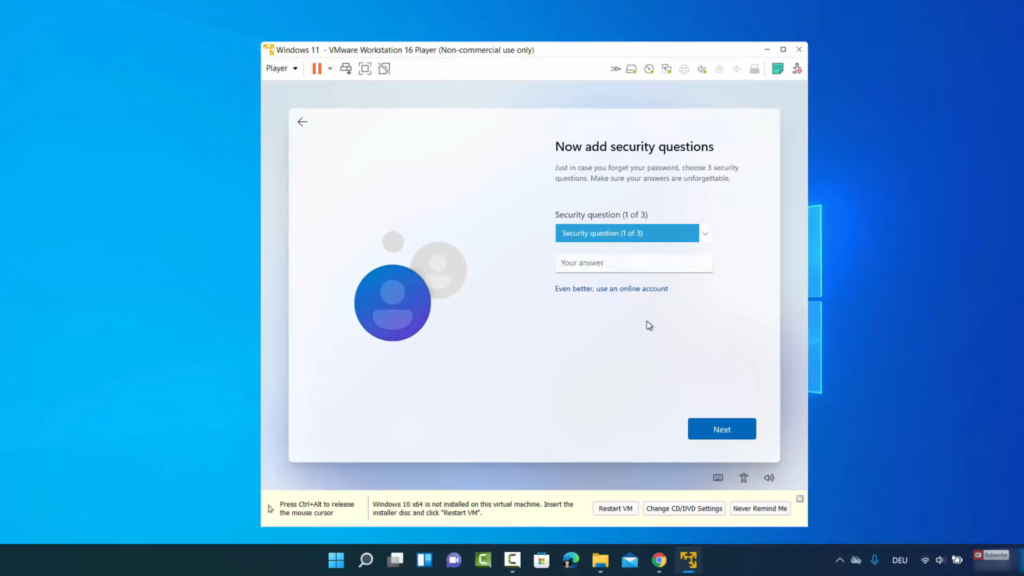
32. Here, you need to provide the answer to the security questions. You can choose any question and then provide an answer for that. Then, click on Next. You need to do the same for the next two windows as well.
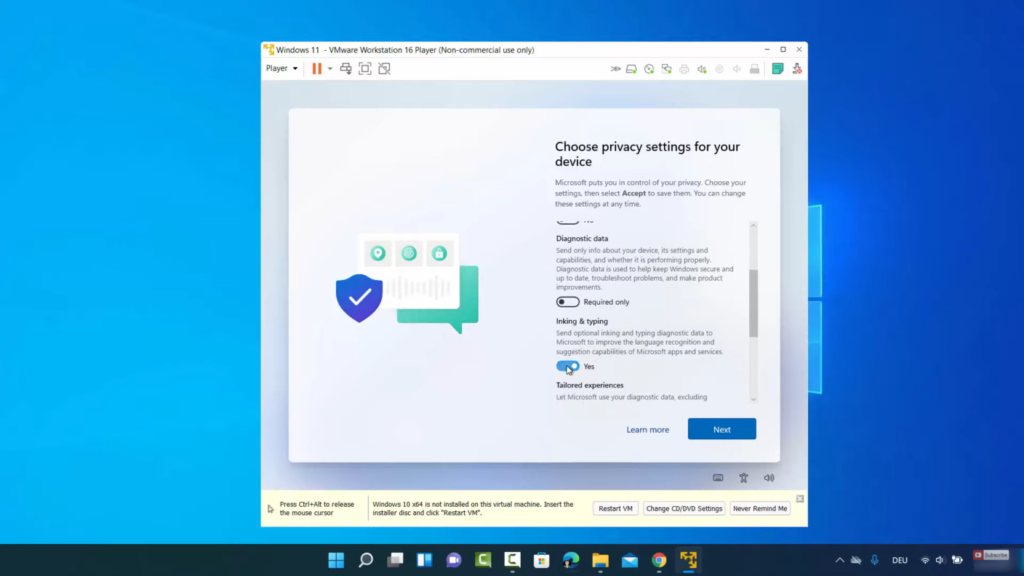
33. In this window, you need to choose privacy settings for your device. You can unselect or select the options that you want and then click on Accept.
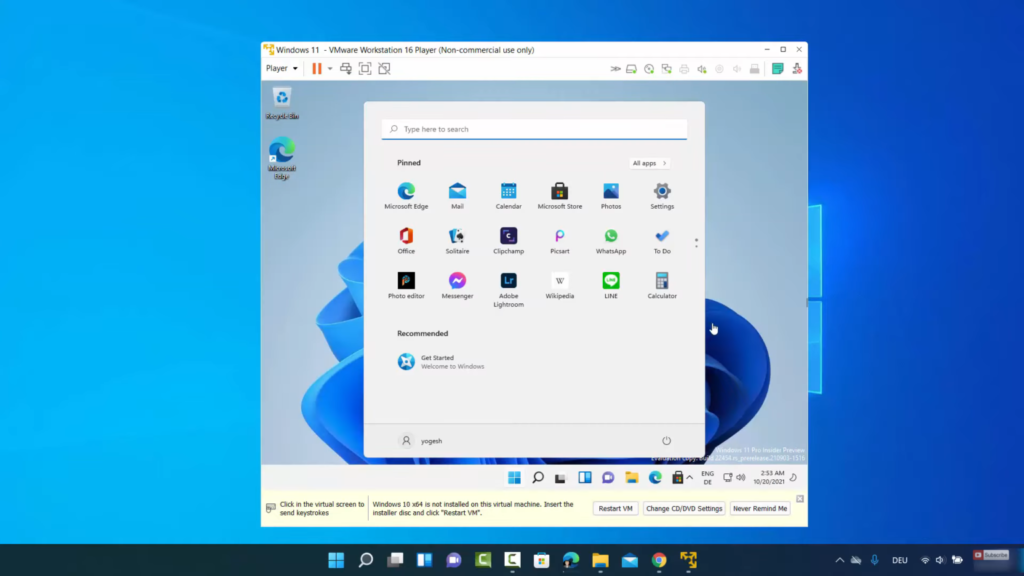
34. Now you will be logged in to your Windows 11 Operating System.
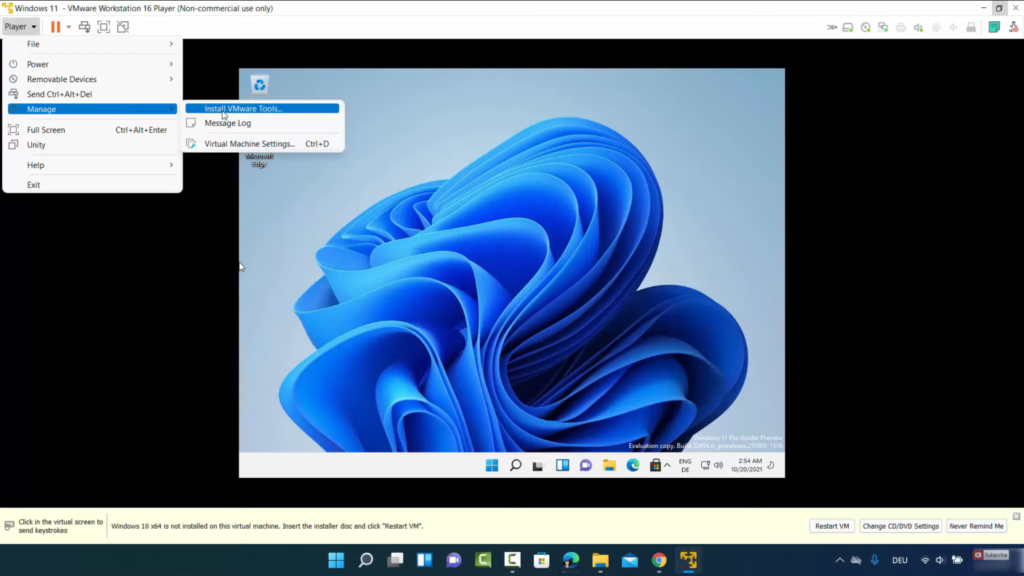
35. Now, when I try to expand it, it is not expanding. To solve this problem, you need to install VMware tools. Click on Player. Then, click on Manage and click on Install VMware tools.
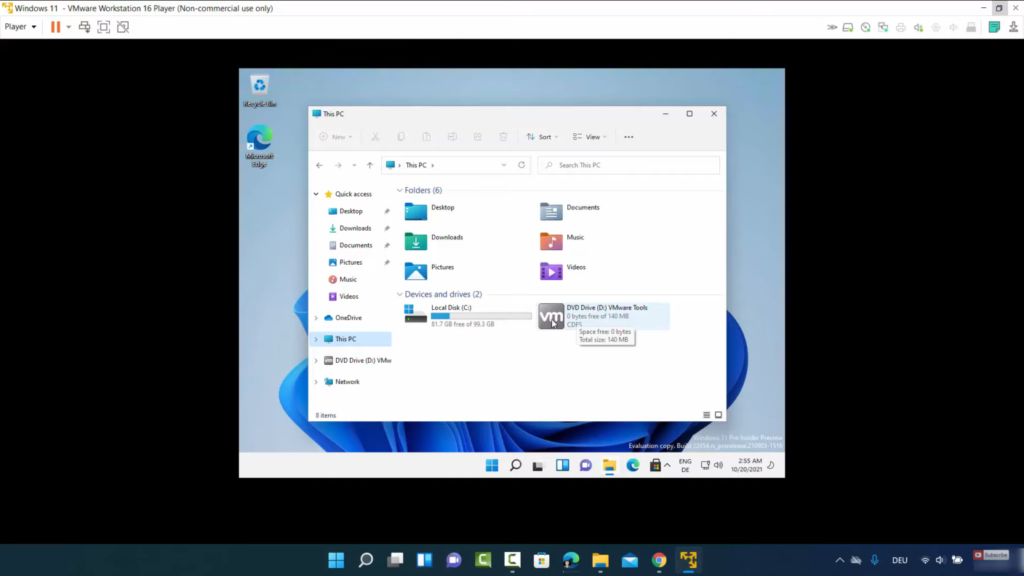
36. Click on File Explorer and click on This PC. You will be able to see the DVD Drive for VMware tools. Click on that option.
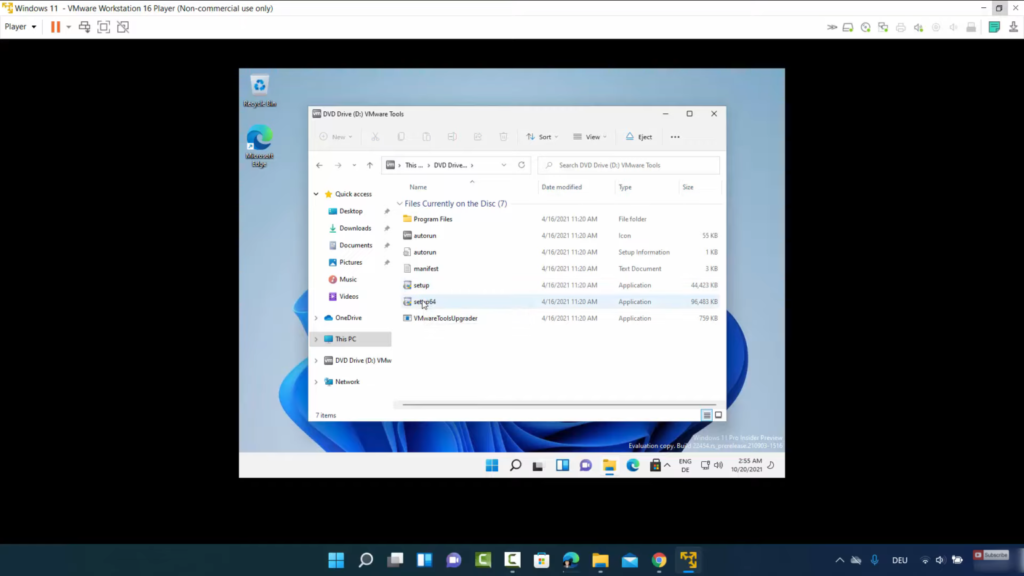
37. Here, you need to click on the Setup64 option.
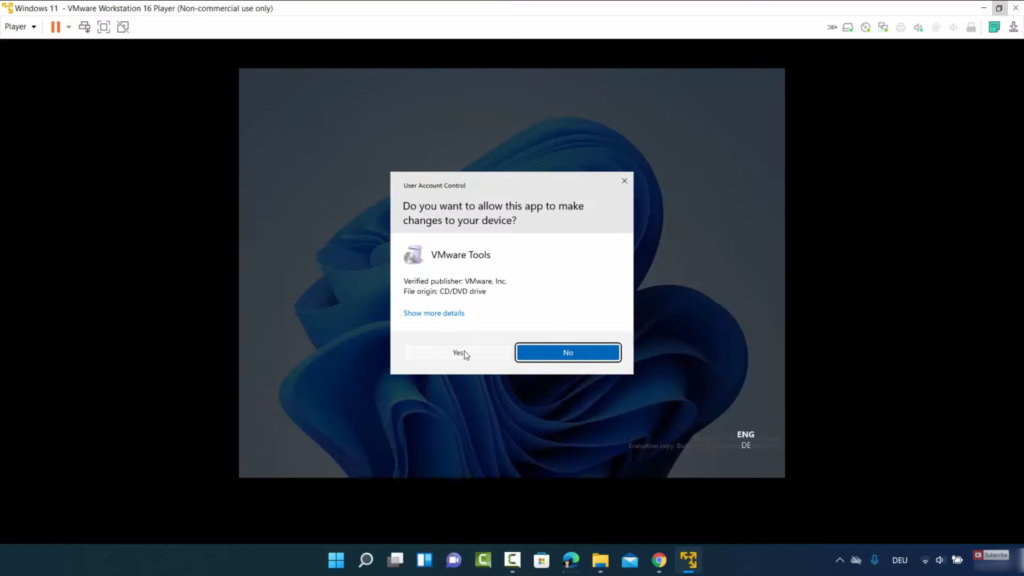
38. It will show a warning. Click on Yes. Then, minimize the window.
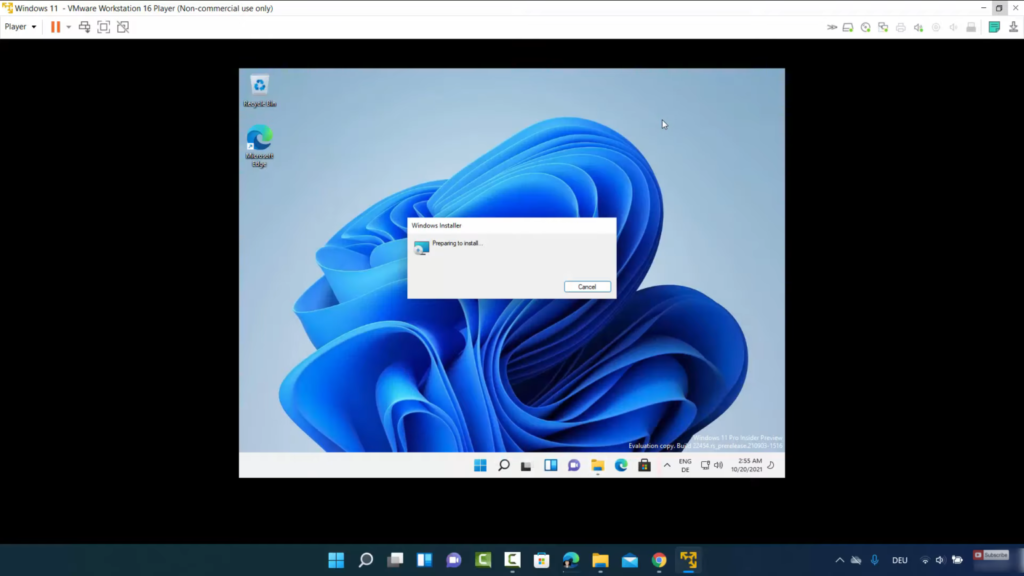
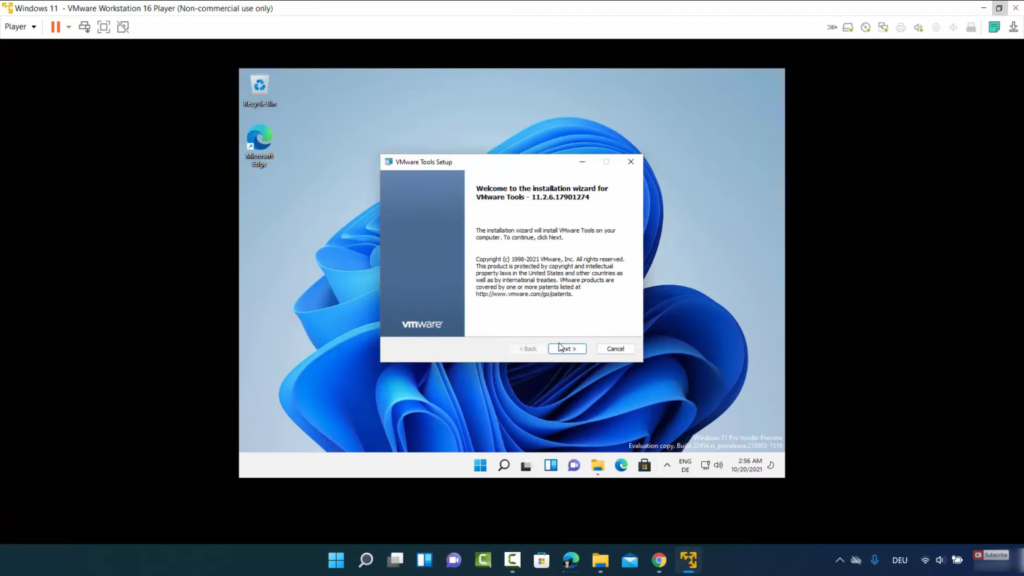
39. It will start the installation process.
40. In this window, you need to click on Next.
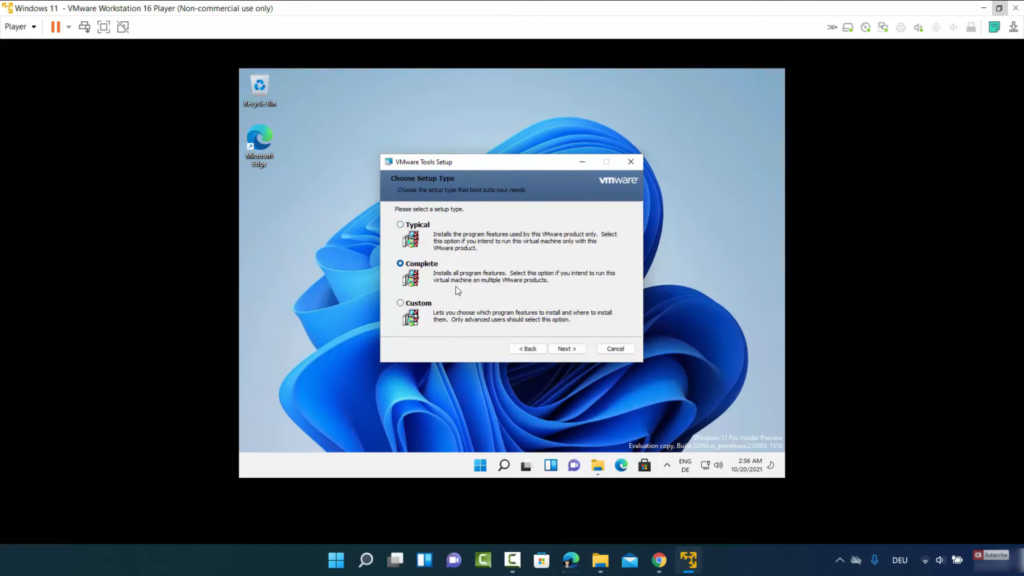
41. In the next window, click on the Complete option. Then, click on Next.
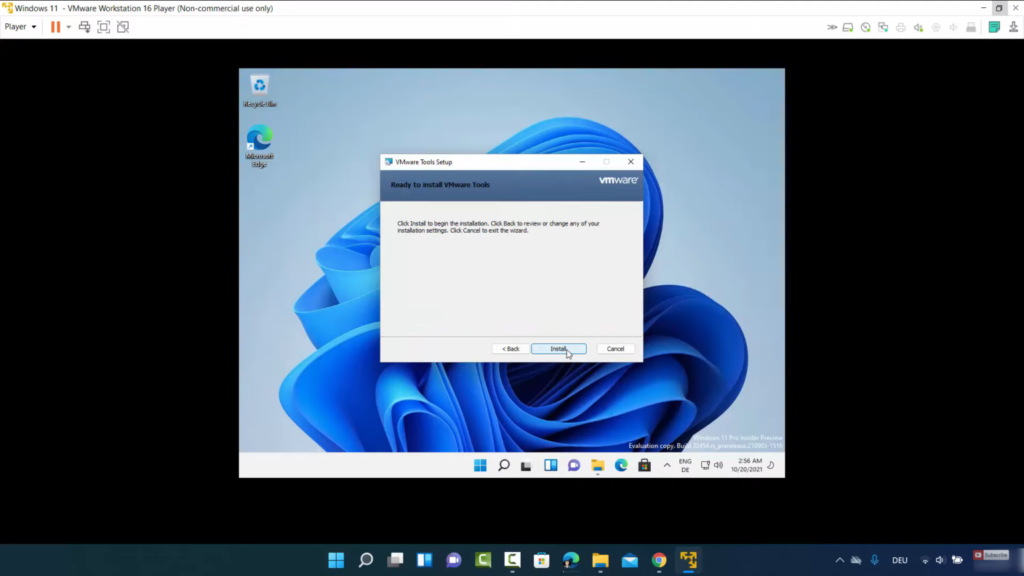
42. Click on Install in the next window.
43. It will install the VMware tools. Then, click on Finish.
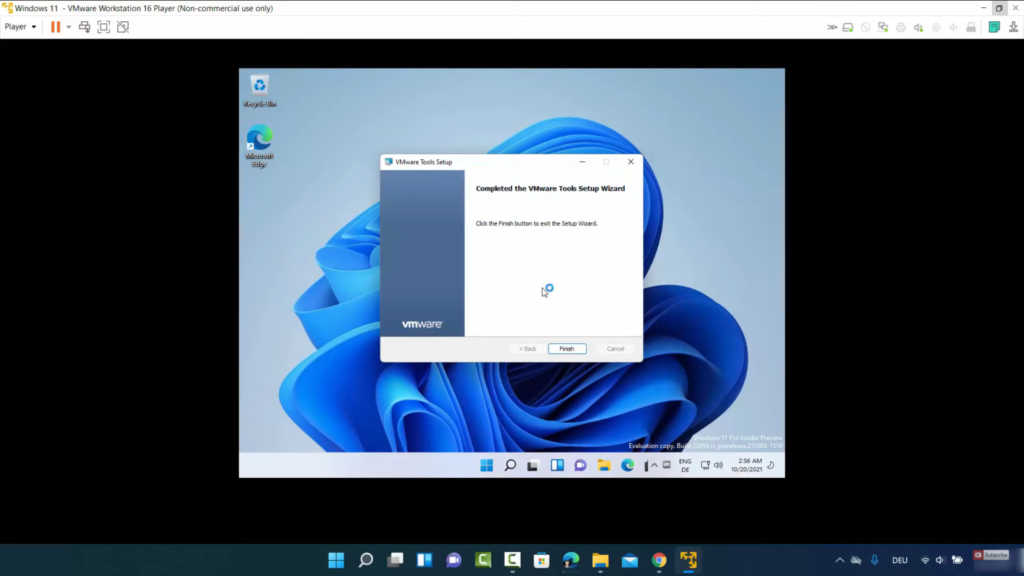
44. It will show a message. Click on Yes.

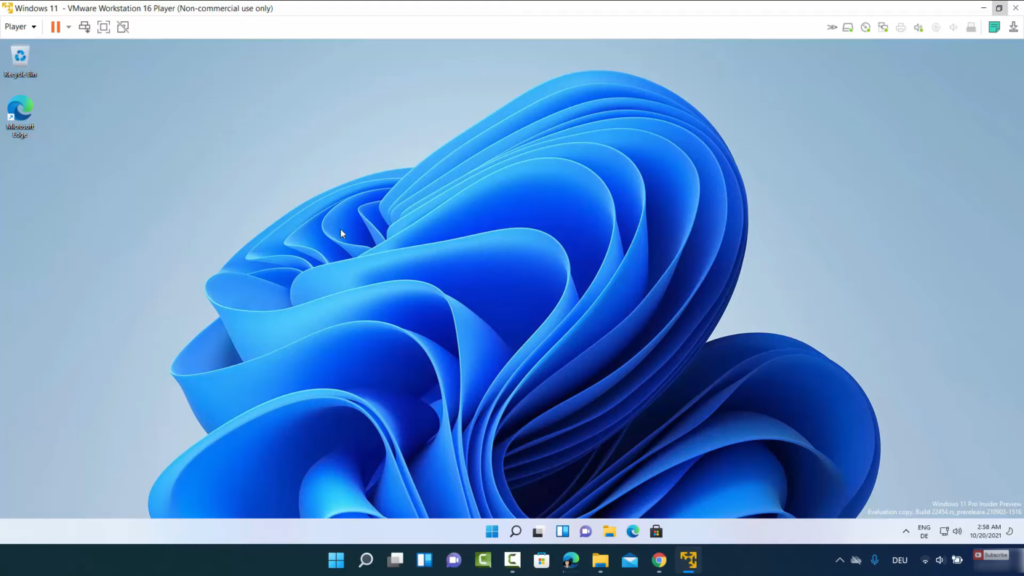
45. It will restart the virtual machine. Now, if you maximize the window, it will be maximized.
These are the steps for bypassing TPM 2.0 and securing boot on VirtualBox for installing Windows 11 Operating System.
Leave a Reply