
In this blog post, I will give a detailed view of fixing the missing connect app in your Windows 11 Operating System.
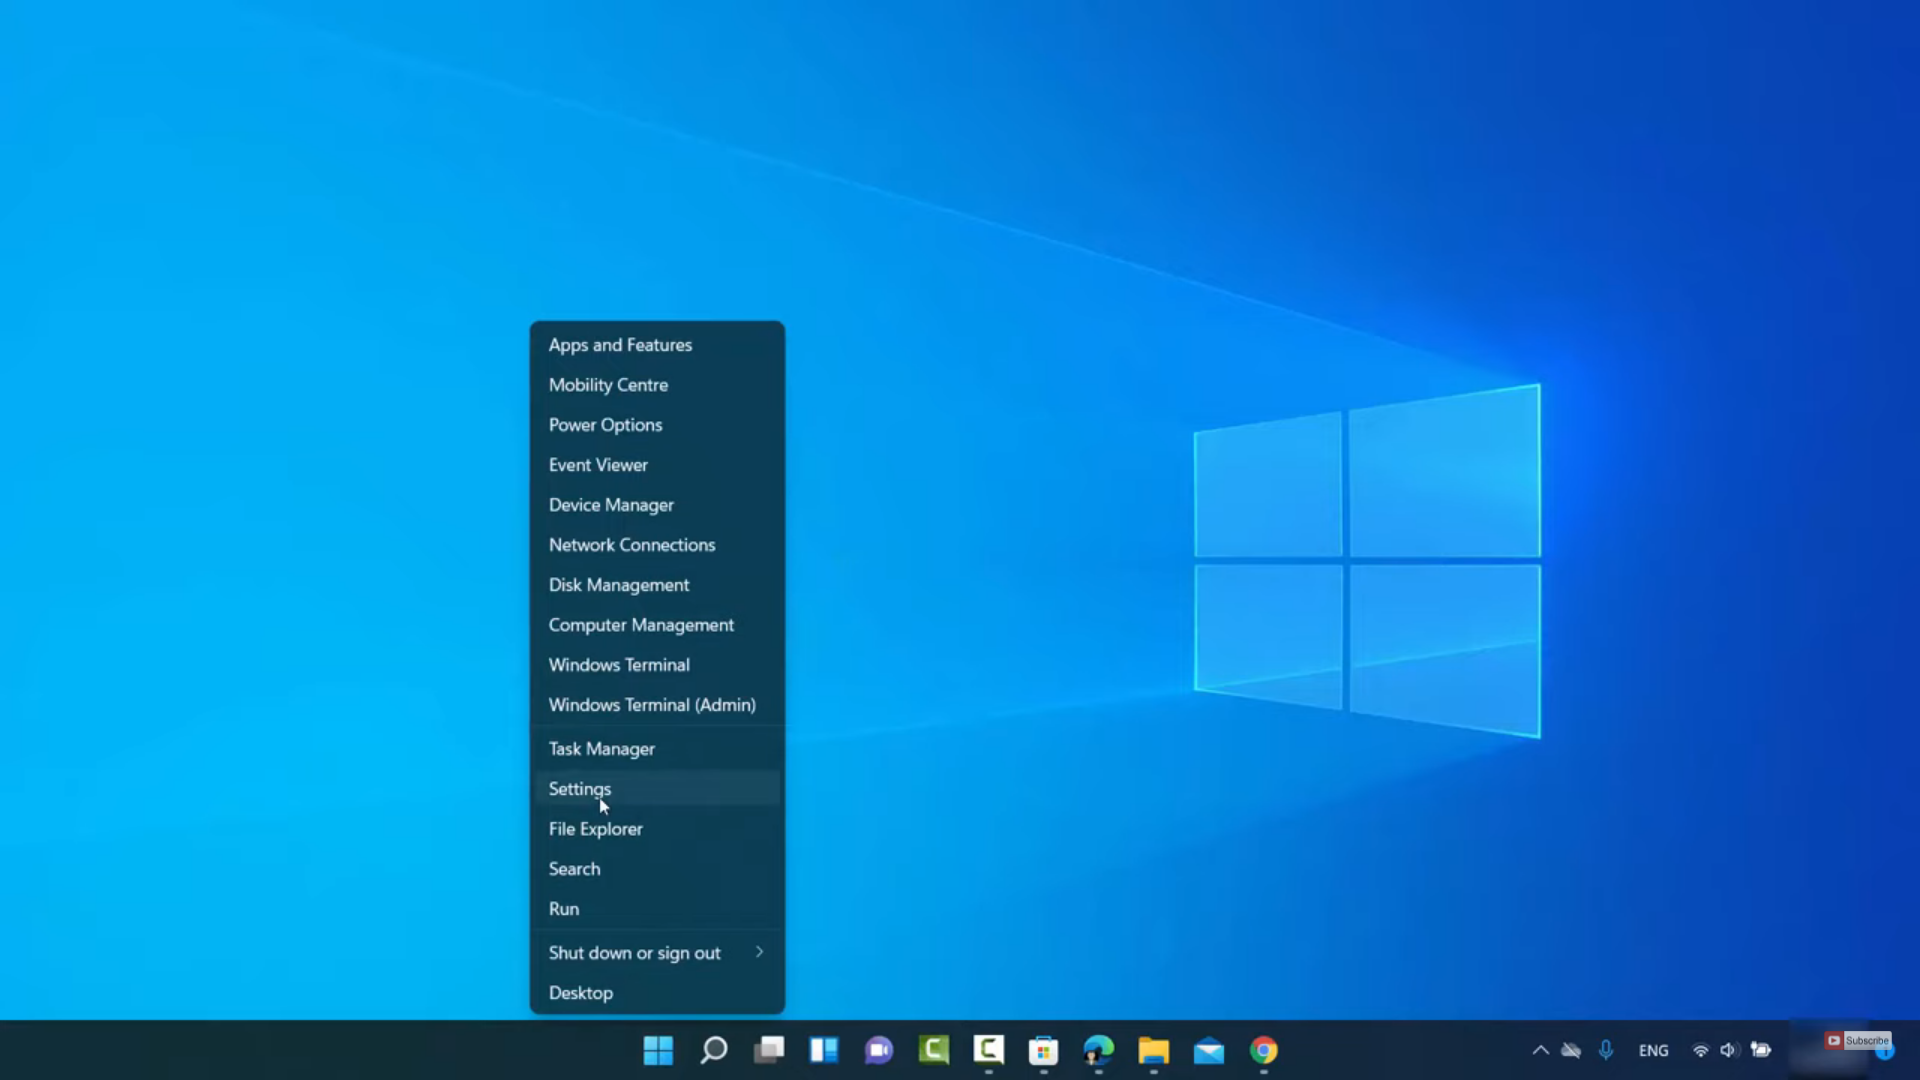
1. Right-click on your Windows start icon and click on Settings.
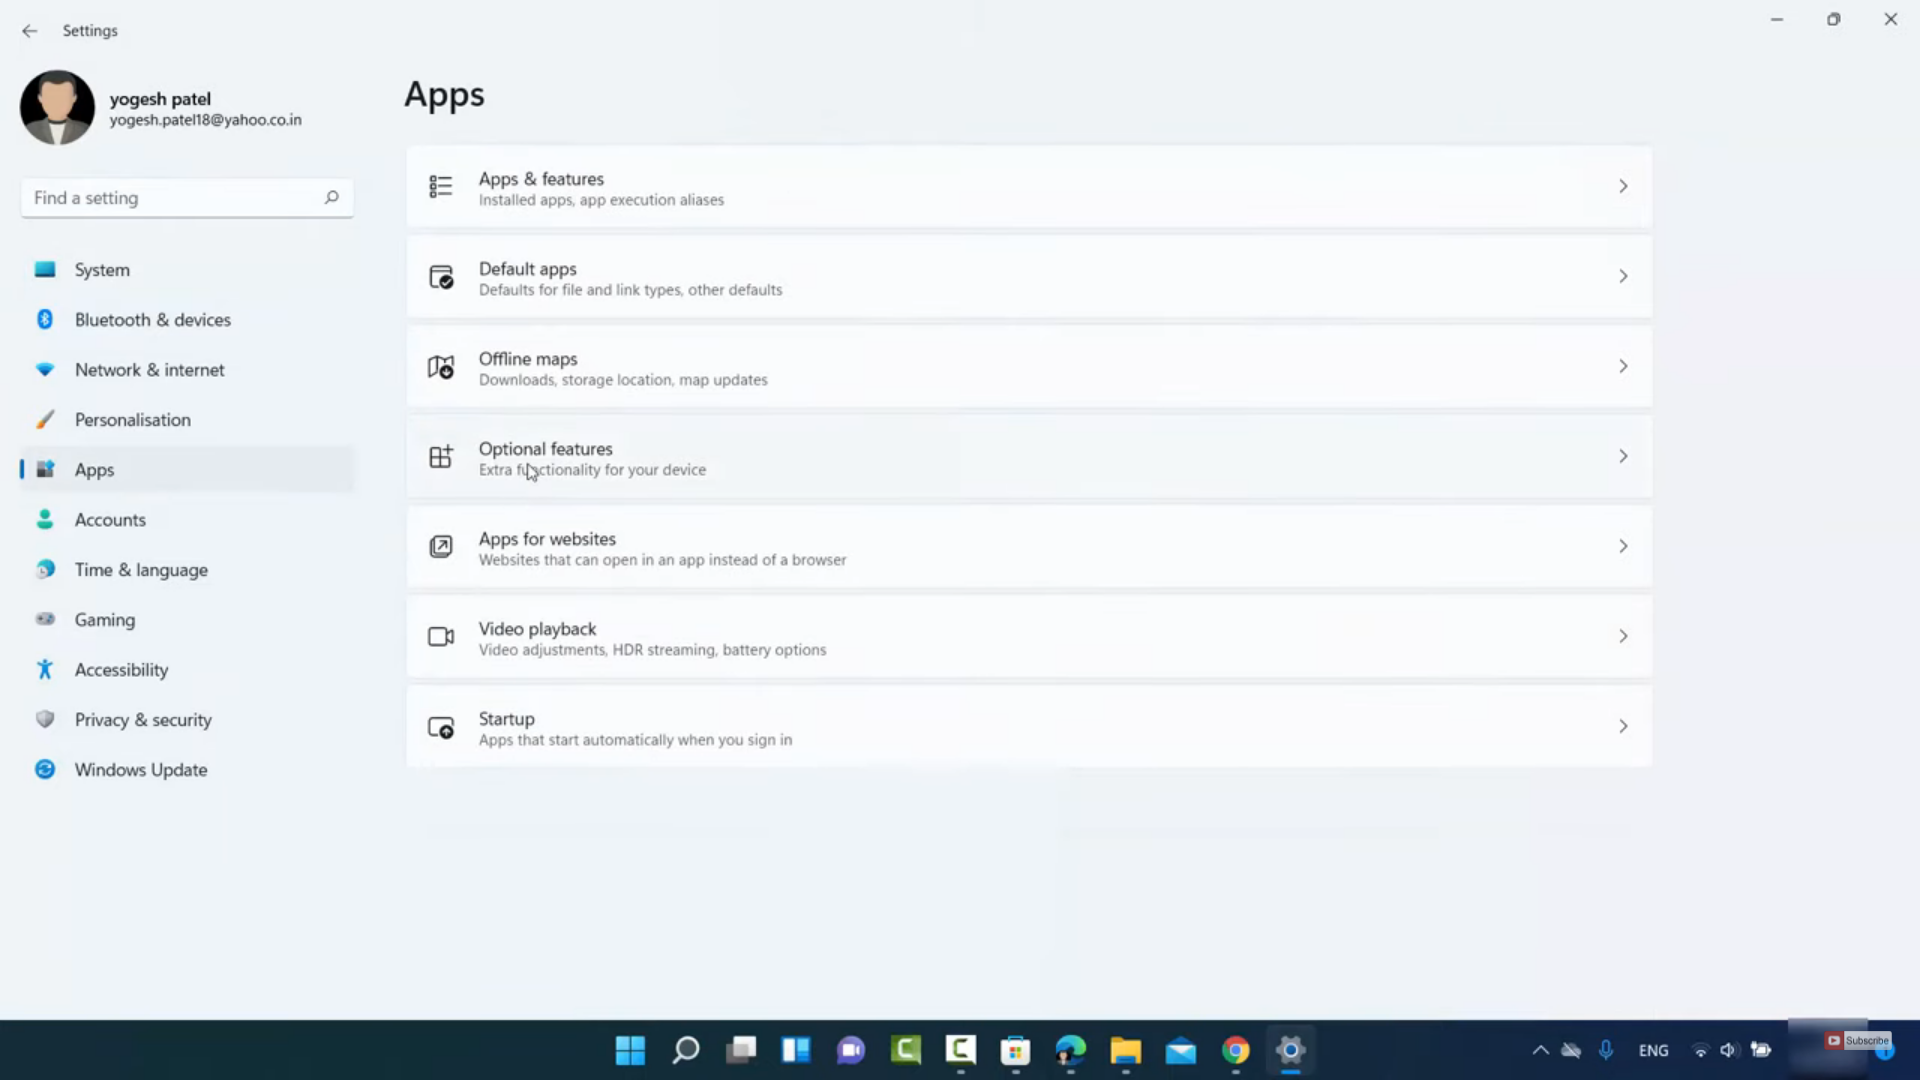
2. In the settings app, click on Apps. Then, click on Optional features.
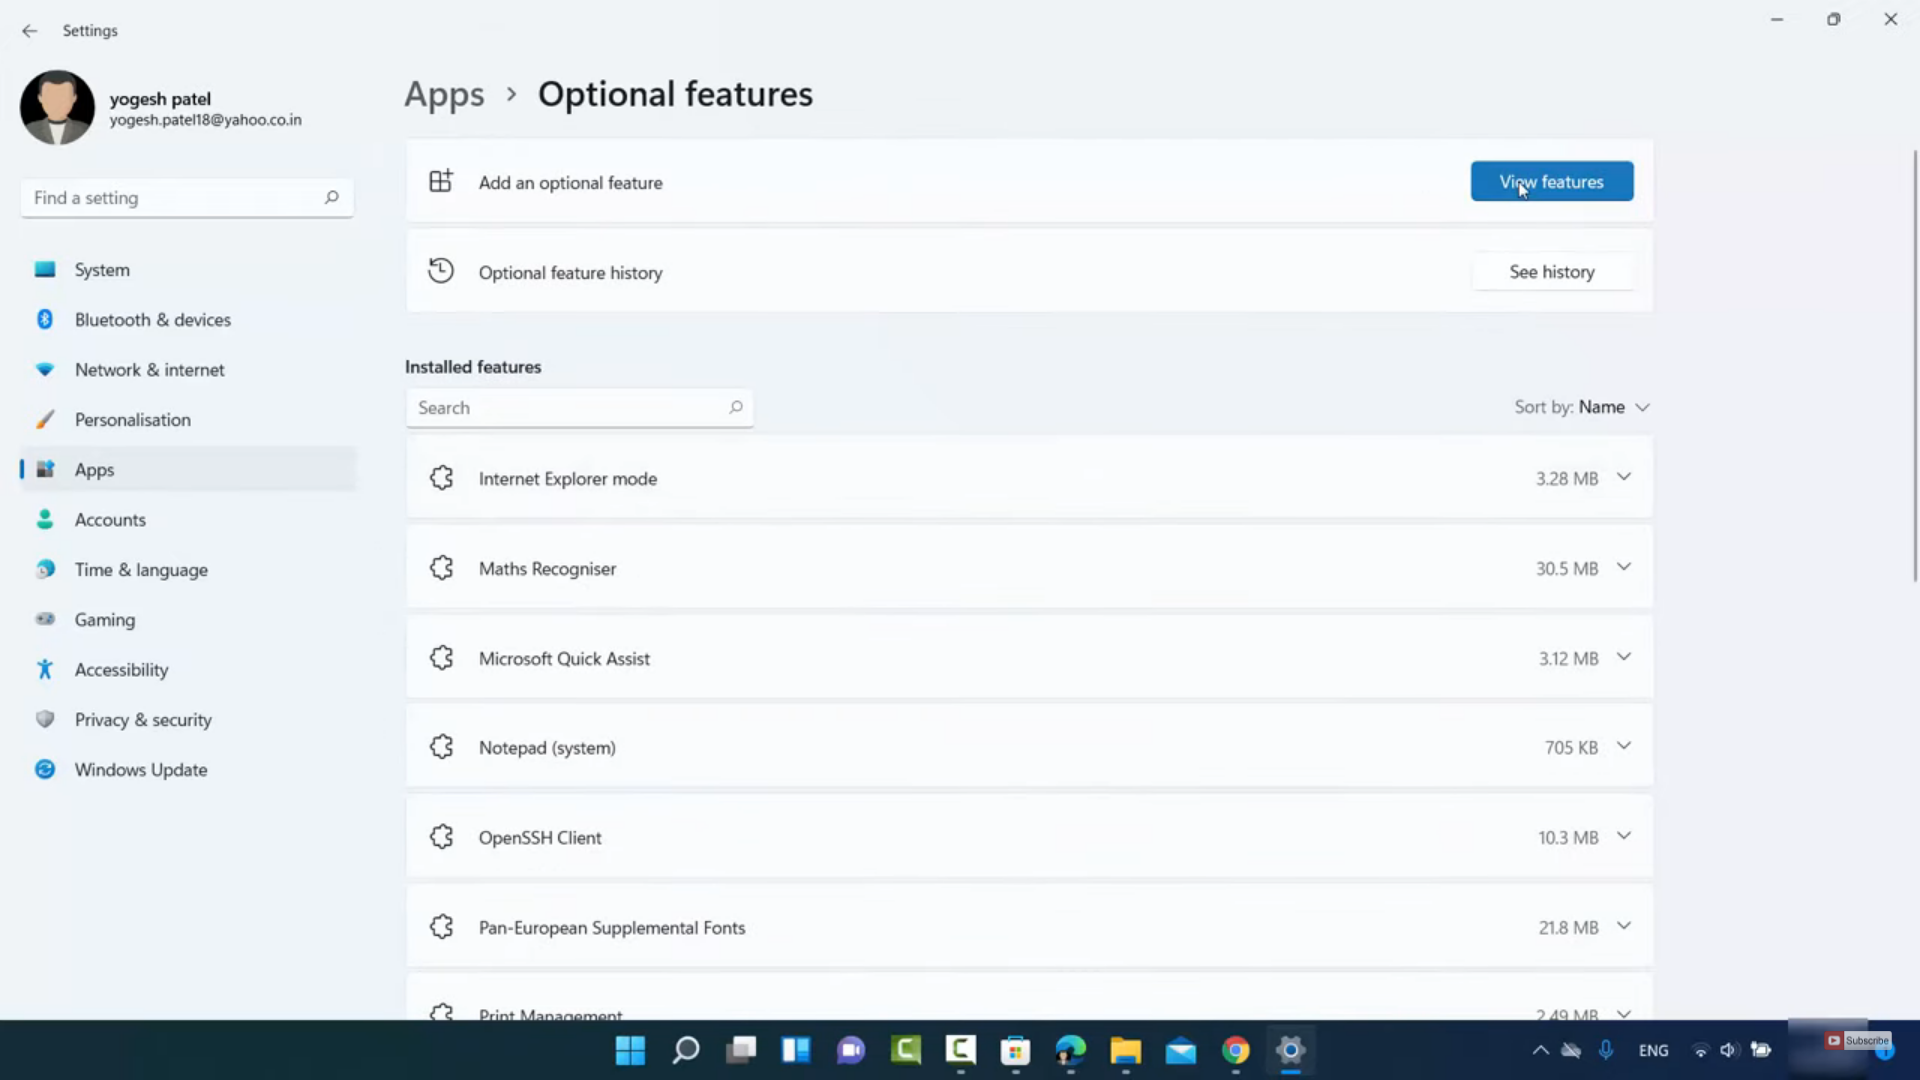
3. Click on View features.
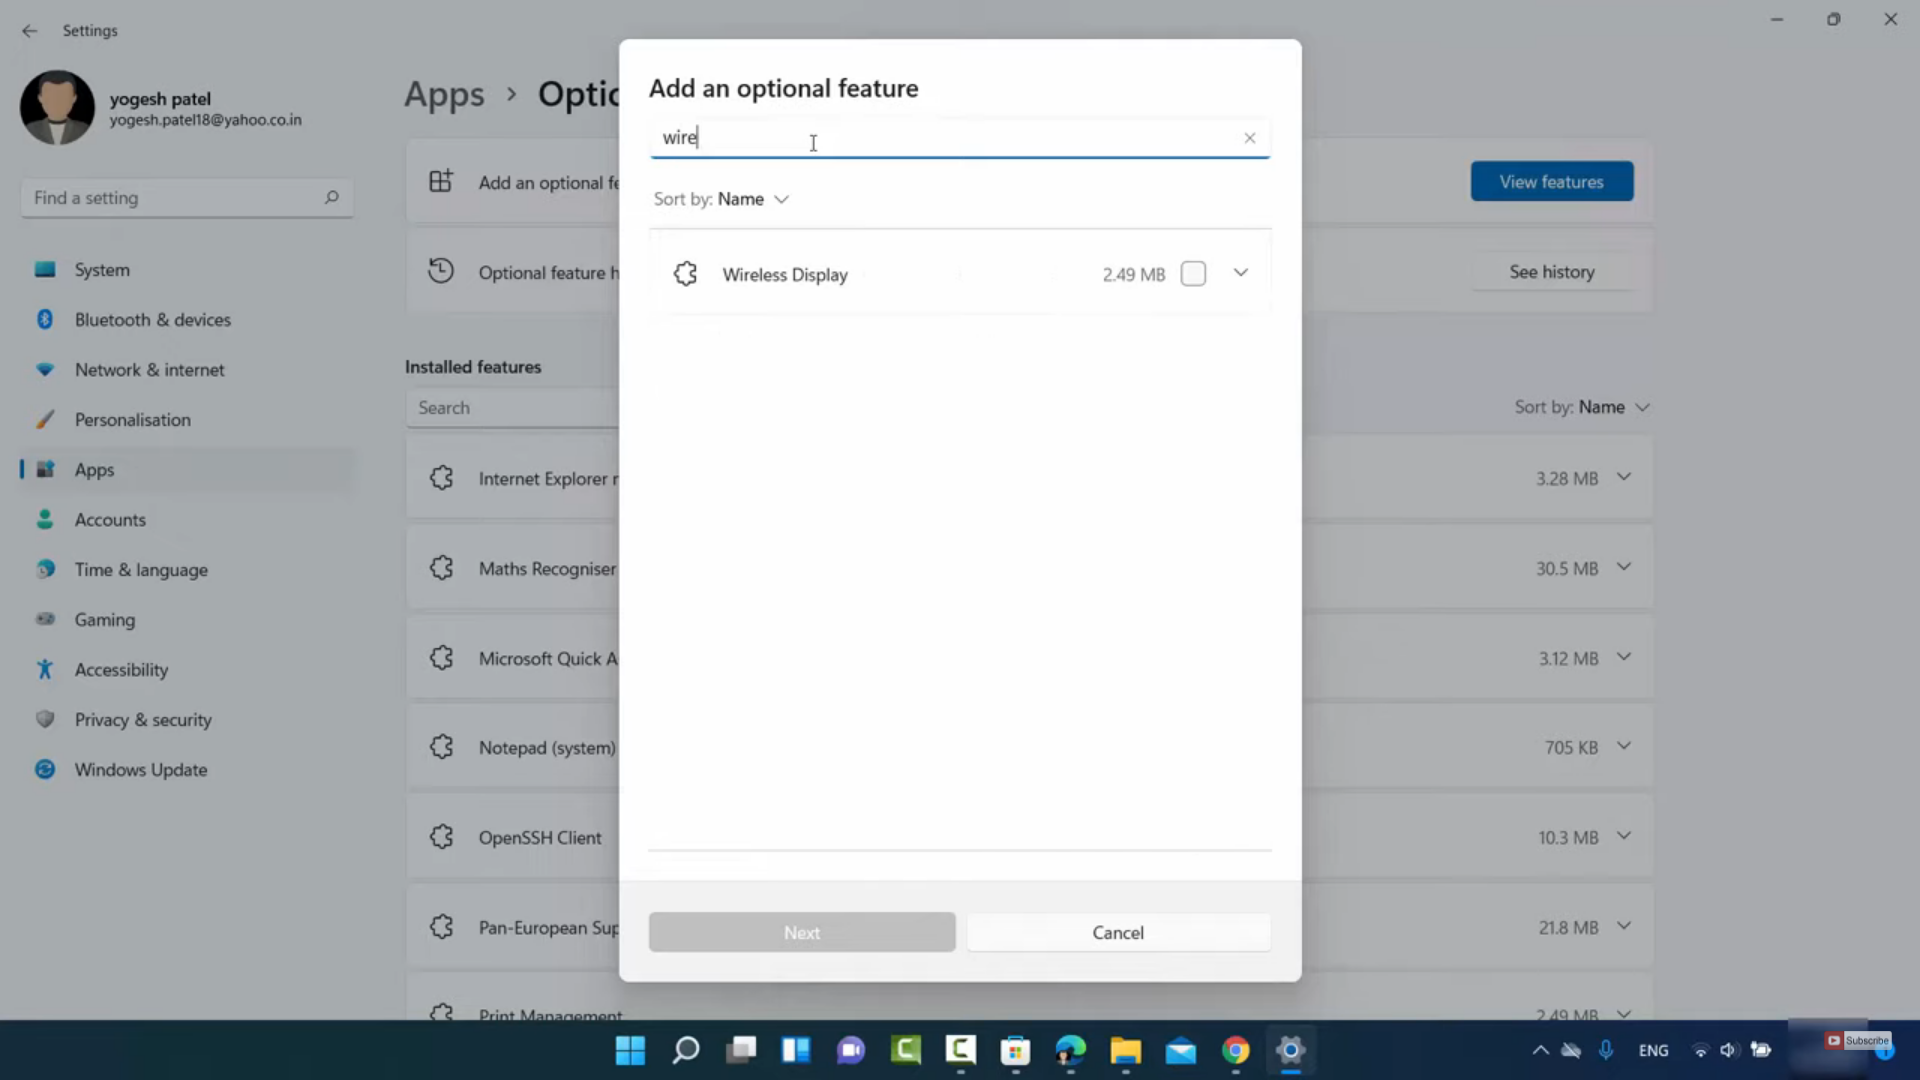
4. In the view features, you will be able to see all the features. Here, you need to search for a wireless display.
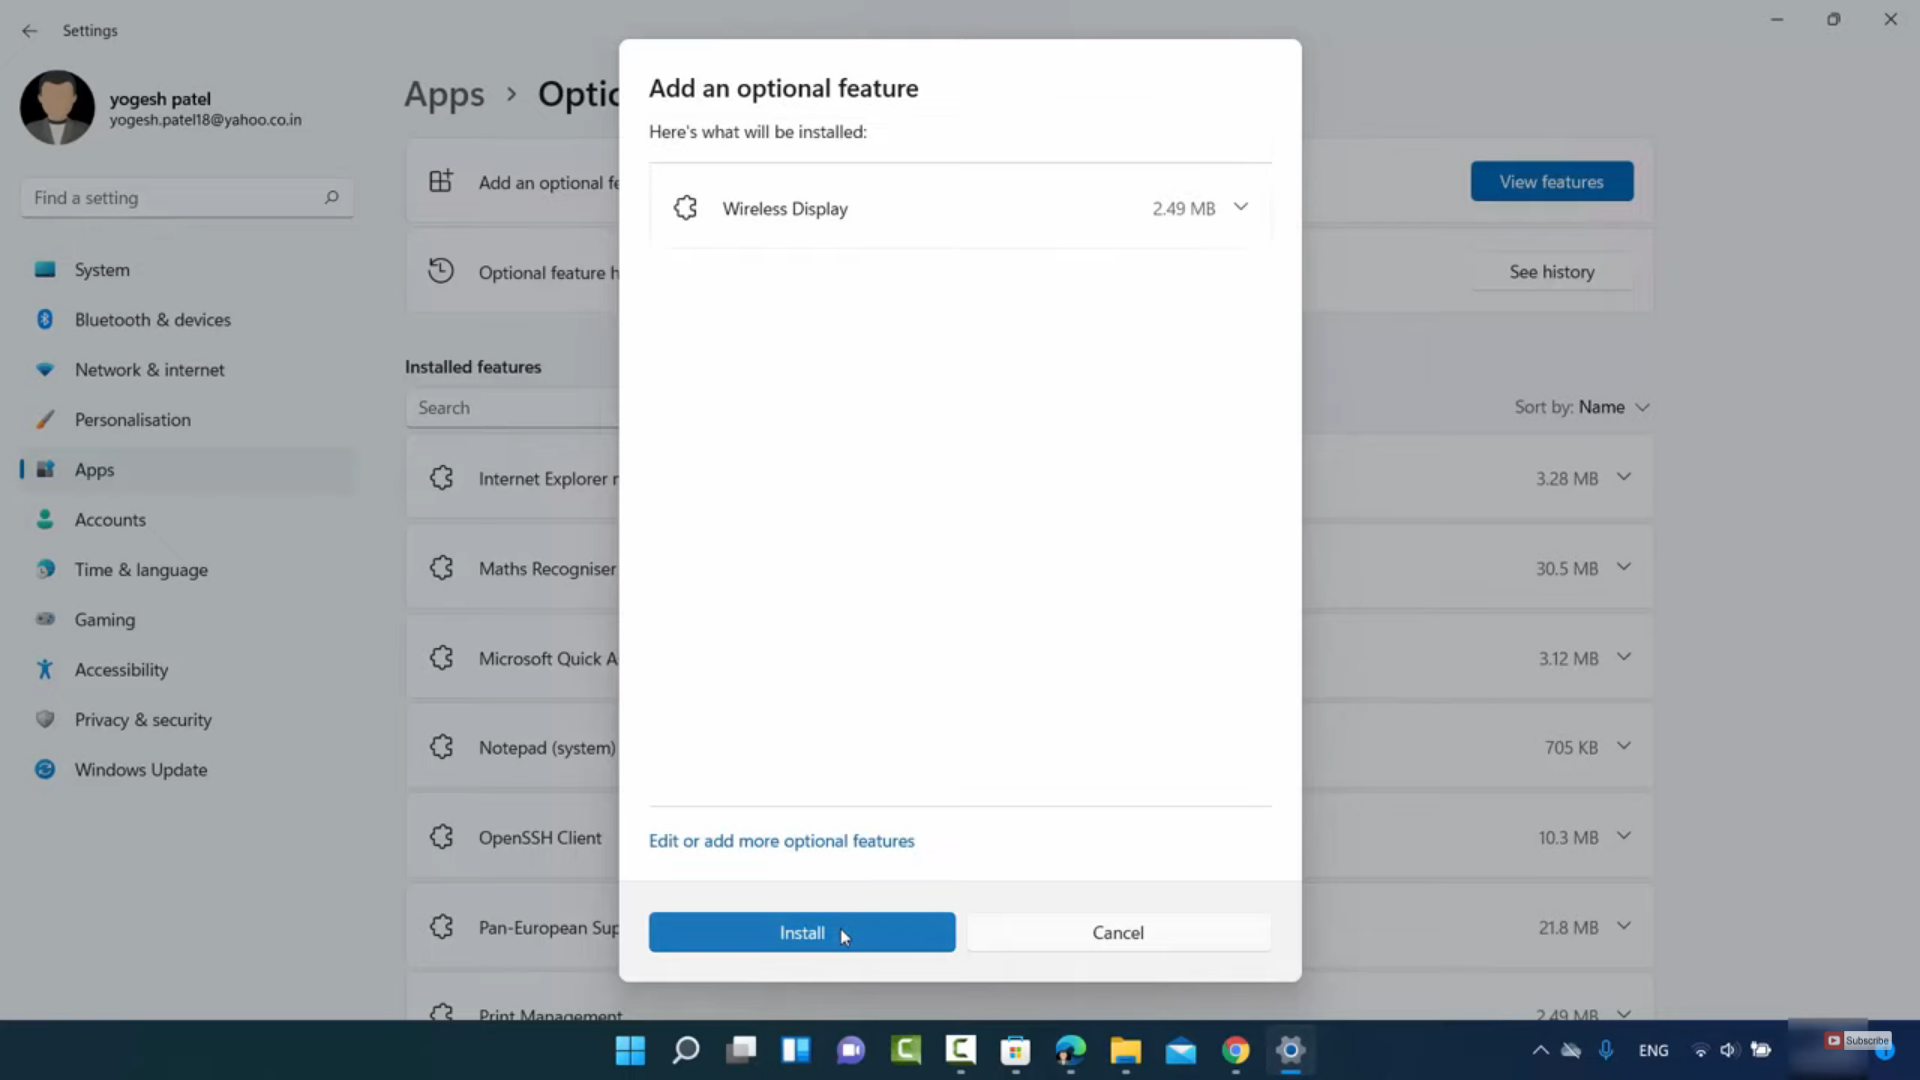
5. Once the search result appears, you need to check the checkbox. Then, click on Next.
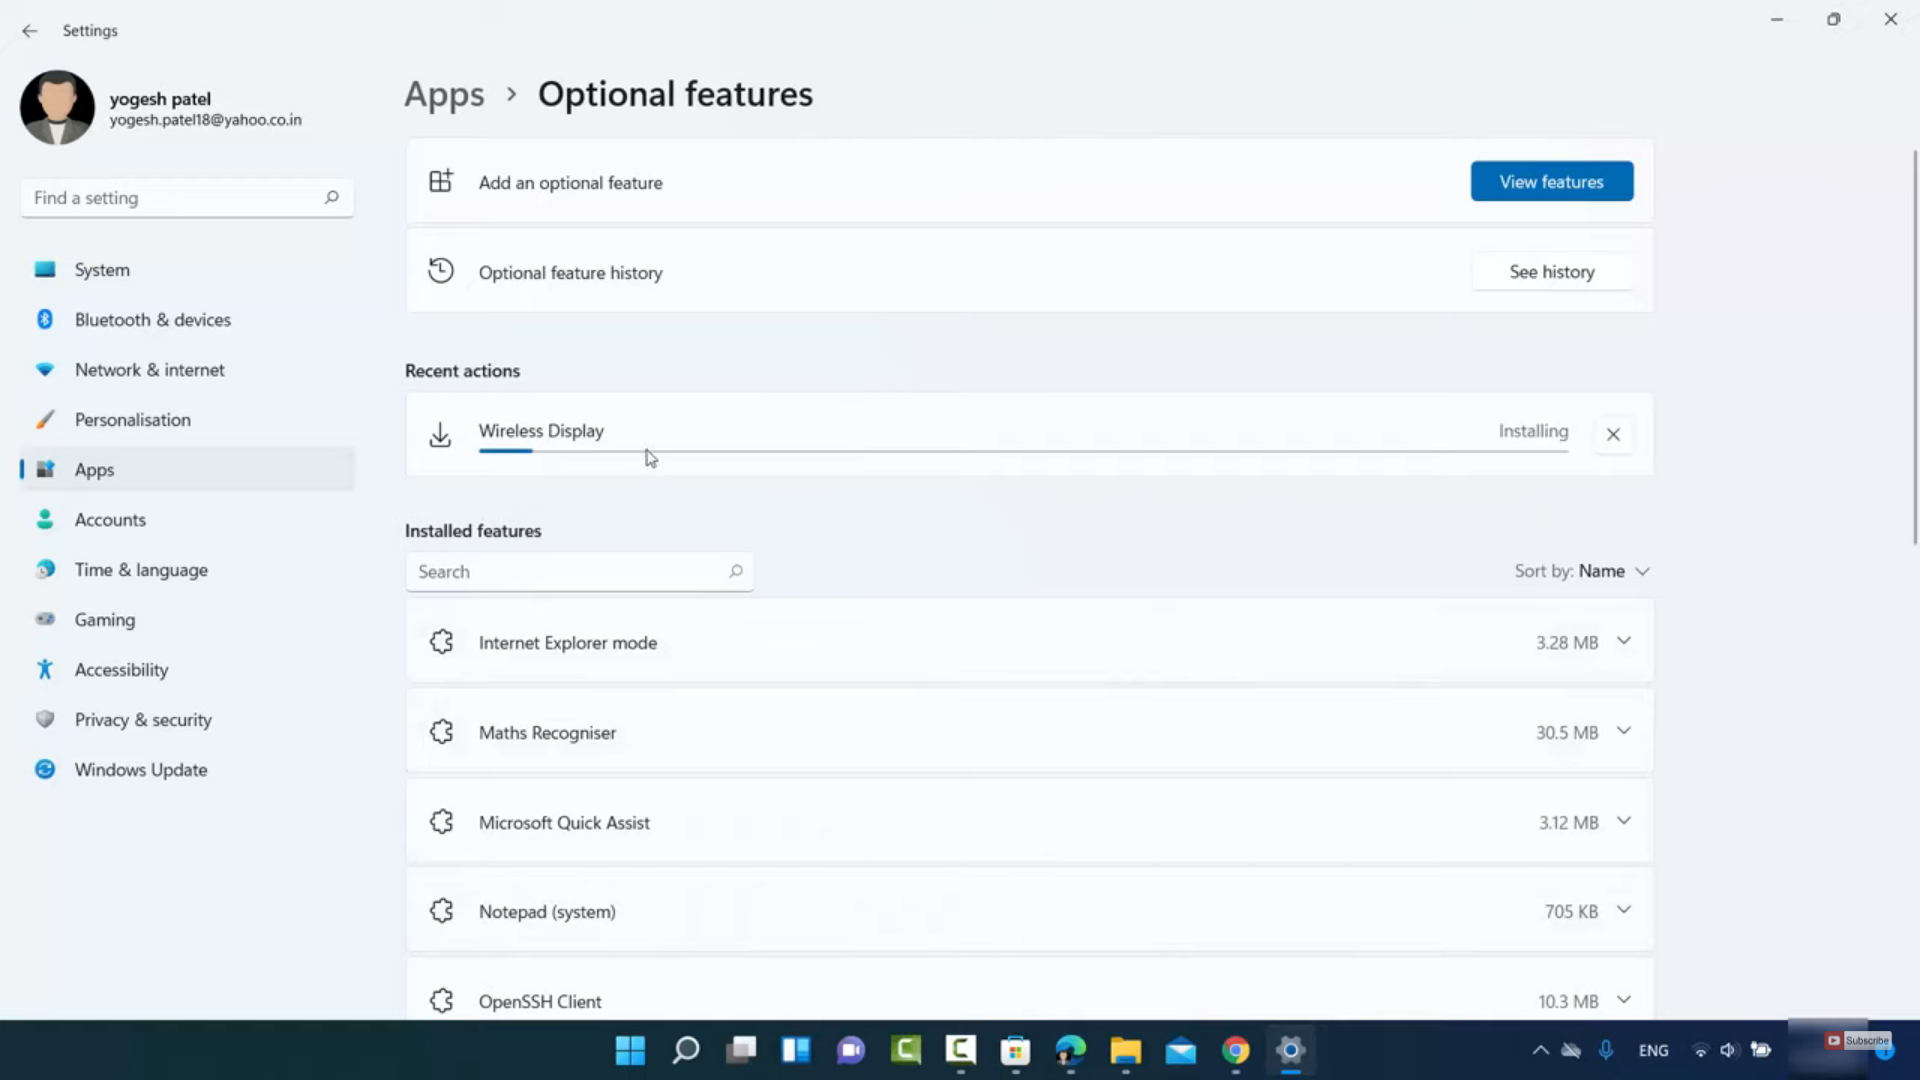
6. Then, click on Install.
7. It will install the wireless display app on your Windows 11 Operating System.
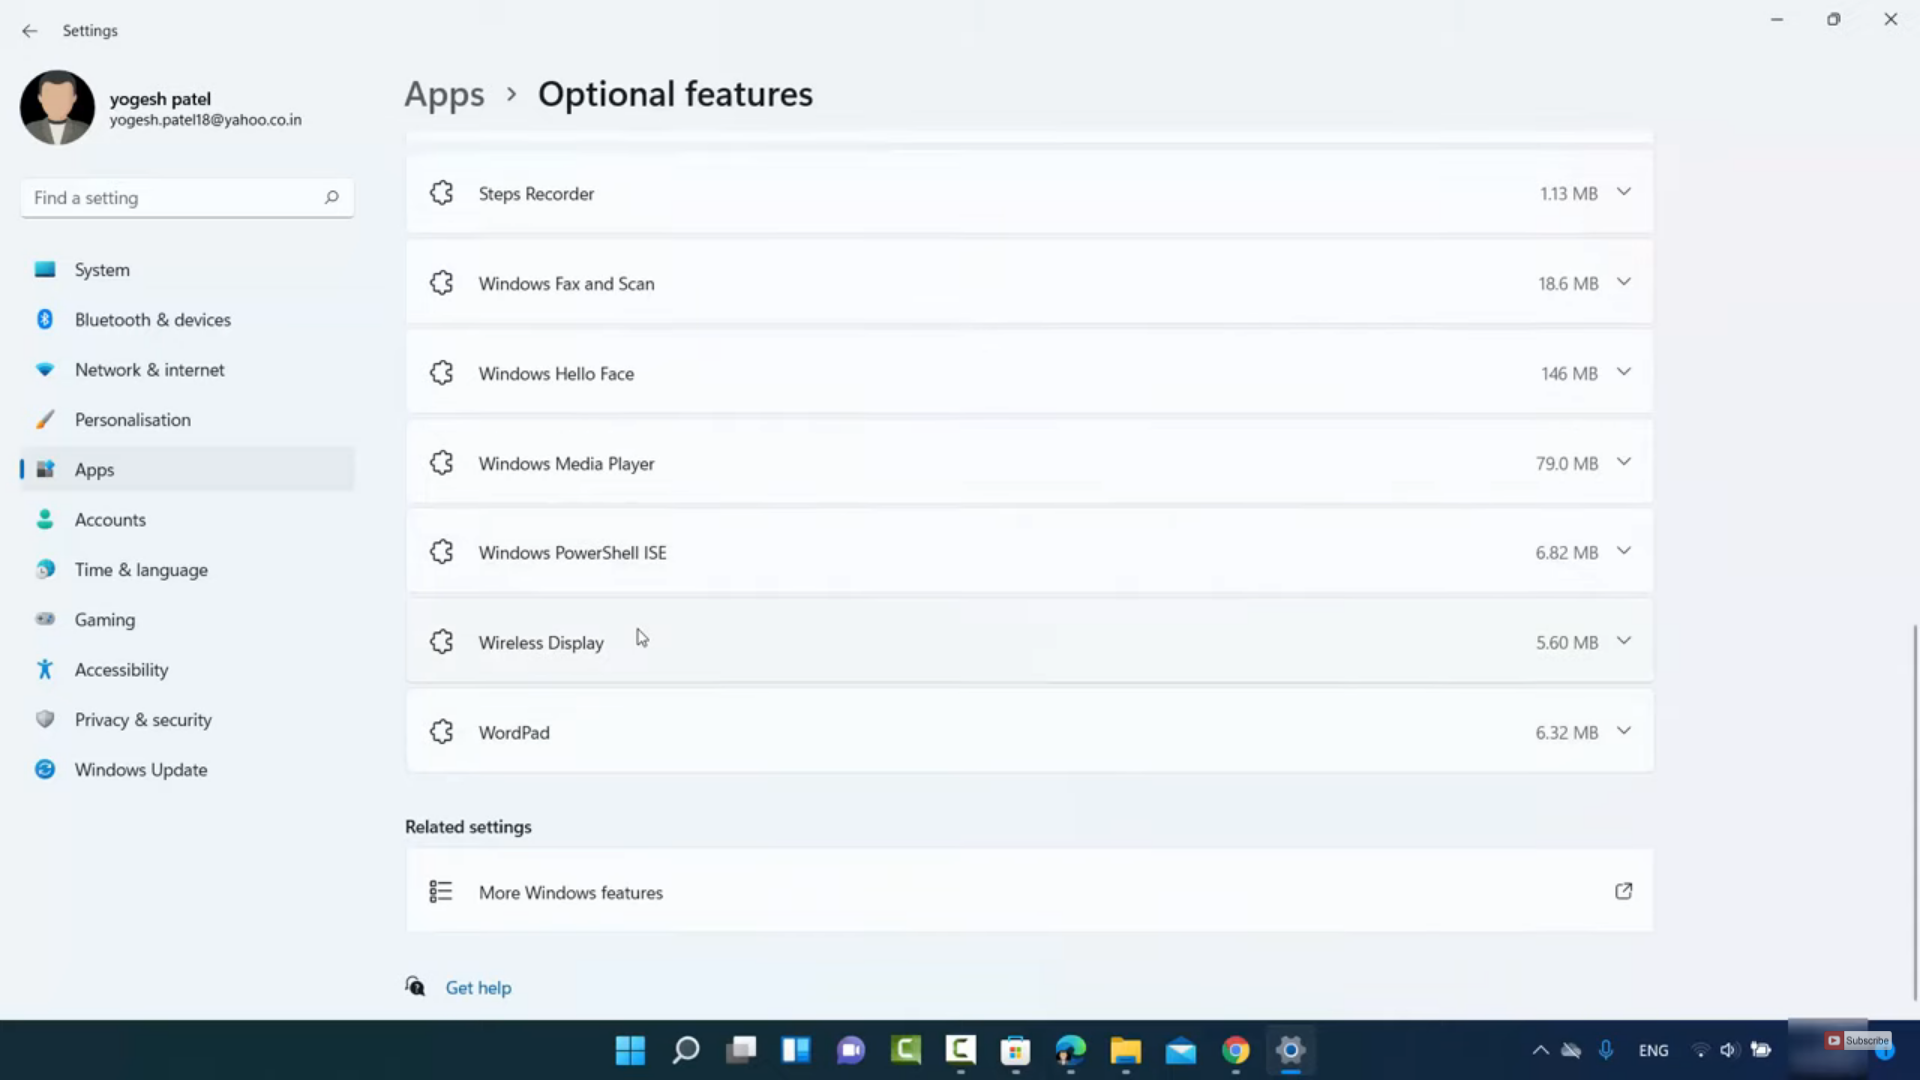
8. Once the app is installed, you will be able to see it under Installed features.
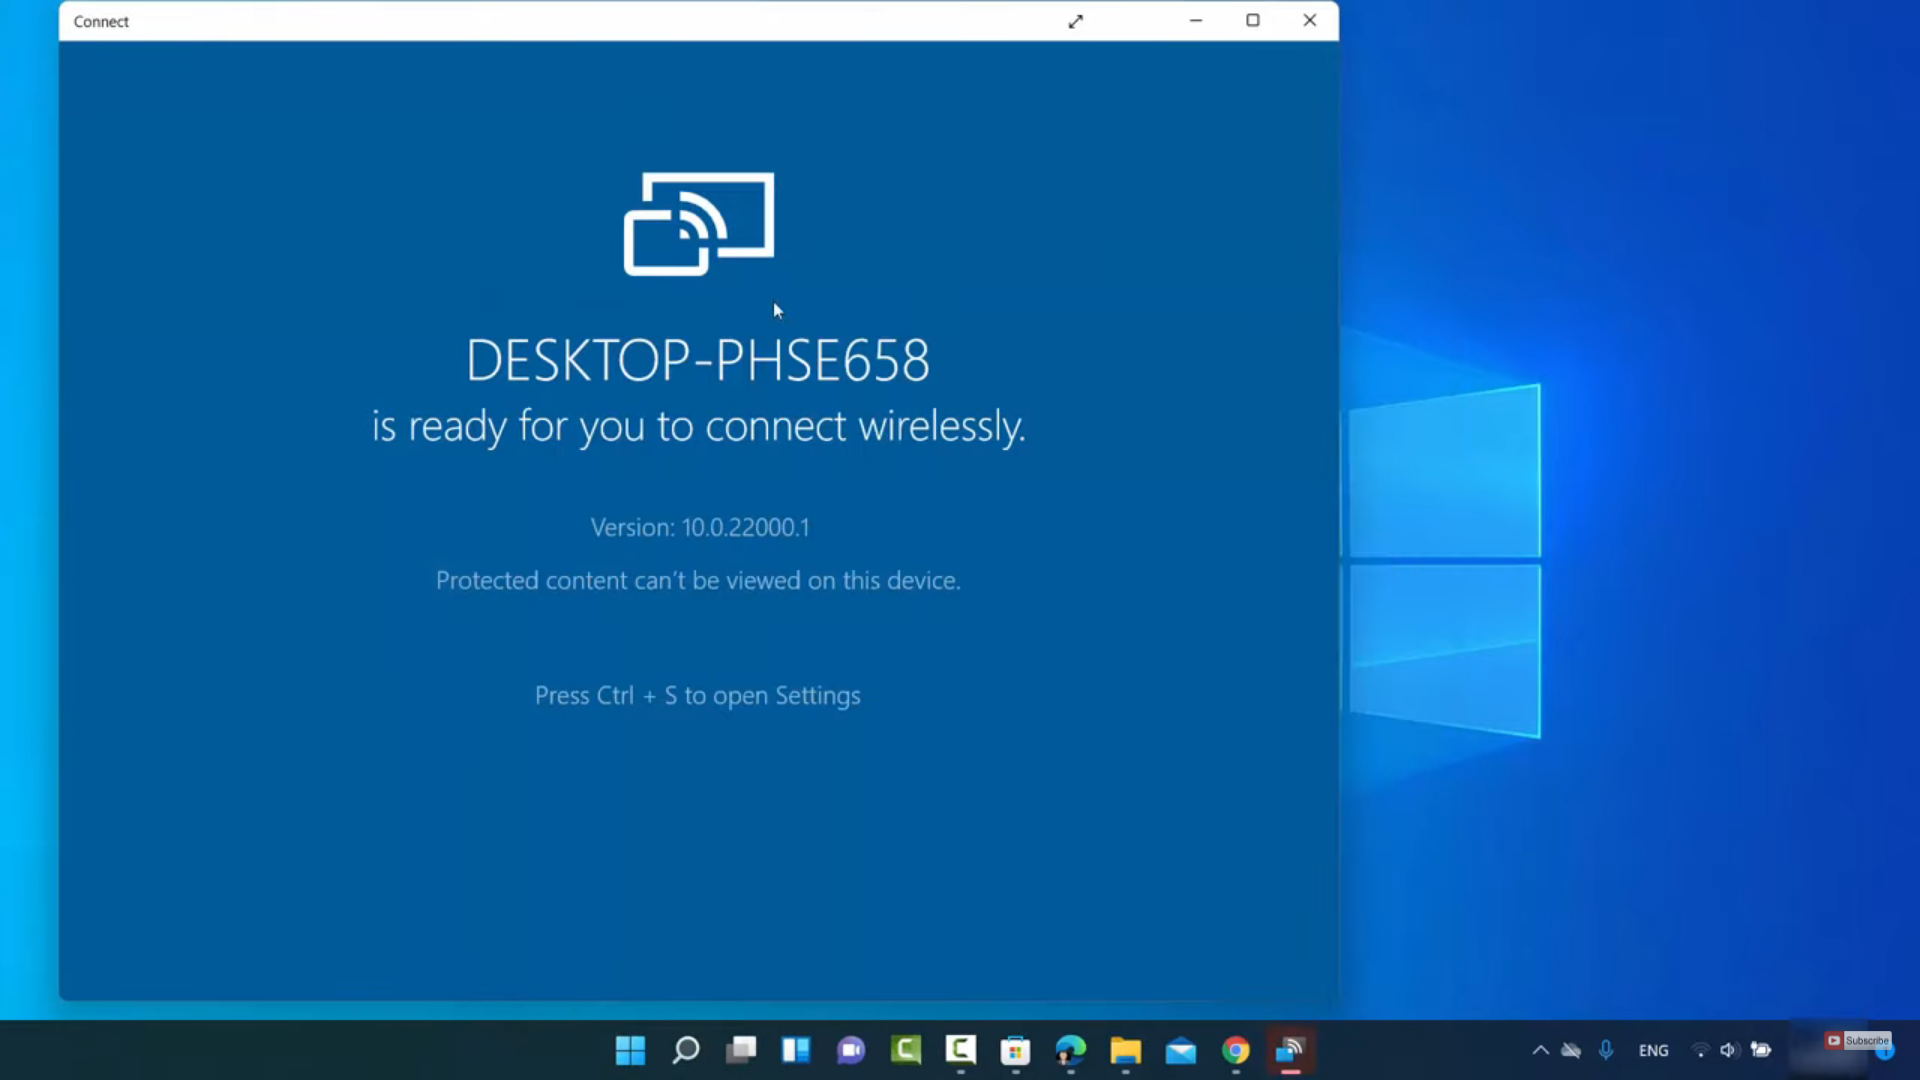
9. Now, search for connect app in the search bar. You will be able to see the connect app.
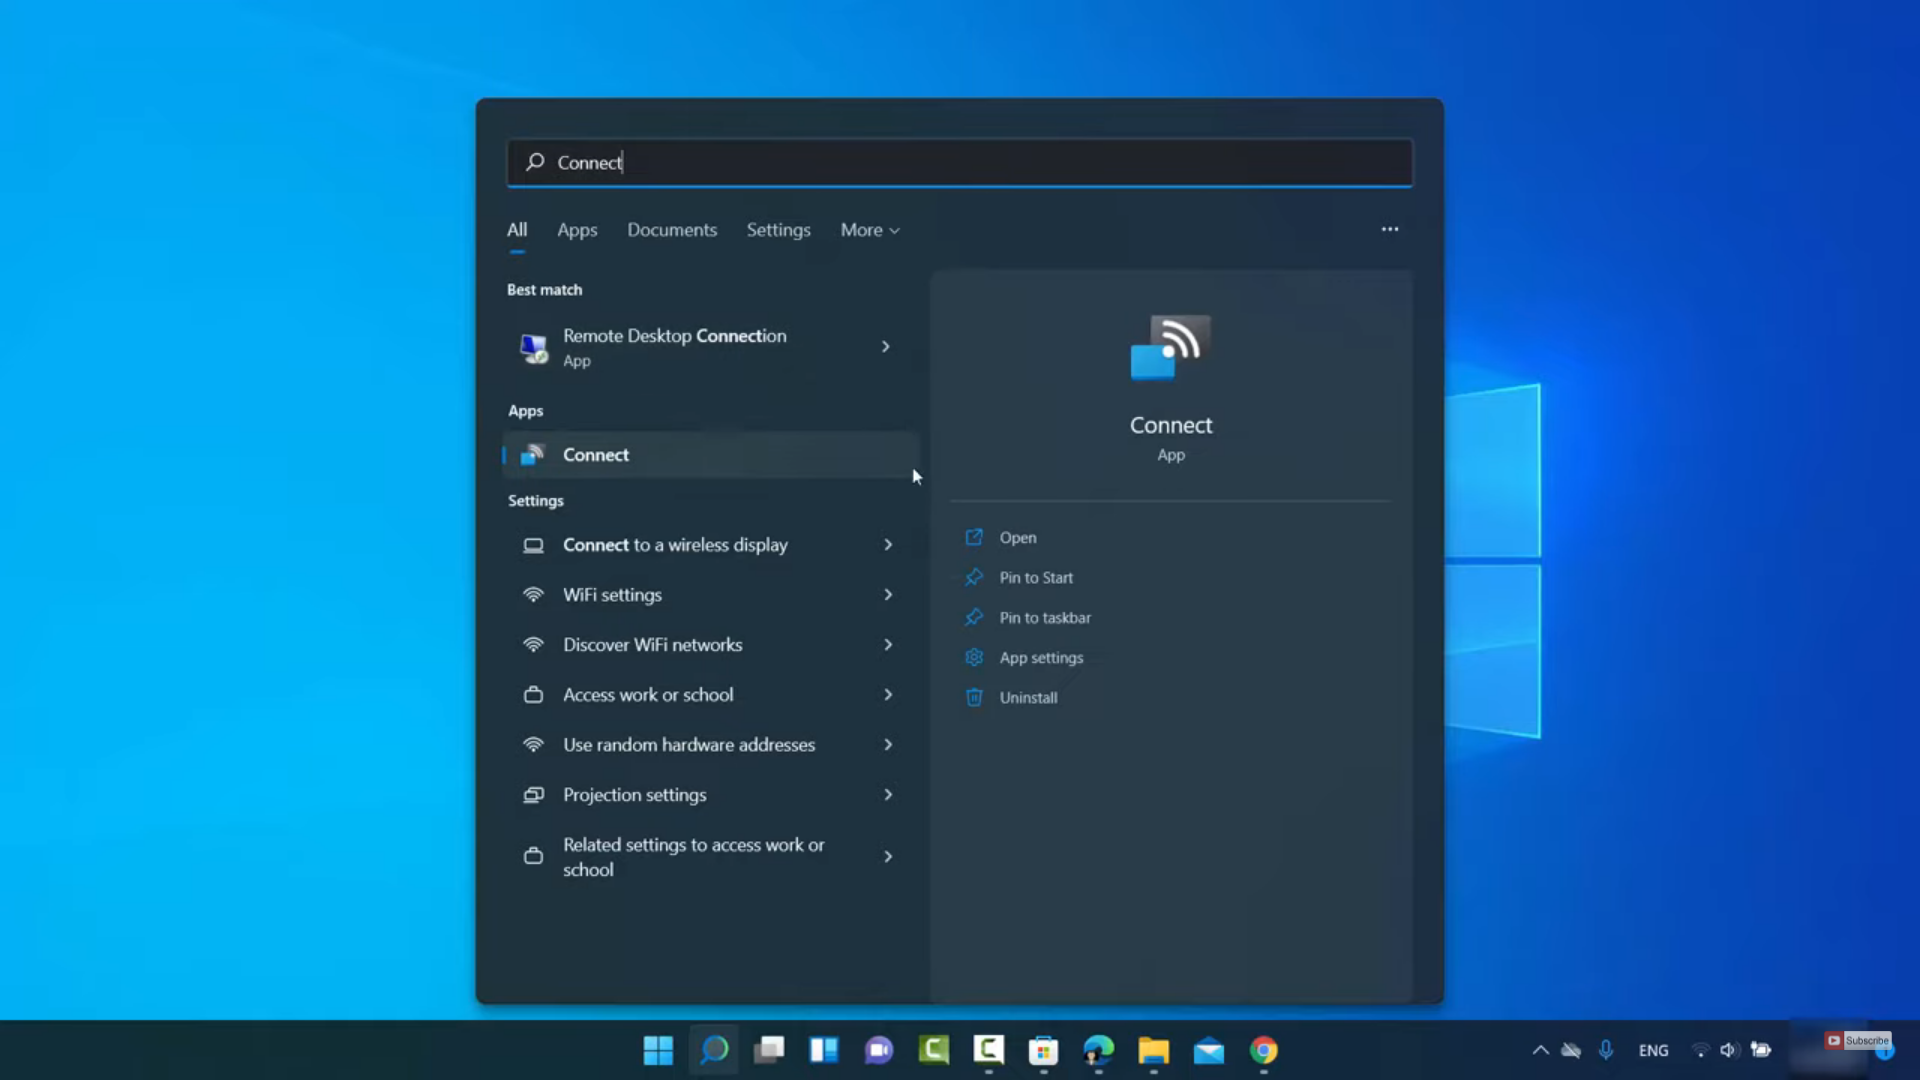
10. Once you click on the connect app, it will open the app. You can now use this app to connect any wireless device to your Windows 11 Operating System.
These are the steps for installing connect app in your Windows 11 Operating System.
Leave a Reply