
In this blog post, I will give a detailed view of turning your Windows 11 computer into a Wi-Fi hotspot.
1. Right-click on your Windows icon and click on the Settings option.
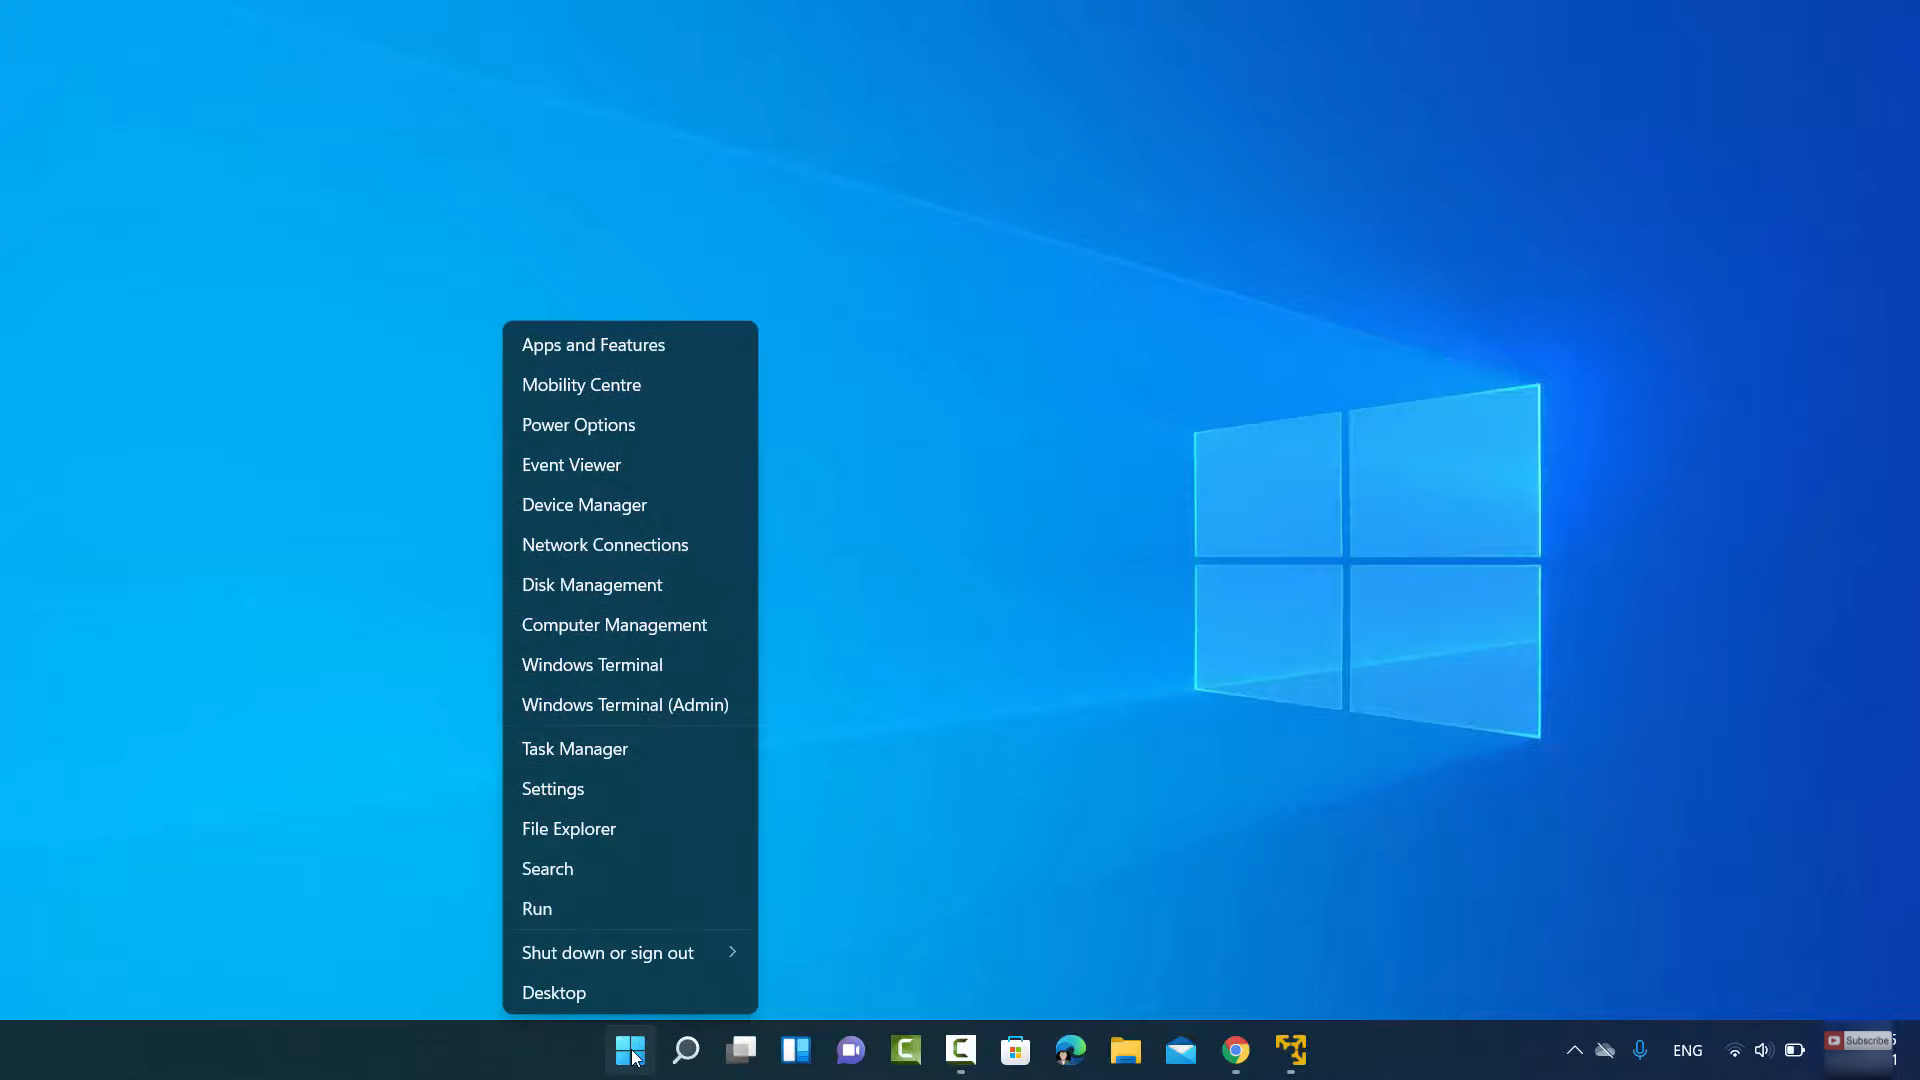
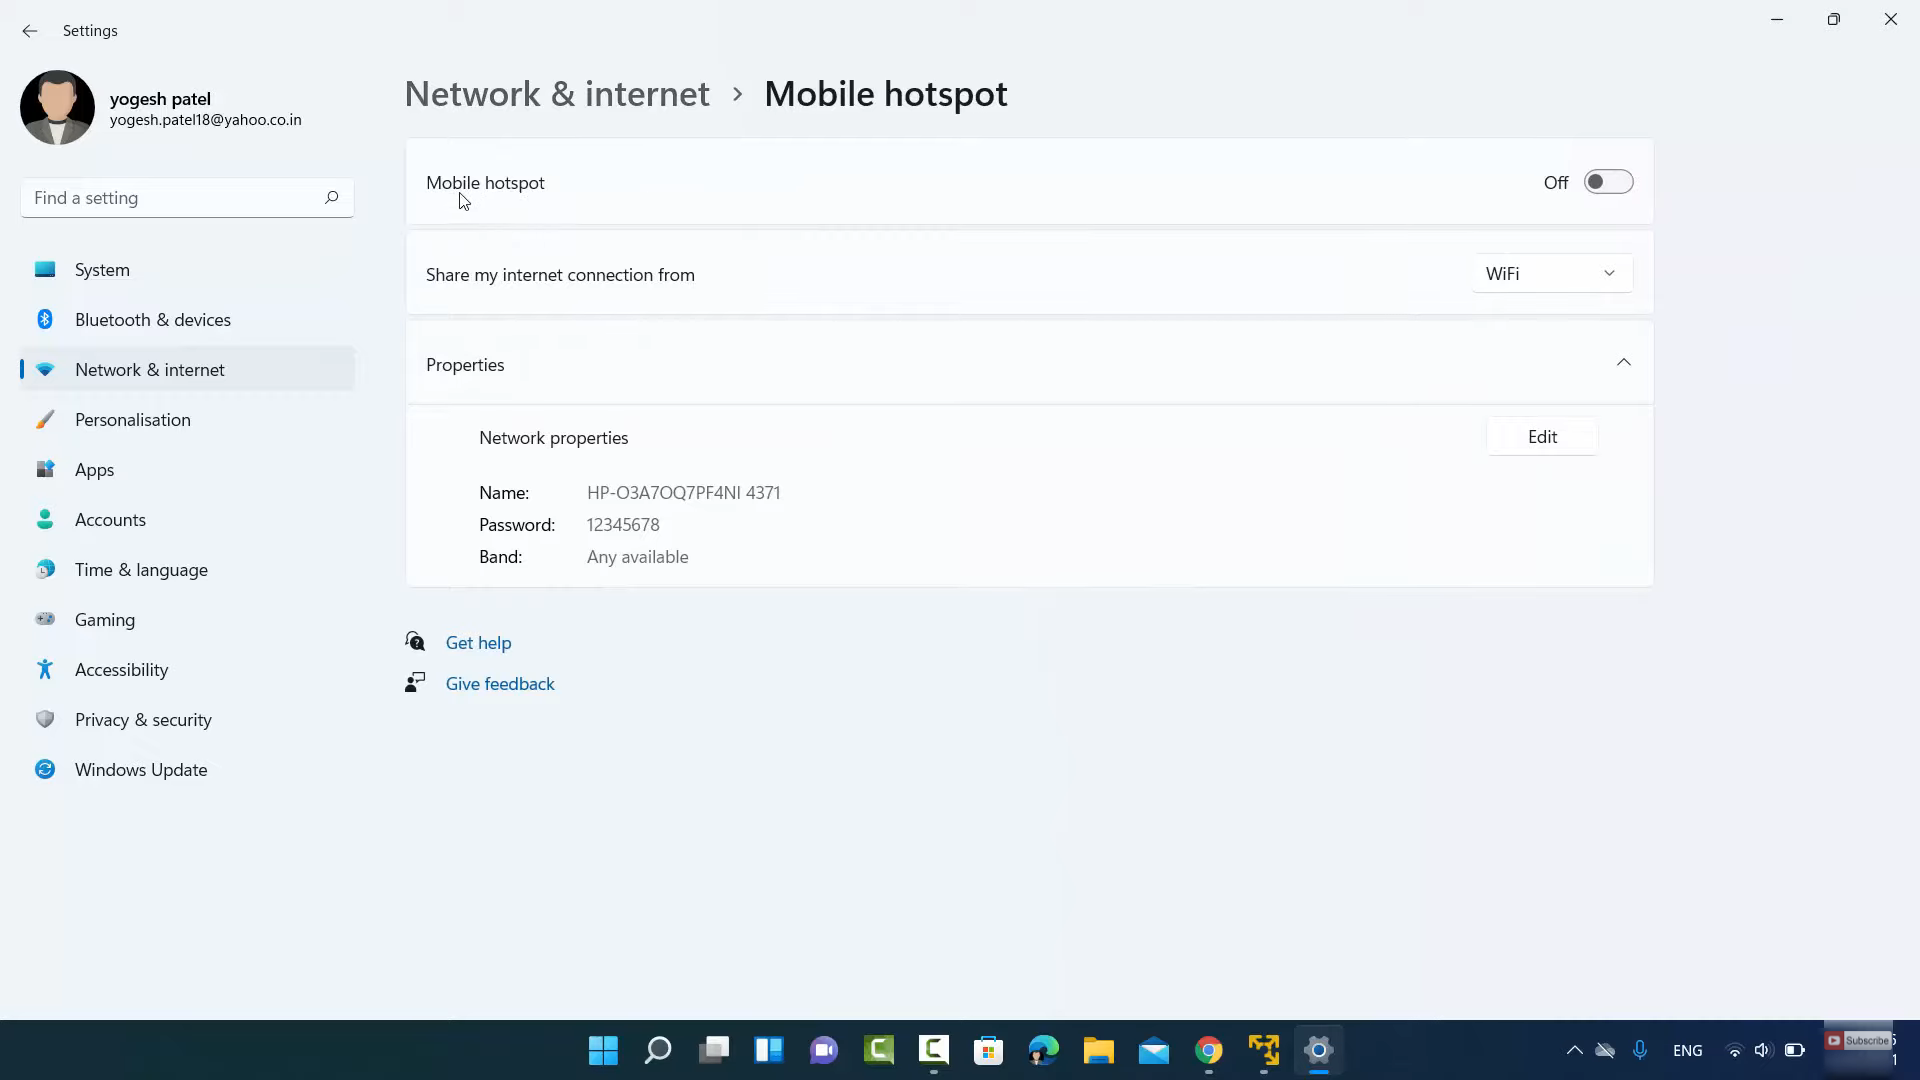
2. In the settings app, click on Network & Internet option. You will be able to see an option called Mobile hotspot. Click on that option.

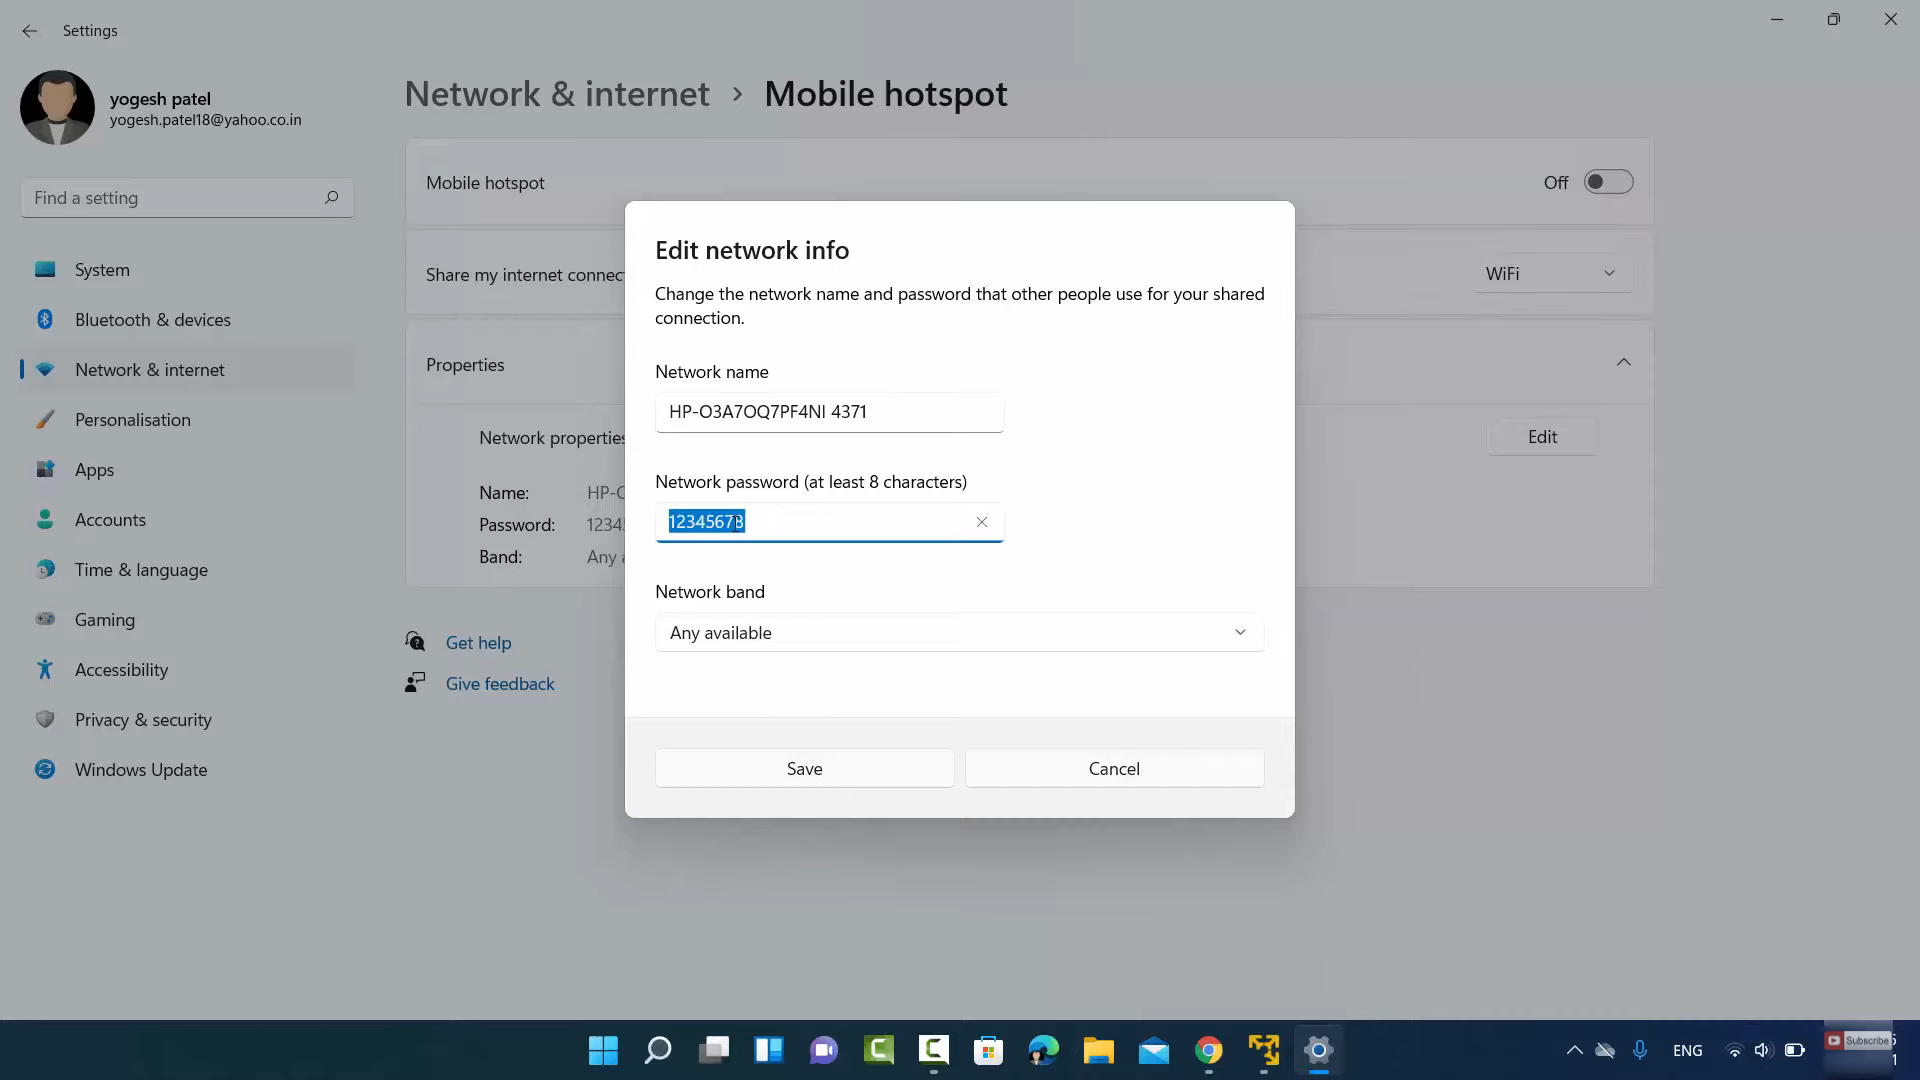
3. By default, the mobile hotspot option will be Off. If you have multiple options you can click on the Wifi option and change to some other network settings. You can also edit the network properties as well by clicking on the Edit option.
4. From here you can change the name, password, and network band. After entering the credentials, click on the Save button.
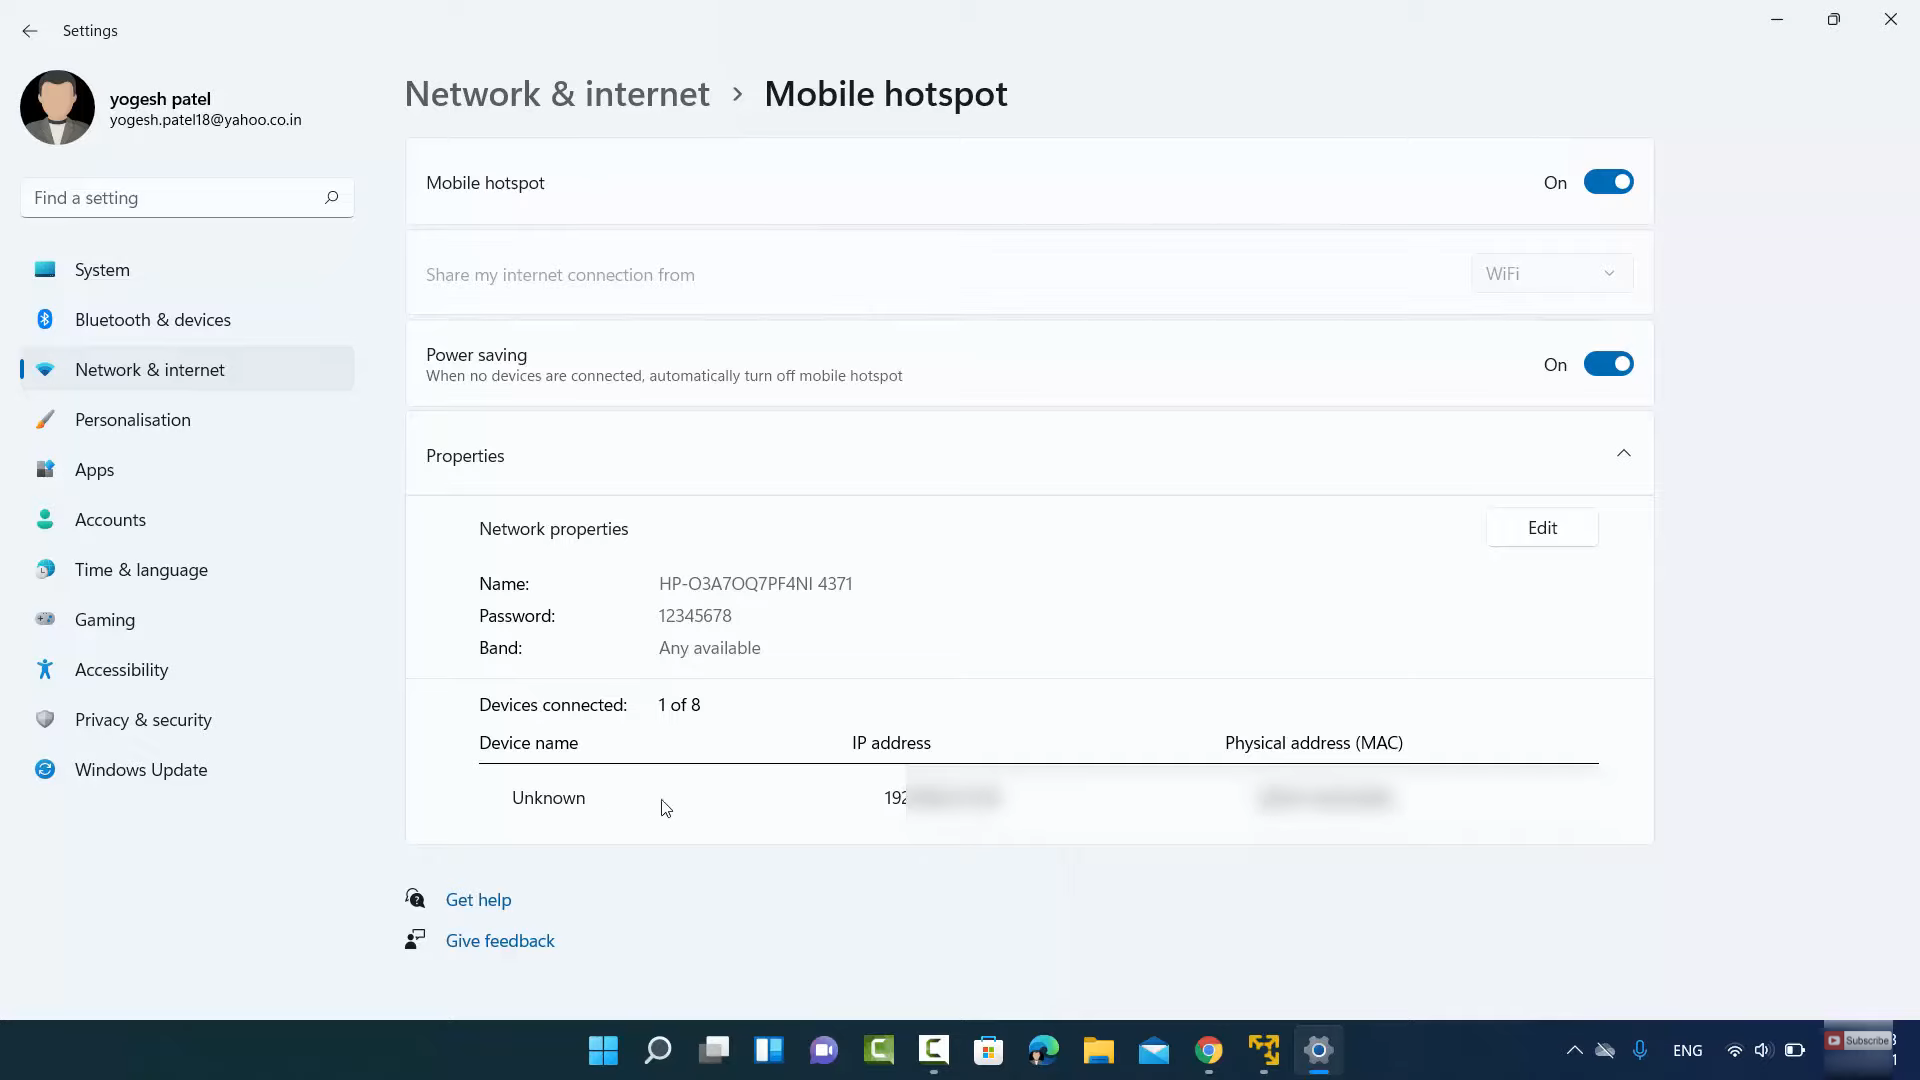
5. Then, toggle the mobile hotspot button.

6. Now, the Windows 11 Operating System has been turned into a wifi hotspot.
7. You can connect the wifi to your android phone. For this, you need to go to settings in your android phone. Then, select wifi. And select the network and enter the password. It will connect to the wifi.
8. You can also observe the IP address in your computer settings window.
These are the steps for turning Windows 11 computer into a wifi hotspot.
Leave a Reply