
In this blog post, I will give a detailed view of installing MySQL 8.0.28 server and workbench’s latest version on your Windows 11 Operating System.
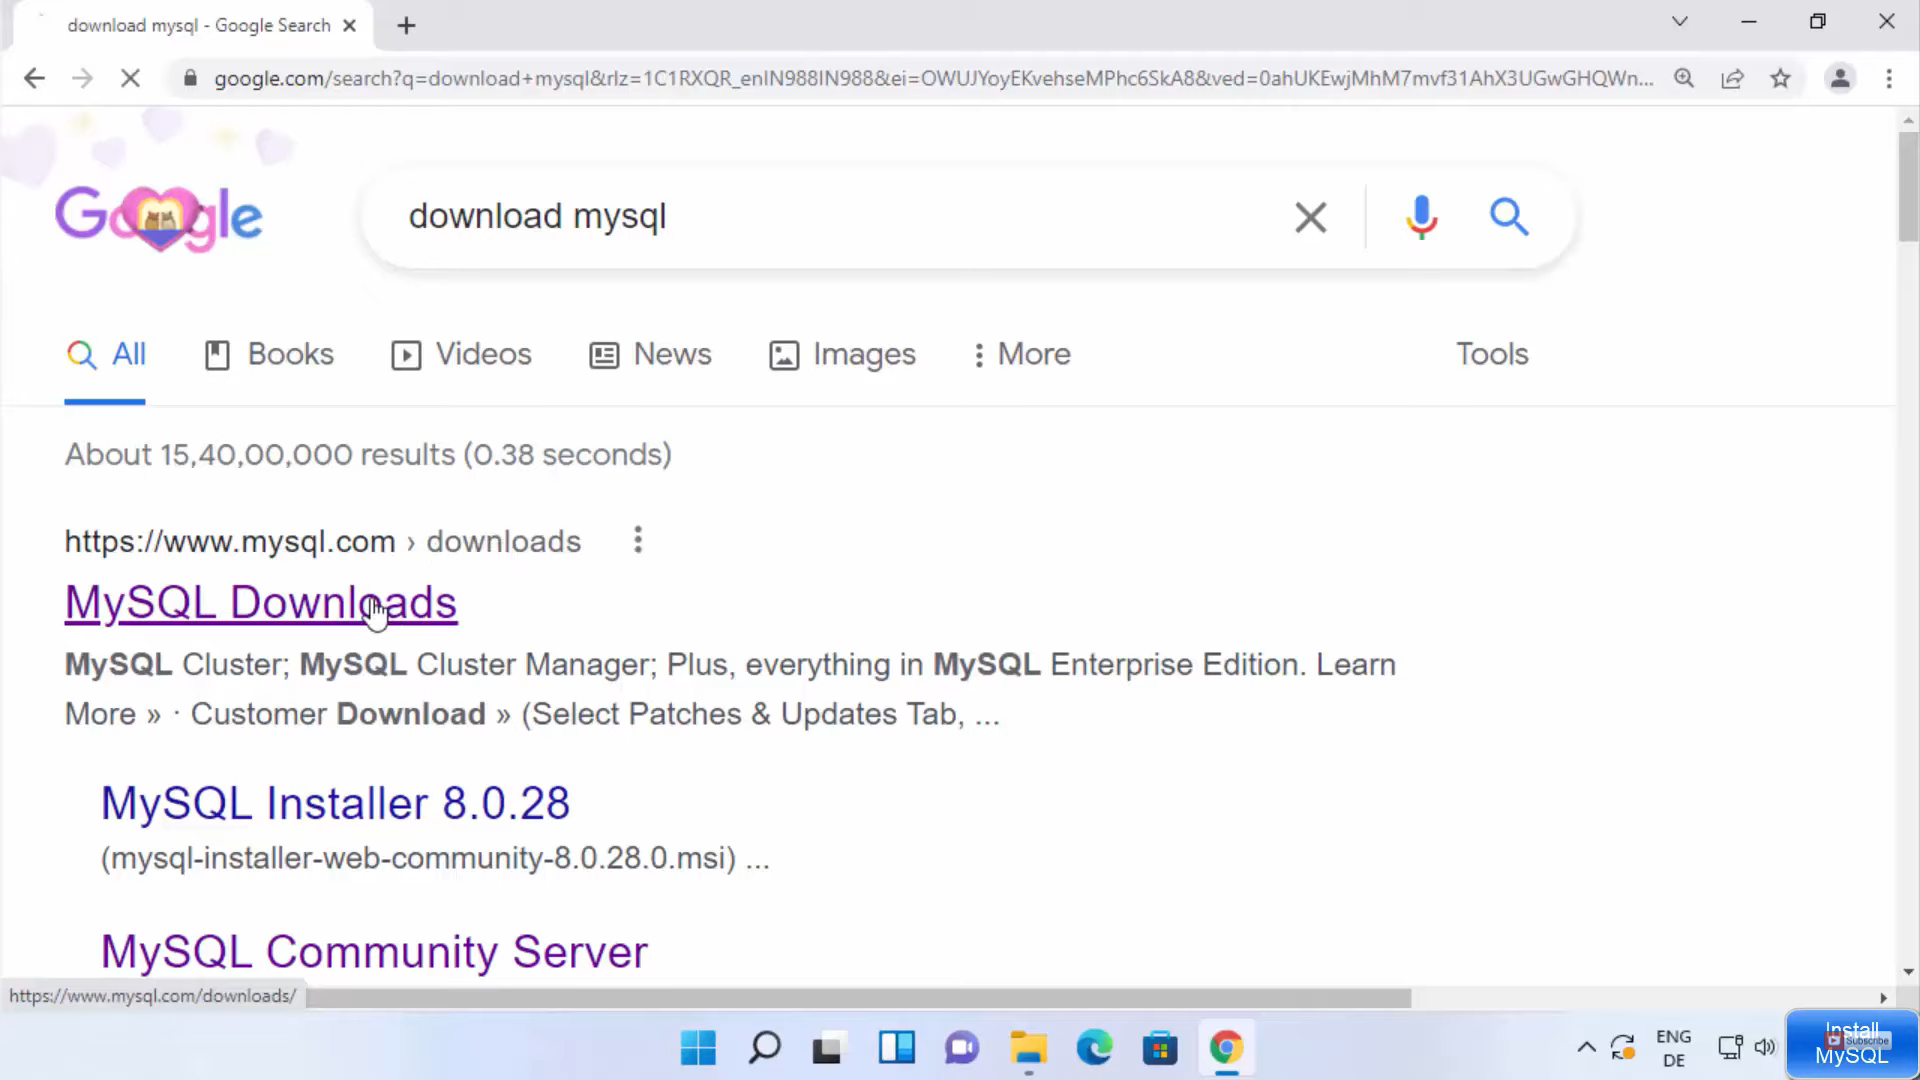
1. Open a web browser and search for download mysql. Click on the first link.
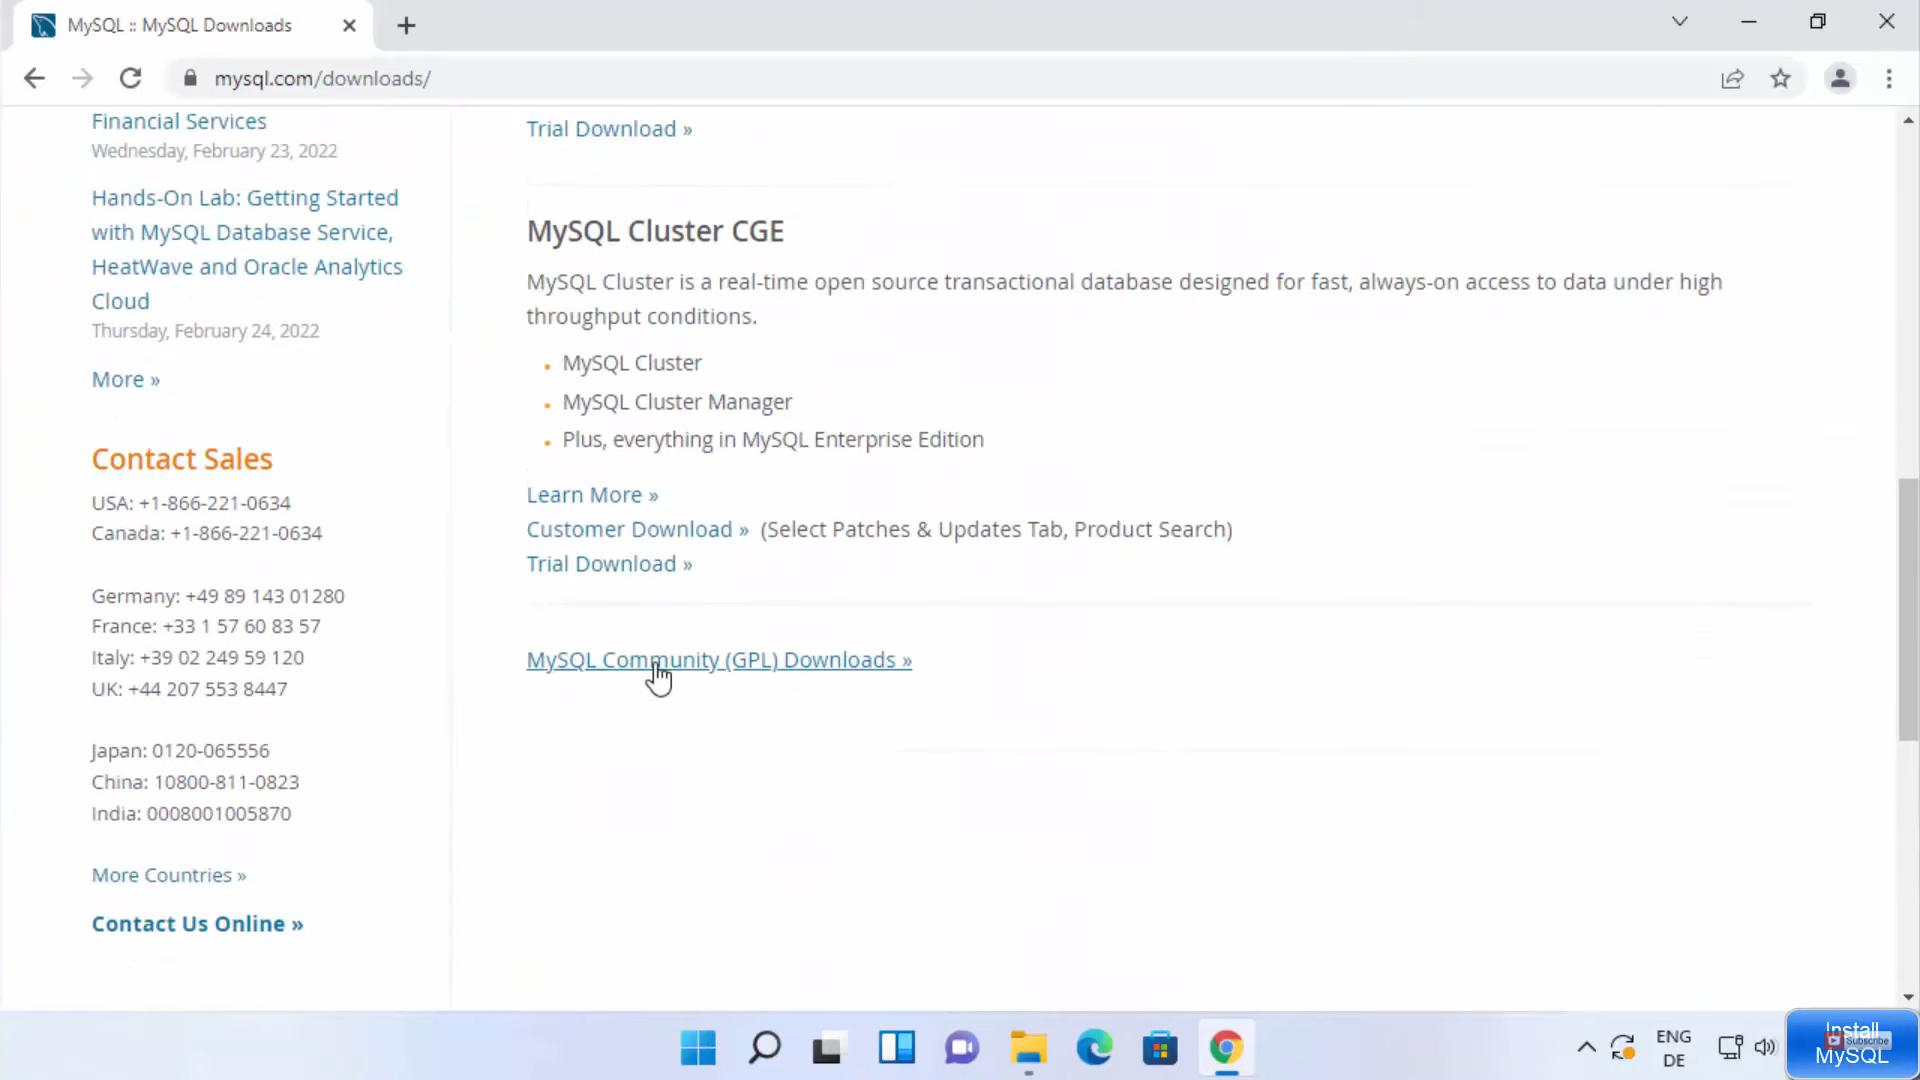
2. Once the link opens, scroll down and click the link MYSQL Community (GPL) Downloads.
3. It will redirect you to another page. We are going to download MYSQL Community Server. Click on that link.

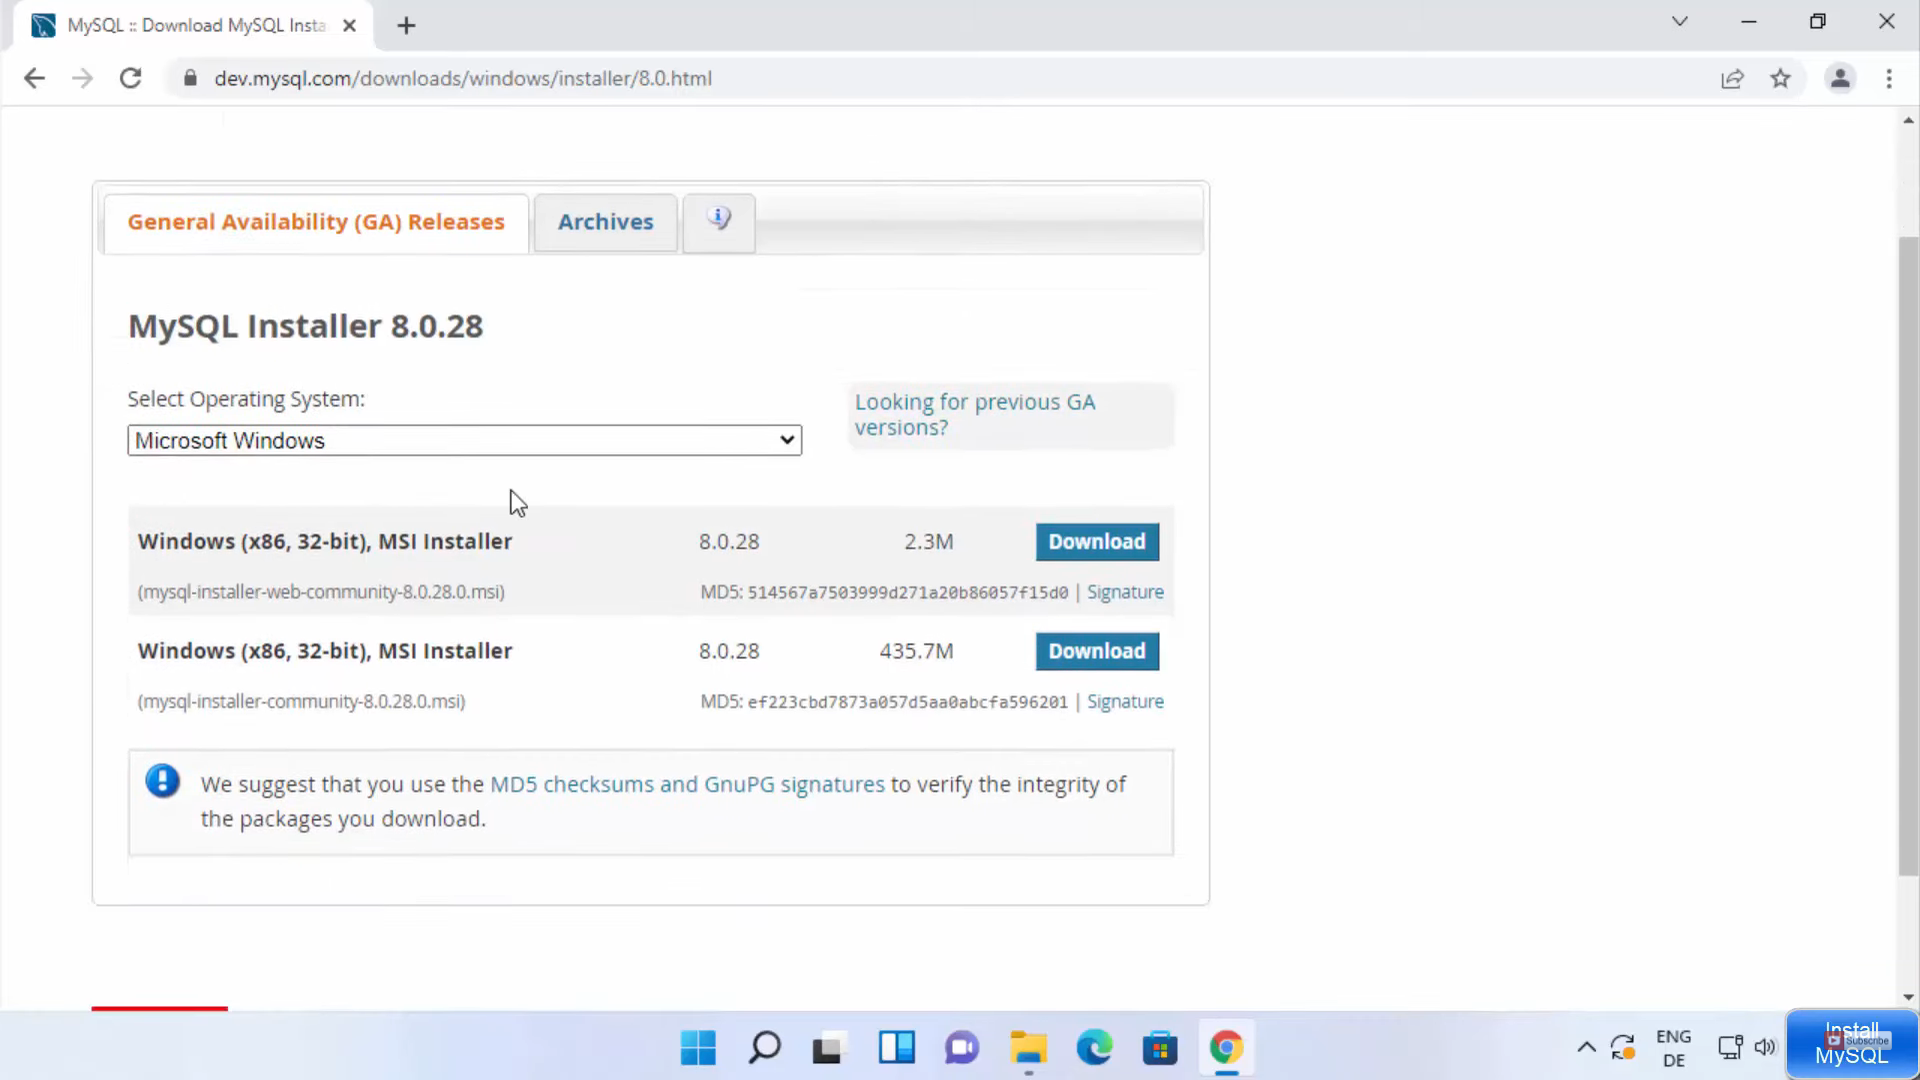
4. In that webpage, choose Microsoft Windows from the dropdown list. When you scroll down, you will be able to see the zip versions. But we are going to install the MSI file. Click on go to download page button.

5. We are going to install the full version which is bigger in file size. Click on the download button.
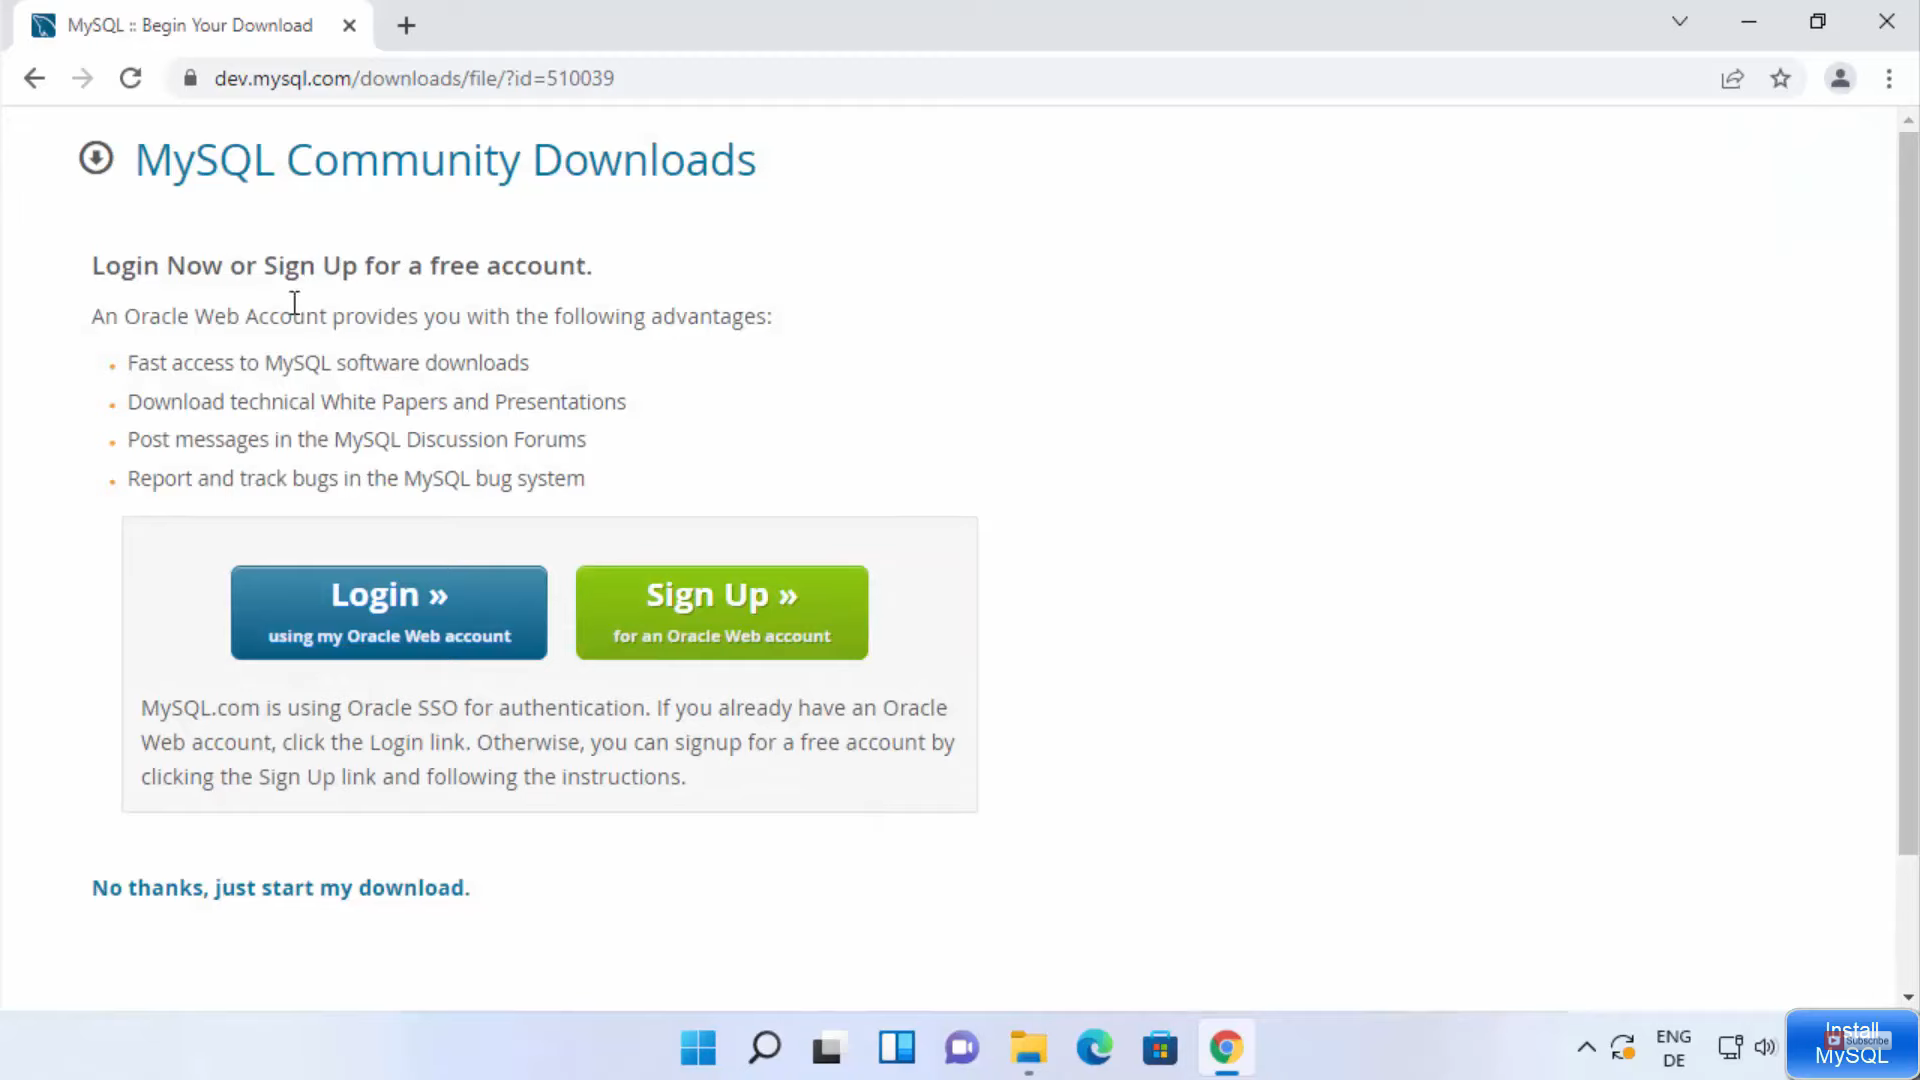
6. On this webpage, just click on no thanks and start the download link. It will start to download.
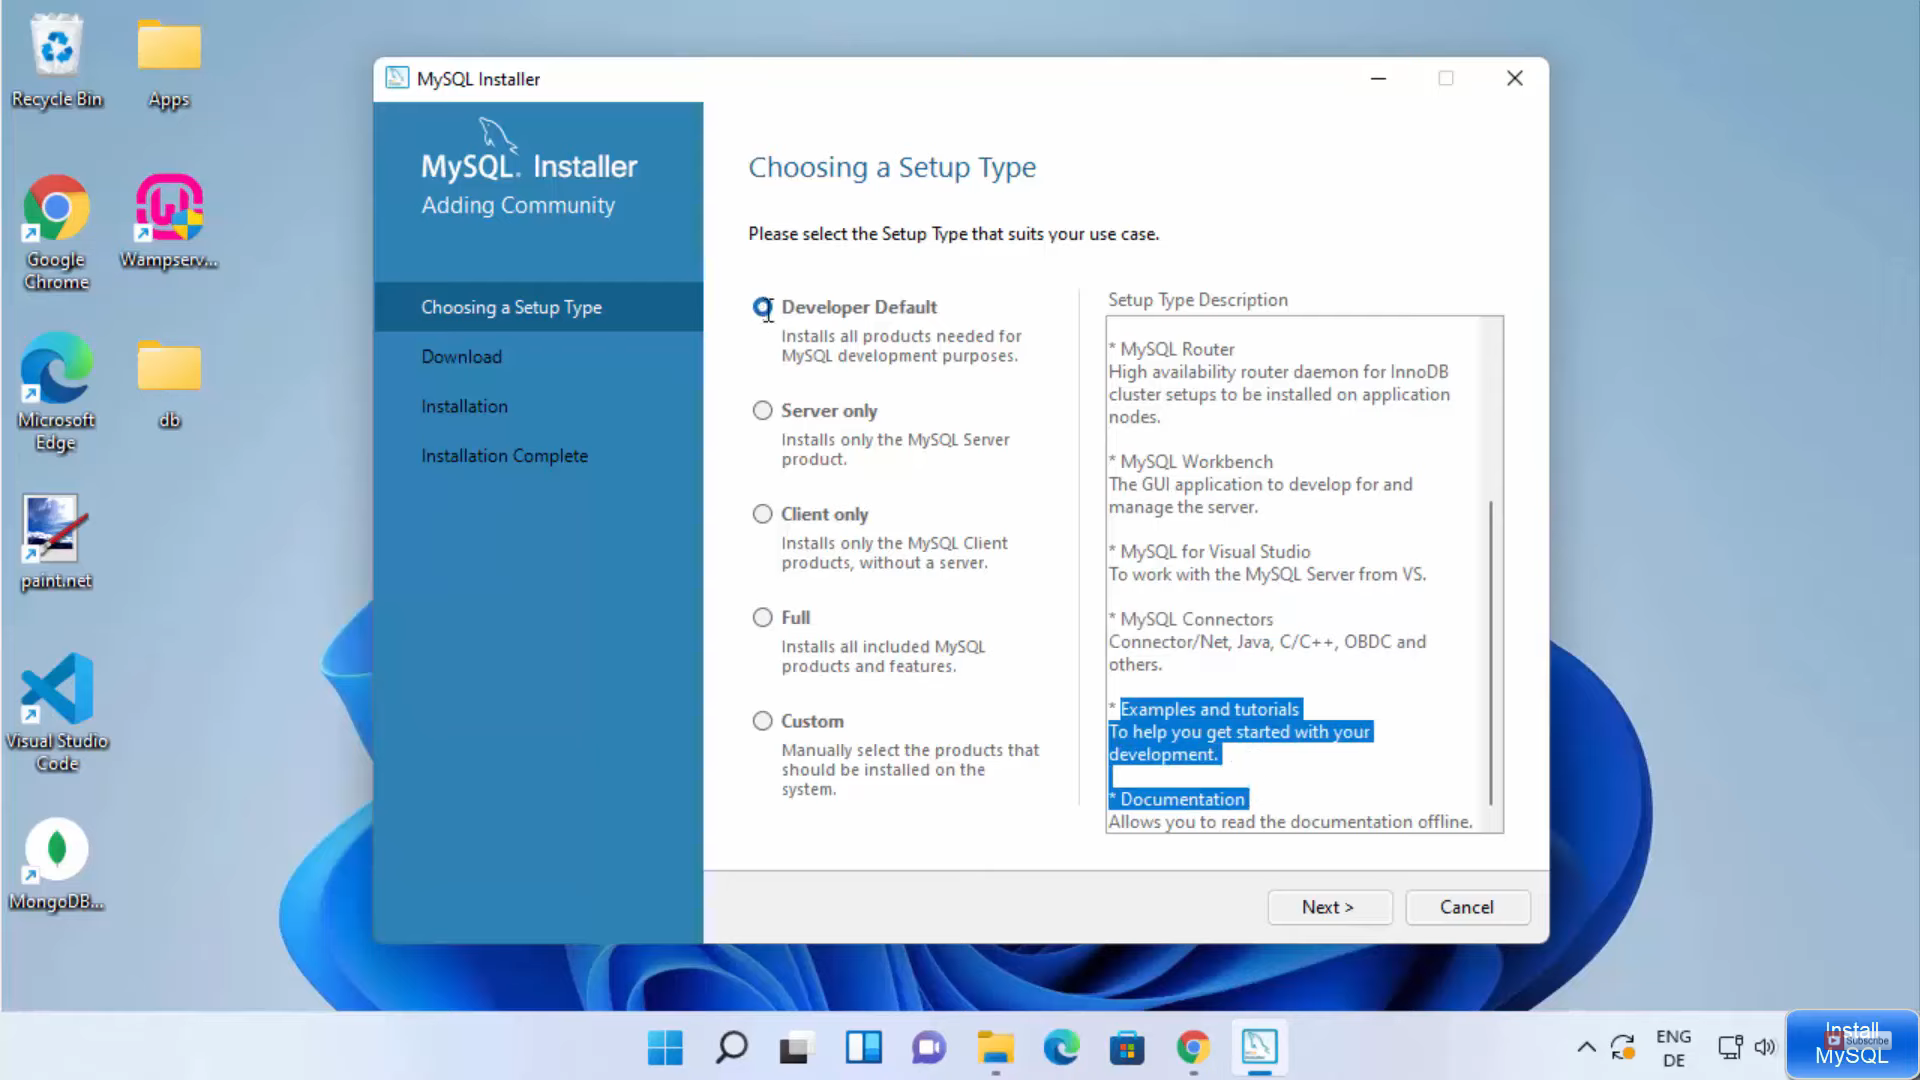
7. Once the download is complete, click on the msi file and minimize the browser. In the setup type window, I am going to choose the first option which is developer default. Then, click on Next.
8. In the next window, I am not going to choose anything and click on Next. It will show some warning. Click on yes.

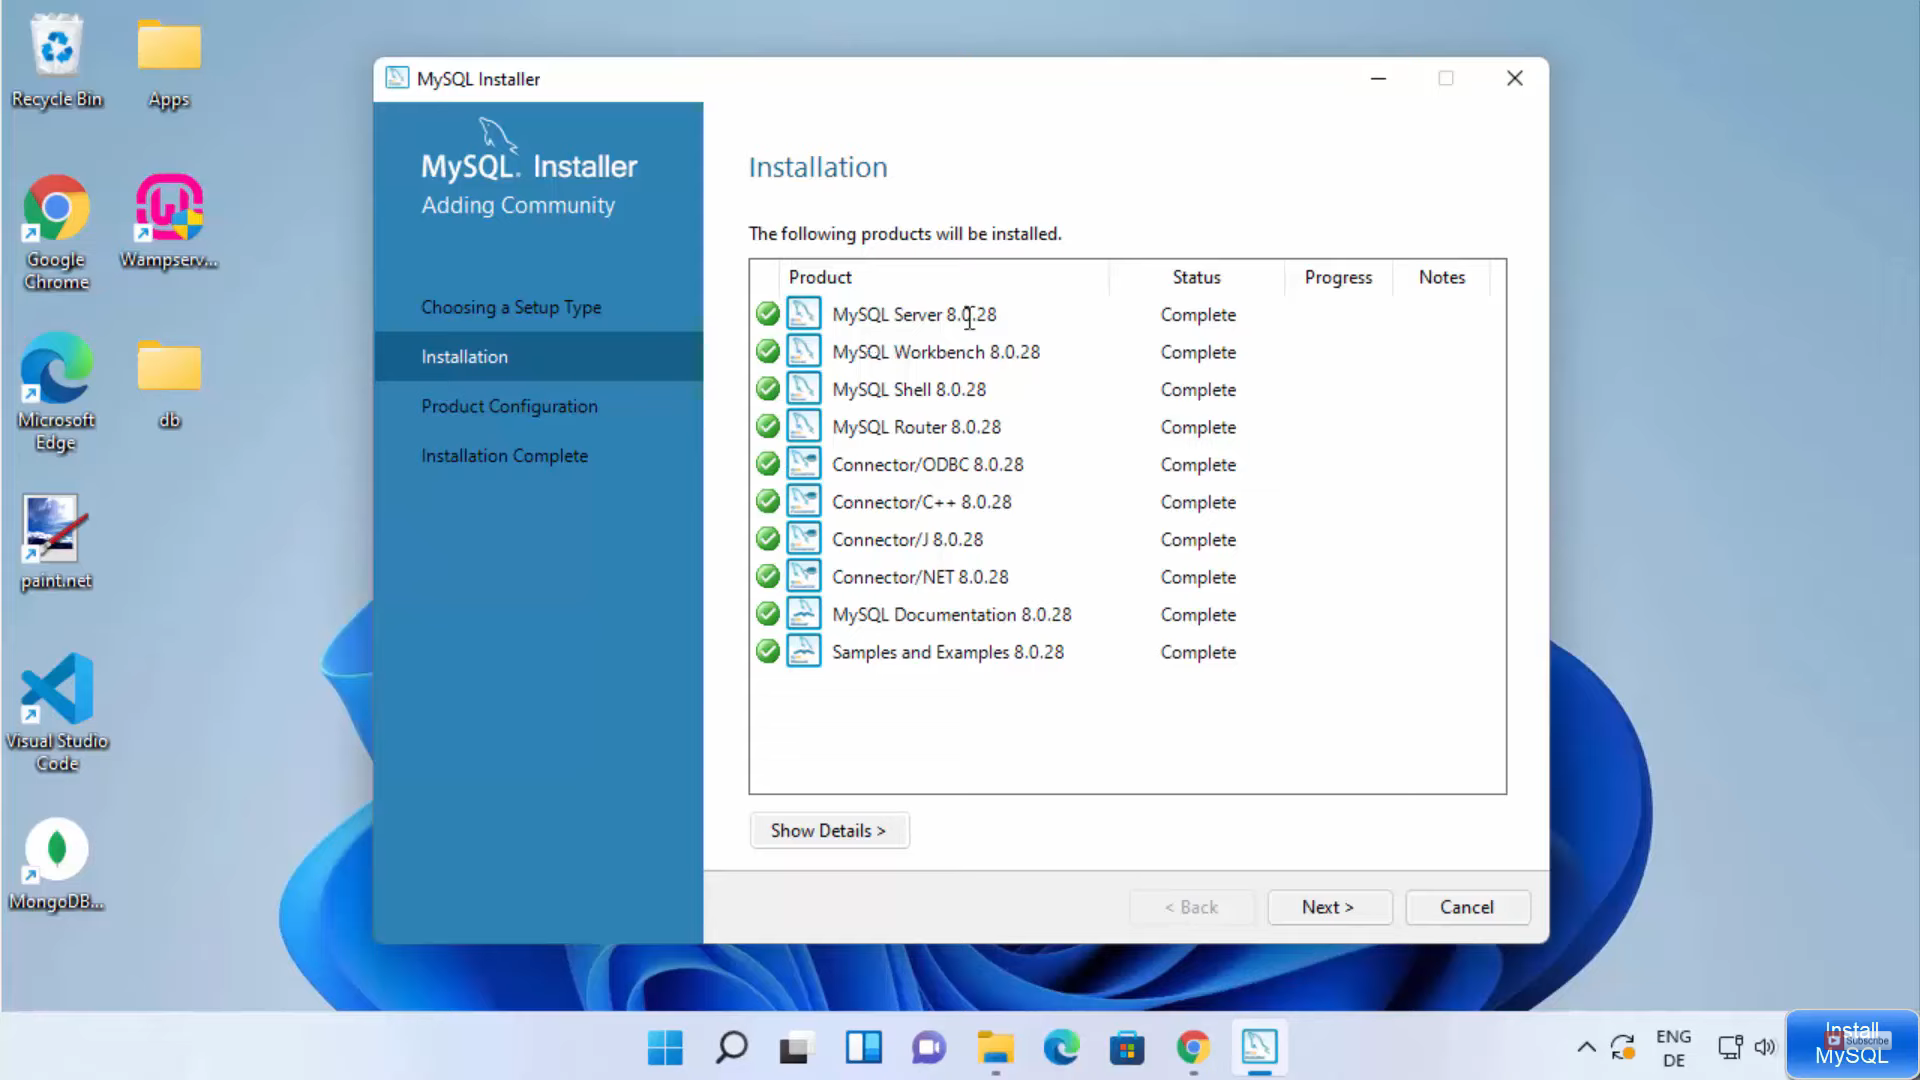
9. In the next window, a list of all the products will be installed. Click on execute to start the installation. Once everything is complete, click on Next.
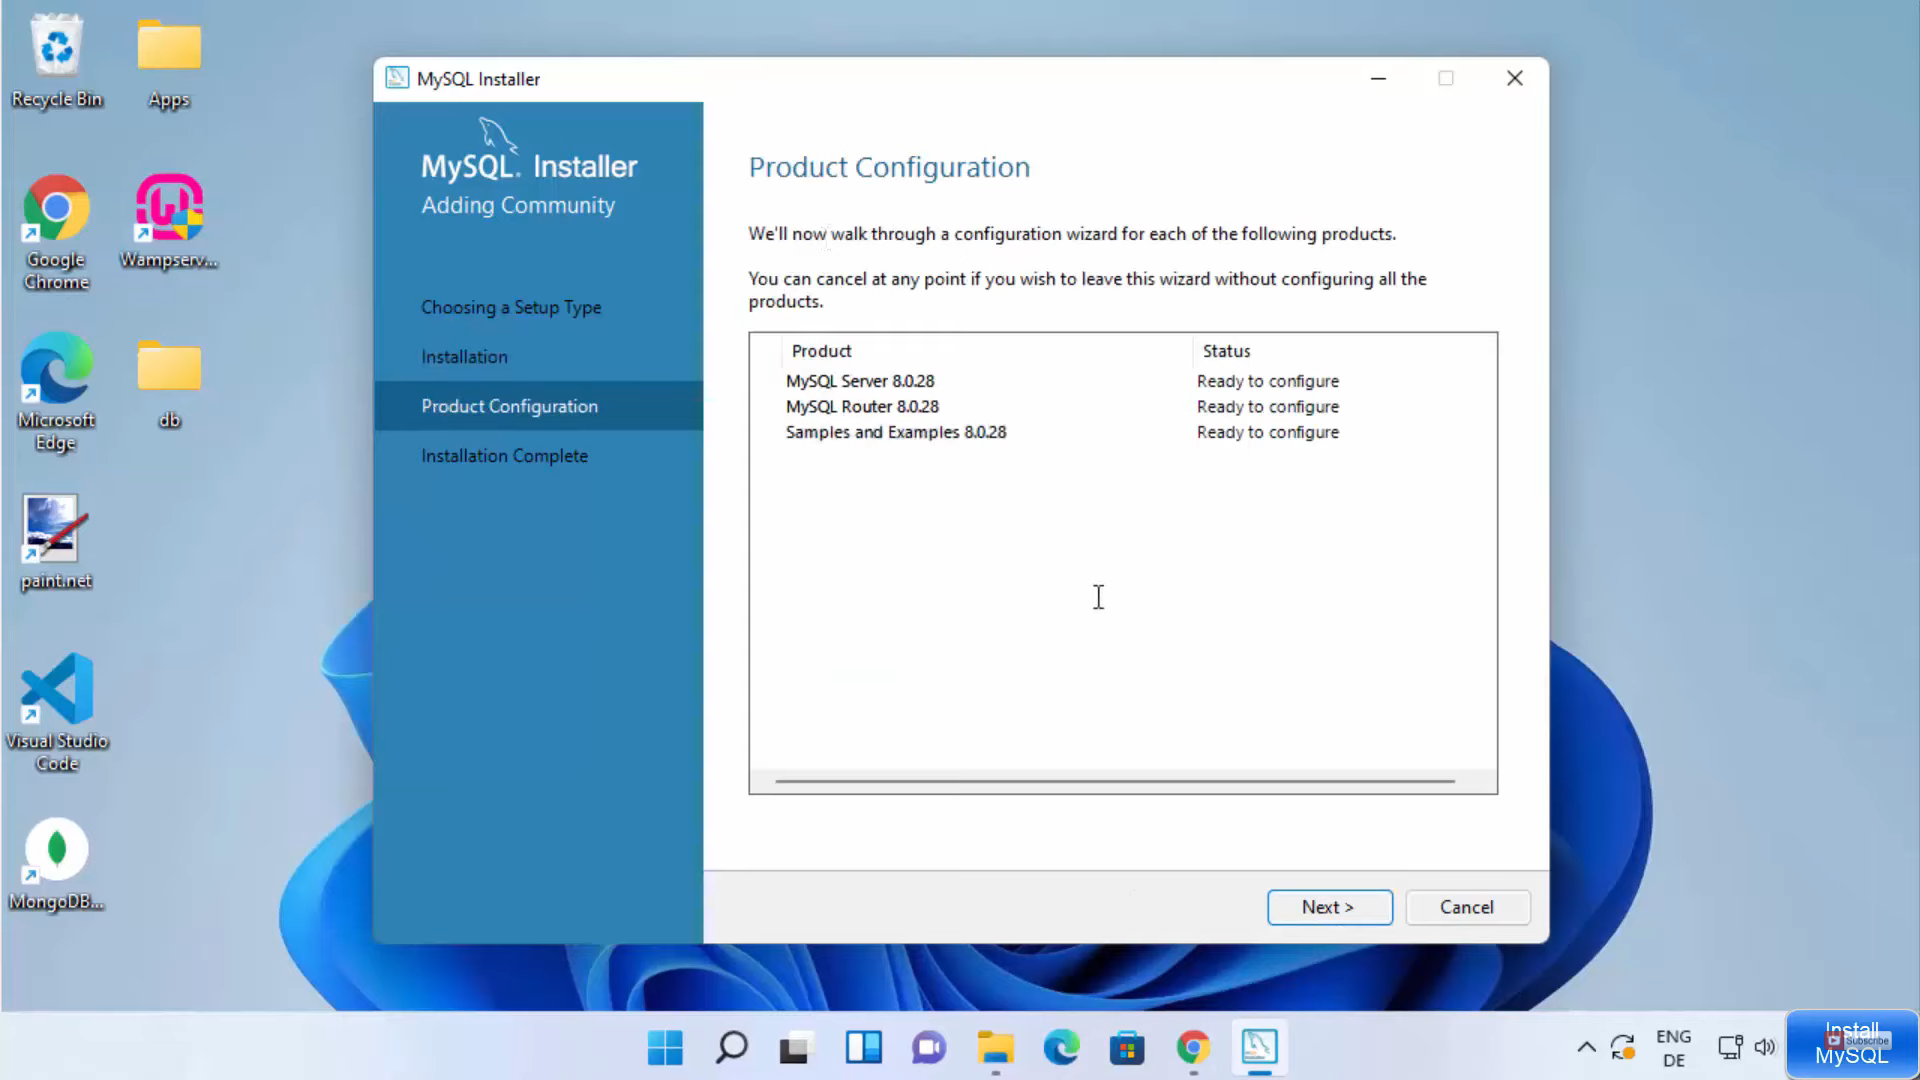
10. In the product configuration window, click on Next.
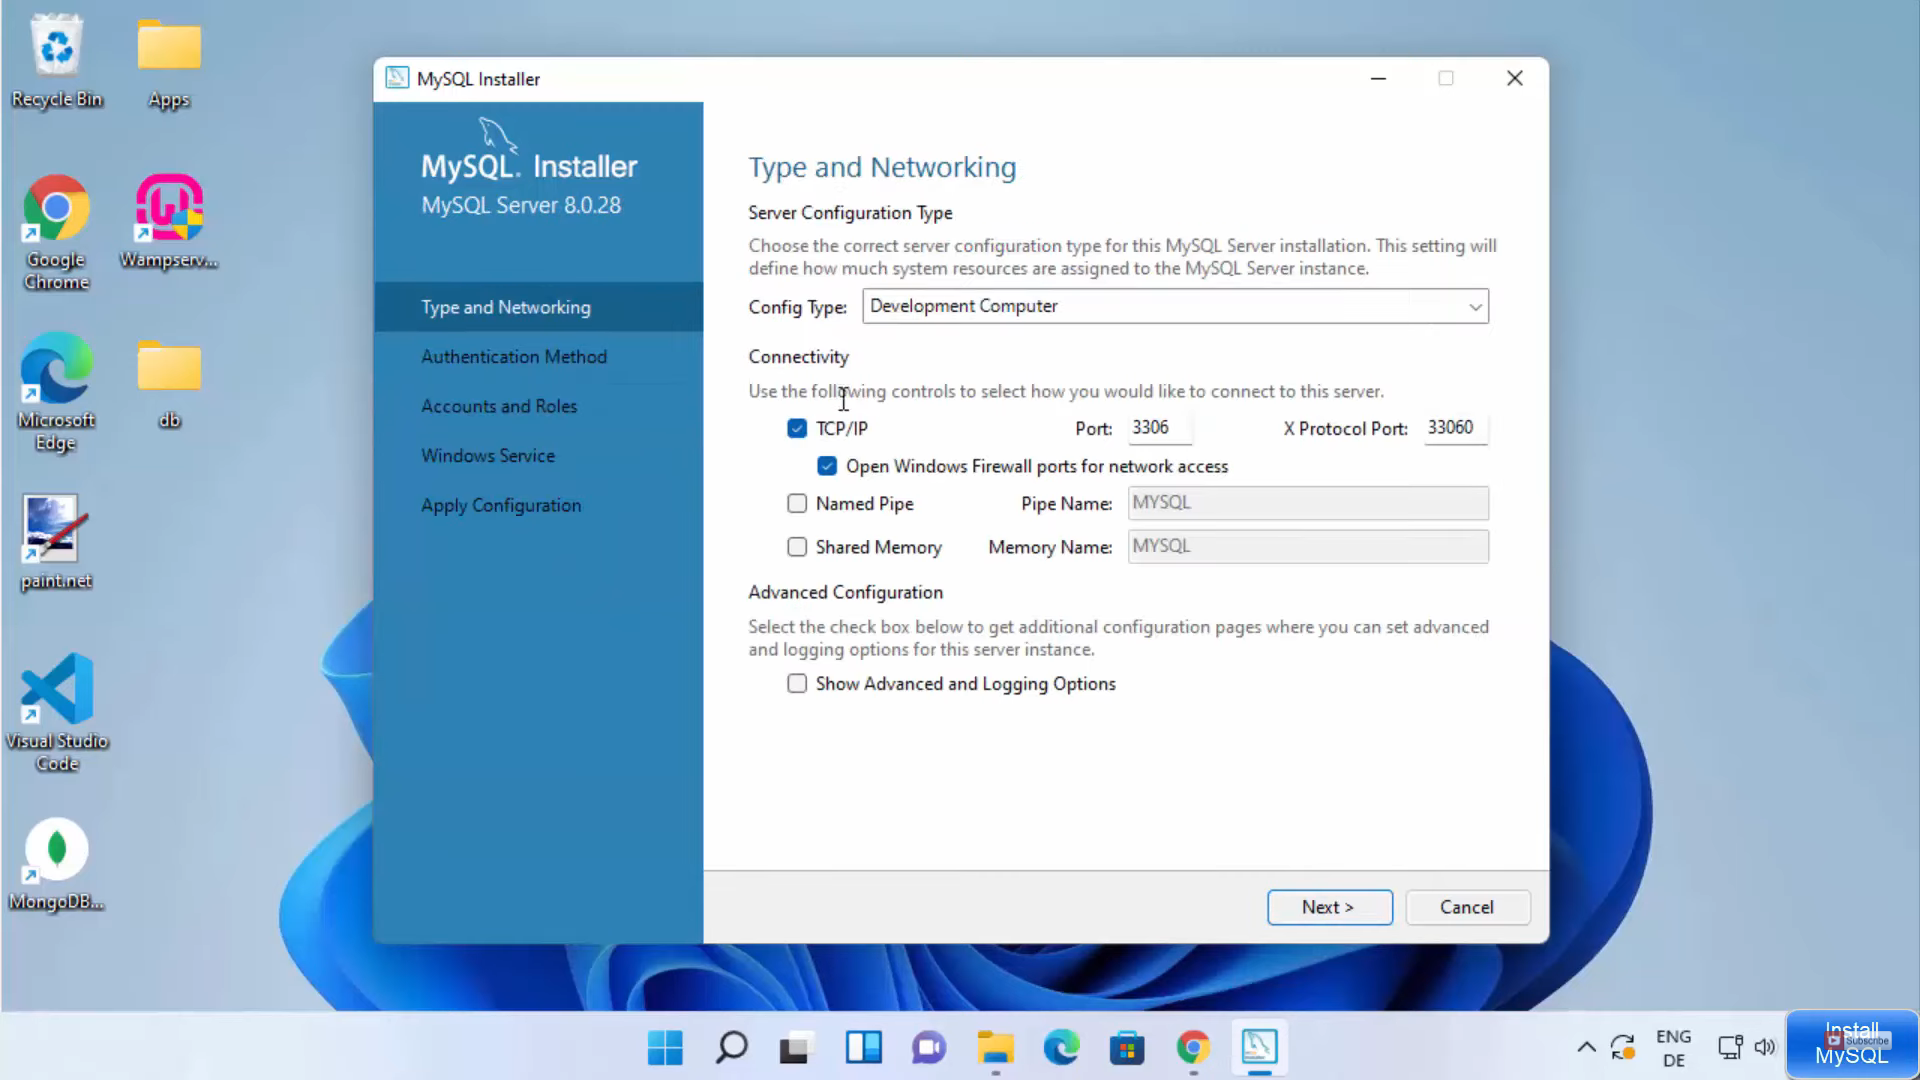
11. In the next window, leave everything as default and click on Next.
12. In this window, I am going to choose the recommended option and click on Next.

13. In the next window, you need to choose a password. Once you have created the password you can create different users as well. Then, click on Next.

14. In this window, leave everything as default and click on Next.

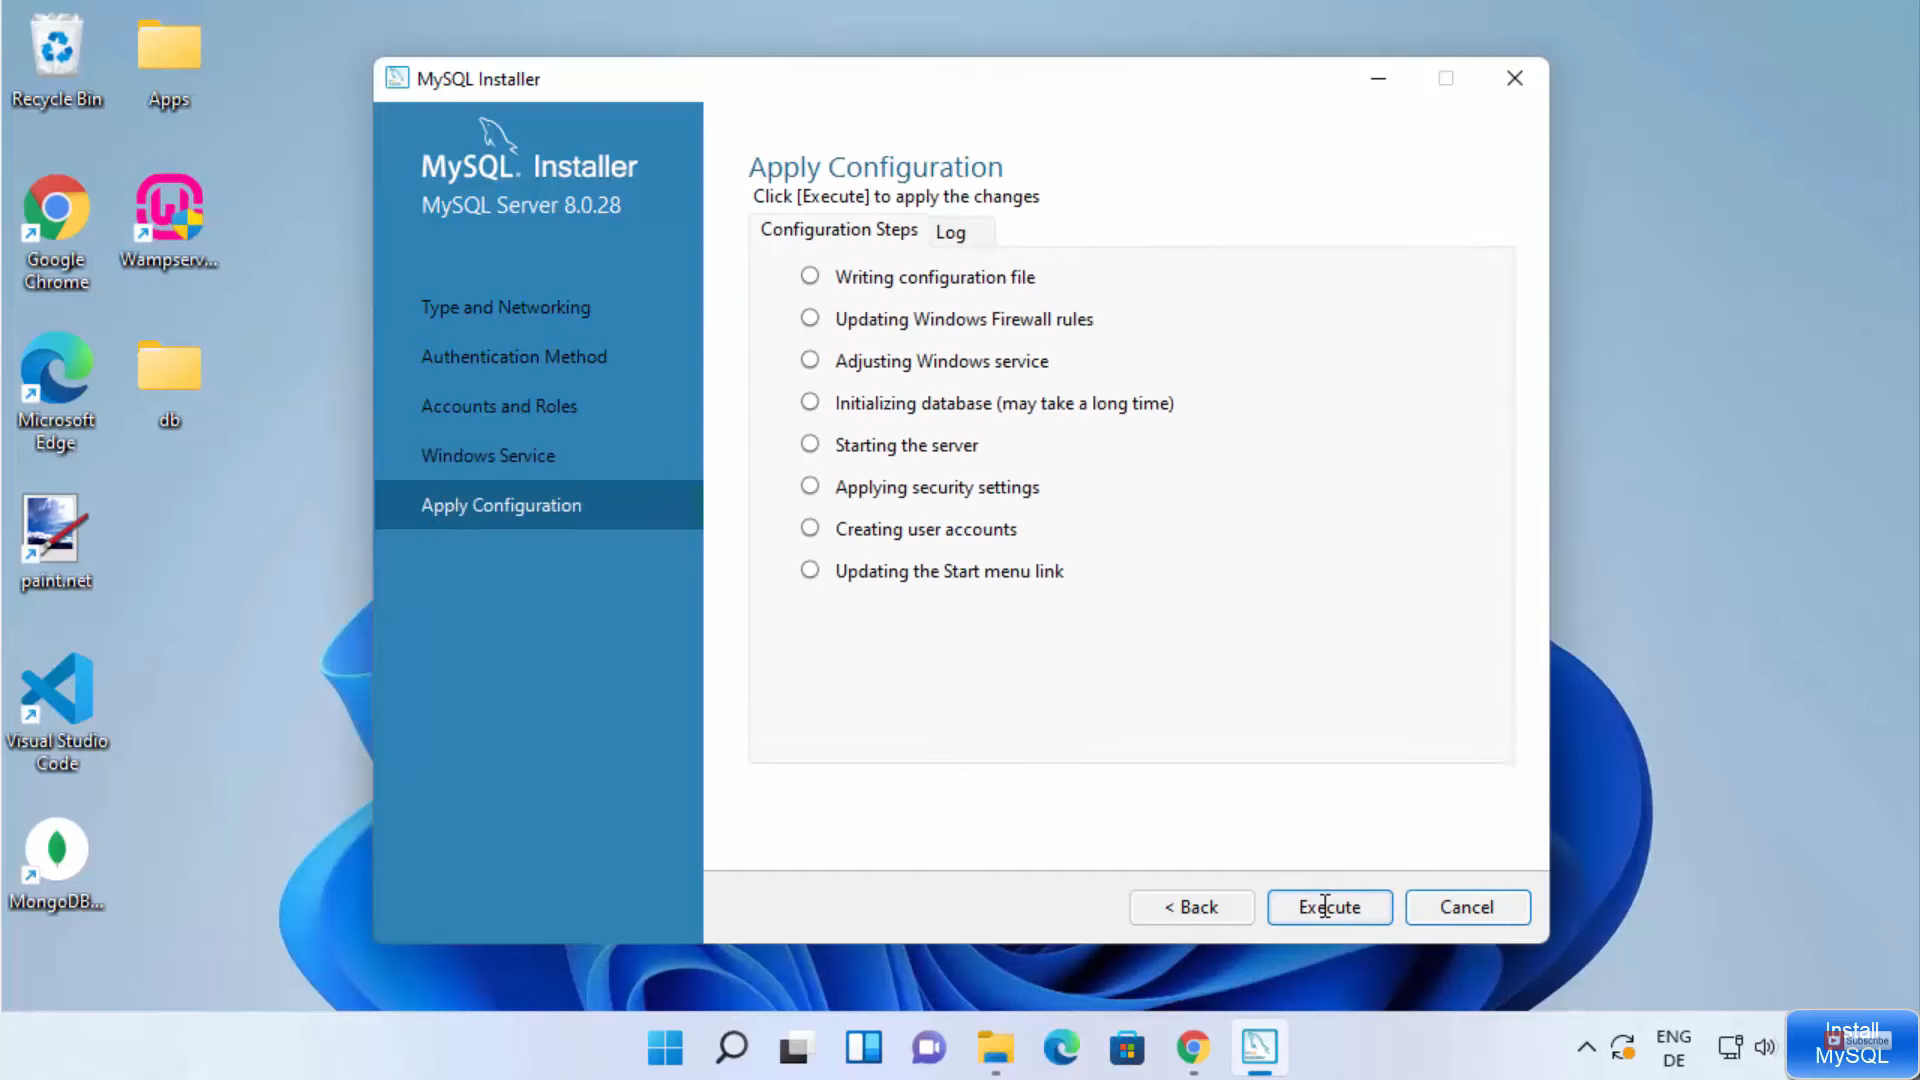
15. In the next window, click on Execute.
16. I am not going to use the router configuration now so click on Finish.

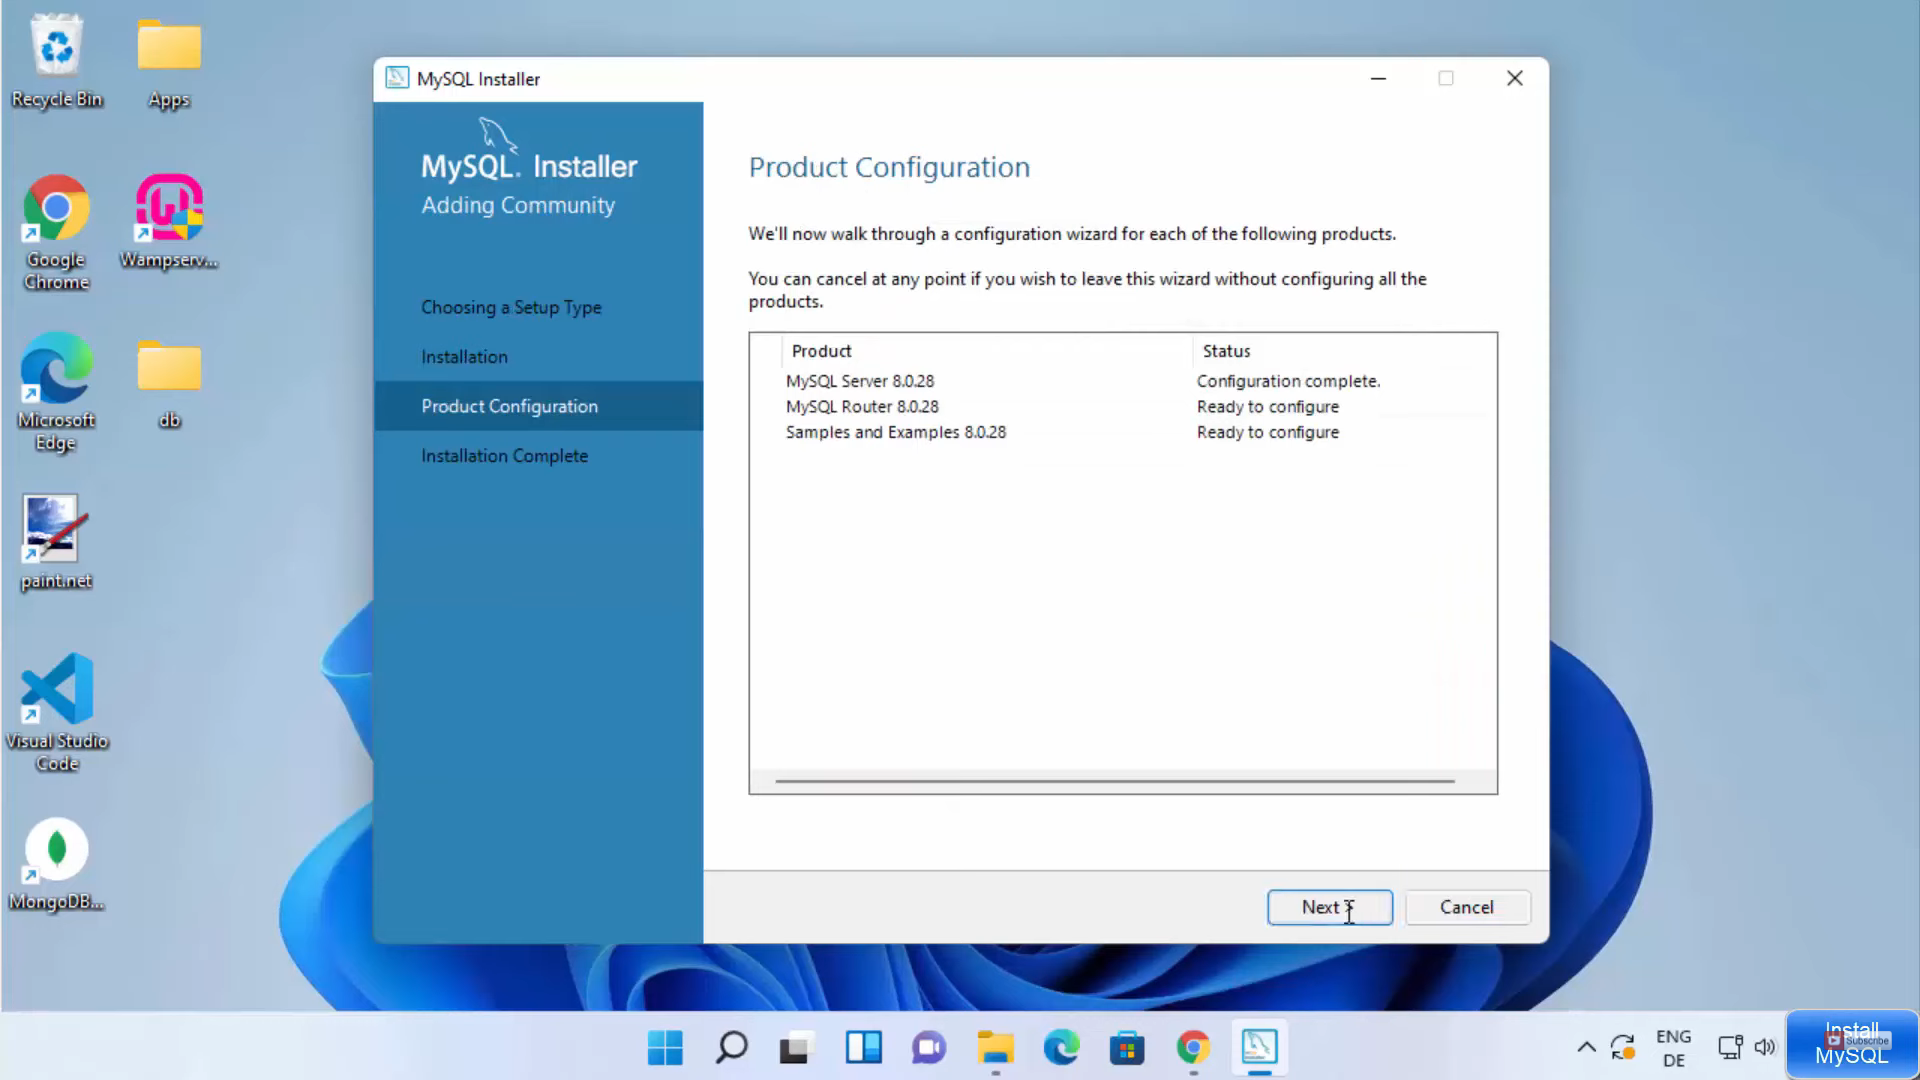
17. In the product configuration window, click on Next.
18. Here, it will ask you to provide the password. Click on the check after entering the password. Then, click on Next.

19. Click on execute in the next window. Once the process is completed successfully click on Finish.

20. In the next window, click on Execute.

21. In this window, click on the button to copy the log to the clipboard. Click on Finish.

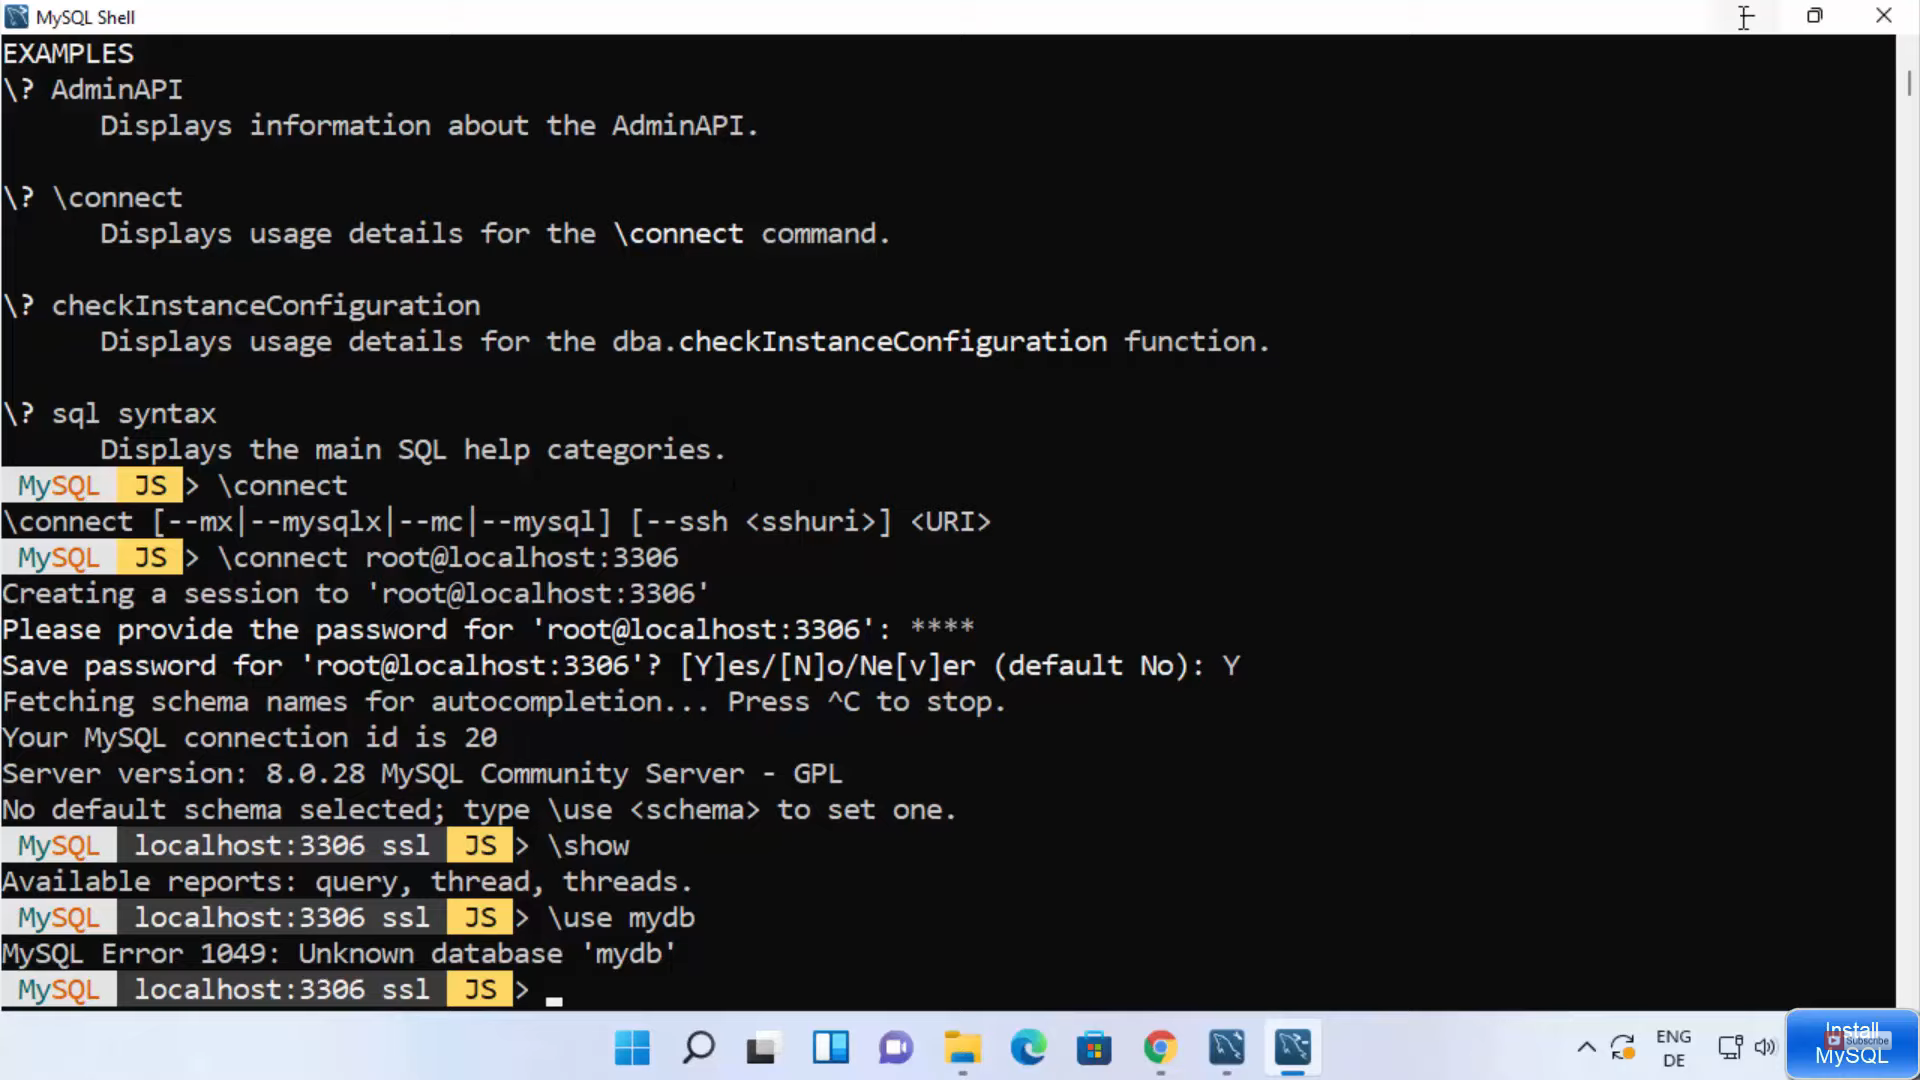
22. Mysql shell and workbench will start. In the shell give \help and press enter. It will show you the most important commands that you can use.

23. When you type \connect and press enter, it will show you how you can use the connect command. Now, when I type \connect root@localhost:3306 (3306 is the default port of MySQL) and press enter. It will ask you for the password. This is the password that you have set at the time of installation. You need to provide that password. If you want to save the password, then type Y. It will save your password. Now, I am connected to my local host. When I type the show command, it will show all the available reports. When I type \use mydb, it will display that database if it is available. These are the steps for working with the MySQL shell.
24. In the Mysql workbench, click on local instance. Or you can click on the Database option at the top and click on Connect to the database.

25. From here, you can choose the hostname and port name. When you click on the store in the vault, it will ask you to provide the password. Then, click on Ok.
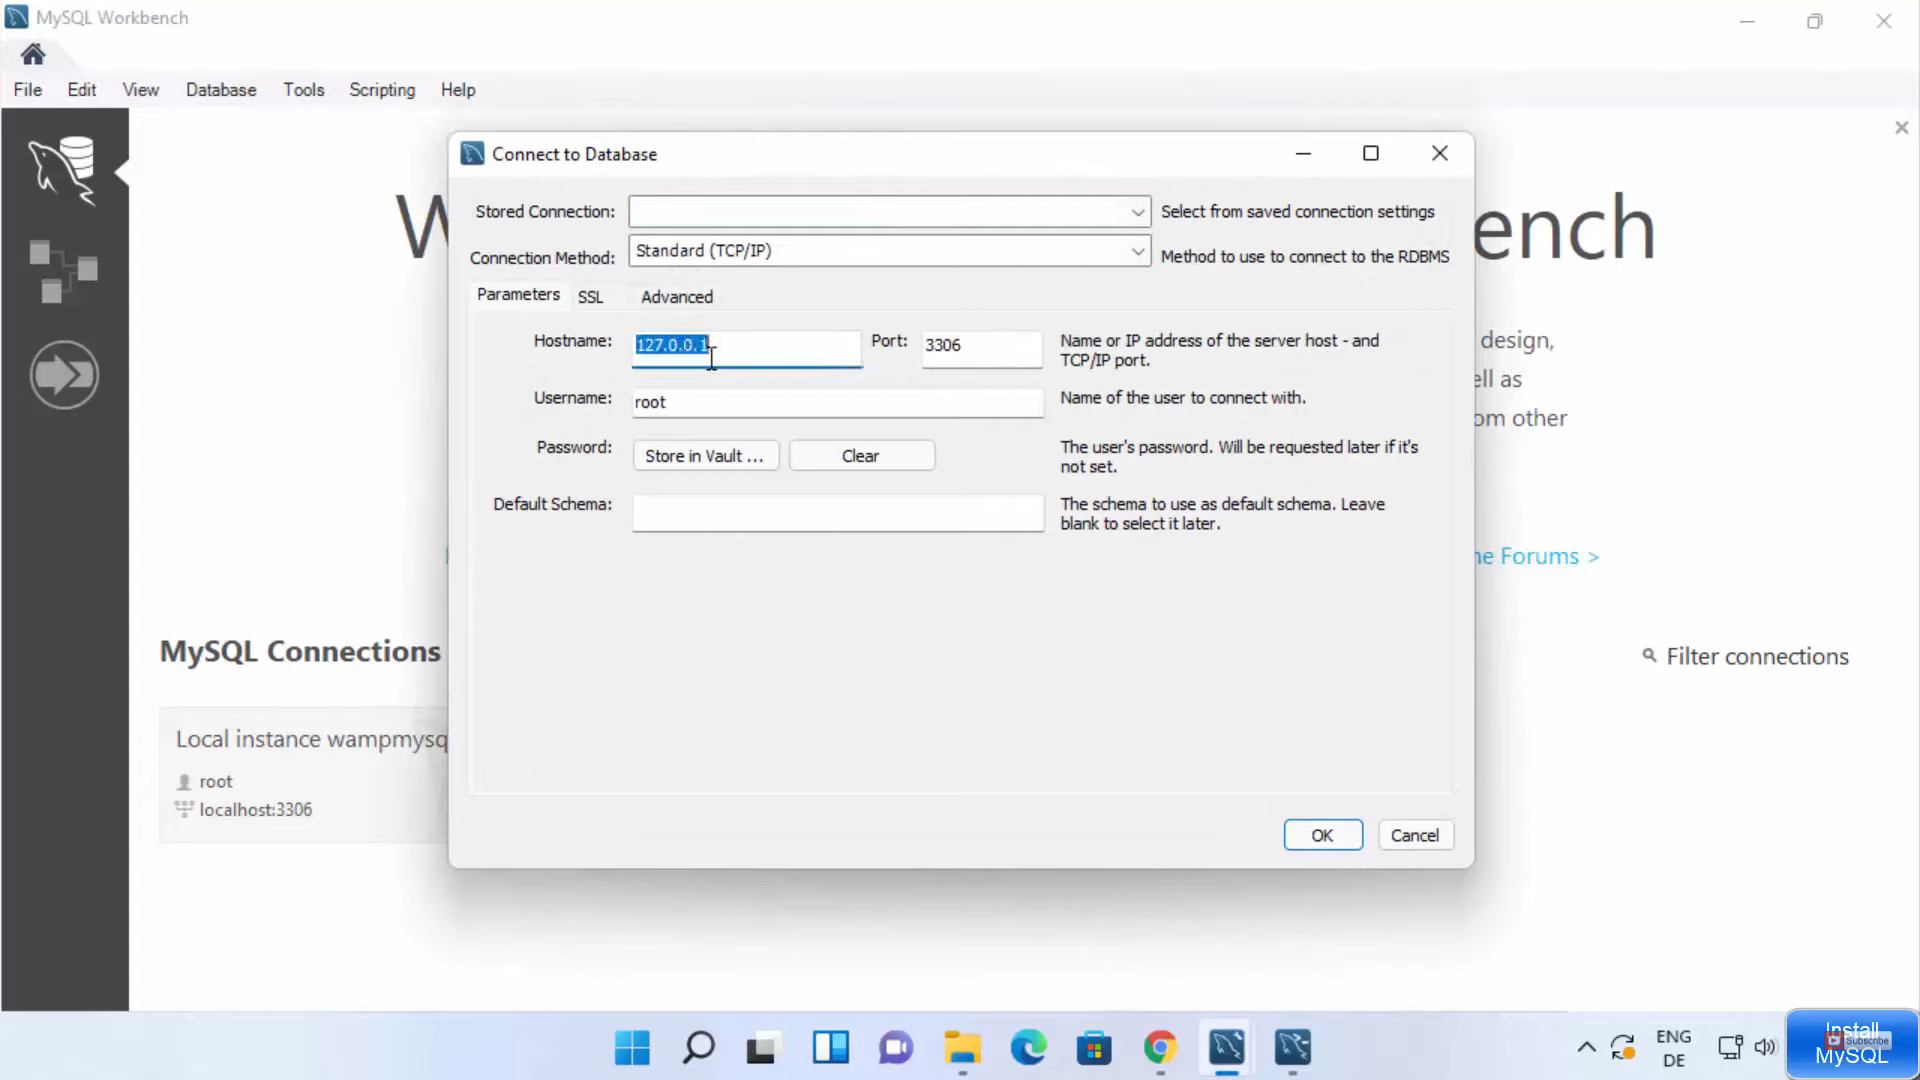
26. It will connect you to the mysql server. Here, you can see 3 schemas. You can see the table result and query here.

These are the steps for downloading and installing MYSQL 8.0.28 server and workbench latest version on your Windows 11 Operating System.
Leave a Reply