
In this blog post, I will give a detailed view of installing guest additions in VirtualBox to your Windows 11 Operating System.
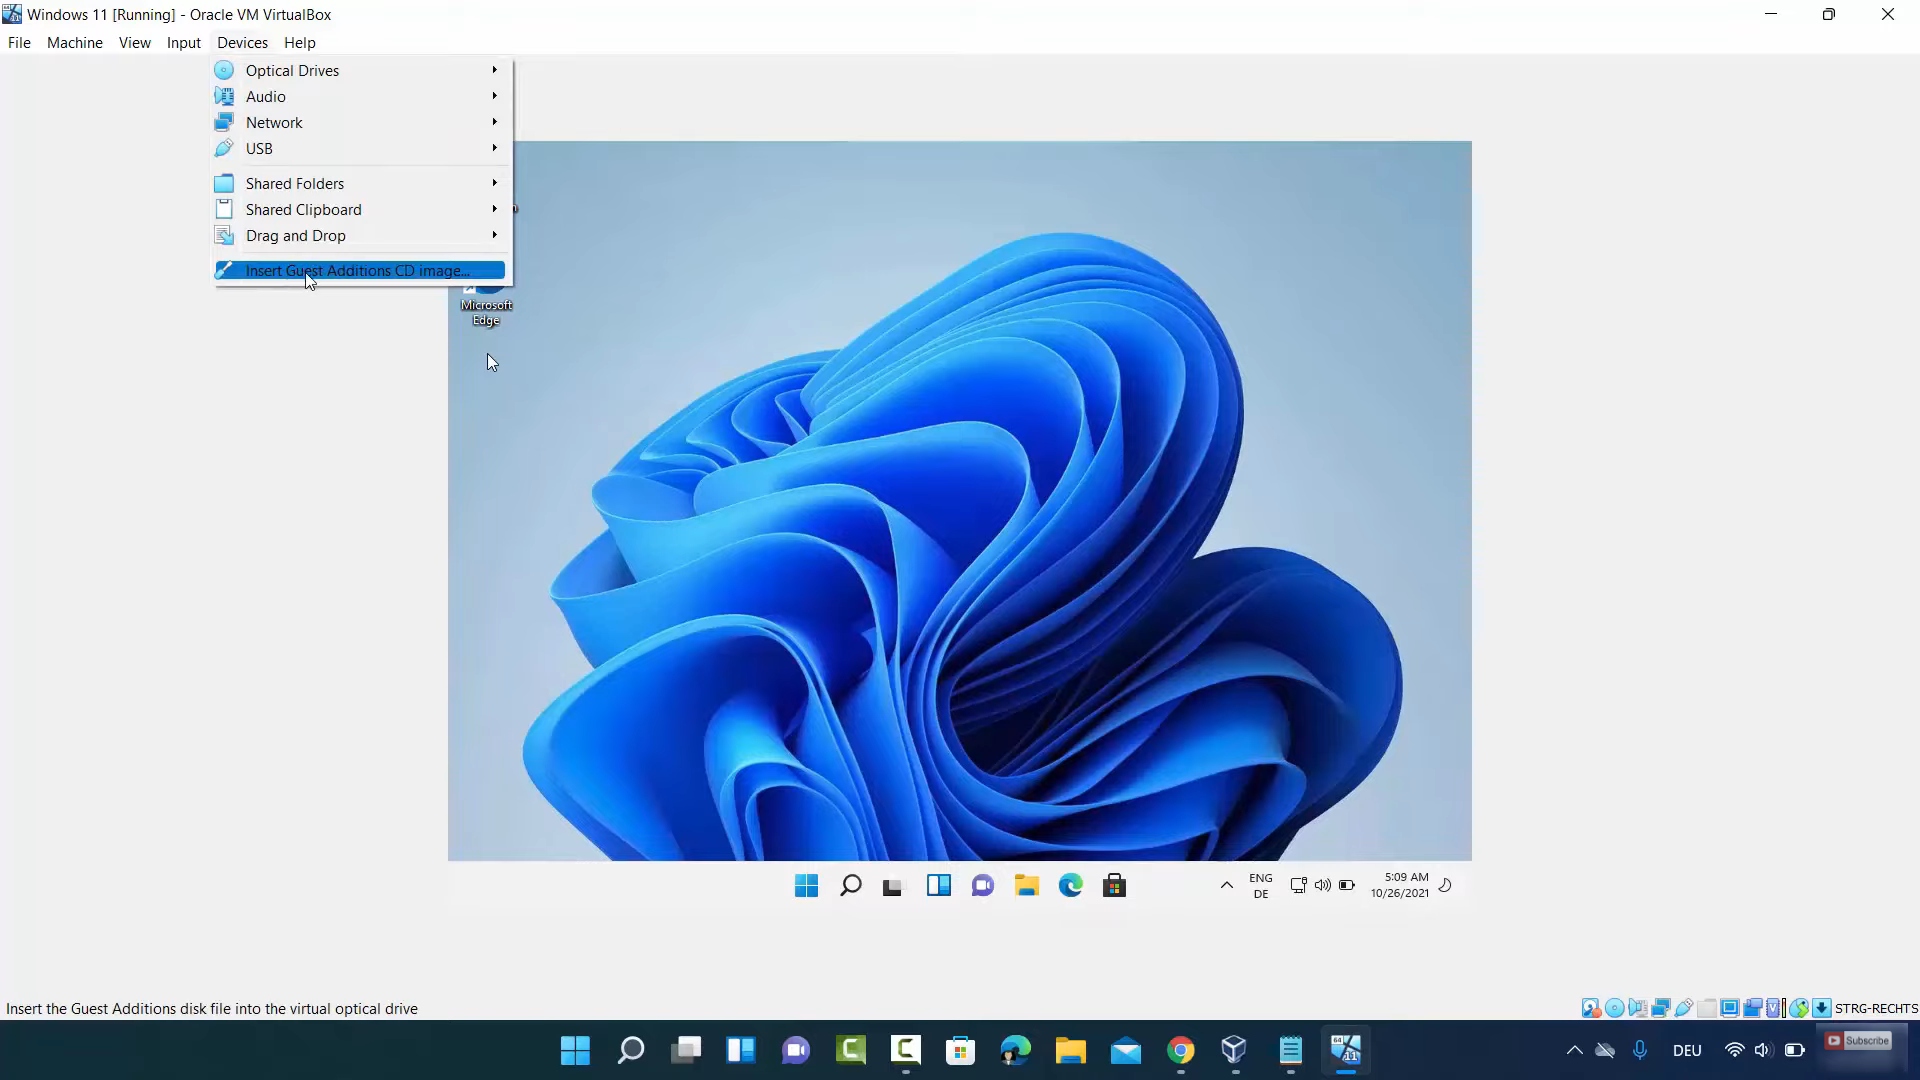
1. For installation, click on Devices at the top. Then, click on the Guest addition CD image option.
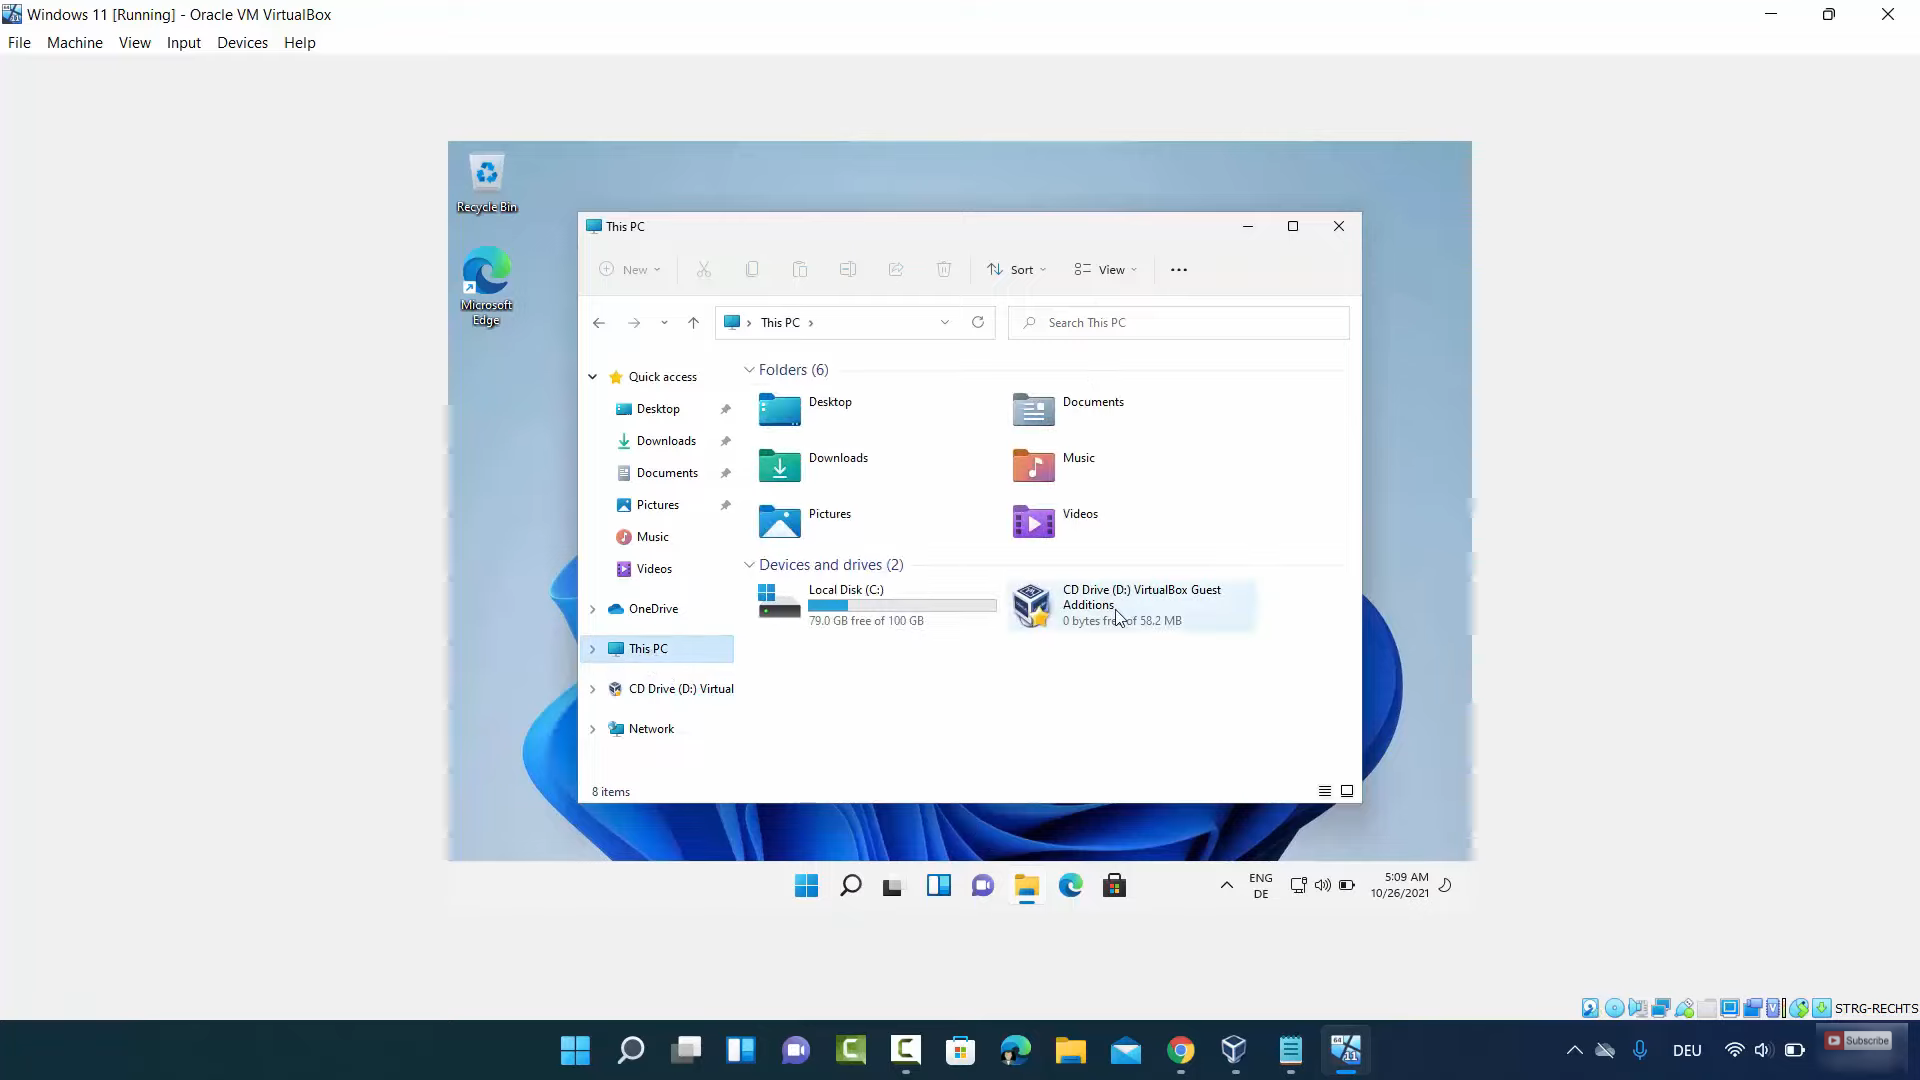
2. Then, click on File Explorer and click on This PC. Double click on CD Drive VirtualBox Guest Additions.
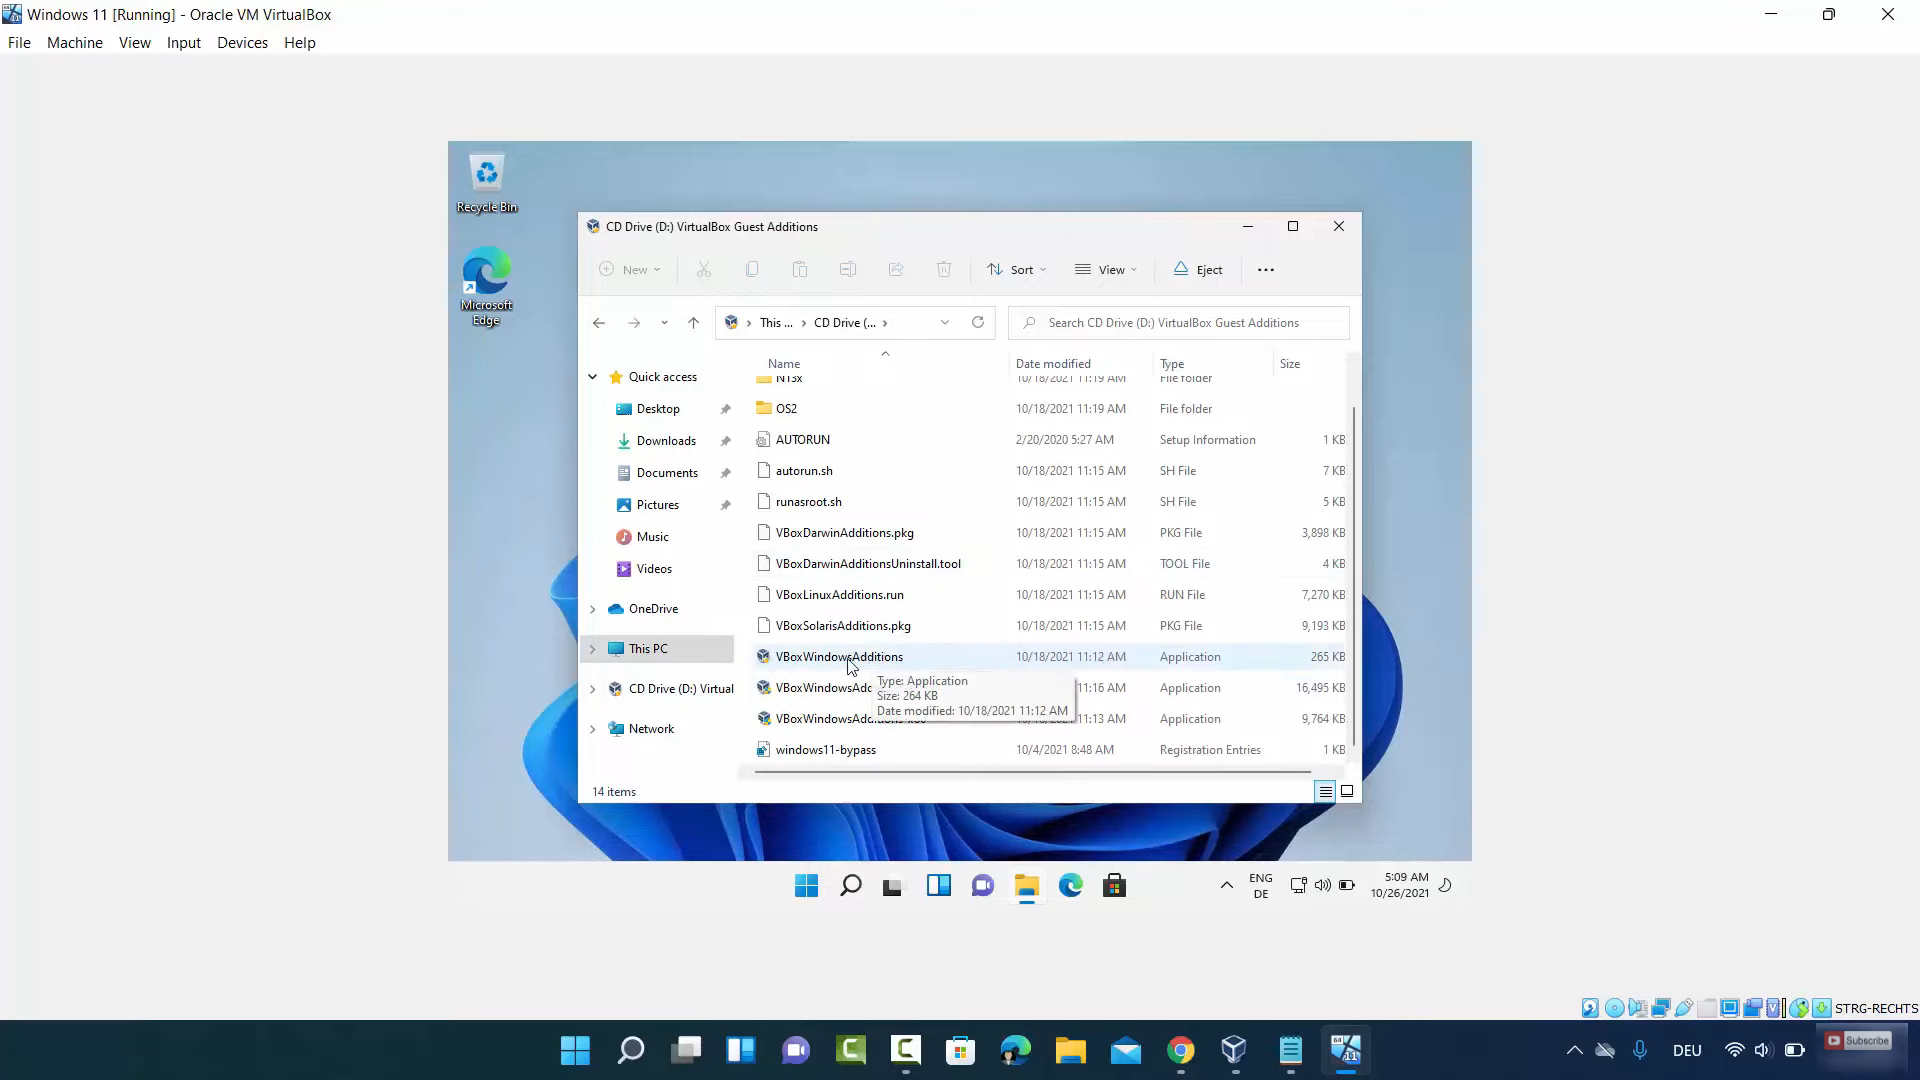
3. Here, you can see the setup. Click on VBoxWindowsAdditions.
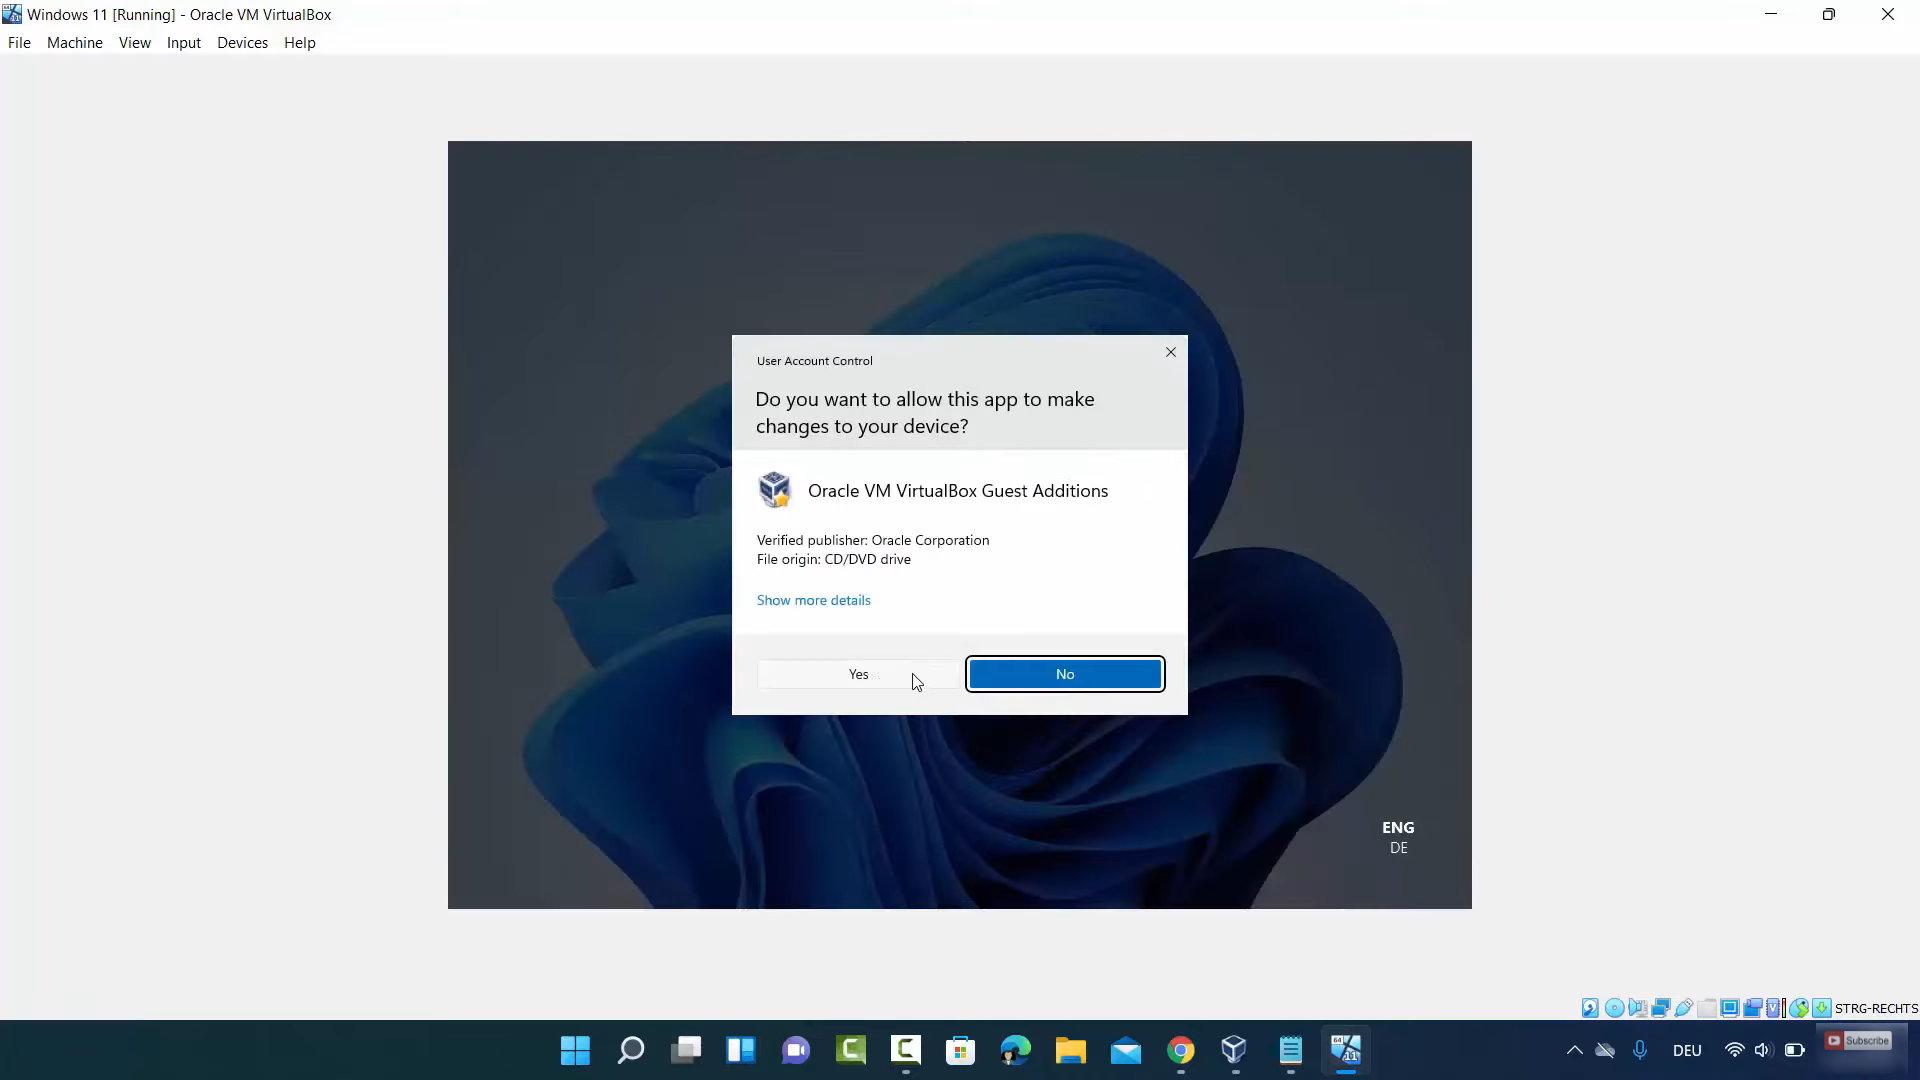
4. It will show a warning. Click on Yes. Then, minimize the file explorer window.
5. In this window, click on Next.

6. This will be the location where it will be installed. If you are not comfortable with the location, you can change it by clicking on the Browse option.

7. In the next window, click on Install.
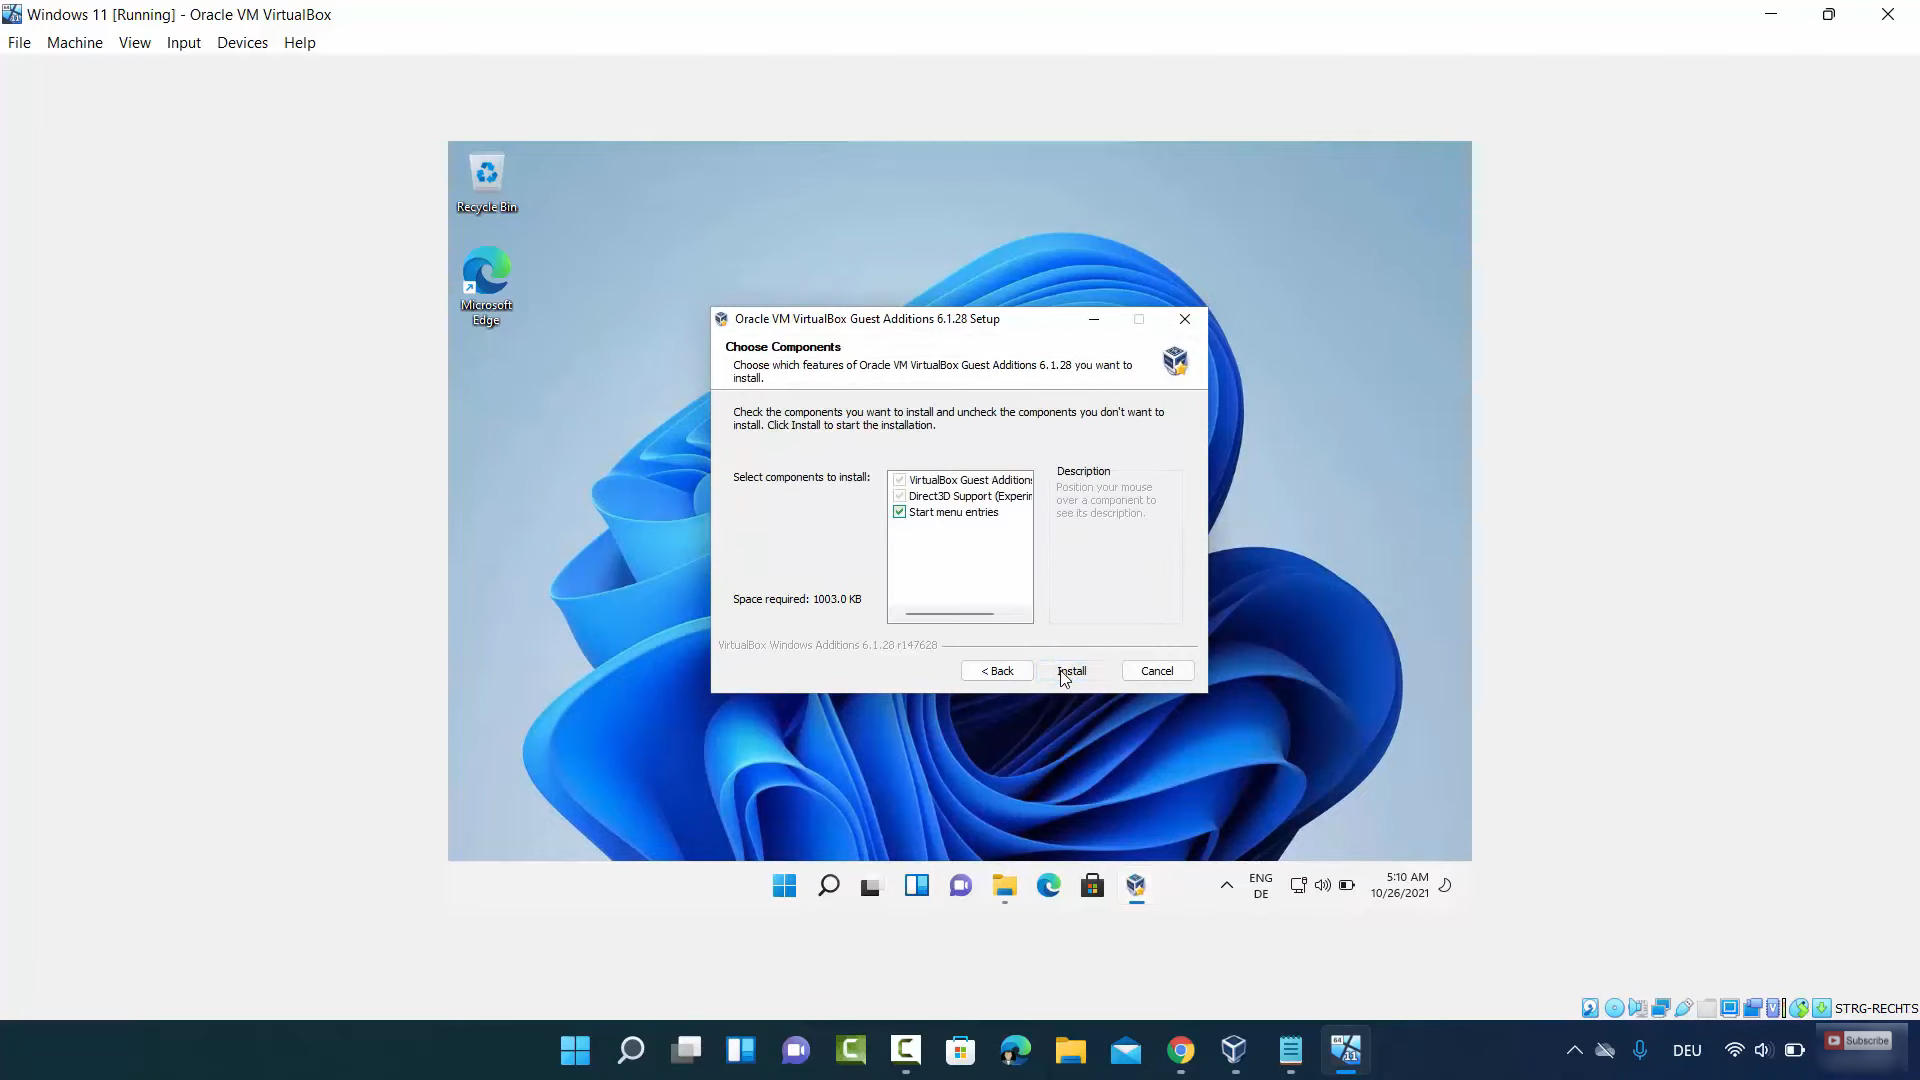
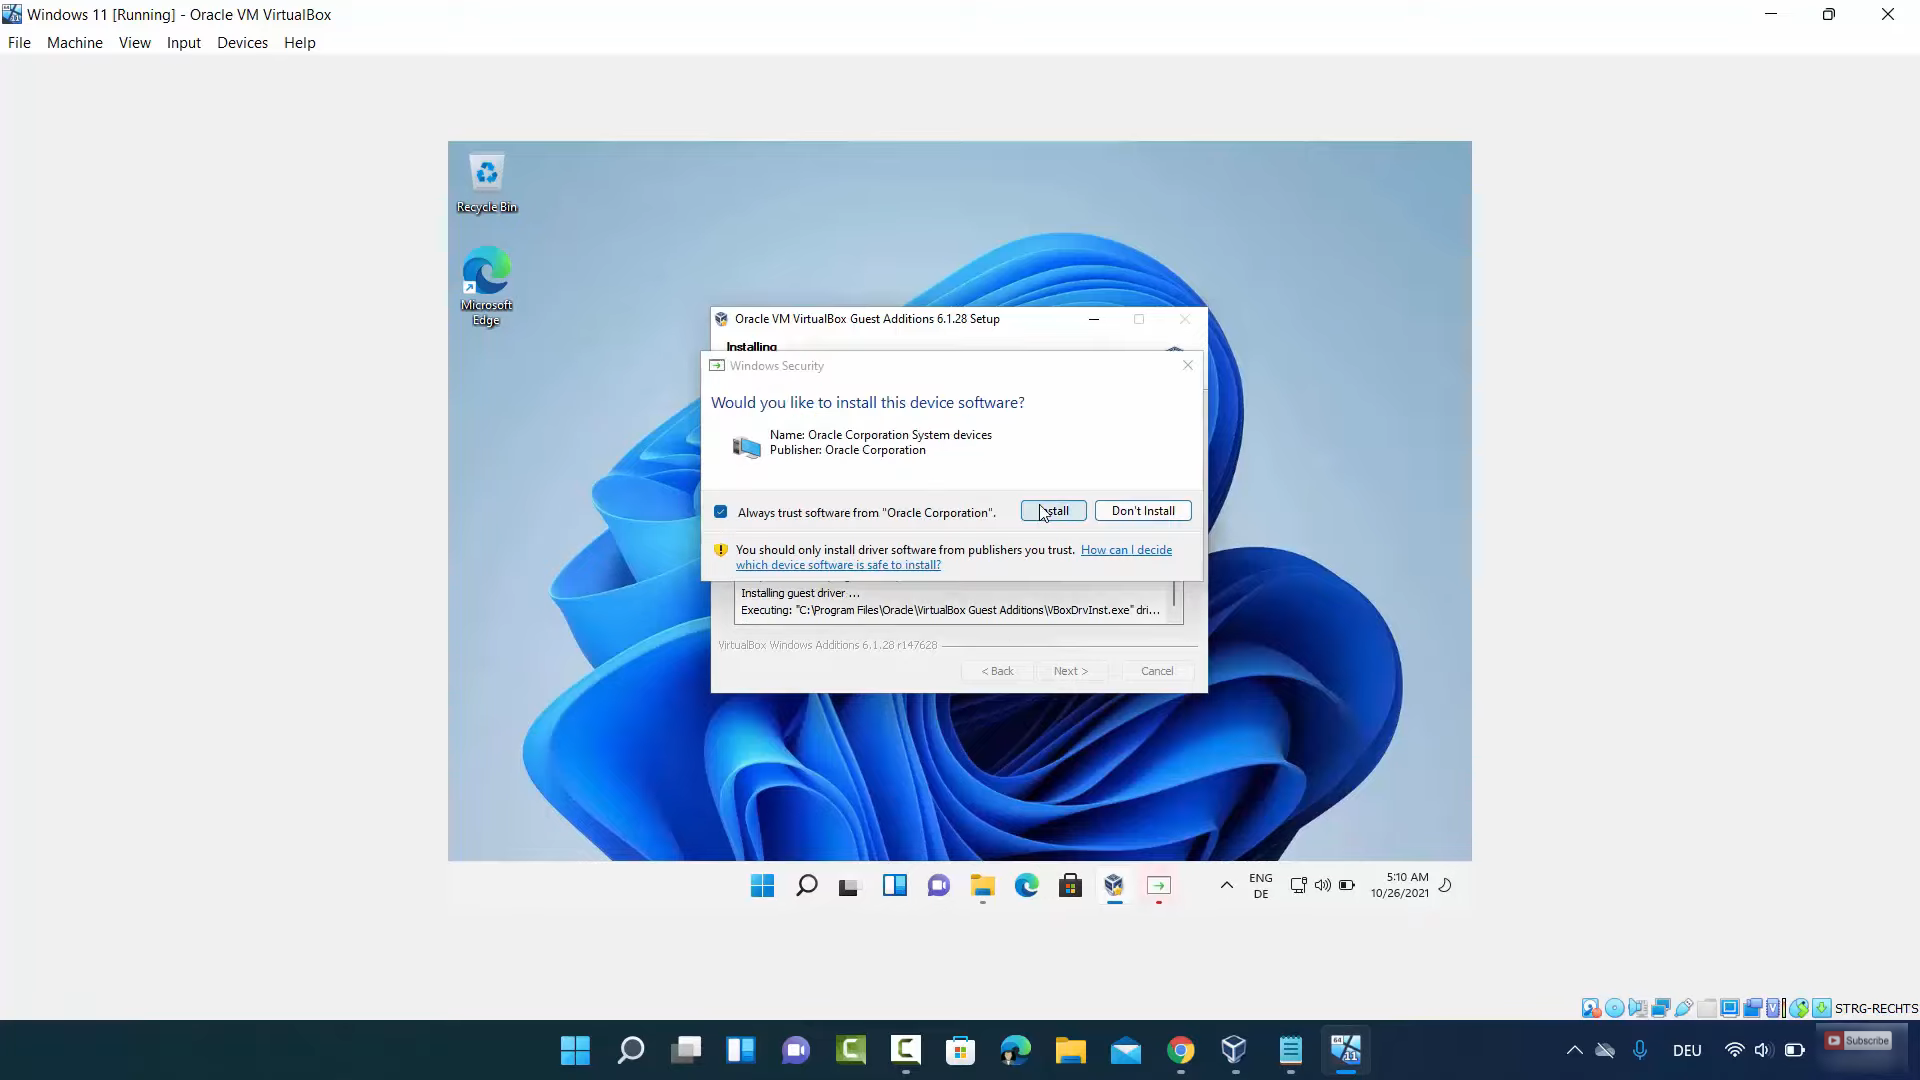
8. It will start the installation process. Click on Install once again.
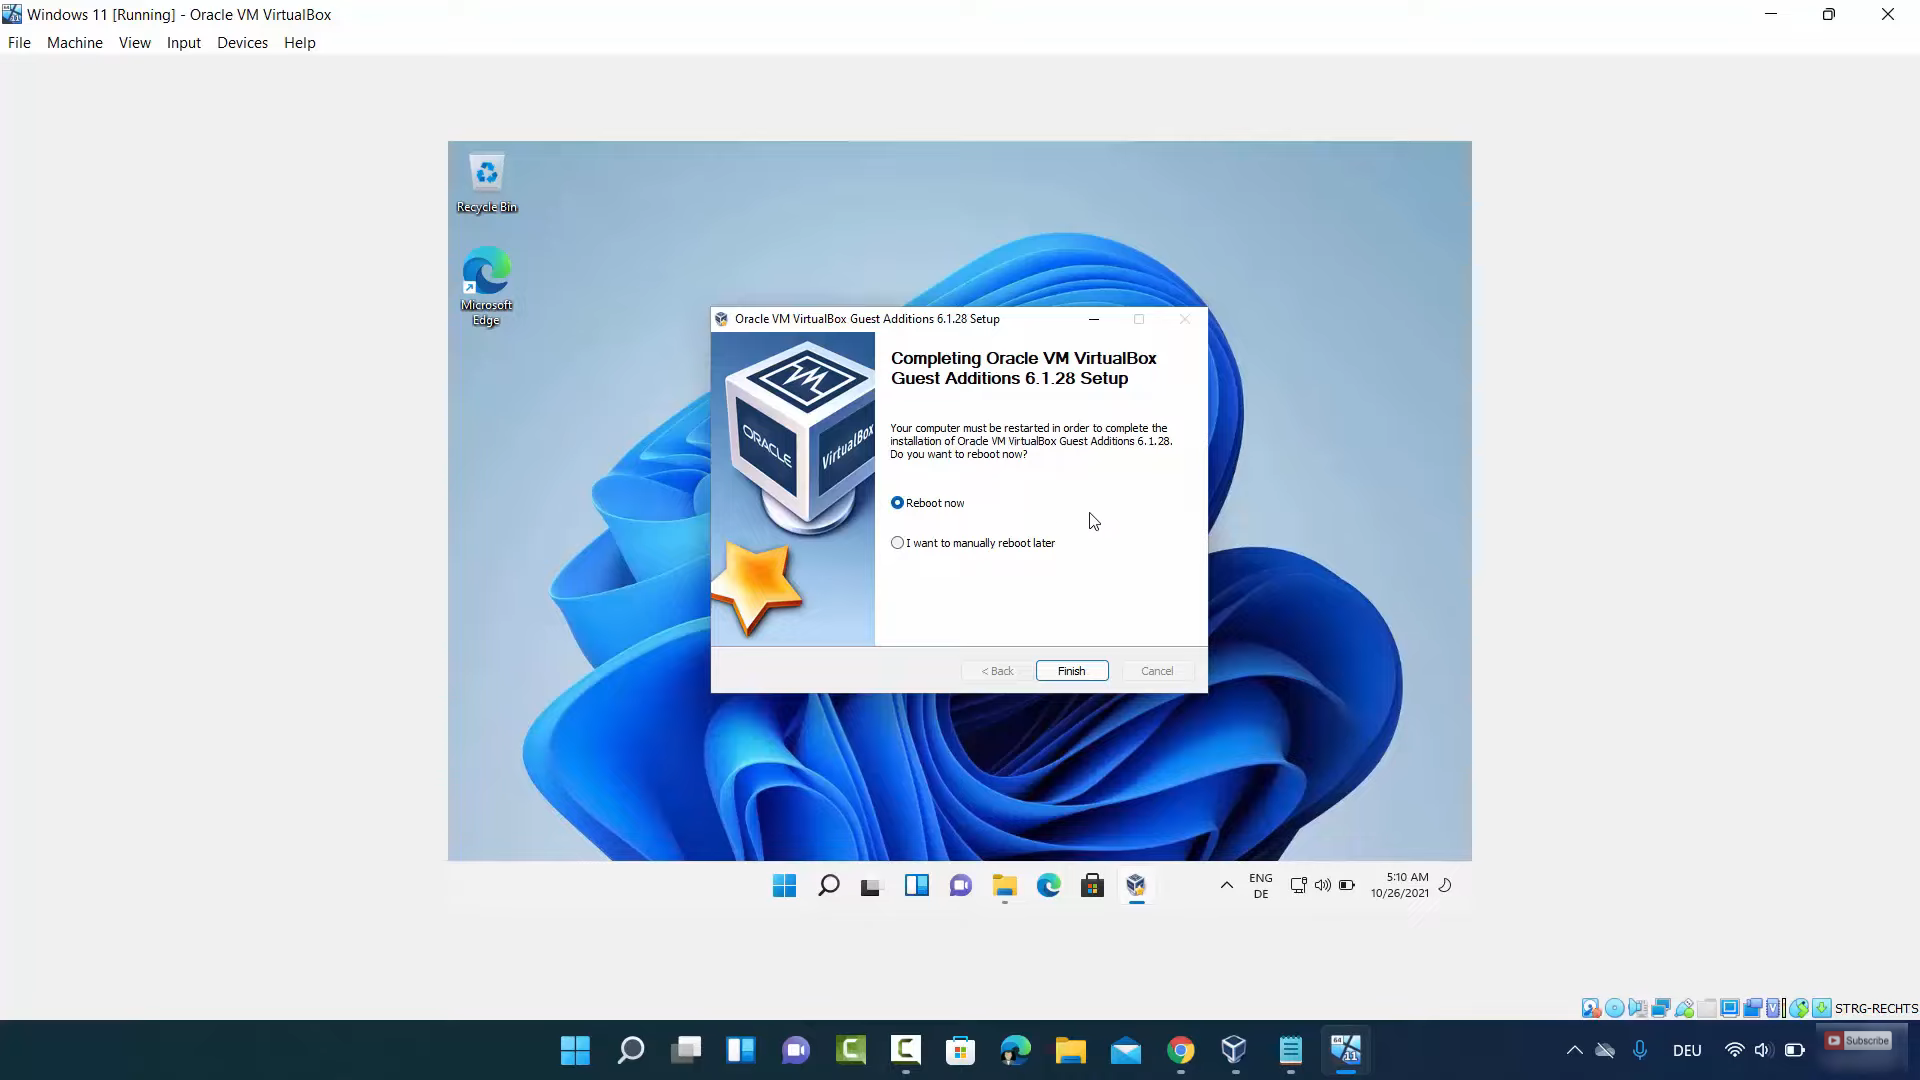
9. Then, click on Finish. It will restart your Windows 11 Operating System.
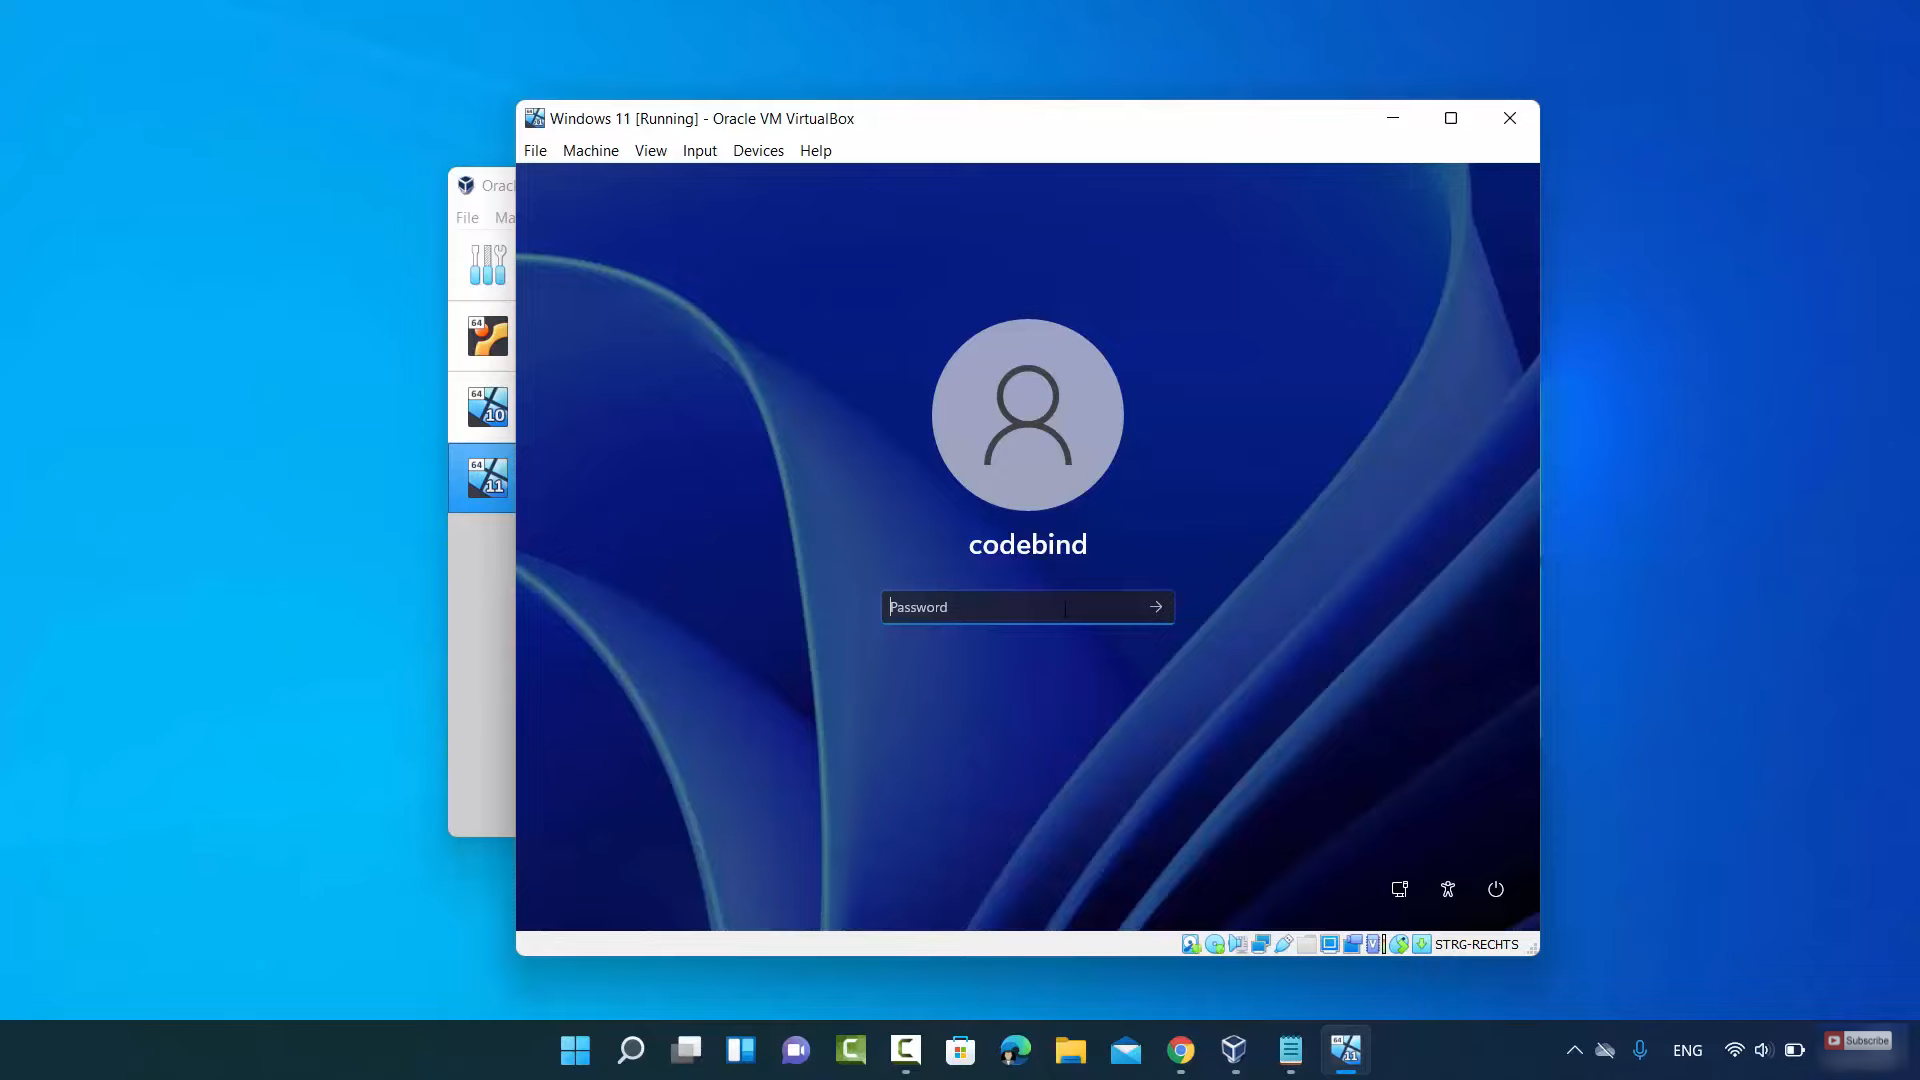
10. Once it is restarted, you need to provide your password here. Then, click on Enter.
11. Once you have logged in, try to resize the virtual machine.
12. Windows 11 screen has been resized now.
These are the steps for installing guest additions to windows 11 in VirtualBox.
Leave a Reply