
In this blog post, I will give a detailed view of changing DNS settings on your Windows 11 Operating System. There are a few different ways available. I will explain them one by one. For this, you need to know the IP addresses or the DNS providers.
Click here to see the list of best DNS providers. From this list, you can decide which DNS providers you want to use. I am going to choose Google DNS Server. Now you know the IP addresses. Minimize the window now.
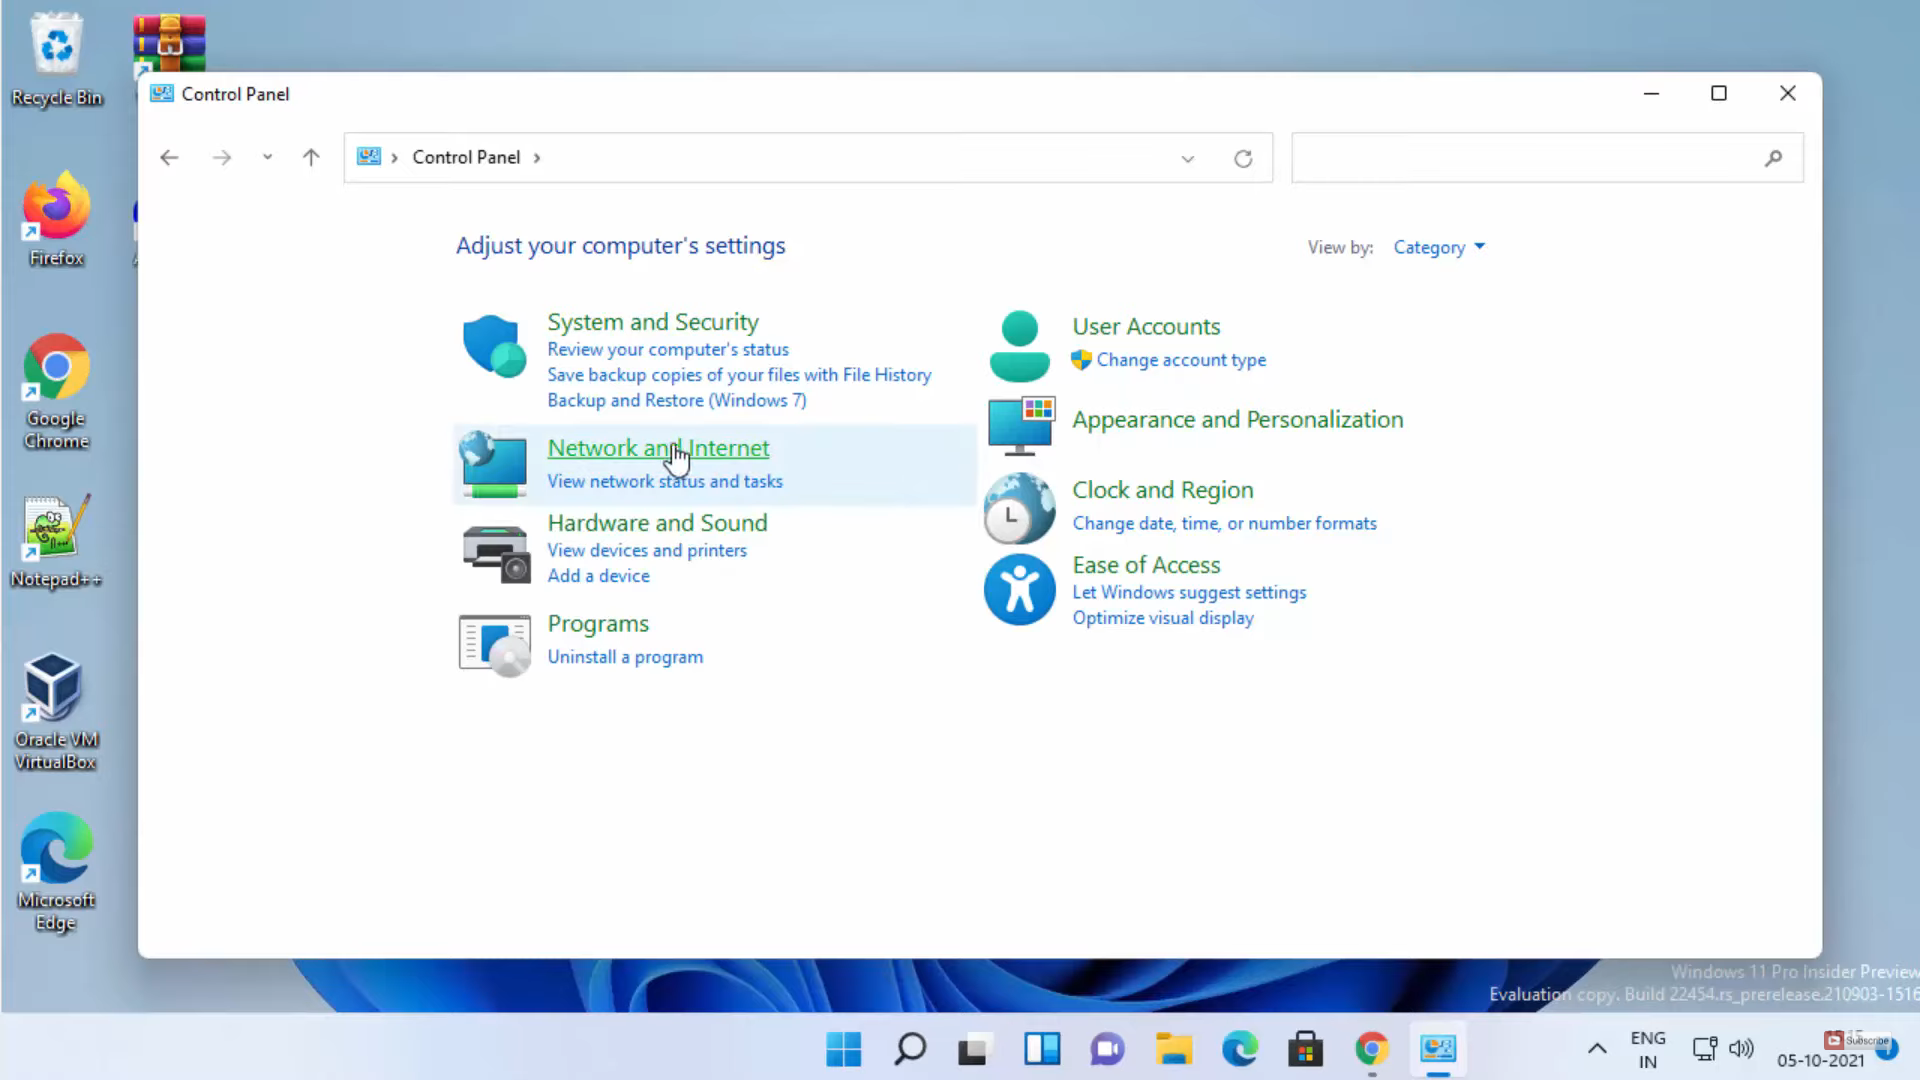
1. Click on the search icon and search for the Control panel app.

2. Once the app opens, click on view by Category. Then, click on Network and Internet option.
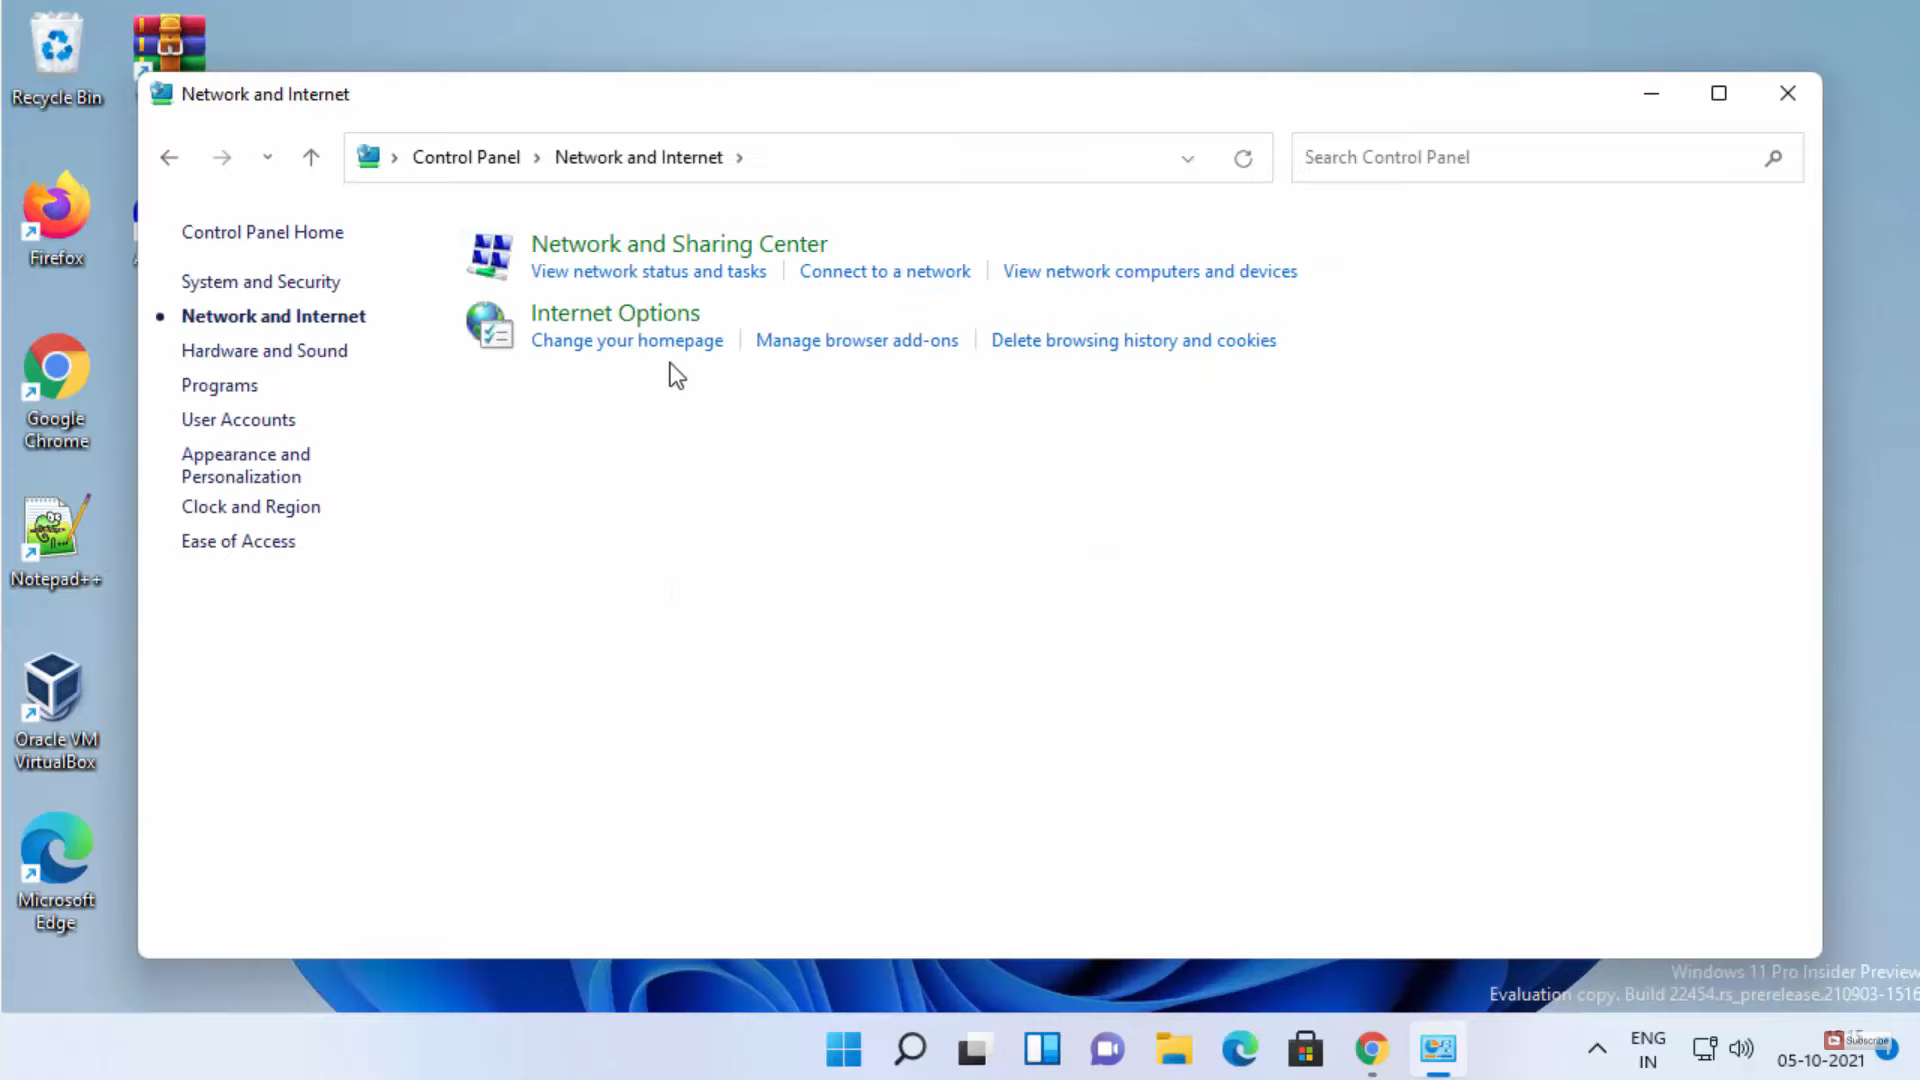
3. Here, you need to click on Network and Sharing Center.
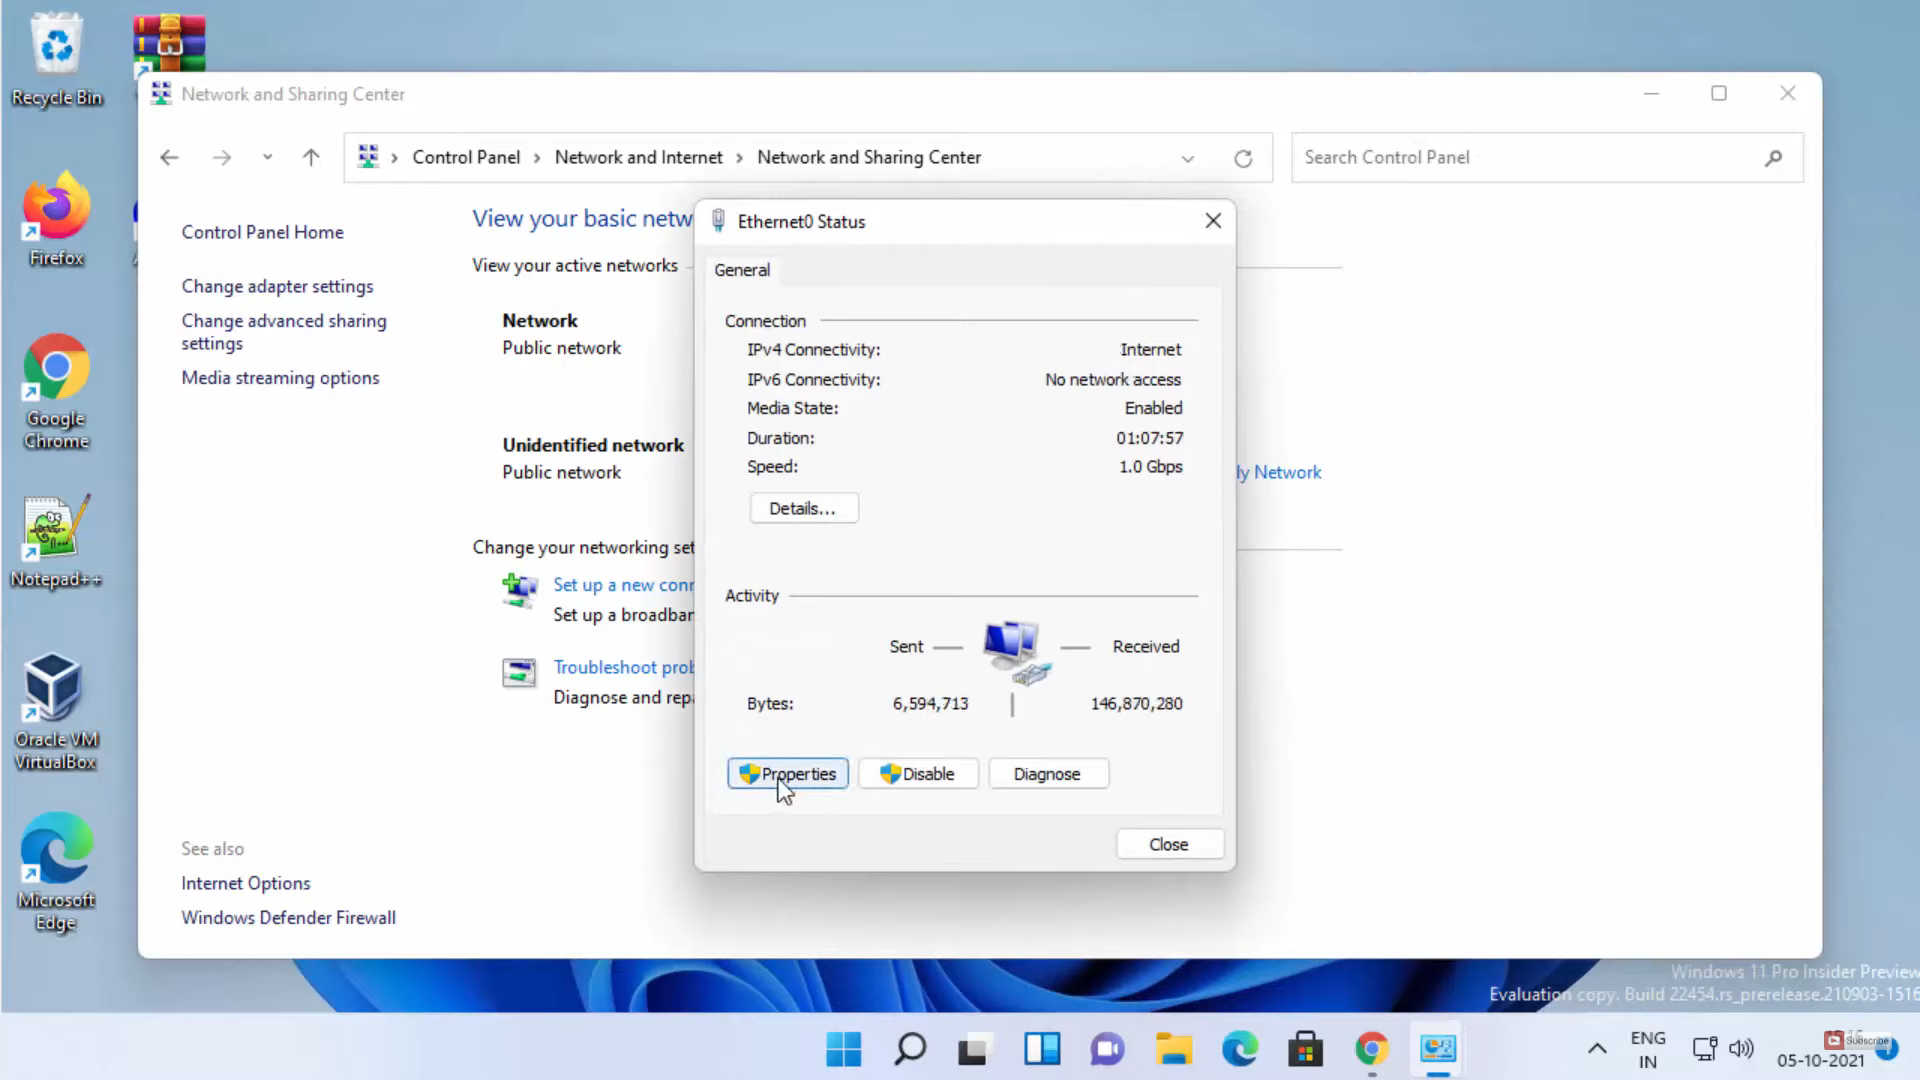
4. It will show your Internet connection. In my case, I am connected with a LAN cable so it shows ethernet. If you are connected with Wifi, then it will show wifi option here. Whatever option you see in the connection at the top, you need to click on that.

5. Here, you need to click on Properties.
6. After clicking properties, you need to choose Internet Protocol version 4 and click on Properties.
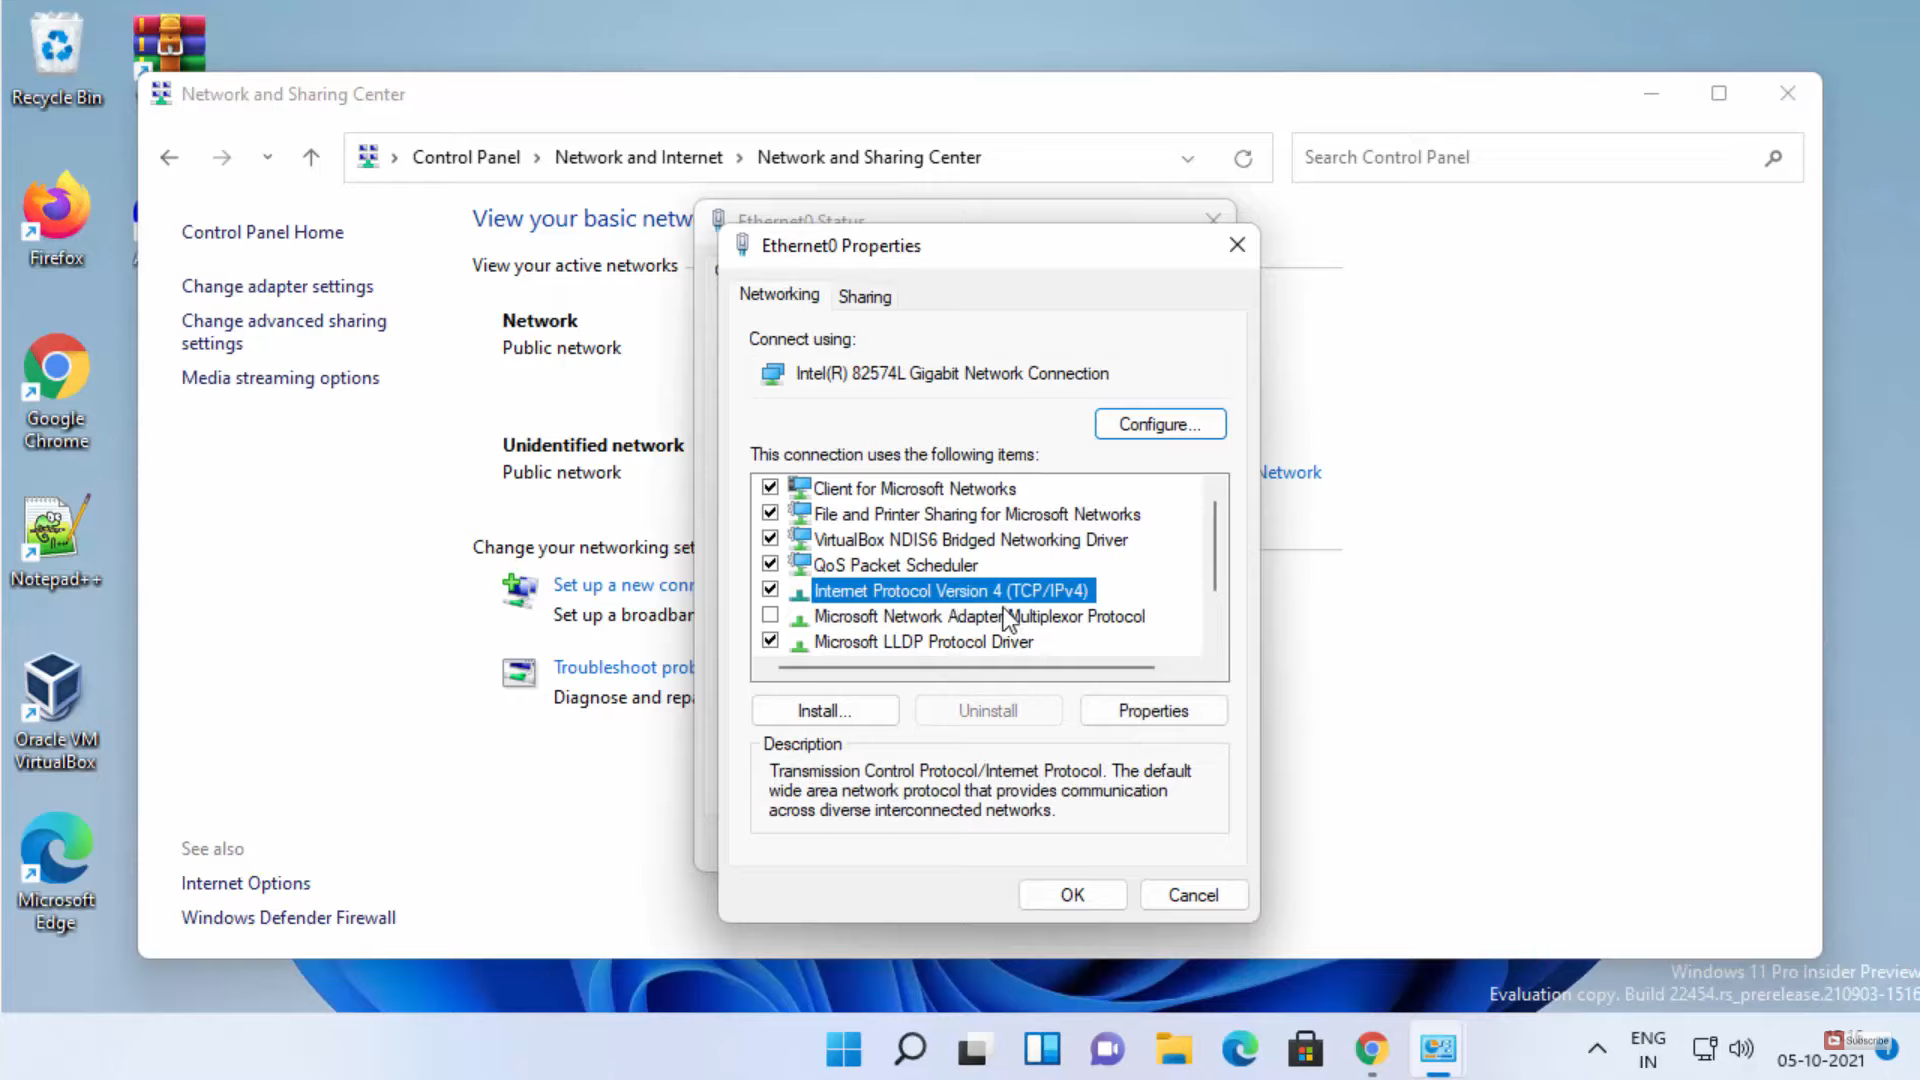
7. From this window, you can change your DNS server address. By default, the option Obtain DNS server address automatically is already selected. If you want to do it manually, then click on the radio button below. And then, you need to provide the primary and secondary addresses for the google DNS server.
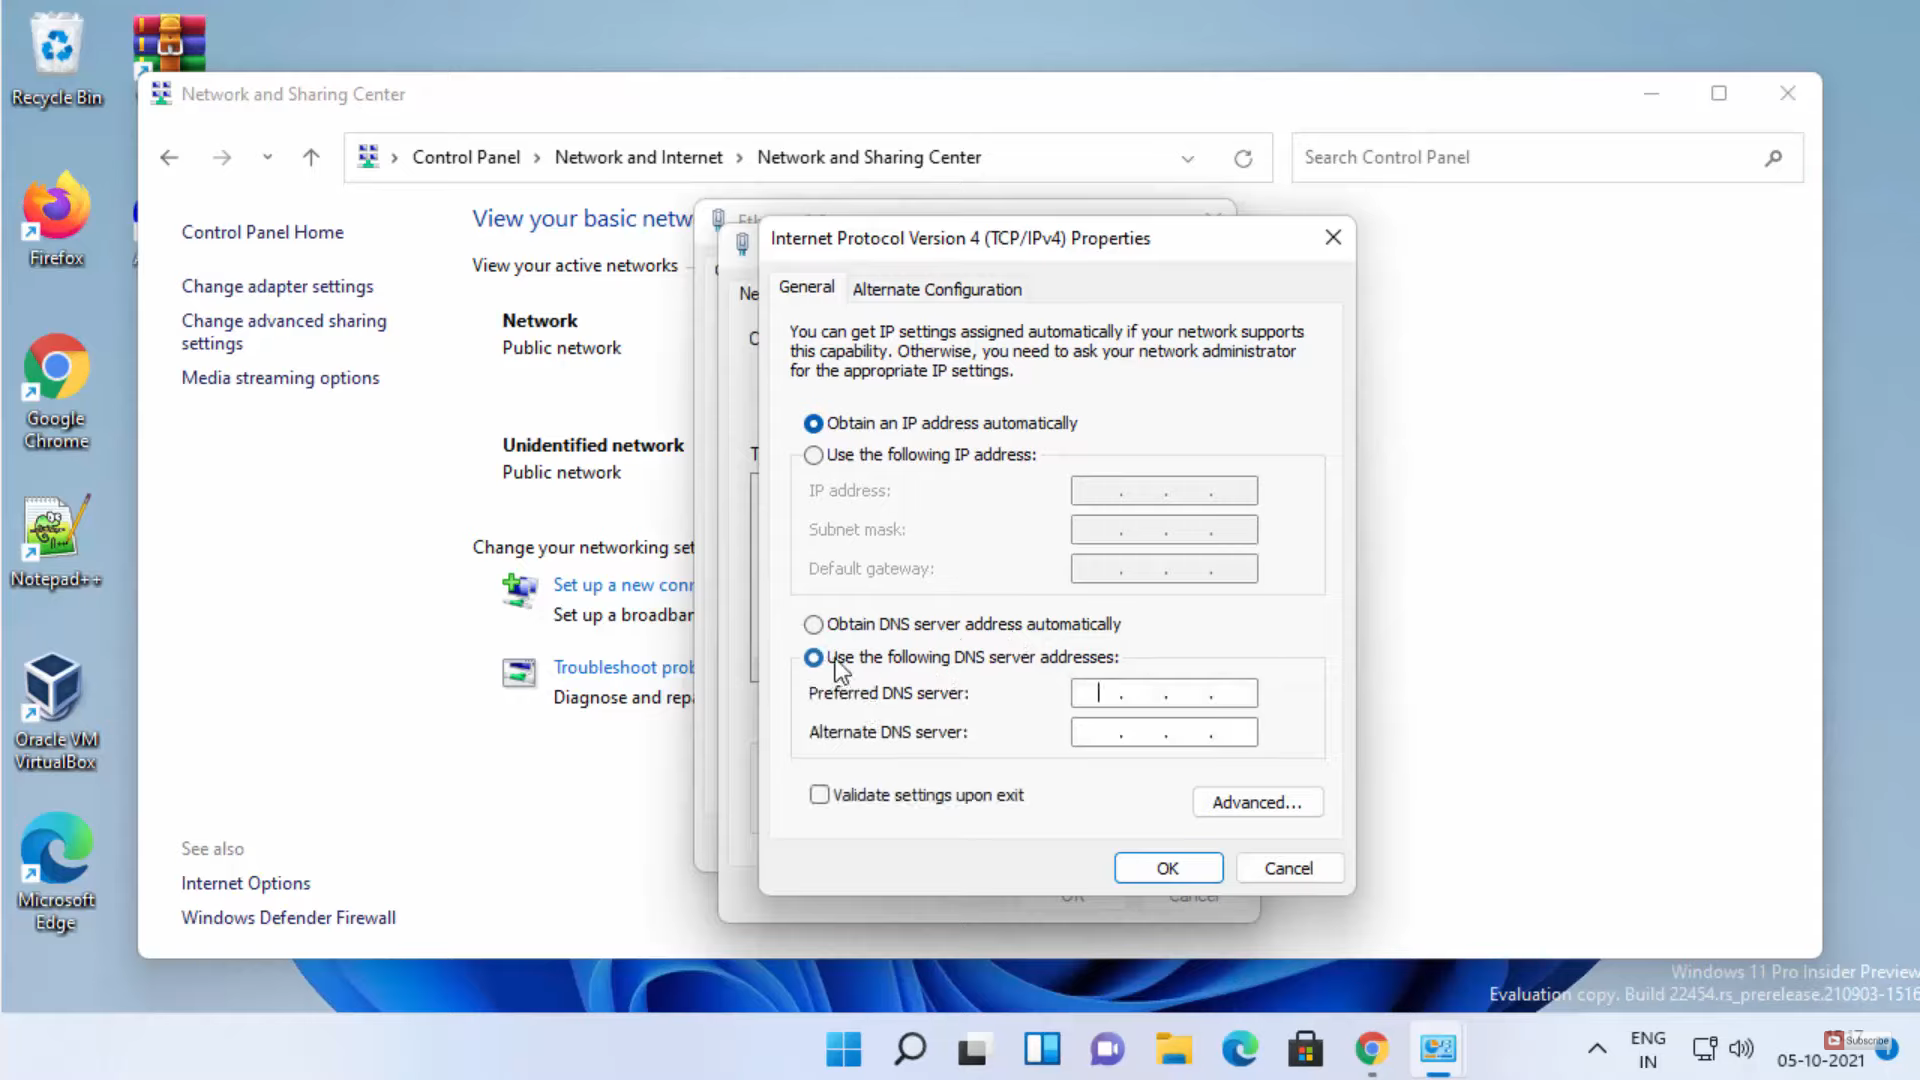
8. After entering the primary and secondary DNS, click on Ok. And then, click on Close for the previous tabs. Now, you have provided Google’s DNS server.

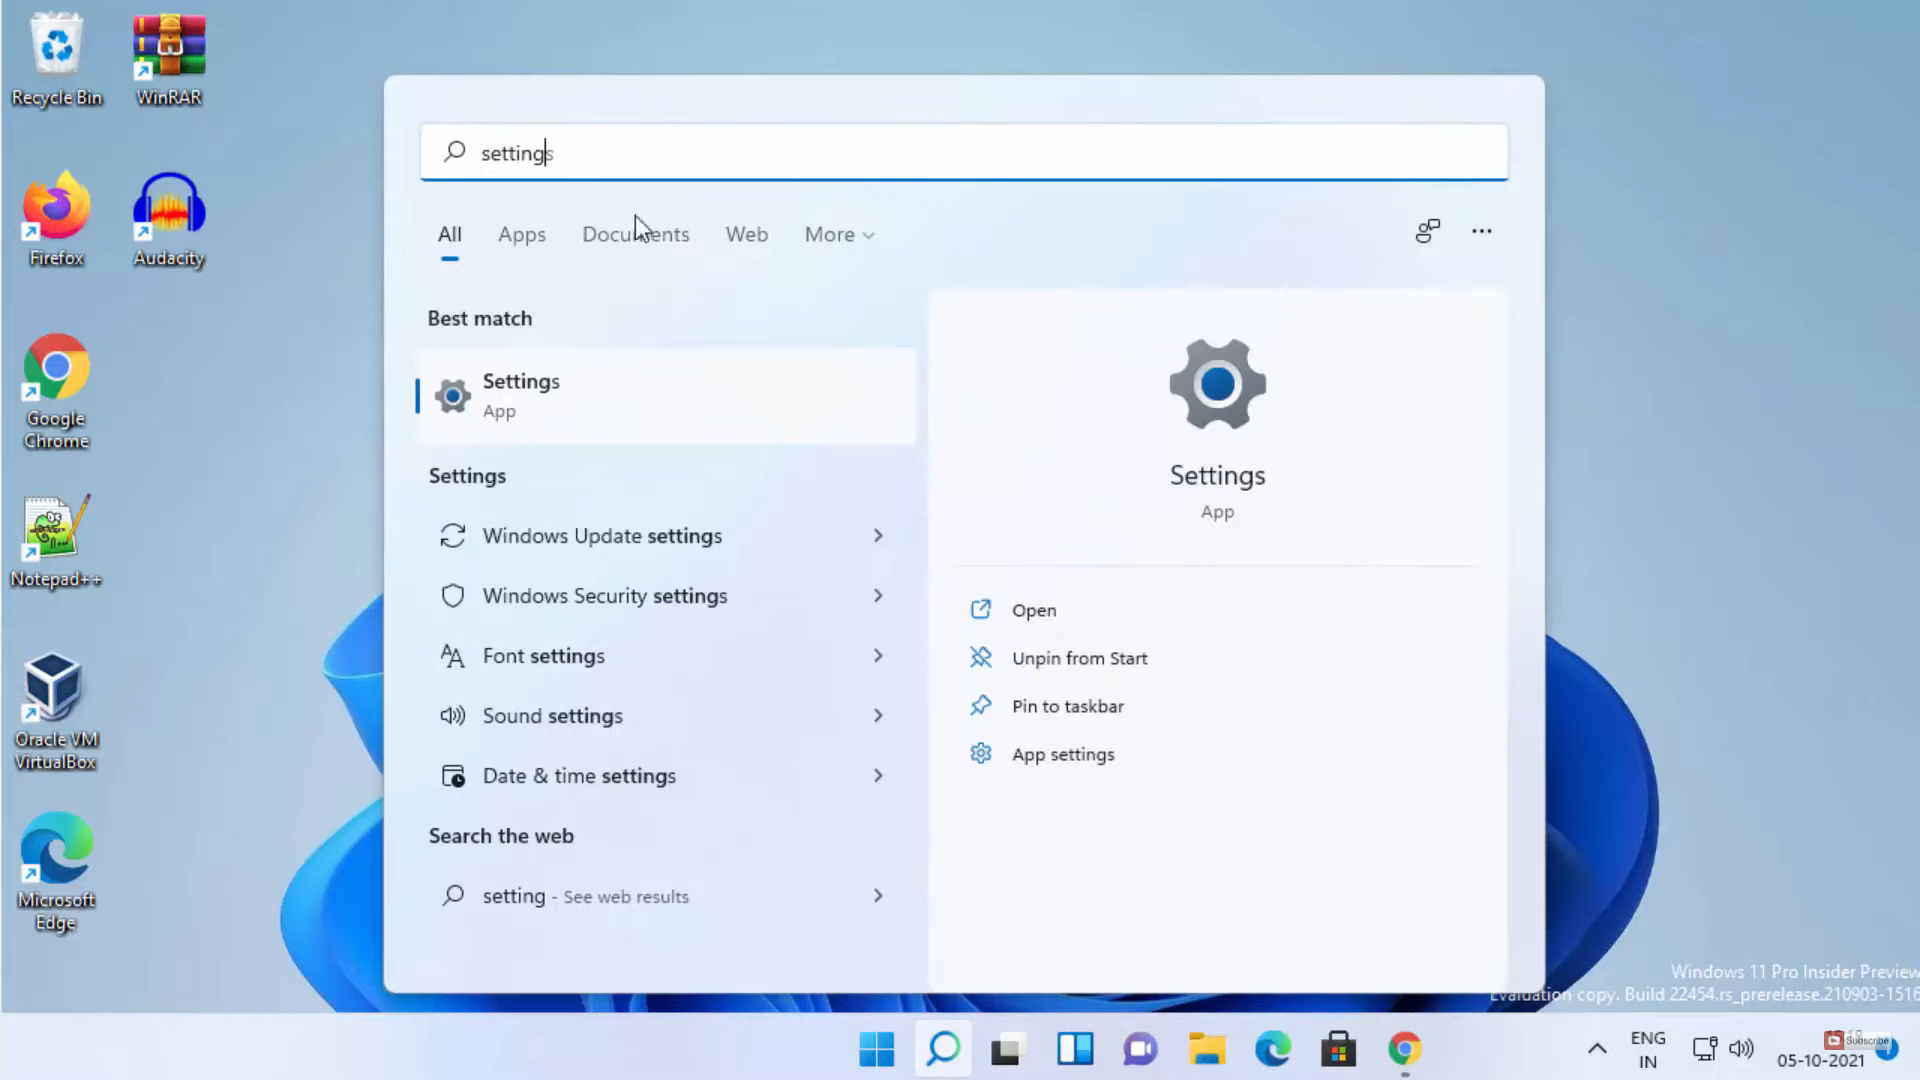
9. For the second method, you need to click on the search icon and search for the Settings app.
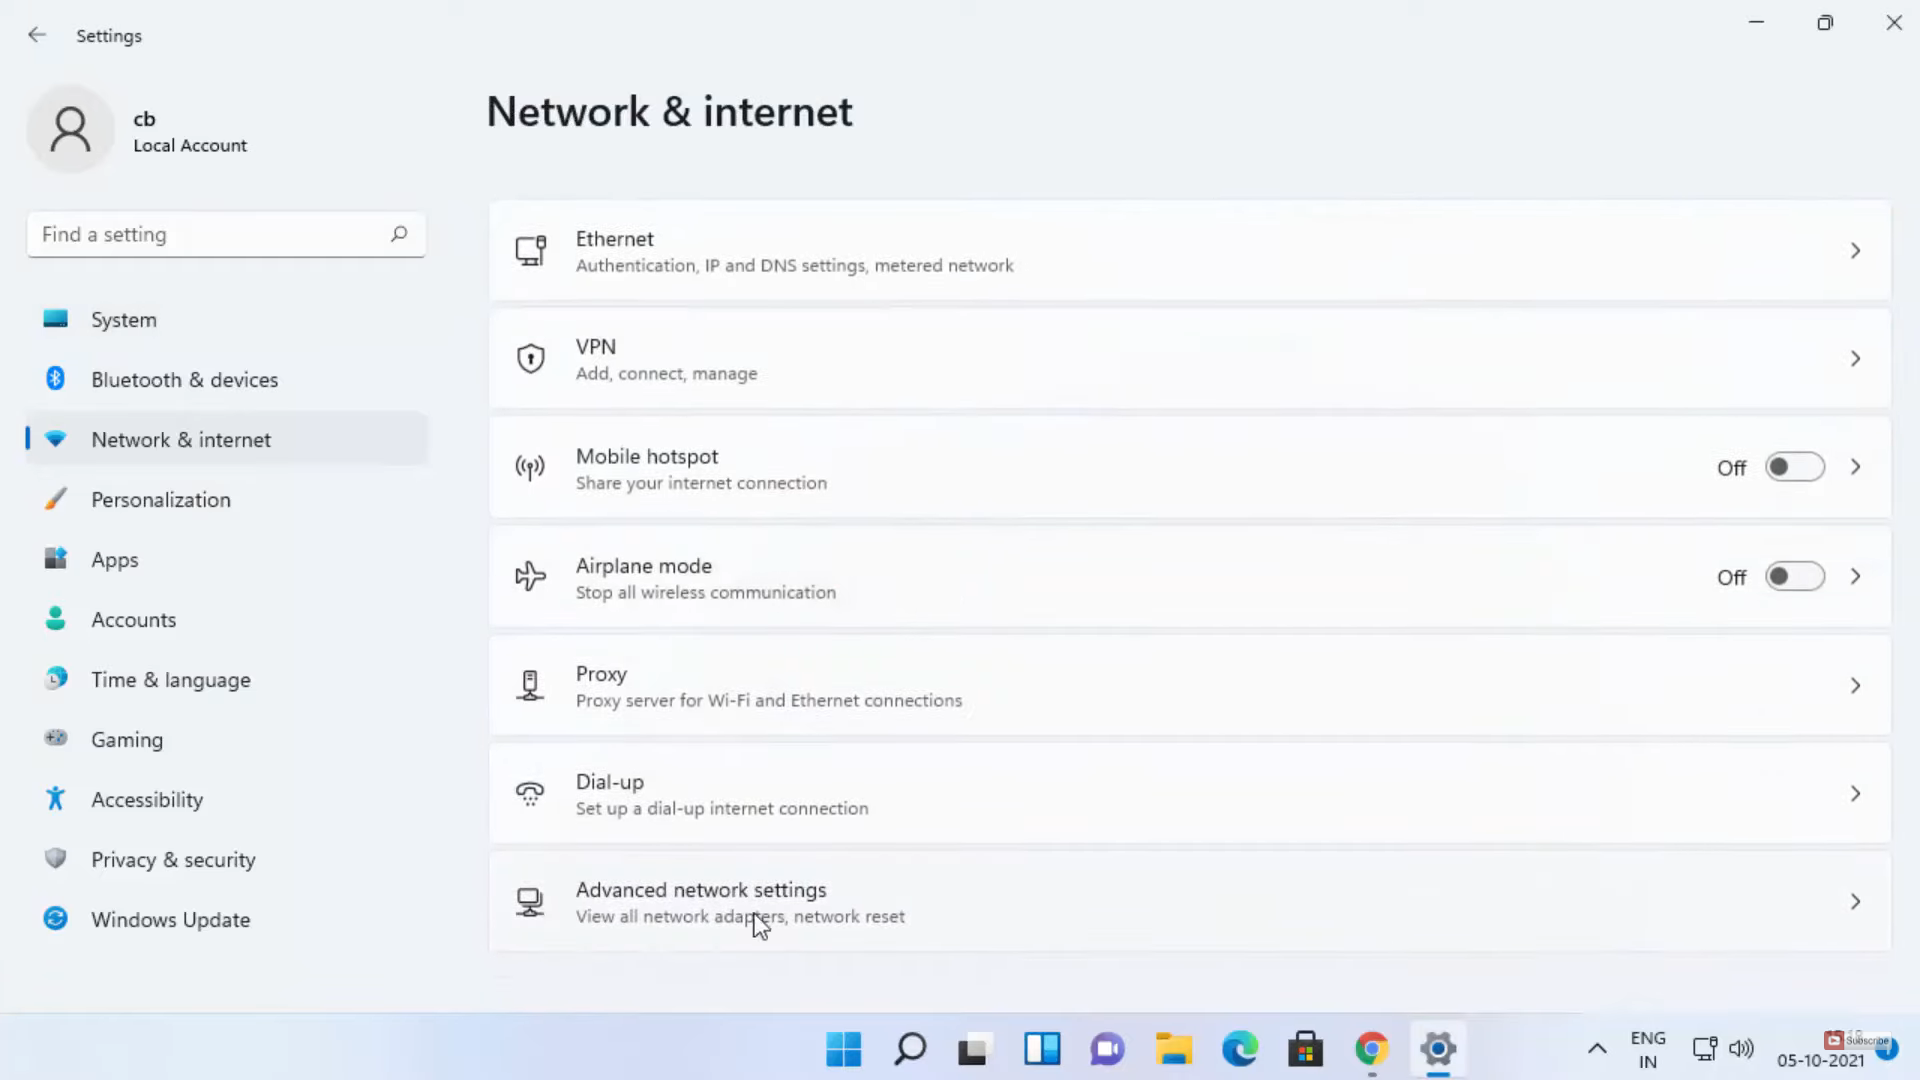
10. In the settings app, select Network and Internet. Then, click on Advanced network settings.
11. Here, you need to select the network. For me it’s ethernet, for you, it can be either wifi or ethernet. Click on that option.

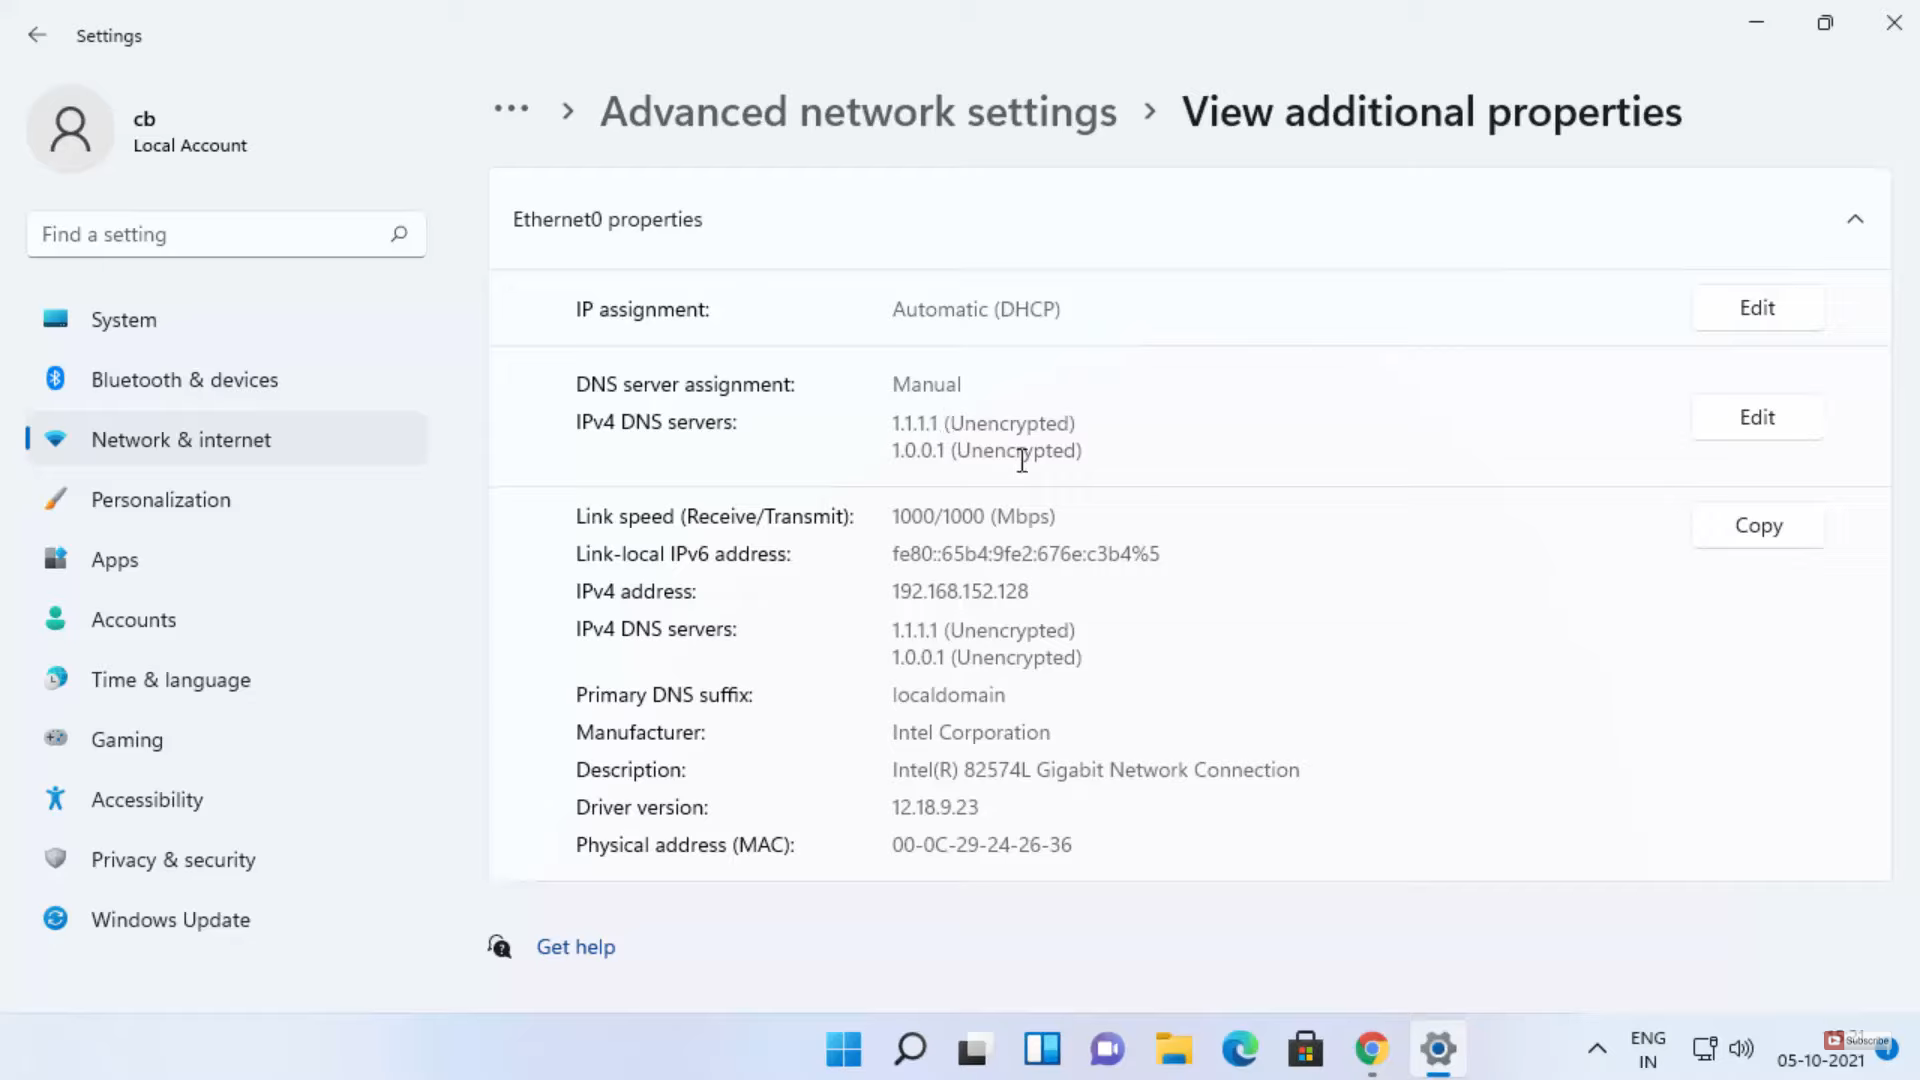
12. Click on View additional properties.

13. From here, you can edit and provide the DNS address server of your choice. Since I have changed it to google’s DNS server, you will be able to see that primary and secondary DNS server.

14. For changing it to some other DNS server, you need to click on Edit. Now, I am going to Cloudflare’s server address. And then, you need to type the primary and secondary DNS of that server. Then, click on Save.
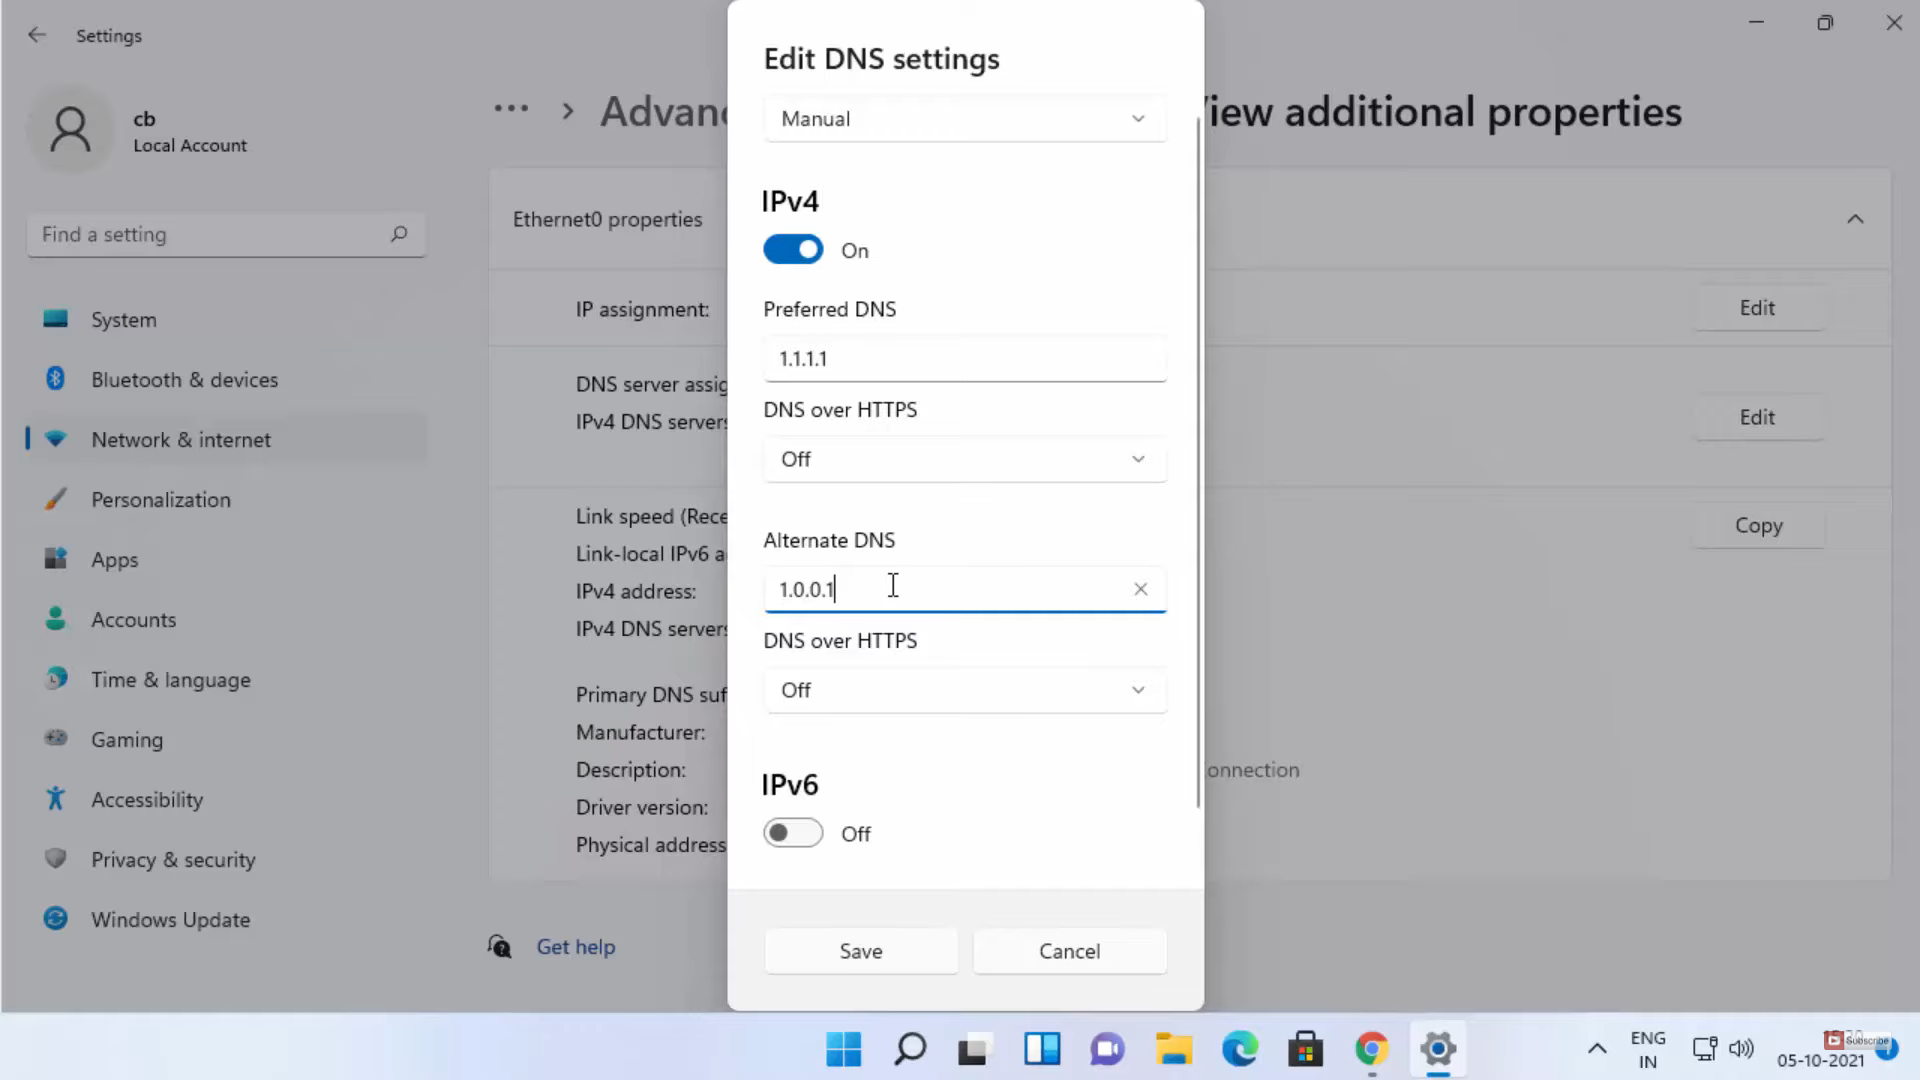
15. It will change the DNS server address.
These are the steps for changing the DNS server on your Windows 11 Operating System. You can follow any of the 2 methods mentioned above as both of them will give the same result.
Leave a Reply