

In this tutorial we will learn How to use WebView in Android Using Android Studio.
So lets create a project.
Step 1 – Create new Android project and name your project as WebViewExample .
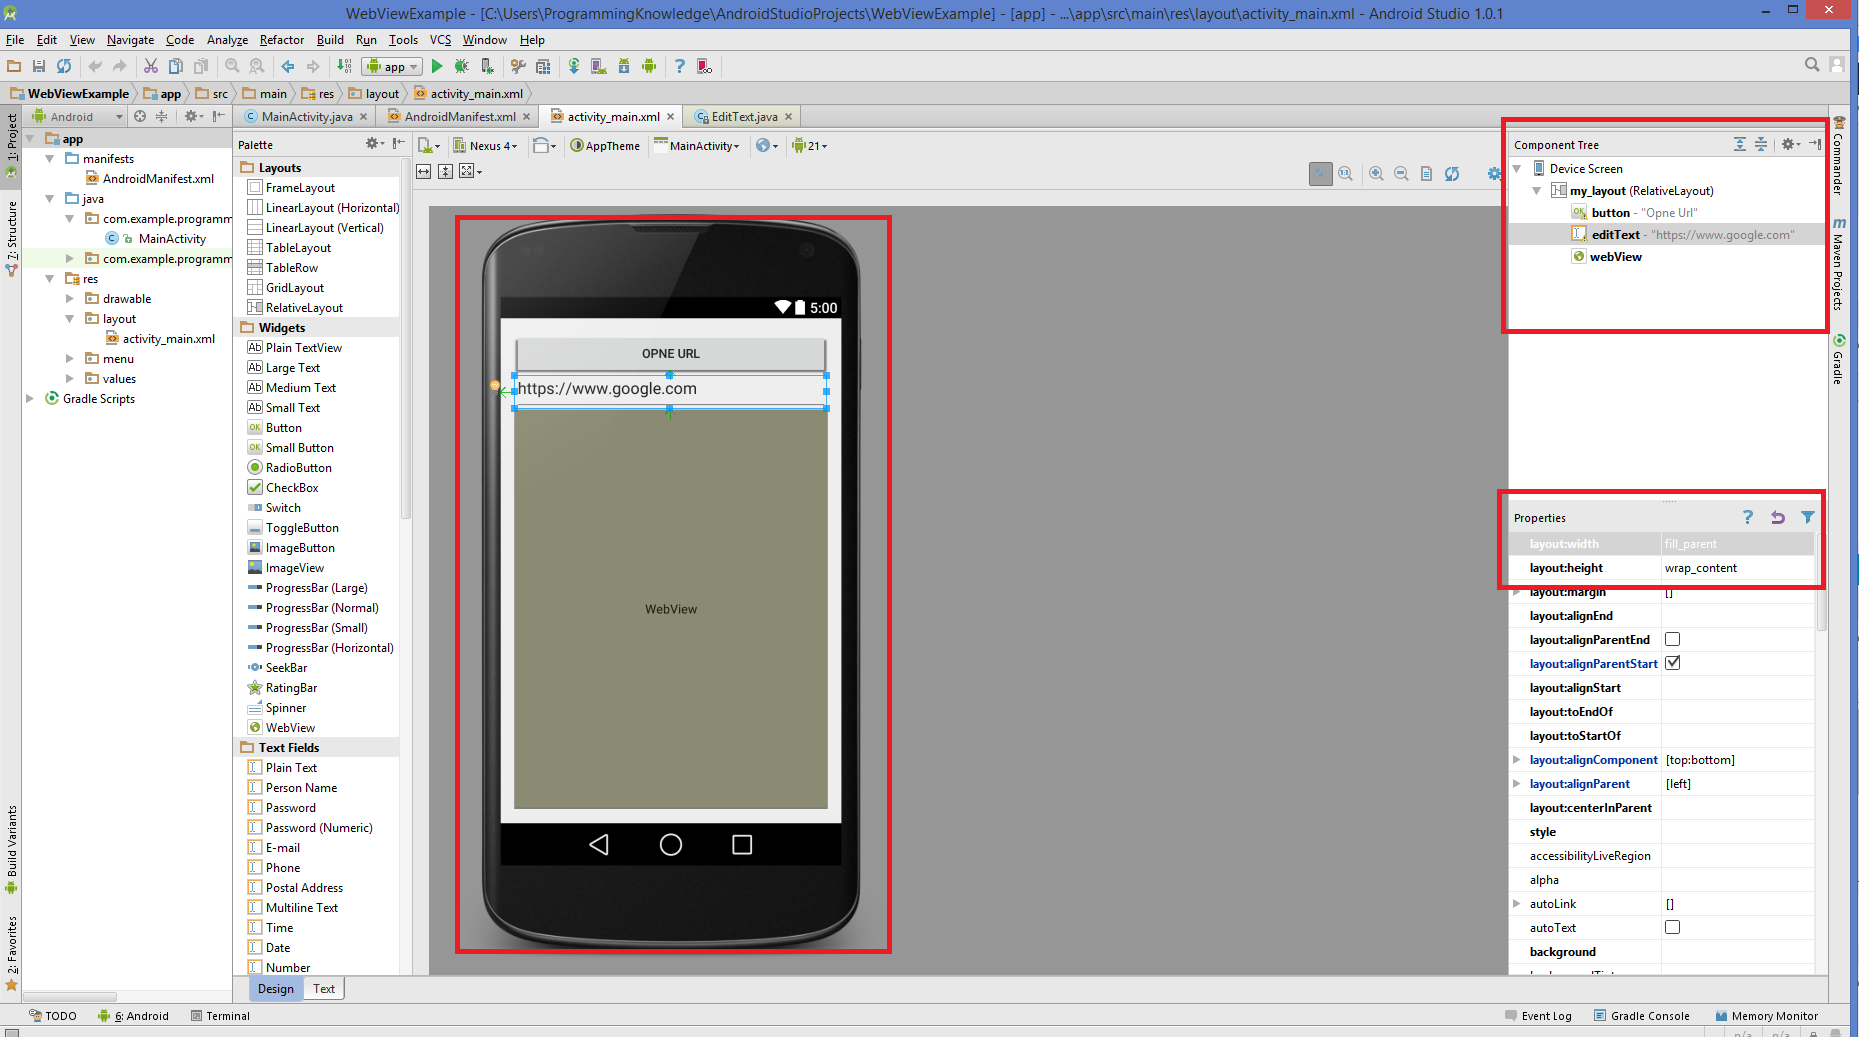
Step 2 – Add a button , a editText and WebView in the main activity as shown in the picture below.
webviewexample/MainActivity.java
<RelativeLayout xmlns:android="http://schemas.android.com/apk/res/android"
    xmlns:tools="http://schemas.android.com/tools" android:layout_width="match_parent"
    android:layout_height="match_parent" android:paddingLeft="@dimen/activity_horizontal_margin"
    android:paddingRight="@dimen/activity_horizontal_margin"
    android:paddingTop="@dimen/activity_vertical_margin"
    android:paddingBottom="@dimen/activity_vertical_margin" tools:context=".MainActivity"
    android:id="@+id/my_layout">

    <Button
        android:layout_width="fill_parent"
        android:layout_height="wrap_content"
        android:text="Opne Url"
        android:id="@+id/button"
        android:layout_alignParentTop="true"
        android:layout_alignParentLeft="true"
        android:layout_alignParentStart="true" />

    <EditText
        android:layout_width="fill_parent"
        android:layout_height="wrap_content"
        android:id="@+id/editText"
        android:layout_below="@+id/button"
        android:layout_alignParentLeft="true"
        android:layout_alignParentStart="true"
        android:text="https://www.google.com" />

    <WebView
        android:layout_width="fill_parent"
        android:layout_height="fill_parent"
        android:id="@+id/webView"
        android:layout_alignParentRight="true"
        android:layout_alignParentEnd="true"
        android:layout_below="@+id/editText"
        android:layout_alignParentLeft="true"
        android:layout_alignParentStart="true" />
</RelativeLayout>
src/main/AndroidManifest.xml
<?xml version="1.0" encoding="utf-8"?>
<manifest xmlns:android="http://schemas.android.com/apk/res/android"
    package="com.example.programmingknowledge.webviewexample" >
    <uses-permission android:name="android.permission.INTERNET" />
    <application
        android:allowBackup="true"
        android:icon="@drawable/ic_launcher"
        android:label="@string/app_name"
        android:theme="@style/AppTheme" >
        <activity
            android:name=".MainActivity"
            android:label="@string/app_name" >
            <intent-filter>
                <action android:name="android.intent.action.MAIN" />

                <category android:name="android.intent.category.LAUNCHER" />
            </intent-filter>
        </activity>
    </application>

</manifest>
layout/activity_main.xml
package com.example.programmingknowledge.webviewexample;

import android.support.v7.app.ActionBarActivity;
import android.os.Bundle;
import android.view.Menu;
import android.view.MenuItem;
import android.view.View;
import android.webkit.WebView;
import android.widget.Button;
import android.widget.EditText;


public class MainActivity extends ActionBarActivity {
    private static Button button_sbm;
    private static EditText url_text;
    private static WebView browser;
    @Override
    protected void onCreate(Bundle savedInstanceState) {
        super.onCreate(savedInstanceState);
        setContentView(R.layout.activity_main);
        openUrl();
    }

    public void openUrl() {
        button_sbm =(Button)findViewById(R.id.button);
        url_text =(EditText)findViewById(R.id.editText);
        browser = (WebView)findViewById(R.id.webView);

        button_sbm.setOnClickListener(
                new View.OnClickListener() {
                    @Override
                    public void onClick(View v) {
                     String url = url_text.getText().toString();
                        browser.getSettings().setLoadsImagesAutomatically(true);
                        browser.getSettings().setJavaScriptEnabled(true);
                        browser.setScrollBarStyle(View.SCROLLBARS_INSIDE_OVERLAY);
                        browser.loadUrl(url);
                    }
                }
        );
    }

    @Override
    public boolean onCreateOptionsMenu(Menu menu) {
        // Inflate the menu; this adds items to the action bar if it is present.
        getMenuInflater().inflate(R.menu.menu_main, menu);
        return true;
    }

    @Override
    public boolean onOptionsItemSelected(MenuItem item) {
        // Handle action bar item clicks here. The action bar will
        // automatically handle clicks on the Home/Up button, so long
        // as you specify a parent activity in AndroidManifest.xml.
        int id = item.getItemId();

        //noinspection SimplifiableIfStatement
        if (id == R.id.action_settings) {
            return true;
        }

        return super.onOptionsItemSelected(item);
    }
}
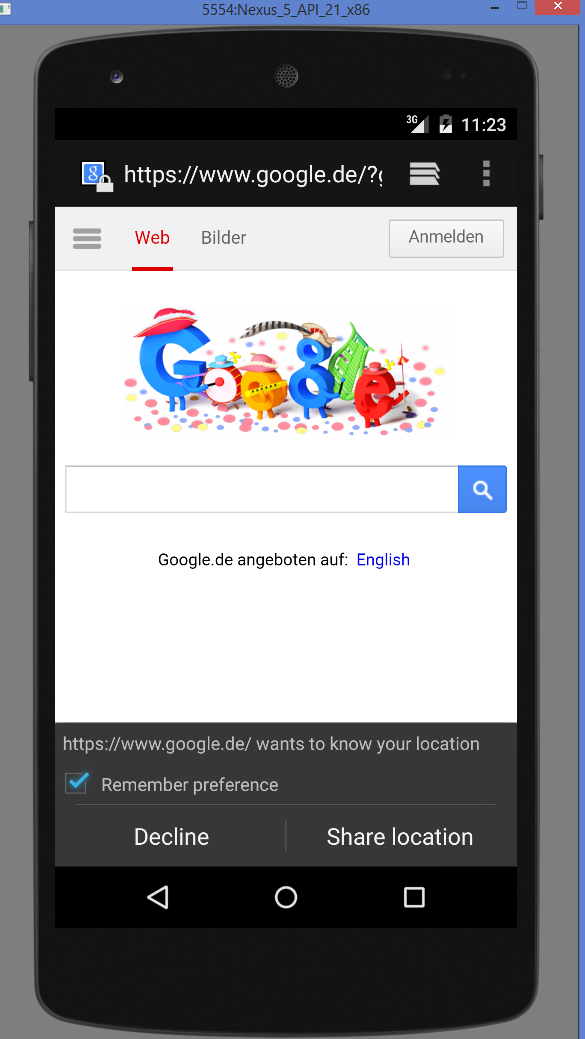
Now run your code and see the following Output:
Click the button below to Download Source code
Hello Sir
It appears that you forgot to post the java file for this project and have posted the xml file twice!
Thanks, I corrected the mistake now.
Good to see this type of article on Android webview.
Android Textview with Order and UnOrder Listview Example